Page 69 of 282

68
SAFETY
DEVICES
CORRECT USE
OF THE
VEHICLE
WARNING
LIGHTS AND
MESSAGES
IN AN
EMERGENCY
VEHICLE
MAINTENANCE
TECHNICAL
SPECIFICATIONS
INDEX
DASHBOARD
AND CONTROLS
IMPORTANT The heater is equipped with
a thermal switch which cuts off the heater
in the event of overheating caused by low
or leaking coolant. In this case, press the
program selection button to start the
heater again after repairing the cooling sys-
tem fault and/or topping up the fluid.
The heater can turn itself off after engine
ignition or if the flame goes out. In this
case, turn the heater off manually and at-
tempt to turn it back on again. If you can-
not turn the heater on, contact a Fiat
Dealership.Turning the heater on
If an automatic climate control system is
fitted, the control unit sets air tempera-
ture and distribution when the parking
heater is turned on.
When a manual heater/climate control
system is fitted, to achieve peak heater
performance, check that the passenger
compartment heater/ventilation unit air
temperature knob is in “warm air” posi-
tion.
For preferential passenger compartment
preheating, turn the air distribution knob
to position
©.
For preferential windscreen demisting, set
the air distribution knob to position
-.
To obtain both functions, set the air dis-
tribution knob to position
®.Digital timer fig. 55
1) Heater cycle warning light
2) Display light
3) Clock pre-set recall number
4) Clock button
5) Hour “forward” button
6) Program selection button
7) Hour “back” button
8) Heat now button
9) Display/adjust time warning light
fig. 55F0N0151m
037-101 Ducato GB 6-11-2007 9:56 Pagina 68
Page 70 of 282

69
SAFETY
DEVICES
CORRECT USE
OF THE
VEHICLE
WARNING
LIGHTS AND
MESSAGES
IN AN
EMERGENCY
VEHICLE
MAINTENANCE
TECHNICAL
SPECIFICATIONS
INDEX
DASHBOARD
AND CONTROLS
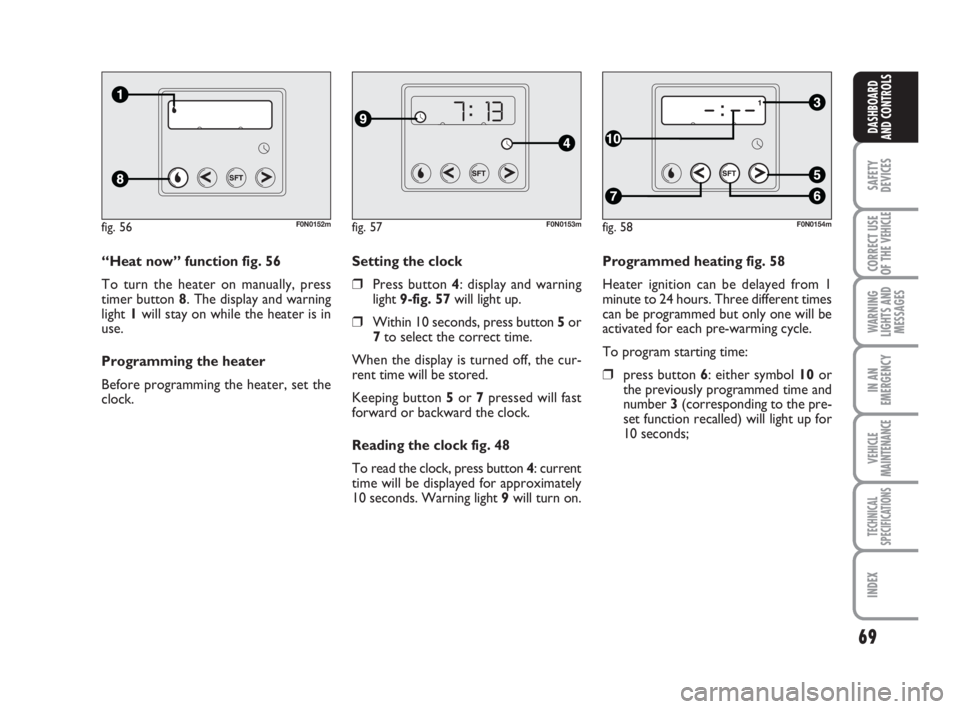
Programmed heating fig. 58
Heater ignition can be delayed from 1
minute to 24 hours. Three different times
can be programmed but only one will be
activated for each pre-warming cycle.
To program starting time:
❒press button 6: either symbol 10 or
the previously programmed time and
number 3 (corresponding to the pre-
set function recalled) will light up for
10 seconds; Setting the clock
❒Press button 4: display and warning
light 9-fig. 57will light up.
❒Within 10 seconds, press button 5or
7to select the correct time.
When the display is turned off, the cur-
rent time will be stored.
Keeping button 5or 7pressed will fast
forward or backward the clock.
Reading the clock fig. 48
To read the clock, press button 4: current
time will be displayed for approximately
10 seconds. Warning light 9will turn on. “Heat now” function fig. 56
To turn the heater on manually, press
timer button 8. The display and warning
light 1will stay on while the heater is in
use.
Programming the heater
Before programming the heater, set the
clock.
fig. 56F0N0152mfig. 57F0N0153mfig. 58F0N0154m
037-101 Ducato GB 6-11-2007 9:56 Pagina 69
Page 71 of 282

70
SAFETY
DEVICES
CORRECT USE
OF THE
VEHICLE
WARNING
LIGHTS AND
MESSAGES
IN AN
EMERGENCY
VEHICLE
MAINTENANCE
TECHNICAL
SPECIFICATIONS
INDEX
DASHBOARD
AND CONTROLS
IMPORTANT To recall other preset
times, press button 6within 10 seconds.
– press button 5or 7within 10 seconds
to select the starting time required.
IMPORTANT Time is stored when:
❒starting time goes off;
❒number 3 is displayed;
❒the display turns on.
IMPORTANT At turning on:
❒warning light corresponding to flame
1 on the display will turn on;
❒number 3 will turn off.
Deleting a programmed
starting time fig. 58
To delete the programmed starting time,
press button 6briefly: the display light will
go off and number 3corresponding to the
selected preset time will disappear.Recalling a pre-set time fig. 59
Press button 6repeatedly until the re-
quired preset starting time appears on the
display (number 3) After 10 seconds, the
time will disappear (it will stay stored),
number 3 and the display will light up.
IMPORTANT To change or delete pre-
set times, follow the instructions in the
paragraphs above.Turning the heater off
According to the operation mode (auto-
matic or manual), the heater can be turned
off:
❒automatically,after the preset pe-
riod of time (60 minutes when the dis-
play light is red);
❒manuallyby pressing again button
“heat now” on the timer (flame 1 but-
ton).
In each case, the heater warning light, the
display and the passenger compartment
fan will be turned off and the heater flame
will be blown out.
The coolant circulation pump will run for
approximately two minutes after the
heater has been turned off to dispose of
as much heat as possible. During this phase
the heater can, however, be turned on.
fig. 59F0N0155m
037-101 Ducato GB 6-11-2007 9:56 Pagina 70
Page 72 of 282

71
SAFETY
DEVICES
CORRECT USE
OF THE
VEHICLE
WARNING
LIGHTS AND
MESSAGES
IN AN
EMERGENCY
VEHICLE
MAINTENANCE
TECHNICAL
SPECIFICATIONS
INDEX
DASHBOARD
AND CONTROLS
❒Always remember to turn the heater
off when refuelling or standing in ser-
vice stations to avoid fires and explo-
sions.
❒Do not park the vehicle over inflam-
mable material such as paper, dry grass
or leaves: fire risk!
❒The temperature near the heater must
never exceed 120°C (e.g. during paint-
ing operations in a workshop oven).
Higher temperatures could damage
the electronic control unit compo-
nents.
❒When the engine is off, the heater takes
power from the battery: it is conse-
quently important to run the engine for
a certain period of time in order to re-
store the battery charge.
❒Follow the prescriptions in section
“Vehicle maintenance” at paragraph
“Engine coolant level” to check the
coolant level. The coolant in the cir-
cuit must contain at least 10% an-
tifreeze fluid.
❒Maintenance and repairs must always
be carried out by a Fiat Dealership and
only genuine spare parts must be used.
MAINTENANCE
Have the heater checked at a Fiat Deal-
ership periodically (always before winter).
This will ensure safe and cheap running
and long appliance life.
The heater burns fuel in the
same way as the engine,
though, of course, to a lesser degree
and therefore to avoid intoxication
and suffocation, never use the sup-
plementary heater in closed areas,
garages or workshops not equipped
with specific exhaust evacuation de-
vices even for short periods of time.
WARNING
IMPORTANT The parking heater goes off
when the battery voltage is low to enable
the vehicle to be started up.
IMPORTANT Before turning on the de-
vice, ensure that the fuel level is higher
than the reserve. Otherwise the device
could lock and require the assistance of
the Fiat Dealership.
037-101 Ducato GB 6-11-2007 9:56 Pagina 71
Page 73 of 282

72
SAFETY
DEVICES
CORRECT USE
OF THE
VEHICLE
WARNING
LIGHTS AND
MESSAGES
IN AN
EMERGENCY
VEHICLE
MAINTENANCE
TECHNICAL
SPECIFICATIONS
INDEX
DASHBOARD
AND CONTROLS
fig. 60F0N0233mfig. 61F0N0185m
SUPPLEMENTARY REAR
HEATER
(where provided for Panorama and
Combi versions)
Panorama and Combi versions are pro-
vided with main plus (optional) supple-
mentary heater with control located on
the headlining above the second seat row
fig. 60.
To turn the heater on, press button
F-fig. 61on the control panel.❒Turn knob Dto position “all cold”
(ring to blue sector) to make air at am-
bient temperature flow out from rear
lower vents (located under the 2^-3^
row seats for Panorama versions and
from the grille on left wheelhouse side
for Combi versions).
❒Turn knob Dto position “all warm”
(ring to red sector) to make warm air
(with stabilised engine rpm) flow out
from rear lower vents (located under
the 2^-3^ row seats for Panorama ver-
sions and from the grille on left wheel-
house side for Combi versions).
037-101 Ducato GB 6-11-2007 9:56 Pagina 72
Page 74 of 282

73
SAFETY
DEVICES
CORRECT USE
OF THE
VEHICLE
WARNING
LIGHTS AND
MESSAGES
IN AN
EMERGENCY
VEHICLE
MAINTENANCE
TECHNICAL
SPECIFICATIONS
INDEX
DASHBOARD
AND CONTROLS
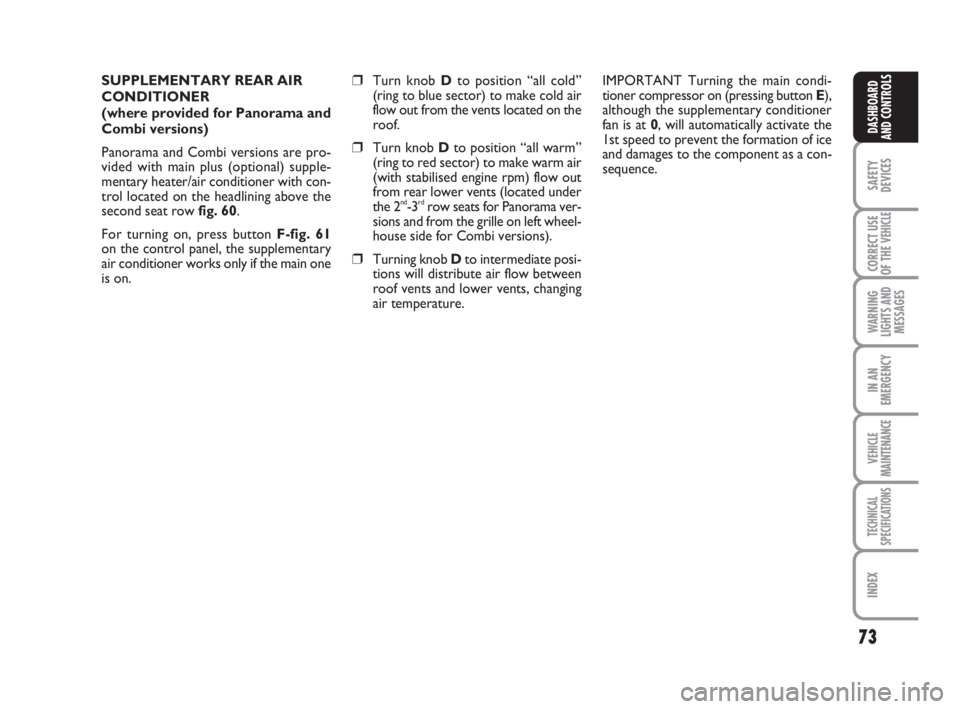
SUPPLEMENTARY REAR AIR
CONDITIONER
(where provided for Panorama and
Combi versions)
Panorama and Combi versions are pro-
vided with main plus (optional) supple-
mentary heater/air conditioner with con-
trol located on the headlining above the
second seat row fig. 60.
For turning on, press button F-fig. 61
on the control panel, the supplementary
air conditioner works only if the main one
is on.❒Turn knob Dto position “all cold”
(ring to blue sector) to make cold air
flow out from the vents located on the
roof.
❒Turn knob Dto position “all warm”
(ring to red sector) to make warm air
(with stabilised engine rpm) flow out
from rear lower vents (located under
the 2
nd-3rdrow seats for Panorama ver-
sions and from the grille on left wheel-
house side for Combi versions).
❒Turning knob Dto intermediate posi-
tions will distribute air flow between
roof vents and lower vents, changing
air temperature.IMPORTANT Turning the main condi-
tioner compressor on (pressing button E),
although the supplementary conditioner
fan is at 0, will automatically activate the
1st speed to prevent the formation of ice
and damages to the component as a con-
sequence.
037-101 Ducato GB 6-11-2007 9:56 Pagina 73
Page 75 of 282
74
SAFETY
DEVICES
CORRECT USE
OF THE
VEHICLE
WARNING
LIGHTS AND
MESSAGES
IN AN
EMERGENCY
VEHICLE
MAINTENANCE
TECHNICAL
SPECIFICATIONS
INDEX
DASHBOARD
AND CONTROLS
EXTERNAL LIGHTS
The left-hand stalk operates most of the
external lights.
The external lights can only be switched
on when the ignition key is at ON.
LIGHTS SWITCHED OFF fig. 62
Knurled ring turned to
å.
fig. 62F0N0030m
fig. 63F0N0031m
fig. 64F0N0032m
SIDE/TAILLIGHTS fig. 63
Turn the knurled ring to
6.
Instrument panel warning light 3will
turn on.DIPPED BEAM HEADLIGHTS
fig. 64
Turn the knurled ring to
2.
Instrument panel warning light 3will
turn on.
037-101 Ducato GB 6-11-2007 9:56 Pagina 74
Page 76 of 282

75
SAFETY
DEVICES
CORRECT USE
OF THE
VEHICLE
WARNING
LIGHTS AND
MESSAGES
IN AN
EMERGENCY
VEHICLE
MAINTENANCE
TECHNICAL
SPECIFICATIONS
INDEX
DASHBOARD
AND CONTROLS
MAIN BEAM HEADLIGHTS fig. 65
When the knurled ring is at
2pull the
lever towards the steering wheel (2nd un-
stable position).
The warning light 1on the instrument
cluster will come on at the same time.
To turn the main beams off, pull again the
lever towards the steering wheel (dipped
beams will turn on again).FLASHING THE HEADLIGHTS
fig. 66
Pull the stalk towards the steering wheel
(1st unstable position) regardless of the
position of the knurled ring. The warning
light 1on the instrument panel will turn
on.
PARKING LIGHTS
These lights can only be turned on with ig-
nition key at STOP or removed, by mov-
ing the left stalk knurled ring first to Oand
then to
6or 2.
The warning light
3on the instrument
cluster will come on at the same time.DIRECTION INDICATORS
fig. 67
Move the stalk to (stable) position:
❒up (position 1): right-hand direction in-
dicator;
❒down (position 2): left-hand direction
indicator.
Instrument panel warning light
ForDwill flash.
Indicators are switched off automatically
when the steering wheel is straightened.
If you want the indicator to flash briefly to
show that you are about to change lane,
move the stalk up or down without click-
ing into position (unstable position). When
released the stalk will return to its home
position.
fig. 65F0N0033mfig. 66F0N0034mfig. 67F0N0035m
037-101 Ducato GB 6-11-2007 9:56 Pagina 75