Page 133 of 554
WARNING!
Be certain that the seatback is securely locked into
position. If the seatback in not securely locked into
position the seat will not provide the proper stability
for child seats and/or passengers. An improperly
latched seat could cause serious injury.
Heated Seats Ð If Equipped
The heated seat switches are located in the instrument
panel under the climate controls.
Heated Seat Switches
UNDERSTANDING THE FEATURES OF YOUR VEHICLE 131
3
Page 136 of 554
WARNING!
If the hood is not fully latched, it could fly up when
the vehicle is moving and block your forward vision.
Be sure all hood latches are latched fully before
driving.
LIGHTS
Headlight Switch Location
134 UNDERSTANDING THE FEATURES OF YOUR VEHICLE
Page 137 of 554

Interior Lights
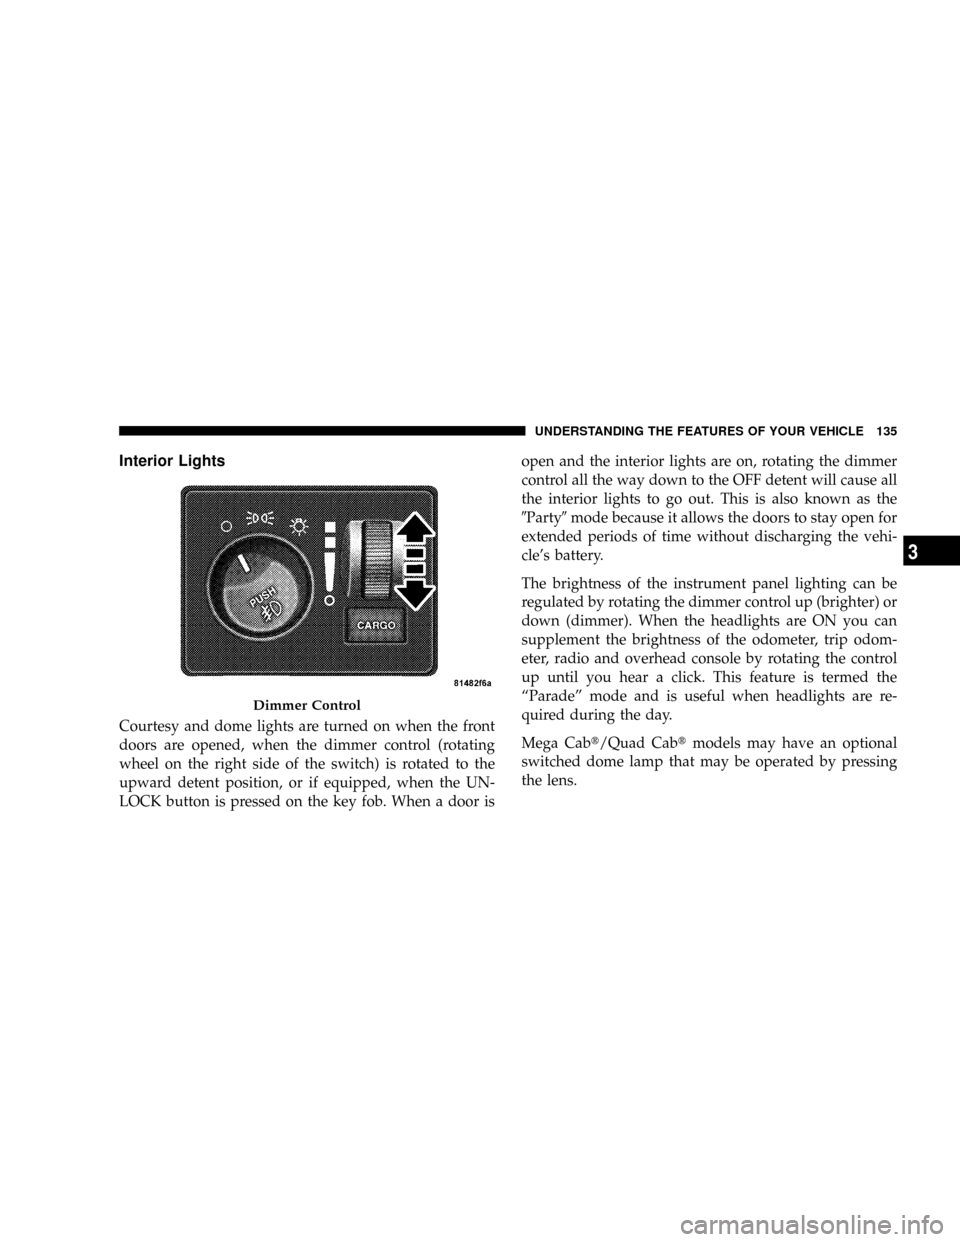
Courtesy and dome lights are turned on when the front
doors are opened, when the dimmer control (rotating
wheel on the right side of the switch) is rotated to the
upward detent position, or if equipped, when the UN-
LOCK button is pressed on the key fob. When a door isopen and the interior lights are on, rotating the dimmer
control all the way down to the OFF detent will cause all
the interior lights to go out. This is also known as the
9Party9mode because it allows the doors to stay open for
extended periods of time without discharging the vehi-
cle's battery.
The brightness of the instrument panel lighting can be
regulated by rotating the dimmer control up (brighter) or
down (dimmer). When the headlights are ON you can
supplement the brightness of the odometer, trip odom-
eter, radio and overhead console by rotating the control
up until you hear a click. This feature is termed the
ªParadeº mode and is useful when headlights are re-
quired during the day.
Mega Cabt/Quad Cabtmodels may have an optional
switched dome lamp that may be operated by pressing
the lens.
Dimmer Control
UNDERSTANDING THE FEATURES OF YOUR VEHICLE 135
3
Page 140 of 554

Lights-on Reminder
If the headlights, parking lights, or cargo lights are left on
after the ignition is turned OFF, a chime will sound when
the driver's door is opened.
Fog Lights Ð If Equipped
The fog lights are turned ON by placing the
headlight rotary control in the parking light or
headlight position and pushing in the headlight
rotary control. The fog lights will operate only when the
parking lights are on or when the vehicle headlights are
on low beam. An indicator light located in the instrument
cluster will illuminate when the fog lights are on. The fog
lights will turn off when the switch is pushed a second
time, when the headlight switch is rotated to the OFF
position, or the high beam is selected.
Cargo Light Ð If Equipped
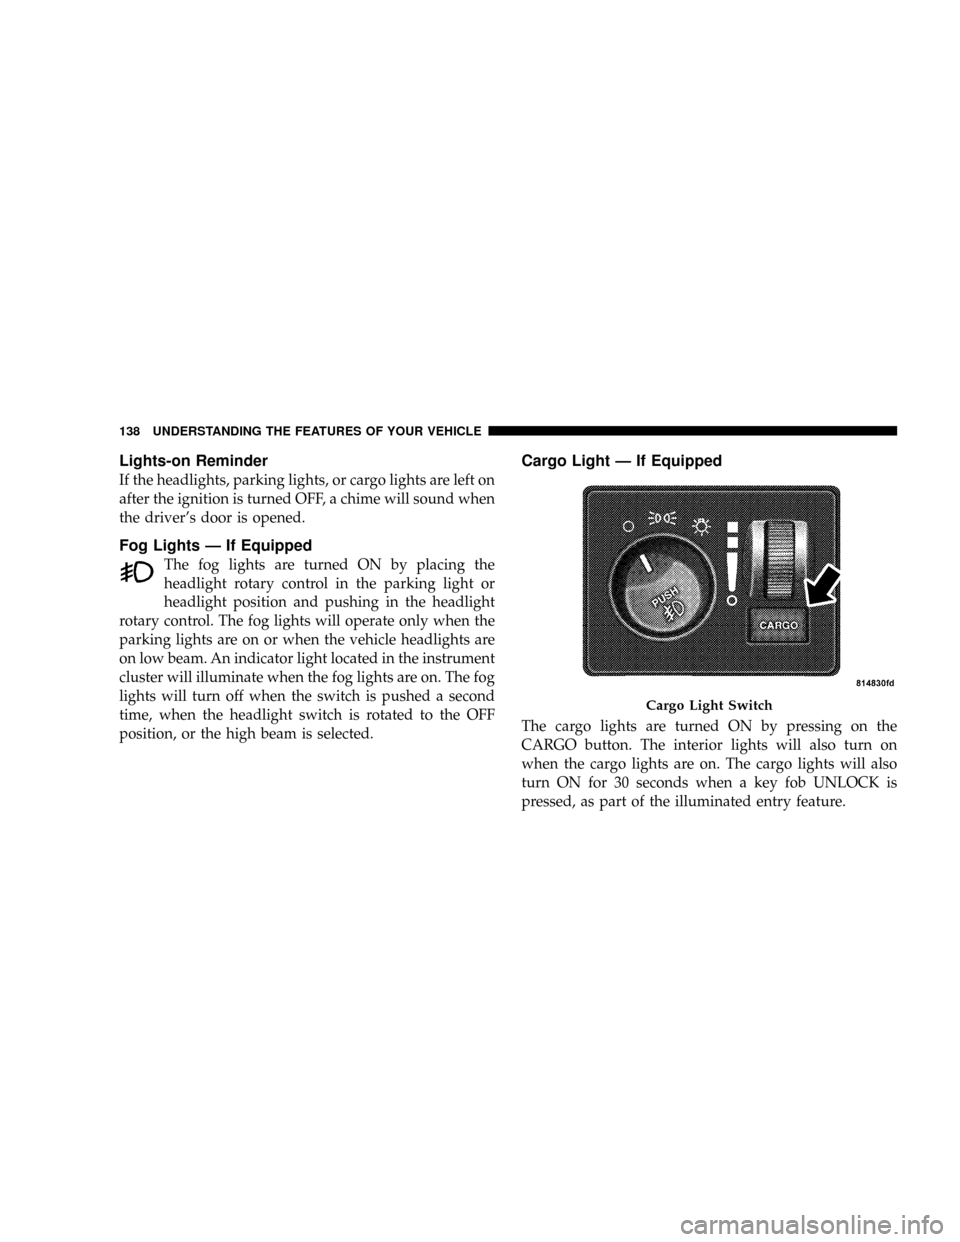
The cargo lights are turned ON by pressing on the
CARGO button. The interior lights will also turn on
when the cargo lights are on. The cargo lights will also
turn ON for 30 seconds when a key fob UNLOCK is
pressed, as part of the illuminated entry feature.
Cargo Light Switch
138 UNDERSTANDING THE FEATURES OF YOUR VEHICLE
Page 145 of 554
TILT STEERING COLUMN
To tilt the column, pull rearward on the lever below the
turn signal control and move the wheel up or down, as
desired. Push the lever forward to lock the column firmly
in place.WARNING!
Tilting the steering column while the vehicle is
moving is dangerous. Without a stable steering col-
umn, you could lose control of the vehicle and have
an accident. Adjust the column only while the ve-
hicle is stopped. Be sure it is locked before driving.
Tilt Steering Control Lever
UNDERSTANDING THE FEATURES OF YOUR VEHICLE 143
3
Page 151 of 554
Courtesy/Reading Lights
In the middle of the console are two courtesy/reading
lights.
Both lights illuminate as courtesy lights when a door is
opened, when the dimmer control is rotated to the
courtesy light position (fully-upward position), or when
the UNLOCK button is pressed on the Remote Keyless
Entry transmitter, if equipped. These lights are also
operated individually as reading lights by pressing the
recessed area of the corresponding lens.
NOTE:The courtesy/reading lights will remain on until
the switch is pressed a second time, so be sure they have
been turned off before leaving the vehicle. If the interior
lights are left on after the vehicle is turned off, they will
extinguish after 15 minutes.
OVERHEAD CONSOLE WITH
COMPASS/TEMPERATURE MINI-TRIP COMPUTER
Ð IF EQUIPPED
This optional overhead console consists of the following:
²Courtesy Lights
²Compass/Temperature Mini-Trip Computer (CMTC)
UNDERSTANDING THE FEATURES OF YOUR VEHICLE 149
3
Page 164 of 554

Then proceed with Step 4 under, ªProgramming
HomeLinkt,º earlier in this section.
Using HomeLinkT
To operate, simply press and release the programmed
HomeLinktbutton. Activation will now occur for the
trained device (i.e., garage door opener, gate operator,
security system, entry door lock, home/office lighting,
etc.) The hand-held transmitter of the device may also be
used at any time.
Reprogramming A Single HomeLinkTButton
To reprogram a channel that has been previously trained,
follow these steps:
1. Turn the ignition switch to the ON/RUN position.
2. Press and hold the desired HomeLinktbutton, for 20
seconds, until the indicator(s) starts to flash.Do not
release the button.3.Without releasing the button,proceed with PRO-
GRAMMING HOMELINKt, Step #2, and follow all
remaining steps.
Security
It is advised to erase all channels before you sell or turn
in your vehicle.
To do this, press and hold the two outside buttons, for 20
seconds, until the indicators begin to flash. Note that all
channels will be erased. Individual channels cannot be
erased.
The HomeLinktUniversal Transceiver is disabled when
the Vehicle Theft Alarm is active.
Troubleshooting Tips
If you are having trouble programming HomeLinkt, here
are some of the most common solutions:
²Replace the battery in the original transmitter.
162 UNDERSTANDING THE FEATURES OF YOUR VEHICLE
Page 185 of 554
Sliding Rear Window Ð If Equipped
A locking device in the center of the window helps to
prevent entry from the rear of the vehicle. Squeeze the
lock to release the window.
PICKUP BOX
The pickup box on your new vehicle has many features
designed for utility and convenience.
NOTE:If you are installing a toolbox to the front of the
pickup box, you must use Moparttoolbox brackets
available from your authorized dealer.
Pickup Box Features
UNDERSTANDING THE FEATURES OF YOUR VEHICLE 183
3