Page 326 of 554
WARNING!
Continued operation with reduced power steering
assist could pose a safety risk to yourself and others.
Service should be obtained as soon as possible.
CAUTION!
Prolonged operation of the steering system at the end
of the steering wheel travel will increase the steering
fluid temperature and should be avoided when pos-
sible. Damage to the power steering pump may occur.
ELECTRONIC BRAKE CONTROL SYSTEM
(ABS/TCS/BAS/HSA/ERM/ESP/TSC) Ð IF
EQUIPPED
Your vehicle is equipped with an advanced electronic
brake control system that includes Anti-Lock Brake Sys-
tem (ABS), Traction Control System (TCS), Brake Assist
System (BAS), HSA (Hill Start Assist), Electronic Roll
Mitigation (ERM), Electronic Stability Program (ESP) and
Trailer Sway Control (TSC). All six systems work to-
gether to enhance vehicle stability and control in various
driving conditions, and are commonly referred to as ESP.
324 STARTING AND OPERATING
Page 327 of 554

ABS (Anti-Lock Brake System)
This ABS system aids the driver in maintaining vehicle
control under adverse braking conditions. The system
controls hydraulic brake pressure to prevent wheel
lockup and help avoid skidding on slippery surfaces
during braking. For more information about ABS, refer to
ªAnti-Lock Brake Systemº under ªBrake Systemº in
Section 5 of this manual.
NOTE:ABS improves steering control of the vehicle
during hard braking maneuvers.
WARNING!
²ABS cannot prevent the natural laws of physics
from acting on the vehicle, nor can it increase
braking or steering efficiency beyond that af-
forded by the condition of the vehicle brakes and
tires or the traction afforded.
²The ABS cannot prevent accidents, including
those resulting from excessive speed in turns,
following another vehicle too closely, or hydro-
planing. Only a safe, attentive, and skillful driver
can prevent accidents.
²The capabilities of an ABS-equipped vehicle must
never be exploited in a reckless or dangerous
manner which could jeopardize the user's safety
or the safety of others.
STARTING AND OPERATING 325
5
Page 329 of 554

applies optimum pressure to the brakes in emergency
braking conditions. This can help reduce braking dis-
tances. The BAS complements the ABS. Applying the
brakes very quickly results in the best BAS assistance. To
receive the benefit of BAS, you must apply continuous
braking pressure during the stopping sequence. Do not
reduce brake pedal pressure unless braking is no longer
desired.
Once the brake pedal is released, the BAS is deactivated.WARNING!
²BAS cannot prevent the natural laws of physics
from acting on the vehicle, nor can it increase
braking efficiency beyond that afforded by the
condition of the vehicle brakes and tires or the
traction afforded.
²The BAS cannot prevent accidents, including
those resulting from excessive speed in turns,
following another vehicle too closely, or hydro-
planing. Only a safe, attentive, and skillful driver
can prevent accidents.
²The capabilities of a BAS-equipped vehicle must
never be exploited in a reckless or dangerous
manner which could jeopardize the user 's safety
or the safety of others.
STARTING AND OPERATING 327
5
Page 341 of 554

TIRE SAFETY INFORMATION
TIRE MARKINGS
NOTE:
²P (Passenger) - Metric tire sizing is based on U.S.
design standards. P-Metric tires have the letter ªPº
molded into the sidewall preceding the size designa-
tion. Example: P215/65R15 95H.
²European-Metric tire sizing is based on European
design standards. Tires designed to this standard have
the tire size molded into the sidewall beginning with
the section width. The letter9P9is absent from this tire
size designation. Example: 215/65R15 96H.
²LT (Light Truck) - Metric tire sizing is based on U.S.
design standards. The size designation for LT-Metric
tires is the same as for P-Metric tires except for the
letters ªLTº that are molded into the sidewall preced-
ing the size designation. Example: LT235/85R16.
²Temporary spare tires are high-pressure compact
spares designed for temporary emergency use only.
Tires designed to this standard have the letter ªTº
molded into the sidewall preceding the size designa-
tion. Example: T145/80D18 103M.
²High flotation tire sizing is based on U.S. design
standards, and it begins with the tire diameter molded
into the sidewall. Example: 31x10.5 R15 LT.
STARTING AND OPERATING 339
5
Page 343 of 554

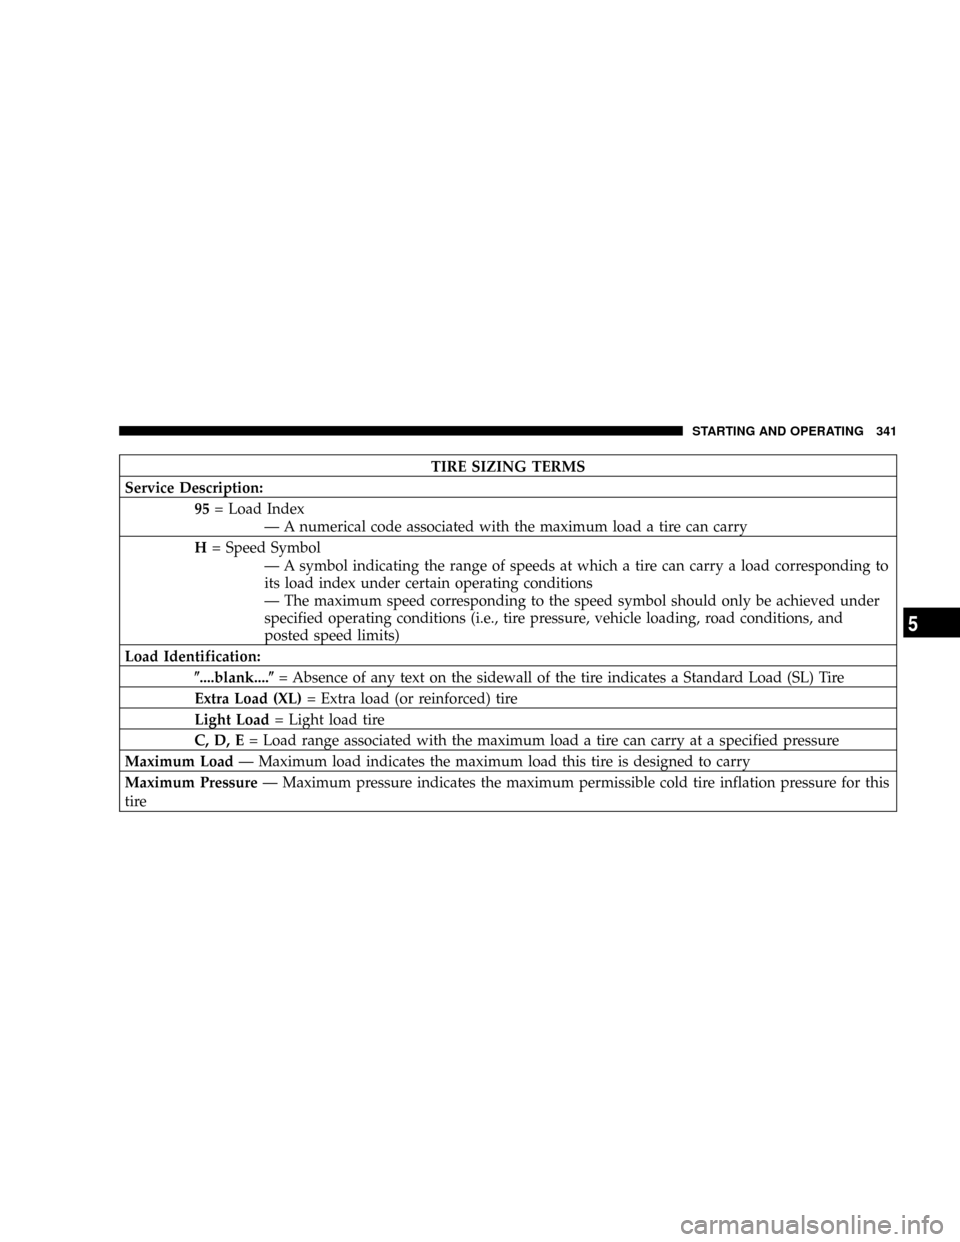
TIRE SIZING TERMS
Service Description:
95= Load Index
Ð A numerical code associated with the maximum load a tire can carry
H= Speed Symbol
Ð A symbol indicating the range of speeds at which a tire can carry a load corresponding to
its load index under certain operating conditions
Ð The maximum speed corresponding to the speed symbol should only be achieved under
specified operating conditions (i.e., tire pressure, vehicle loading, road conditions, and
posted speed limits)
Load Identification:
(....blank....(= Absence of any text on the sidewall of the tire indicates a Standard Load (SL) Tire
Extra Load (XL)= Extra load (or reinforced) tire
Light Load= Light load tire
C, D, E= Load range associated with the maximum load a tire can carry at a specified pressure
Maximum LoadÐ Maximum load indicates the maximum load this tire is designed to carry
Maximum PressureÐ Maximum pressure indicates the maximum permissible cold tire inflation pressure for this
tire
STARTING AND OPERATING 341
5
Page 429 of 554
²For 2500/3500 4x4 series trucks, when changing the
front wheel, assemble the jack drive tube to the jack
and connect the drive tube to the extension tube.
Place the jack under the axle as close to the tire as
possible with the drive tubes extending to the front.
Connect the jack tube extension and wheel wrench.²For all trucks, when changing a rear wheel, as-
semble the jack drive tube to the jack and connect
the drive tube to the extension tube. Place the jack
under the axle between the spring and the shock
absorber with the drive tubes extending to the rear.
Rear Jacking Location (All)
WHAT TO DO IN EMERGENCIES 427
6
Page 492 of 554
Cavity Cartridge
FuseMini
FuseDescription
9 30 Amp
PinkOff Road Module
Power
10 5 Amp
OrangeTrx-Off Rd Pkg Sen
(Gas Engine Only)
NOTE: Insert 5 amp
fuse in this cavity to
enable the TRX capa-
bility (If Equipped).
11 20 Amp
YellowIgnition Off Draw
(IOD)-Cabin Com-
partment Node
(CCN)/Radio/Under
Hood Lamp/Wireless
Control Module
(WCM)/Satellite Digi-
tal Audio Receiver
(SDARS)/Hands Free
Module (HFM)/EOMCavity Cartridge
FuseMini
FuseDescription
12 30 Amp
PinkElectric Brake
13 25 Amp
NaturalPower-Battery
RWAL/ABS Module
Feed
14 15 Amp
BluePark Lights Left
15 20 Amp
YellowTrailer Park Lights
16 15 Amp
BluePark Lights Right
17 Ð Ð
18 40 Amp
GreenABS Pump
19 30 Amp
PinkTrailer Tow Battery
Feed
490 MAINTAINING YOUR VEHICLE
Page 493 of 554
Cavity Cartridge
FuseMini
FuseDescription
20 10 Amp
RedOccupant Restraints
Controller (ORC) 2
21 10 Amp
RedOccupant Restraints/
Pass Disable Switch
22 2 Amp
GrayIGN Switch Feed
23 10 Amp
RedHVAC
24 20 Amp
BlueAISIN Relay Feed
(Diesel Only)
25 10 Amp
RedPower Mirror/T-Case
Brake
26 20 Amp
YellowBrake Switch/Center
High Mount Stop
Light (CHMSL)/
Aftermarket CHMSLCavity Cartridge
FuseMini
FuseDescription
27 40 Amp
GreenPower Seats
28 10 Amp
RedPower Run/Start-
PCM/Steering Angle
Sensor
29 10 Amp
Red4X4 Switch/Pass Dr
Switch/EC Mirror
30 15 Amp
BluePower Run/Start-
ABS/RWAL/Smart
Bar/YAW Sensor/
Universal Exhaust
Gas Oxygen (Uego)
Sensor Controller
31 10 Amp
RedPCM (Gas)/TCM
(Diesel 58RFE)
MAINTAINING YOUR VEHICLE 491
7