Page 444 of 527

²Make sure that the radiator and coolant recovery
bottle overflow hoses are not kinked or obstructed.
²Keep the front of the radiator clean. If your vehicle is
equipped with air conditioning, keep the front of the
condenser clean also.
²Do not change the thermostat for summer or winter
operation. If replacement is ever necessary, install
ONLY the correct type thermostat. Other designs may
result in unsatisfactory coolant performance, poor gas
mileage, and increased emissions.
Fan
Inspection
Check the fan for cracks and bent or broken blades. If any
of these conditions exist, you must replace the fan. Make
sure it is securely mounted.NOTE:This service procedure must be performed by a
trained service technician. Make arrangements with your
authorized dealer for this inspection.
Charge Air Cooler (Inter-Cooler)
The charge air cooler is positioned between the radiator
and the air conditioner condenser. Air enters the engine
through the air cleaner and passes through the turbo-
charger where it is pressurized. This pressurized air
rapidly reaches high temperature. The air is then directed
through a hose to the charge air cooler and through
another hose to the intake manifold of the engine. The air
entering the engine has been cooled by about 50 to 100
degrees Fahrenheit. This cooling process enables more
efficient burning of fuel resulting in fewer emissions.
442 MAINTAINING YOUR VEHICLE
Page 446 of 527

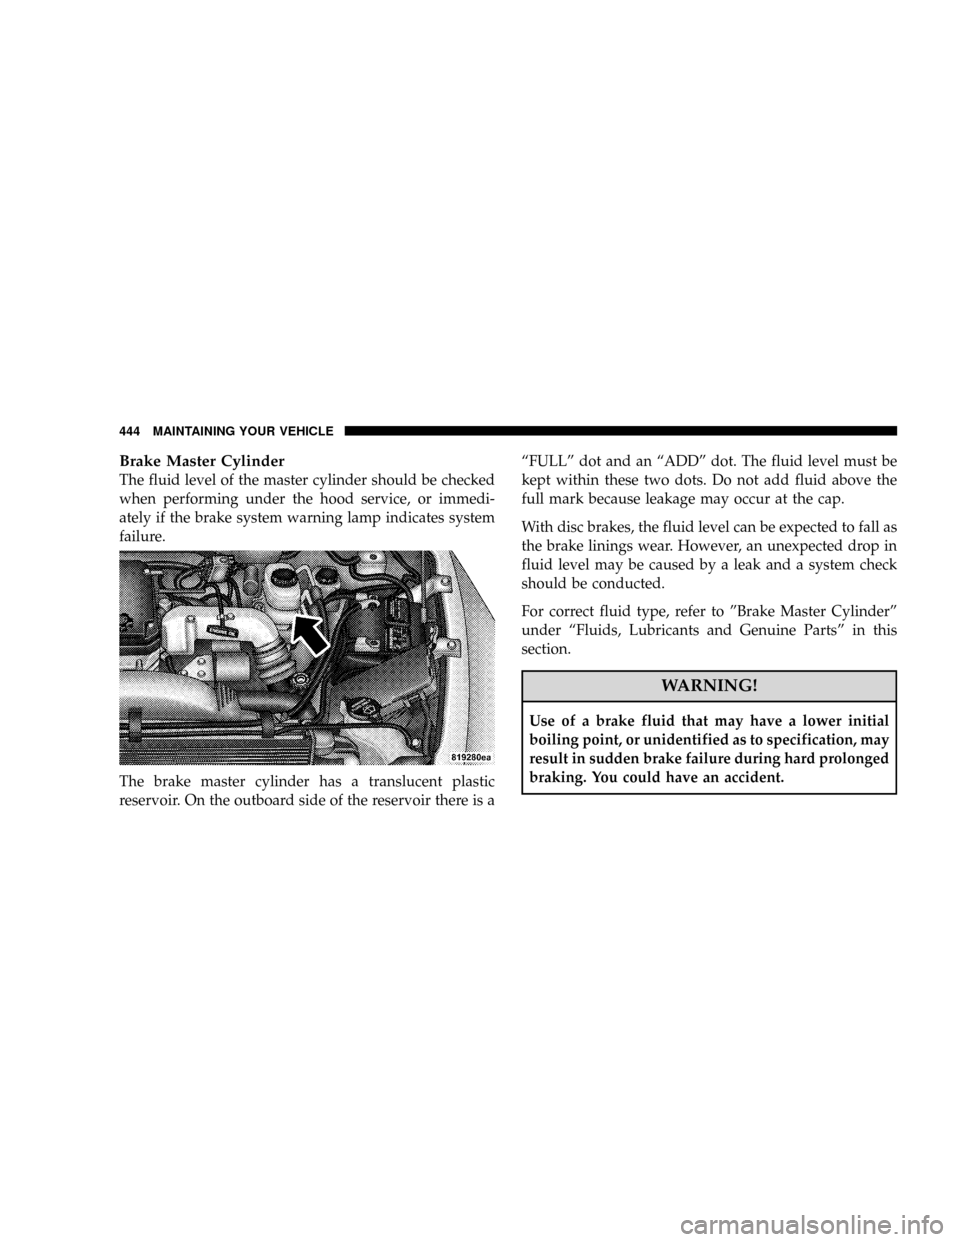
Brake Master Cylinder
The fluid level of the master cylinder should be checked
when performing under the hood service, or immedi-
ately if the brake system warning lamp indicates system
failure.
The brake master cylinder has a translucent plastic
reservoir. On the outboard side of the reservoir there is aªFULLº dot and an ªADDº dot. The fluid level must be
kept within these two dots. Do not add fluid above the
full mark because leakage may occur at the cap.
With disc brakes, the fluid level can be expected to fall as
the brake linings wear. However, an unexpected drop in
fluid level may be caused by a leak and a system check
should be conducted.
For correct fluid type, refer to ºBrake Master Cylinderº
under ªFluids, Lubricants and Genuine Partsº in this
section.
WARNING!
Use of a brake fluid that may have a lower initial
boiling point, or unidentified as to specification, may
result in sudden brake failure during hard prolonged
braking. You could have an accident.
444 MAINTAINING YOUR VEHICLE
Page 447 of 527

WARNING!
Overfilling the brake fluid reservoir can result in
spilling brake fluid on hot engine parts and the
brake fluid catching fire.
Use only brake fluid that has been in a tightly closed
container to avoid contamination from foreign matter or
moisture.
CAUTION!
Do not allow a petroleum-base fluid to contaminate
the brake fluid. Seal damage and loss of brake
performance may result.
Brake Hoses
Inspection should be performed whenever the brake
system is serviced or at intervals specified. Inspect hy-
draulic brake hoses for surface cracking, scuffing or worn
spots. If there is any evidence of cracking, scuffing, or
worn spots, the hose should be replaced immediately!
Eventual deterioration of the hose can take place with
possible burst failure.
Clutch Linkage
If the clutch pedal linkage begins to squeak or grunt, the
clutch pedal pivot bushings should be lubricated. Refer
to Fluids, Lubricants and Genuine Parts for the correct
lubricant type. Multipurpose Grease, NLGI Grade 2 E.P.
Clutch Hydraulic System
The clutch hydraulic system is a sealed maintenance-free
system. In the event of leakage or other malfunction, the
system must be replaced.
MAINTAINING YOUR VEHICLE 445
7
Page 448 of 527

Rear Axle And 4x4 Front Driving Axle Fluid Level
For Model 9.25 Front Axles and 10.5º/11.5º Rear Axles
refer to Fluids, Lubricants and Genuine Parts for the
correct lubricant type. For normal service, periodic fluid
level checks are not required. When the vehicle is ser-
viced for other reasons, the exterior surfaces of the axle
assembly should be inspected.
When checking the fluid level, the vehicle should be in a
level position. The fluid level should be 1/4º 1/4º (6.4
mm 6.4 mm) below the fill hole on the 9.25º Front Axle.
The fluid level should be 3/4º 1/4º (19 mm 6.4 mm)
below the fill hole on all 10.5º and 1/4º 1/4º (6.4 mm
6.4 mm) on 11.5º Rear Axles.
Drain And Refill
Follow the Maintenance Schedule for recommended fron
and rear axle fluid change intervals.
Lubricant Selection
Refer to Fluids, Lubricants and Genuine Parts for the
correct lubricant type.
NOTE:The presence of water in the gear lubricant will
result in corrosion and possible failure of differential
components. Operation of the vehicle in water, as may be
encountered in some off-highway types of service, will
require draining and refilling the axle to avoid damage.
Limited-Slip Differentialsin vehicles equipped with
10.5º/11.5º AxlesDO NOT REQUIREany limited slip
oil additive (friction modifiers).
Transfer Case Ð If Equipped
Fluid Level Check
This fluid level can be checked by removing the filler
plug. The fluid level should be to the bottom edge of the
filler plug hole with the vehicle in a level position.
446 MAINTAINING YOUR VEHICLE
Page 450 of 527

CAUTION!
Using a transmission fluid other than the manufac-
turers recommended fluid may cause deterioration in
transmission shift quality and/or torque converter
shudder. Using a transmission fluid other than the
manufacturers recommended fluid will result in
more frequent fluid and filter changes. Refer to
Fluids, Lubricants and Genuine Parts for correct
fluid type.
Fluid Level Check
If equipped with a dipstick, use the following procedure.
If your vehicle has a capped dipstick tube, it is sealed and
should not be tampered with. Your authorized dealer has
the proper tools to ensure that the fluid level is set
properly. The fluid level should be checked when theengine is fully warmed up and the fluid in the transmis-
sion is at normal operating temperature. Operation of the
transmission with an improper fluid level will greatly
reduce the life of the transmission and of the fluid. Check
the fluid level whenever the vehicle is serviced.
Procedure For Checking Fluid Level
To properly check the automatic transmission fluid level,
the following procedure must be used:
1. Operate the engine at idle speed and normal operating
temperature.
2. The vehicle must be on level ground.
3. Fully apply the parking brake and press the brake
pedal.
4. Place the gear selector momentarily in each gear
position ending with the lever in PARK.
448 MAINTAINING YOUR VEHICLE
Page 452 of 527

Automatic Transmission Fluid and Filter Change
To obtain best performance and long life for automatic
transmissions, the manufacturer recommends that they
be given regular maintenance service by an authorized
dealer or Service Center. It is important that the trans-
mission fluid is maintained at the correct level, and that
it is drained and refilled as specified.
Use only manufacturer 's recommended transmission
fluid; for correct fluid type, refer to ªAutomatic Trans-
missionº under ªFluids, Lubricants and Genuine Partsº
in this section. It is important that the transmission fluid
be maintained at the prescribed level using the recom-
mended fluid..
The fluid and filter(s) should be changed as specified in
the Maintenance Schedule (Section 8).
NOTE:If the transmission is disassembled for any
reason, the fluid and filter should be changed.
Special Additives
Automatic Transmission Fluid (ATF) is an engineered
product and its performance may be impaired by supple-
mental additives. Therefore, do not add any fluid addi-
tives to the transmission. The only exception to this
policy is the use of special dyes to aid in detecting fluid
leaks. In addition, avoid using transmission sealers as
they may adversely affect seals.
Front Wheel Bearings
Front wheel bearings for your vehicle are sealed-for-life.
They do not require greasing or seal replacement. In
some instances, these bearings will ªpurgeº excess grease
and the bearing housing will look slightly wet. This is
normal.
²Periodic inspection for excess play is recommended.
²If a bearing assembly is accidentally separated when
servicing the brake rotors, it should be replaced.
450 MAINTAINING YOUR VEHICLE
Page 454 of 527

Required Maintenance For Noise Control Systems
The following maintenance services must be performed
every 6 months or 6,000 miles (9 600 km), whichever
comes first, to assure proper operation of the noise
control systems. In addition, inspection and service
should be performed anytime a malfunction is observed
or suspected. Proper maintenance of the entire vehicle
will help the effectiveness of the noise control systems.
Exhaust System
Inspect the entire exhaust system for leaks and damaged
parts. Devices such as hangers, clamps, and U-bolts
should be tight and in good condition. Damaged compo-
nents, burned or blown out mufflers, burned or rusted
out exhaust pipes should be replaced according to the
procedures and specifications outlined in the appropriate
service manual.Air Cleaner Assembly
Inspect air cleaner housing for proper assembly and fit.
Make certain that the air cleaner is properly positioned
and that the cover is tight. Check all hoses leading to the
air cleaner for tightness. The air filter element must also
be clean and serviced according to the instructions out-
lined in the Maintenance Schedule Section of this
manual.
Tampering With Noise Control System Prohibited
Federal law prohibits the following acts or the causing
thereof: (1) the removal or rendering inoperative by any
person, other than for purposes of maintenance, repair, or
replacement, of any device or element of design incorpo-
rated into any new vehicle for the purpose of noise
control prior to its sale or delivery to the ultimate
purchaser or while it is in use, or (2) the use of the vehicle
after such device or element of design has been removed
or rendered inoperative by any person.
452 MAINTAINING YOUR VEHICLE
Page 456 of 527
Maintenance Log and Service Chart (Diesel Engines)
Noise Systems Maintenance Chart and Service Log Ð Insert Month, Day, Year under column mileage closest to the
mileage at which service was performed.
MILES 7,500 15,000 22,500 30,000 37,500 45,000 52,500 60,000
KILOMETERS 12 000 24 000 36 000 48 000 60 000 72 000 84 000 96 000
Exhaust system-inspect
Air cleaner assembly-inspect
ODOMETER READING
PERFORMED BY
PERFORMED AT
MILES 67,500 75,000 82,500 90,000 97,500 84,000 105,00 112,500
KILOMETERS 108 000 120 000 132 000 144 000 126 000 156 000 168 000 181 000
Exhaust system-inspect
Air cleaner assembly-inspect
ODOMETER READING
PERFORMED BY
PERFORMED AT
454 MAINTAINING YOUR VEHICLE