Page 392 of 554

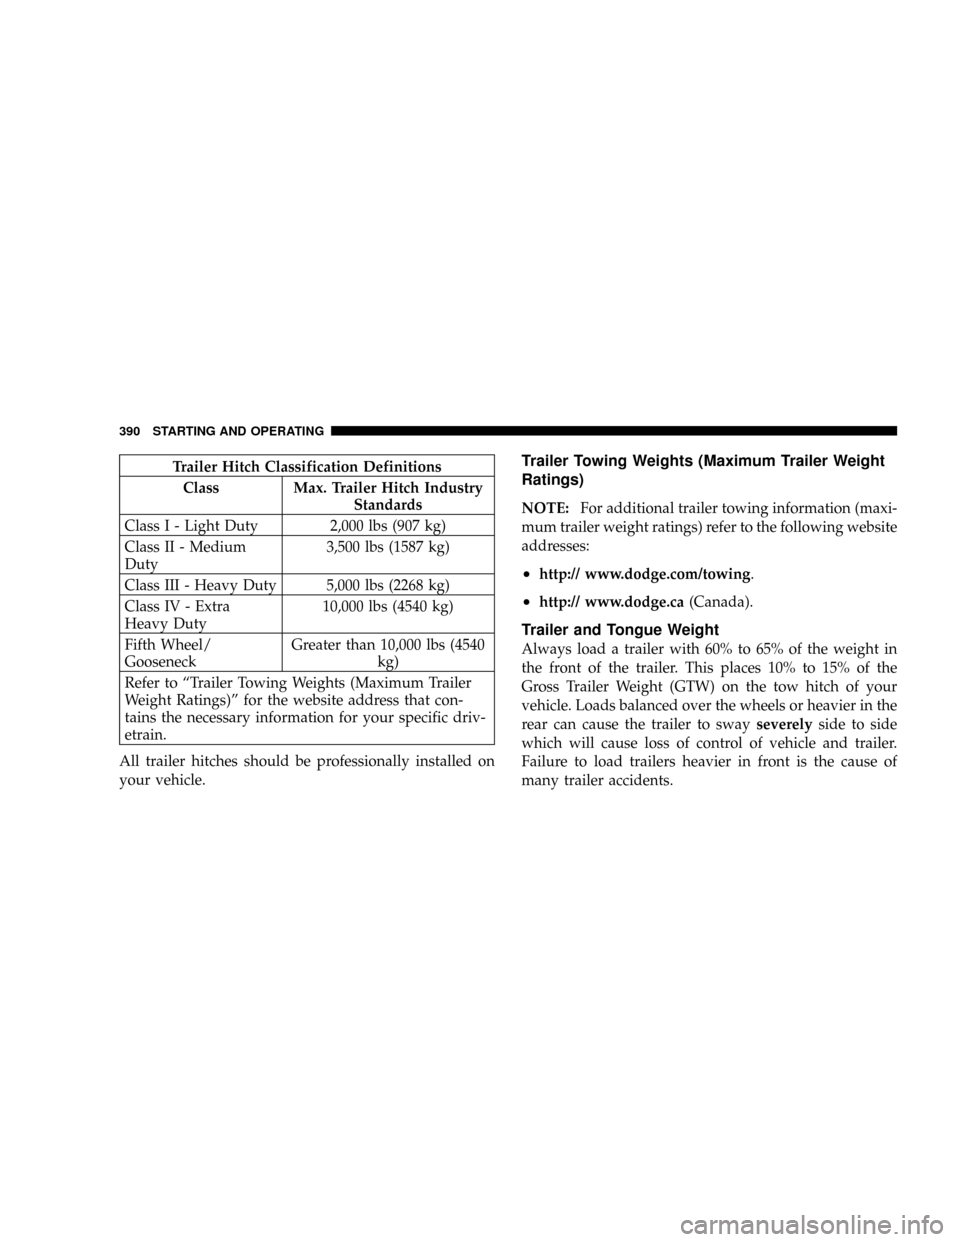
Trailer Hitch Classification Definitions
Class Max. Trailer Hitch Industry
Standards
Class I - Light Duty 2,000 lbs (907 kg)
Class II - Medium
Duty3,500 lbs (1587 kg)
Class III - Heavy Duty 5,000 lbs (2268 kg)
Class IV - Extra
Heavy Duty10,000 lbs (4540 kg)
Fifth Wheel/
GooseneckGreater than 10,000 lbs (4540
kg)
Refer to ªTrailer Towing Weights (Maximum Trailer
Weight Ratings)º for the website address that con-
tains the necessary information for your specific driv-
etrain.
All trailer hitches should be professionally installed on
your vehicle.Trailer Towing Weights (Maximum Trailer Weight
Ratings)
NOTE:For additional trailer towing information (maxi-
mum trailer weight ratings) refer to the following website
addresses:
²http:// www.dodge.com/towing.
²http:// www.dodge.ca(Canada).
Trailer and Tongue Weight
Always load a trailer with 60% to 65% of the weight in
the front of the trailer. This places 10% to 15% of the
Gross Trailer Weight (GTW) on the tow hitch of your
vehicle. Loads balanced over the wheels or heavier in the
rear can cause the trailer to swayseverelyside to side
which will cause loss of control of vehicle and trailer.
Failure to load trailers heavier in front is the cause of
many trailer accidents.
390 STARTING AND OPERATING
Page 398 of 554
Towing Requirements Ð Trailer Lights & Wiring
Whenever you pull a trailer, regardless of the trailer size,
stop lights and turn signals on the trailer are required for
motoring safety.
The Trailer Tow Package may includea4and7pin
wiring harness. Use a factory approved trailer harness
and connector.
NOTE:Do not cut or splice wiring into the vehicles
wiring harness.
The electrical connections are all complete to the vehicle
but you must mate the harness to a trailer connector.
Refer to the following illustrations.
4-Pin Connector
396 STARTING AND OPERATING
Page 401 of 554

NOTE:Using the ªTOW HAULº or ªOD/OFFº range
while operating the vehicle under heavy operating con-
ditions will improve performance and extend transmis-
sion life by reducing excessive shifting and heat build up.
This action will also provide better engine braking.
The automatic transmission fluid and filter should be
changed if you REGULARLY tow a trailer for more than
45 minutes of continuous operation. See Maintenance
Schedule in section 8 of this manual for transmission
fluid change intervals.
NOTE:Check the automatic transmission fluid level
before towing.
Towing Tips Ð Tow/Haul (If Equipped)
To reduce potential for automatic transmission overheat-
ing, turn the ªTOW HAUL OD/OFFº feature ON when
driving in hilly areas or shift the transmission to Drive
position 2 on more severe grades.
Towing Tips Ð Electronic Speed Control (If
Equipped)
þ
Don't use in hilly terrain or with heavy loads.
þWhen using the speed control, if you experience speed
drops greater than 10 mph (16 km/h), disengage until
you can get back to cruising speed.
þUse speed control in flat terrain and with light loads to
maximize fuel efficiency.
Towing Tips Ð Cooling System
To reduce potential for engine and transmission over-
heating, take the following actions:
þCity Driving
When stopped for short periods of time, put transmission
in neutral and increase engine idle speed.
þHighway Driving
Reduce speed.
STARTING AND OPERATING 399
5
Page 403 of 554
SNOWPLOW
Snowplow Prep Packages are available as a factory-
installed option. These packages include components
necessary to equip your vehicle with a snowplow.
1500 Models (Light Duty)
NOTE:Do not use 1500 (light duty) Models for snow-
plow applications.
WARNING!
On 1500 Models, snowplows, winches, and other
aftermarket equipment should not be added to the
front end of your vehicle. The airbag crash sensors
may be affected by the change in the front end
structure. The airbags could deploy unexpectedly or
could fail to deploy during a collision resulting in
serious injury or death.
Trailer Towing Position
STARTING AND OPERATING 401
5
Page 405 of 554

Before Plowing
²
Check the hydraulic system for leaks and proper fluid
level.
²Check the mounting bolts and nuts for proper tightness.
²Check the runners and cutting edge for excessive wear.
The cutting edge should be 1/4 to 1/2 inch (6.4 mm
to13 mm) above ground in snow plowing position.
²Check that snowplow lighting is connected and func-
tioning properly.
Snowplow Model Prep Package Availability
For Detailed Information Visit www.dodge.com or refer
to the Current Dodge Truck Body Builders Guide.
1. The 1500 models are NOT available for snowplow
applications.
2. The maximum number of occupants in the truck
should not exceed two.3. The total GVWR, or the Front GAWR, or the Rear
GAWR should never be exceeded.
4. The snowplow prep packages are not available with
the Sport Package.
5. Cargo capacity will be reduced by the addition of
options or passengers, etc.
The loaded vehicle weight, including the snowplow sys-
tem, all aftermarket accessories, driver, passengers, op-
tions, and cargo, must not exceed either the Gross Vehicle
Weight (GVWR) or Gross Axle Weight (GAWR) ratings.
These weights are specified on the Safety Compliance
Certification Label on the driver's side door opening.
NOTE: Detach the snowplow when transporting
passengers.
Vehicle front end wheel alignment was set to specifications
at the factory without consideration for the weight of the
plow. Front end tow-in should be checked and reset if
STARTING AND OPERATING 403
5
Page 412 of 554

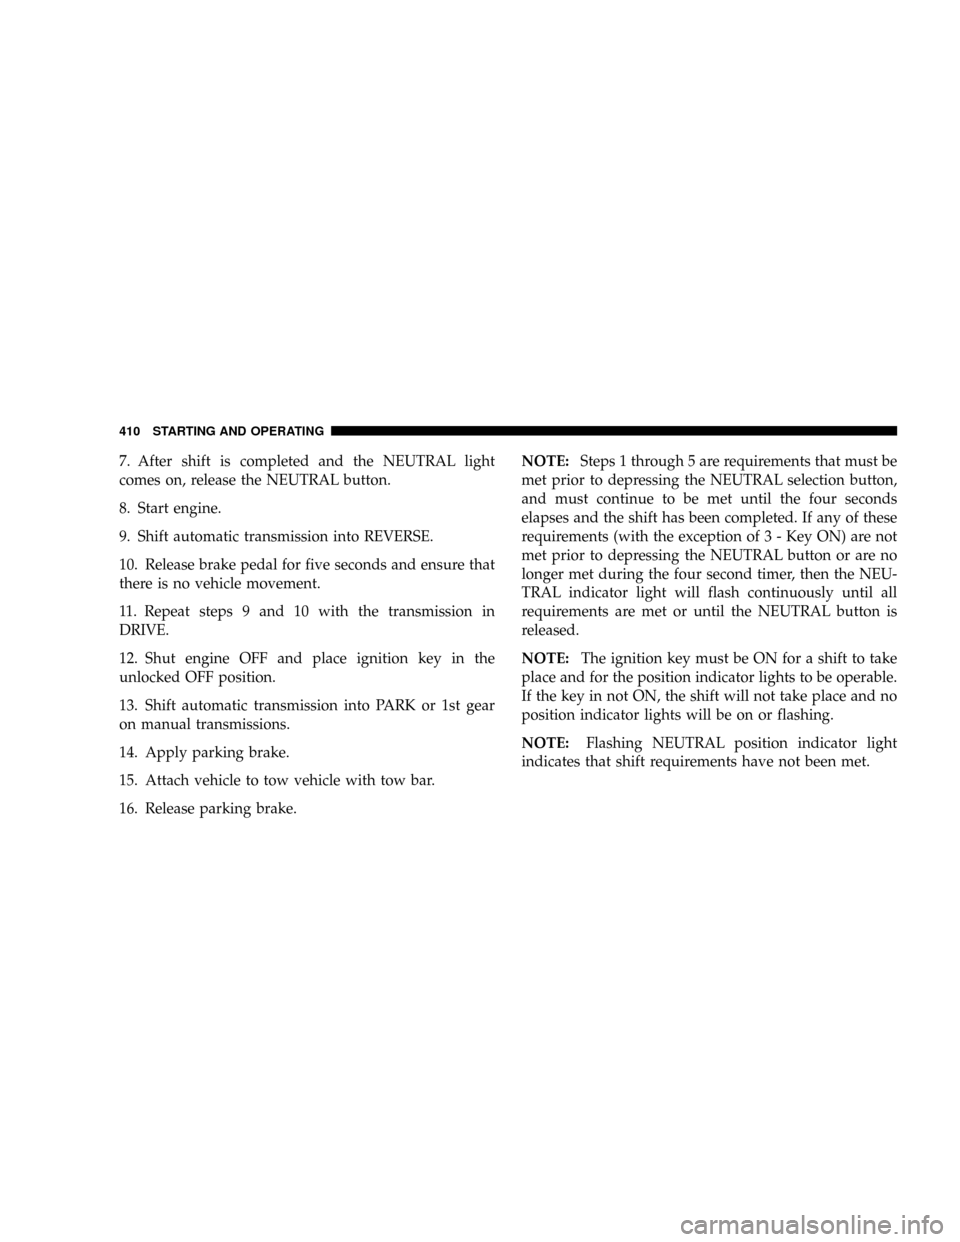
7. After shift is completed and the NEUTRAL light
comes on, release the NEUTRAL button.
8. Start engine.
9. Shift automatic transmission into REVERSE.
10. Release brake pedal for five seconds and ensure that
there is no vehicle movement.
11. Repeat steps 9 and 10 with the transmission in
DRIVE.
12. Shut engine OFF and place ignition key in the
unlocked OFF position.
13. Shift automatic transmission into PARK or 1st gear
on manual transmissions.
14. Apply parking brake.
15. Attach vehicle to tow vehicle with tow bar.
16. Release parking brake.NOTE:Steps 1 through 5 are requirements that must be
met prior to depressing the NEUTRAL selection button,
and must continue to be met until the four seconds
elapses and the shift has been completed. If any of these
requirements (with the exception of 3 - Key ON) are not
met prior to depressing the NEUTRAL button or are no
longer met during the four second timer, then the NEU-
TRAL indicator light will flash continuously until all
requirements are met or until the NEUTRAL button is
released.
NOTE:The ignition key must be ON for a shift to take
place and for the position indicator lights to be operable.
If the key in not ON, the shift will not take place and no
position indicator lights will be on or flashing.
NOTE:Flashing NEUTRAL position indicator light
indicates that shift requirements have not been met.
410 STARTING AND OPERATING
Page 413 of 554

CAUTION!
Damage to the transmission may occur if the trans-
mission is shifted into PARK with the transfer case in
NEUTRAL and the engine running. With the transfer
case in NEUTRAL ensure, that the engine is OFF
prior to shifting the transmission into PARK.
Returning to Normal Operation Ð Electronic Shift
Transfer Case
Use the following procedure to prepare your vehicle for
normal usage:
1. Bring vehicle to a complete stop.
2. Shut OFF the engine.
3. Turn the ignition key to the ON position, but do not
start the engine.4. Depress the brake pedal.
5. Shift automatic transmission to NEUTRAL or depress
clutch on manual transmission.
6. Using the point of a ballpoint pen or similar object,
depress the recessed transfer case Neutral (N) button for
one second.
7. After the Neutral indicator light turns off, release the
Neutral (N) button.
8. After the Neutral (N) button has been released, the
transfer case will shift to the position identified by the
selector switch.
9. Shift automatic transmission into PARK.
NOTE:The transfer case cannot be shifted into NEU-
TRAL from the 4AUTO (if equipped) position.
STARTING AND OPERATING 411
5
Page 414 of 554

NOTE:Steps 1 through 5 are requirements that must be
met prior to depressing the transfer case Neutral (N)
button, and must continue to be met until one second
elapses and the shift has been completed. If any of these
requirements (with the exception of step 3 - key ON) are
not met prior to depressing the Neutral (N) button, or are
no longer met during the one second time, then all of the
mode position indicator lights will flash continuously
until all requirements are met, or until the Neutral (N)
button is released.
NOTE:The ignition key must be ON for a transfer case
shift to take place and for the position indicator lights to
be operable. If the key is not ON, the shift will not take
place and no position indicator lights will be on or
flashing.NOTE:Flashing Neutral position indicator light indi-
cates that shift requirements have not been met.
WARNING!
You or others could be injured if you leave the
vehicle unattended with the transfer case in the
NEUTRAL position without first fully engaging the
parking brake. The transfer case NEUTRAL position
disengages both the front and rear driveshafts from
the powertrain and will allow the vehicle to move
despite the transmission position. The parking brake
should always be applied when the driver is not in
the vehicle.
412 STARTING AND OPERATING