2008 DODGE GRAND CARAVAN warning light
[x] Cancel search: warning lightPage 32 of 531
To Enter the Vehicle After Remote Start
To enter the vehicle while the engine is running during a
Remote Start, you must first unlock the vehicle using the
UNLOCK button on the transmitter. After the vehicle is
unlocked, you have 60 seconds to enter the vehicle, insert
the key into the ignition switch and move it to the RUN
position, otherwise the engine will cancel Remote Start-
ing and automatically turn off.
To Exit Remote Start Mode and Drive the Vehicle
Before the end of the 15 minute cycle, press and release
the UNLOCK button on the RKE transmitter to unlock
the doors and disarm the Vehicle Security Alarm (if
equipped). Then, prior to the end of the 15 minute cycle,
insert the key into the ignition switch and turn the switch
to the ON position.
NOTE:
²The ignition switch must be in the ON position in
order to drive the vehicle.
²For vehicles equipped with the Electronic Vehicle
Information Center (EVIC), the message ªInsert Key/
Turn To Runº will flash in the EVIC until you insert
the key. Once inserted, the message ªTurn To Runº
will flash in the EVIC until you turn the key to run.
Cancel Remote Start
Remote Starting will also cancel if any of the following
occur:
²The engine stalls or RPM exceeds 2500.
²Any engine warning telltale lights come on.
²The hood is opened.
²The Hazard Switch is pressed.
²The transmission gear selector lever is moved out of
PARK.
²Pressing the brake pedal.
²Allow the engine to run for the entire 15 minute cycle.
30 THINGS TO KNOW BEFORE STARTING YOUR VEHICLE
Page 42 of 531
Auto Up Feature With Anti±Pinch Protection Ð If
Equipped
The left front window switch may be equipped with an
Auto Up feature. Lift the window switch to the second
detent, release, and the window will go up automatically.
To stop the window from going all the way up during the
Auto Up operation, push down on the switch briefly.
To close the window part way, lift the window switch to
the first detent and release when you want the window to
stop.
NOTE:
²If the window runs into any obstacle during auto-
close, it will reverse direction and then stop. Remove
the obstacle and use the window switch again to close
the window.
²Any impact due to rough road conditions may trigger
the auto reverse function unexpectedly during auto-
close. If this happens, pull the switch lightly to the first
detent and hold to close window manually.
WARNING!
There is no anti-pinch protection when the window
is almost closed. To avoid personal injury be sure to
clear your arms, hands, fingers and all objects from
the window path before closing.
Auto Up Reset Ð If Equipped
To reactivate the Auto Up feature, perform the following
steps after vehicle power is restored:
1. Pull the window switch up to close the window
completely and continue to hold the switch up for an
additional two seconds after the window is closed.
40 THINGS TO KNOW BEFORE STARTING YOUR VEHICLE
Page 46 of 531
²If the power sliding side door is not in the full open or
close position, it will fully open when a power sliding
door switch is pressed. To close the door, wait until it
is fully open and then press the switch again.
²The power sliding side door switches will not operate
if the transmission gear selector lever is in gear or the
vehicle speed is above 0 mph (0 km/h).
²If the power sliding door encounters multiple obstruc-
tions within the same cycle, the system will automati-
cally stop and must be opened or closed manually.
WARNING!
You, or others, could be injured if caught in the path
of the sliding door. Make sure the door path is clear
before closing the door.
Power Sliding Side Door Open Flash
The left and right exterior hazard lights will flash for 12
seconds when either sliding door is opened. This will
alert other drivers in the area that passenger(s) could be
entering or exiting the vehicle.
The Sliding Side Door Open Flash can be enabled or
disabled by performing the following procedure:
1. Place the key in the ignition switch.
2. Cycle the ignition switch ON/OFF four times ending
in the OFF position.(Do not start the engine).
3. Within 10 seconds of the final cycle, press the hazard
switch.
4. A single chime will sound to signify that you have
successfully completed the programming.
44 THINGS TO KNOW BEFORE STARTING YOUR VEHICLE
Page 52 of 531
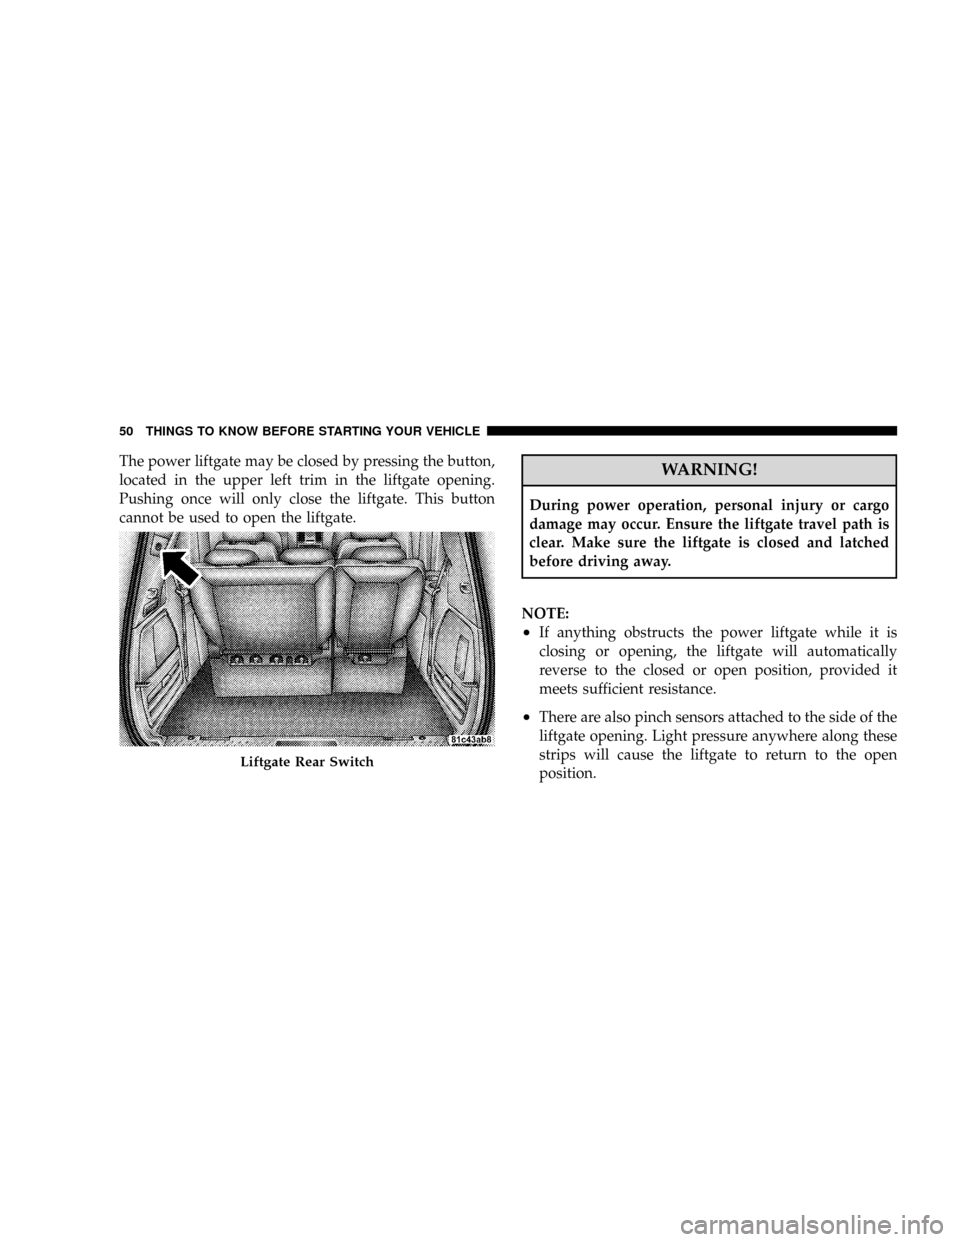
The power liftgate may be closed by pressing the button,
located in the upper left trim in the liftgate opening.
Pushing once will only close the liftgate. This button
cannot be used to open the liftgate.WARNING!
During power operation, personal injury or cargo
damage may occur. Ensure the liftgate travel path is
clear. Make sure the liftgate is closed and latched
before driving away.
NOTE:
²If anything obstructs the power liftgate while it is
closing or opening, the liftgate will automatically
reverse to the closed or open position, provided it
meets sufficient resistance.
²There are also pinch sensors attached to the side of the
liftgate opening. Light pressure anywhere along these
strips will cause the liftgate to return to the open
position.
Liftgate Rear Switch
50 THINGS TO KNOW BEFORE STARTING YOUR VEHICLE
Page 64 of 531
6. To release the belt, push the red button on the buckle.
The belt will automatically retract to its stowed position.
If necessary, slide the latch plate down the webbing to
allow the belt to retract fully.
WARNING!
A frayed or torn belt could rip apart in a collision and
leave you with no protection. Inspect the belt system
periodically, checking for cuts, frays, or loose parts.
Damaged parts must be replaced immediately. Do
not disassemble or modify the system. Seat belt
assemblies must be replaced after a collision if they
have been damaged (bent retractor, torn webbing,
etc.).
Third Row Center Shoulder Belt Instructions
The shoulder belt for the third row center seat is located
in the headliner slightly behind the third row seat.Pull the strap down and secure the small latch plate of
the lap belt into the small buckle until you hear a ªclickº.
Position the shoulder belt on your chest so that it is
comfortable and not resting on your neck. When the belt
is long enough to fit, insert the large latch plate into the
buckle until you hear a ªclickº
The retractor will withdraw any slack in the belt.
To release the small latch plate, position the end of the
large latch plate against the red button on the small
buckle and push upward. Reinstall the latch plates into
the headliner.
Adjustable Upper Shoulder Belt Anchorage
In the front seats and the second row outboard seats, the
shoulder belt anchorage can be adjusted upward or
downward to help position the belt away from your
neck. The upper anchorage can be adjusted upward by
62 THINGS TO KNOW BEFORE STARTING YOUR VEHICLE
Page 66 of 531
Seat Belt Pretensioners
The seat belts for both front seating positions are
equipped with pretensioning devices that are designed to
remove slack from the seat belt in the event of a collision.
These devices improve the performance of the seat belt
by assuring that the belt is tight about the occupant early
in a collision. Pretensioners work for all size occupants,
including those in child restraints.
NOTE:These devices are not a substitute for proper seat
belt placement by the occupant. The seat belt still must be
worn snugly and positioned properly.
The pretensioners are triggered by the Occupant Re-
straint Controller (ORC). Like the front airbags, the
pretensioners are single use items. After a collision that is
severe enough to deploy the airbags and pretensioners,
both must be replaced.
Enhanced Seat Belt Use Reminder System
(BeltAlertT)
If the occupied driver's seat belt has not been buckled
within 60 seconds of starting the vehicle and if the vehicle
speed is greater than 5 mph (8 km/h), BeltAlerttwill
alert the driver to buckle the seat belt. The driver should
also instruct all other occupants to buckle their seat belts.
Once the warning is triggered, BeltAlerttwill continue to
chime and flash the Seat Belt Warning Light for 96
seconds or until the driver's seat belt is buckled.
BeltAlerttwill be reactivated if the driver's seat belt is
unbuckled for more than 10 seconds and the vehicle
speed is greater than 5 mph (8 km/h).
BeltAlerttProgramming
BeltAlerttcan be enabled or disabled by your authorized
dealer or by following these steps:
64 THINGS TO KNOW BEFORE STARTING YOUR VEHICLE
Page 67 of 531
NOTE:The following steps must occur within the first
60 seconds of the ignition switch being turned to the ON
or START position. DaimlerChrysler does not recom-
mend deactivating BeltAlertt.
1. With all doors closed and the ignition switch in any
position except ON or START, buckle the driver's seat
belt.
2. Turn the ignition switch to the ON position (engine
does not need to be running), and wait for the Seat Belt
Warning Light to turn off.
3. Within 60 seconds of turning the ignition switch to the
ON/RUN position, unbuckle and then re-buckle the
driver's seat belt at least three times within 60 seconds,
ending with the seat belt buckled.
NOTE:Watch for the Seat Belt Warning Light to turn on
while unbuckling and off while re-buckling the seat belt.4. Turn the ignition switch to the OFF position. A single
chime will sound to signify that you have successfully
completed the programming.
BeltAlerttcan be reactivated by repeating this procedure.
NOTE:Although BeltAlertthas been deactivated, the
Seat Belt Warning Light will continue to illuminate while
the driver's seat belt remains unbuckled.
Seat Belts and Pregnant Women
We recommend that pregnant women use the seat belts
throughout their pregnancies. Keeping the mother safe is
the best way to keep the baby safe.
Pregnant women should wear the lap part of the belt
across the thighs and as snug across the hips as possible.
Keep the belt low so that it does not come across the
abdomen. That way the strong bones of the hips will take
the force if there is a collision.
THINGS TO KNOW BEFORE STARTING YOUR VEHICLE 65
2
Page 75 of 531
impact sensors signals, a central electronic ORC deploys
the front airbags, side inflatable airbag curtains, side seat
thorax airbags, and front seat belt pretensioners as re-
quired for each type of impact.
The ORC monitors the readiness of the electronic parts of
the system whenever the ignition switch is in the START
or ON position. These include all of the components
listed above except the steering wheel and column,
instrument panel, and seat belt reminder light. If the key
is in the OFF position, in the ACC position, or not in the
ignition, the airbags are not on and will not inflate.
The ORC contains a backup power supply system that
will deploy the airbags even if the battery loses power or
it becomes disconnected prior to deployment.
Also, the ORC turns on the AIRBAG warning
light in the instrument panel for approximately
four to six seconds for a self-check when the
ignition is first turned on. After the self-check,the AIRBAG warning light will turn off. If the ORC
detects a malfunction in any part of the system, it turns
on the AIRBAG warning light, either momentarily or
continuously. A single chime will sound if the light comes
on again after initial start up.
It also includes diagnostics that will illuminate the instru-
ment cluster AIRBAG warning light if a malfunction is
noted. The diagnostics also record the nature of the
malfunction.
WARNING!
Ignoring the AIRBAG light in your instrument panel
could mean you won't have the airbags to protect you
in a collision. If the light does not come on, stays on
after you start the vehicle, or if it comes on as you
drive, have the airbag system checked right away.
THINGS TO KNOW BEFORE STARTING YOUR VEHICLE 73
2