2008 DODGE CHARGER fold seats
[x] Cancel search: fold seatsPage 46 of 466

Adjustable Upper Shoulder Belt Anchorage
In the driver and front passenger seats, the shoulder belt
can be adjusted upward or downward to position the belt
away from your neck. Push and fully depress the button
above the webbing to release the anchorage, and then
move it up or down to the position that serves you best.As a guide, if you are shorter than average, you will
prefer a lower position, and if you are taller than average,
you will prefer a higher position. When you release the
anchorage, try to move it up and down to make sure that
it is locked in position.
In the rear seat, move toward the center of the seat to
position the belt away from your neck.
Lap/Shoulder Belt Untwisting Procedure
Use the following procedure to untwist a twisted lap/
shoulder belt.
1. Position the latch plate as close as possible to the
anchor point.
2. At about 6 to 12 inches (15 to 30 cm) above the latch
plate, grasp and twist the belt webbing 180É to create a
fold that begins immediately above the latch plate.
Adjusting Upper Shoulder Belt
46 THINGS TO KNOW BEFORE STARTING YOUR VEHICLE
Page 80 of 466

NThings You Should Know About Your
UConnectŸ System....................105
NGeneral Information...................114
mSeats................................114
NManual Seats Ð If Equipped.............114
NPower Seats Ð If Equipped..............115
NPower Reclining Seats Ð If Equipped.......116
NLumbar Support Ð If Equipped...........117
NHead Restraints......................118
NHeated Seats Ð If Equipped.............118
NFolding Rear Seat.....................120
mTo Open And Close The Hood.............121
mLights...............................123NHeadlight Switch.....................123
NAutomatic Headlights Ð If Equipped.......124
NHeadlights On With Wipers (Available With
Auto Headlights Only).................125
NHeadlight Time Delay..................125
NDaytime Running Lights Ð If Equipped.....126
NLights-On Reminder...................126
NFog Lights Ð If Equipped...............126
NMulti-Function Lever...................126
NOverhead Console Map/Reading Lights.....128
NInterior Lights.......................128
mWindshield Wipers And Washers............130
NIntermittent Wiper System...............130
80 UNDERSTANDING THE FEATURES OF YOUR VEHICLE
Page 120 of 466

WARNING!
Persons who are unable to feel pain to the skin
because of advanced age, chronic illness, diabetes,
spinal cord injury, medication, alcohol use, exhaus-
tion, or other physical condition must exercise care
when using the seat heater. It may cause burns even
at low temperatures, especially if used for long
periods.
Do not place anything on the seat that insulates
against heat, such as a blanket or cushion. This may
cause the seat heater to overheat.
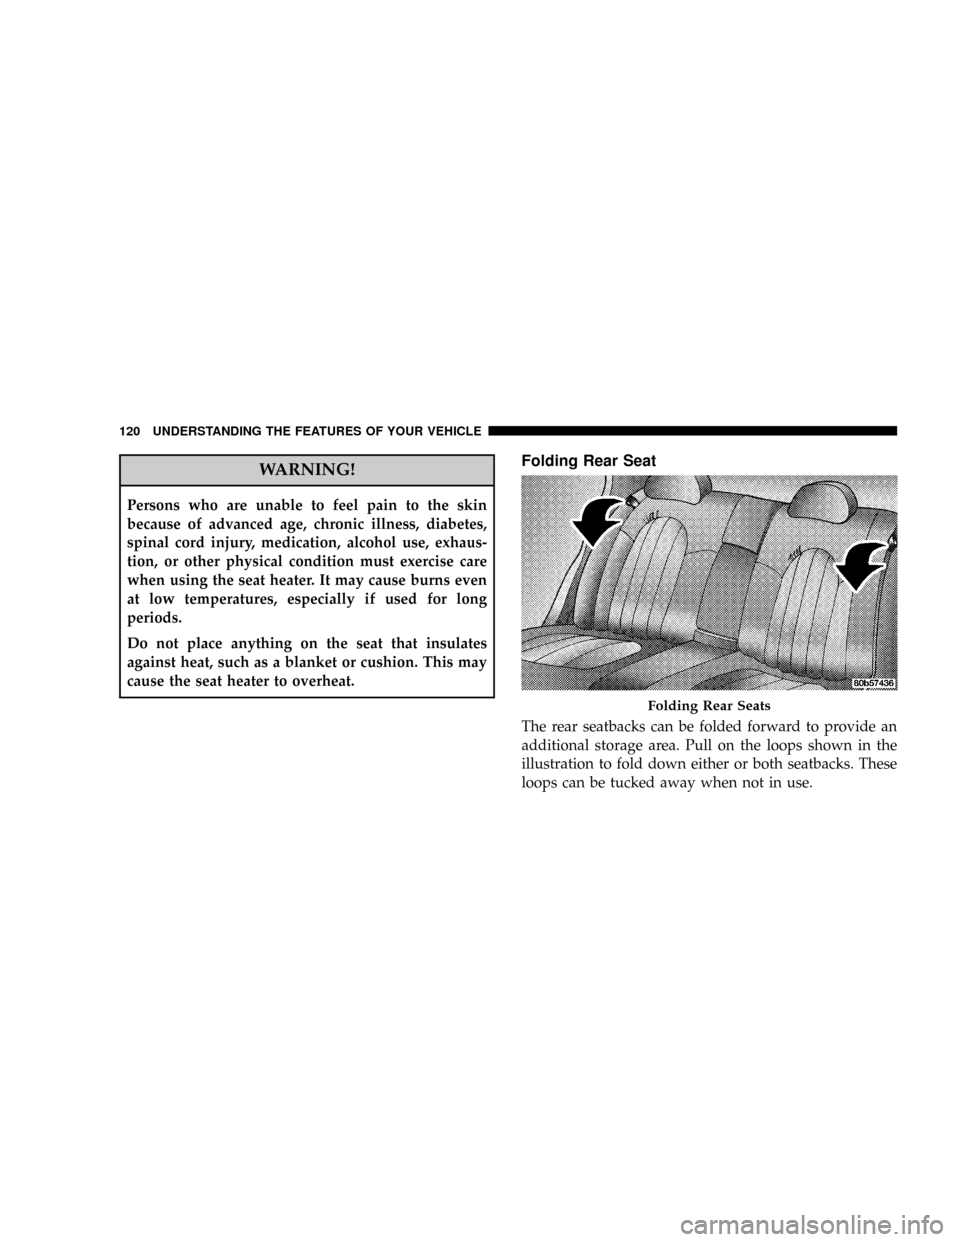
Folding Rear Seat
The rear seatbacks can be folded forward to provide an
additional storage area. Pull on the loops shown in the
illustration to fold down either or both seatbacks. These
loops can be tucked away when not in use.
Folding Rear Seats
120 UNDERSTANDING THE FEATURES OF YOUR VEHICLE
Page 121 of 466

When the seatback is folded to the upright position, make
sure it is latched by strongly pulling on the top of the
seatback above the seat strap.
WARNING!
²Be certain that the seatback is securely locked into
position. If the seatback in not securely locked
into position the seat will not provide the proper
stability for child seats and/or passengers. An
improperly latched seat could cause serious injury.
²The cargo area in the rear of the vehicle (with the
rear seatbacks in the locked-up or folded down
position) should not be used as a play area by
children when the vehicle is in motion. They could
be seriously injured in an accident. Children
should be seated and using the proper restraint
system.
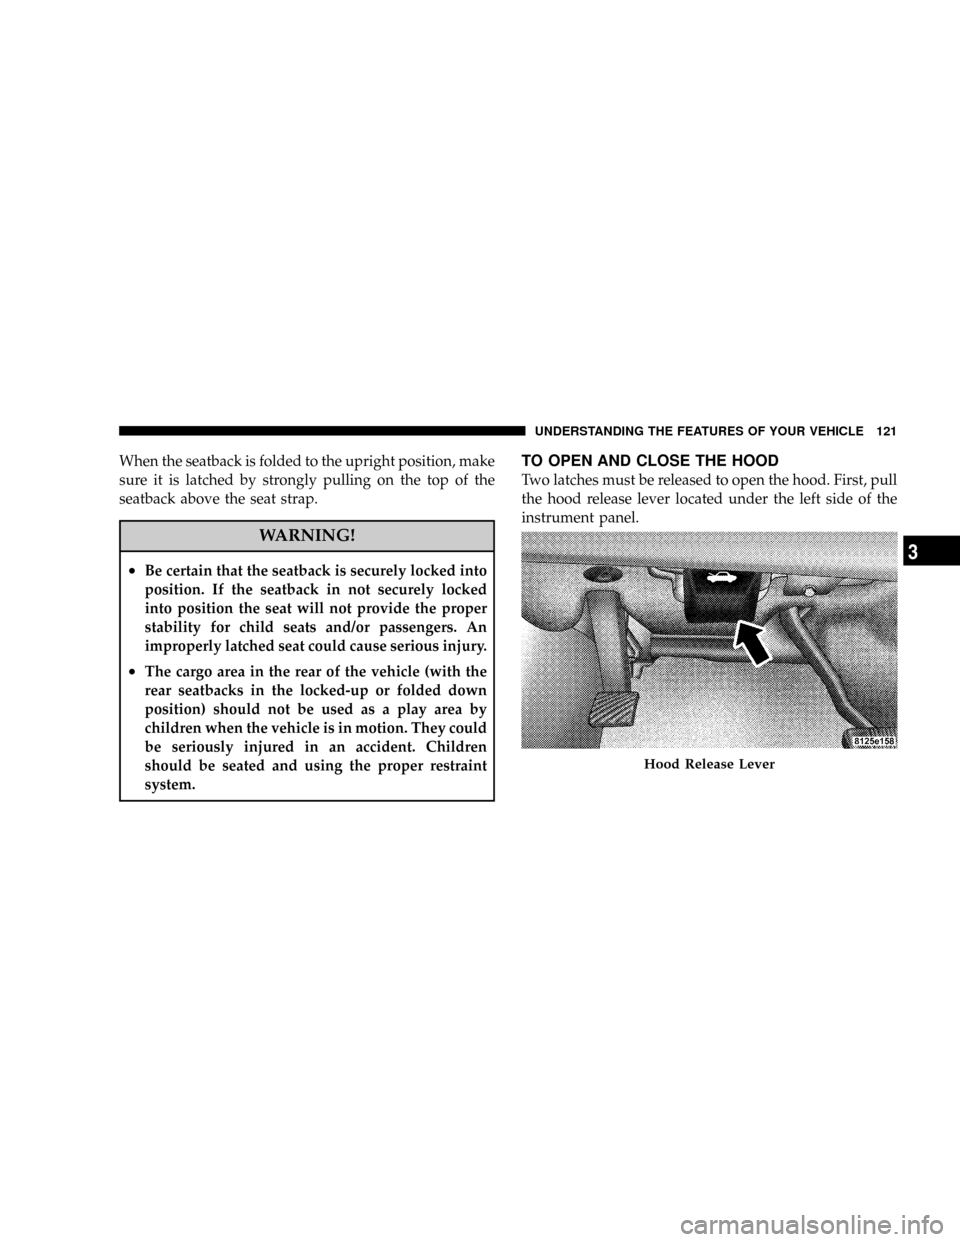
TO OPEN AND CLOSE THE HOOD
Two latches must be released to open the hood. First, pull
the hood release lever located under the left side of the
instrument panel.
Hood Release Lever
UNDERSTANDING THE FEATURES OF YOUR VEHICLE 121
3
Page 154 of 466

The top compartment holds small items, such as a pen
and note pad, while the larger bottom compartment will
hold CDs and alike. The bottom compartment also con-
tains a 12-volt power outlet and a molded-in coin holder
(designed to hold various size coins). A slot in the left and
right side of the top compartment provides clearance for
power cords to pass conveniently out of the bin with the
lid closed. This feature is ideal for games, laptops, cell
phones, or other electrical equipment. The console's front
opening lid allows for easy access to these compartments.
With Vehicle Entertainment System (VES)
The center console contains a large storage compartment.
The storage compartment contains a 12-volt power outlet
and a molded-in coin holder (designed to hold various
size coins). A slot in the top left and right side of the
storage compartment provides clearance for power cords
to pass conveniently out of the compartment with the lid
closed. This feature is ideal for games, laptops, cell
phones, or other electrical equipment. The console'sfront-opening lid allows for easy access to the storage
compartment for the both the driver and the front
passenger.
Cargo Area
The 60/40 split-folding rear seat provides cargo-carrying
versatility. The seatbacks fold down easily by pulling
nylon tabs between the seatbacks and the bolsters. When
the seats are folded down, they provide a continuous,
nearly flat extension of the load floor.
When the seatback is folded to the upright position, make
sure it is latched by strongly pulling on the top of the
seatback above the seat strap.
154 UNDERSTANDING THE FEATURES OF YOUR VEHICLE
Page 155 of 466

WARNING!
²Be certain that the seatback is securely locked into
position. If the seatback in not securely locked
into position, the seat will not provide the proper
stability for child seats and/or passengers. An
improperly latched seat could cause serious in-
jury.
²The cargo area in the rear of the vehicle (with the
rear seatbacks in the locked-up or folded down
position) should not be used as a play area by
children when the vehicle is in motion. They
could be seriously injured in an accident. Chil-
dren should be seated and using the proper re-
straint system.
²To help protect against personal injury, passen-
gers should not be seated in the rear cargo area.
The rear cargo space is intended for load carrying
purposes only, not for passengers, who should sit
in seats and use seat belts.
WARNING!
²The weight and position of cargo and passengers
can change the vehicle center of gravity and ve-
hicle handling. To avoid loss of control resulting
in personal injury, follow these guidelines for
loading your vehicle:
²Always place cargo evenly on the cargo floor. Put
heavier objects as low and as far forward as possible.
²Place as much cargo as possible in front of the rear
axle. Too much weight or improperly placed weight
over or behind the rear axle can cause the rear of the
vehicle to sway.
²Do not pile luggage or cargo higher than the top of the
seatback. This could impair visibility or become a
dangerous projectile in a sudden stop or collision.
UNDERSTANDING THE FEATURES OF YOUR VEHICLE 155
3
Page 458 of 466

Phone, Cellular.....................87,209,211
Phone, Hands-Free (UConnectŸ)........87,209,211
Placard, Tire and Loading Information......... 294
Port
Universal Serial Bus (USB).............191,209
USB .............................191,209
Power
Brakes.............................. 280
Deck Lid Release....................... 38
Distribution Center (Fuses)............... 404
Door Locks........................... 29
Mirrors.............................. 86
Outlet (Auxiliary Electrical Outlet).......... 149
Seats............................... 115
Steering............................. 282
Steering, Checking..................... 384
Sunroof............................. 146
Windows............................. 34
Power Steering Fluid..................384,423Pregnant Women and Seat Belts.............. 49
Preparation for Jacking.................... 347
Pretensioners
Seat Belts............................. 47
Programmable Electronic Features............ 186
Programming Transmitters (Remote Keyless
Entry)................................. 20
Radial Ply Tires......................... 301
Radiator Cap (Coolant Pressure Cap).......... 390
Radio Broadcast Signals................... 190
Radio, Navigation....................... 209
Radio Operation...................192,211,239
Radio Remote Controls.................... 237
Radio, Satellite...............191,192,209,211,226
Radio (Sound Systems).................191,209
Rear Cup Holder........................ 152
Rear Seat, Folding....................... 120
Rear Wheel Bearings..................... 398
458 INDEX
Page 460 of 466

Schedule, Maintenance.................... 426
Seat Belt Maintenance.................... 403
Seat Belt Reminder....................... 47
Seat Belts..........................40,41,77
Adjustable Upper Shoulder Anchorage........ 46
And Pregnant Women................... 49
Child Restraint...................65,66,67,72
Extender............................. 50
Front Seat..........................41,42
Inspection............................ 77
Operating Instructions................... 42
Pretensioners.......................... 47
Rear Seat............................. 41
Reminder............................ 168
Untwisting Procedure.................... 46
Seats................................. 114
Adjustment.......................... 114
Head Restraints....................... 118
Heated.............................. 118Height Adjustment..................... 115
Lumbar Support....................... 117
Power.............................. 115
Rear Folding......................... 120
Reclining............................ 116
Seatback Release....................... 120
Tilting.............................. 115
Security Alarm (Theft Alarm).............18,172
Selection of Coolant (Antifreeze)..........389,421
Selection of Oil......................... 376
Self-Sealing Tires........................ 307
Sentry Key (Immobilizer)................... 15
Sentry Key Programming................... 17
Sentry Key Replacement................... 16
Service Assistance....................... 434
Service Contract......................... 436
Service Engine Soon Light (Malfunction
Indicator)............................. 174
Service Manuals........................ 438
460 INDEX