2008 CHRYSLER TOWN AND COUNTRY key battery
[x] Cancel search: key batteryPage 121 of 531
NOTE:
²You may not hear all of the tones due to cellular phone
network configurations; this is normal.
²Some paging and voice mail systems have system time
out settings that are too short and may not allow the
use of this feature.
Barge In - Overriding Prompts
The ªVoice Recognitionº button can be used when you
wish to skip part of a prompt and issue your voice
recognition command immediately. For example, if a
prompt is asking9Would you like to pair a phone, clear
a{,9you could press the ªVoice Recognitionº button and
say,9Pair a Phone9to select that option without having to
listen to the rest of the voice prompt.
Turning Confirmation Prompts On/Off
Turning confirmation prompts off will stop the system
from confirming your choices (e.g., the UConnecttsys-
tem will not repeat a phone number before you dial it).
²Press the PHONE button to begin.
²After the9Ready9prompt and the following beep, say
9Setup Confirmations.9The UConnecttsystem will
play the current confirmation prompt status and you
will be given the choice to change it.
Phone and Network Status Indicators
If available on the radio and/or on a premium display
such as the instrument panel cluster, and supported by
your cell phone, the UConnecttsystem will provide
notification to inform you of your phone and network
status when you are attempting to make a phone call
using UConnectt. The status is given for roaming, net-
work signal strength, phone battery strength, etc.
Dialing Using the Cellular Phone Keypad
You can dial a phone number with your cellular phone
keypad and still use the UConnecttsystem (while dial-
ing via the cell phone keypad, the user must exercise
caution and take precautionary safety measures). By
UNDERSTANDING THE FEATURES OF YOUR VEHICLE 119
3
Page 195 of 531
ELECTRICAL POWER OUTLETS Ð IF EQUIPPED
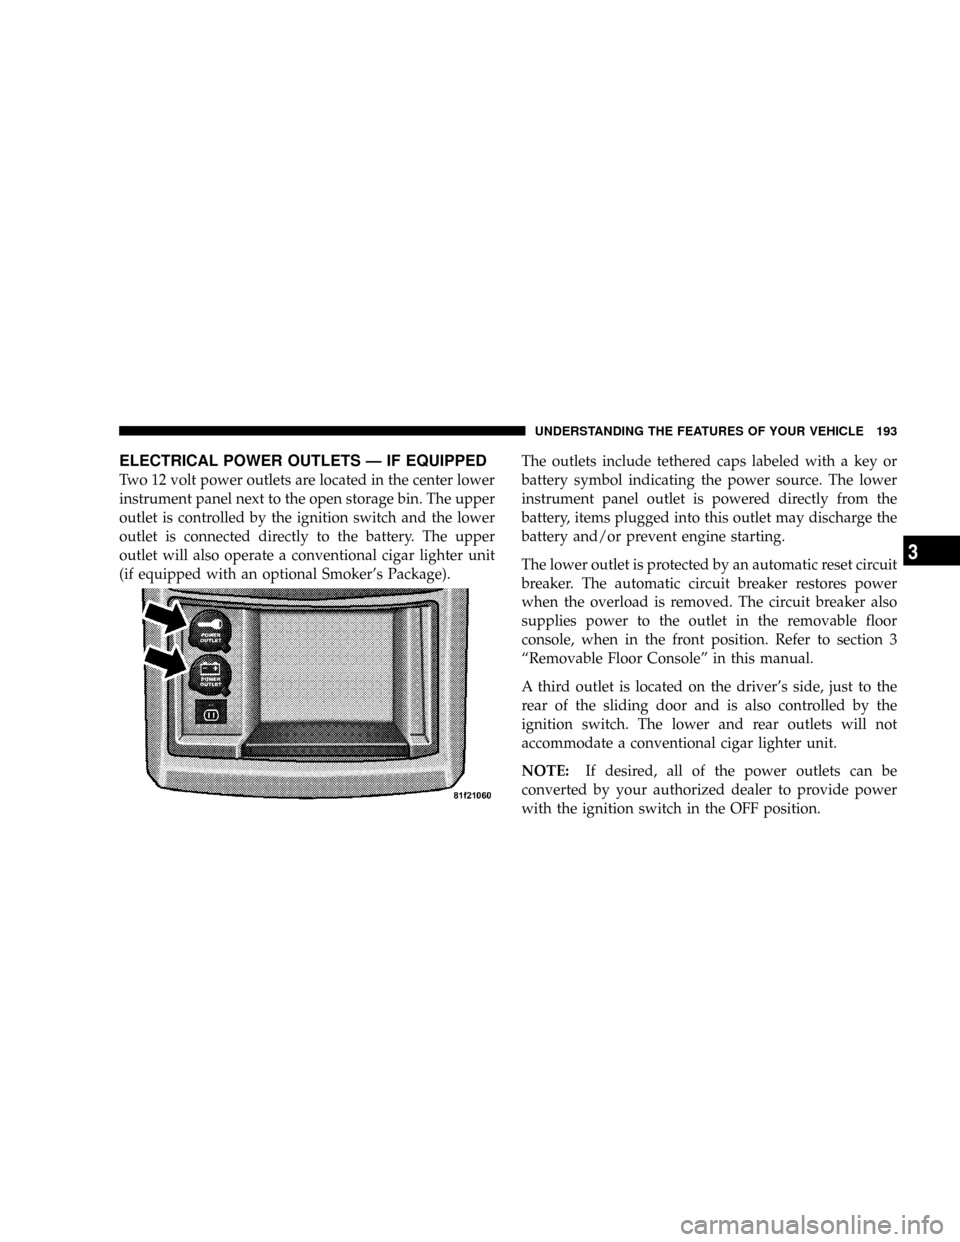
Two 12 volt power outlets are located in the center lower
instrument panel next to the open storage bin. The upper
outlet is controlled by the ignition switch and the lower
outlet is connected directly to the battery. The upper
outlet will also operate a conventional cigar lighter unit
(if equipped with an optional Smoker's Package).The outlets include tethered caps labeled with a key or
battery symbol indicating the power source. The lower
instrument panel outlet is powered directly from the
battery, items plugged into this outlet may discharge the
battery and/or prevent engine starting.
The lower outlet is protected by an automatic reset circuit
breaker. The automatic circuit breaker restores power
when the overload is removed. The circuit breaker also
supplies power to the outlet in the removable floor
console, when in the front position. Refer to section 3
ªRemovable Floor Consoleº in this manual.
A third outlet is located on the driver's side, just to the
rear of the sliding door and is also controlled by the
ignition switch. The lower and rear outlets will not
accommodate a conventional cigar lighter unit.
NOTE:If desired, all of the power outlets can be
converted by your authorized dealer to provide power
with the ignition switch in the OFF position.
UNDERSTANDING THE FEATURES OF YOUR VEHICLE 193
3
Page 330 of 531
If The Engine Fails To Start
WARNING!
²NEVER pour fuel or other flammable liquids into
the throttle body air inlet opening in an attempt to
start the vehicle. This could result in a flash fire
causing serious personal injury.
²DO NOT attempt to push or tow your vehicle to get
it started. Vehicles equipped with an automatic
transmission cannot be started this way. Unburned
fuel could enter the catalytic converter and once the
engine has started, ignite and damage the converter
and vehicle.
²If the vehicle has a discharged battery, booster
cables may be used to obtain a start from a booster
battery or the battery in another vehicle. This type
of start can be dangerous if done improperly. Refer
to Section 6 of this manual for proper jump-starting
procedures and follow them carefully.
If the engine fails to start after you have followed the
ªNormal Startingº procedure, it may be flooded. Push
the accelerator pedal all the way to the floor and hold it
there while cranking the engine. This should clear any
excess fuel in case the engine is flooded.
CAUTION!
To prevent damage to the starter, DO NOT crank the
engine for more than 15±second intervals at one time.
Wait 10 to 15 seconds before trying again.
If the engine has been flooded, it may start to run, but not
have enough power to continue running when the key is
released. If this occurs, continue cranking with the accel-
erator pedal pushed all the way to the floor. Release the
accelerator pedal and the key once the engine is running
smoothly.
328 STARTING AND OPERATING
Page 439 of 531
This vehicle has a simple ignition key-actuated test,
which you can use prior to going to the test station. To
check if this vehicle's OBD II system is ready, you must
do the following:
1. Insert the ignition key into the ignition switch.
2. Turn the ignition to the ON position, but do not crank
or start the engine.
3. If you crank or start the engine, you will have to start
this test over.
4. As soon as you turn the ignition key to the ON
position, you will see the MIL symbol come on as part of
a normal bulb check.
5. Approximately 15 seconds later, one of two things will
happen:
a. The MIL will flash for about 10 seconds and then
return to being fully illuminated until you turn OFFthe ignition key or start the engine. This means that the
vehicle's OBD II system isnot readyand you should
notproceed to the I/M station.
b. The MIL will not flash at all and will remain fully
illuminated until you turn OFF the ignition key or start
the engine. This means that the vehicle's OBD II
system isready,and you can proceed to the I/M
station.
If the OBD II system isnot ready,you should see an
authorized dealer or repair facility. If this vehicle was
recently serviced or had a battery failure or replacement,
you may need to do nothing more than drive the vehicle
as you normally would in order for the OBD II system to
update. A recheck with the above test routine may then
indicate that the system is now ready.
Regardless of whether the vehicle's OBD II system is
ready or not ready, if the MIL is illuminated during
normal vehicle operation, you should have the vehicle
MAINTAINING YOUR VEHICLE 437
7
Page 511 of 531
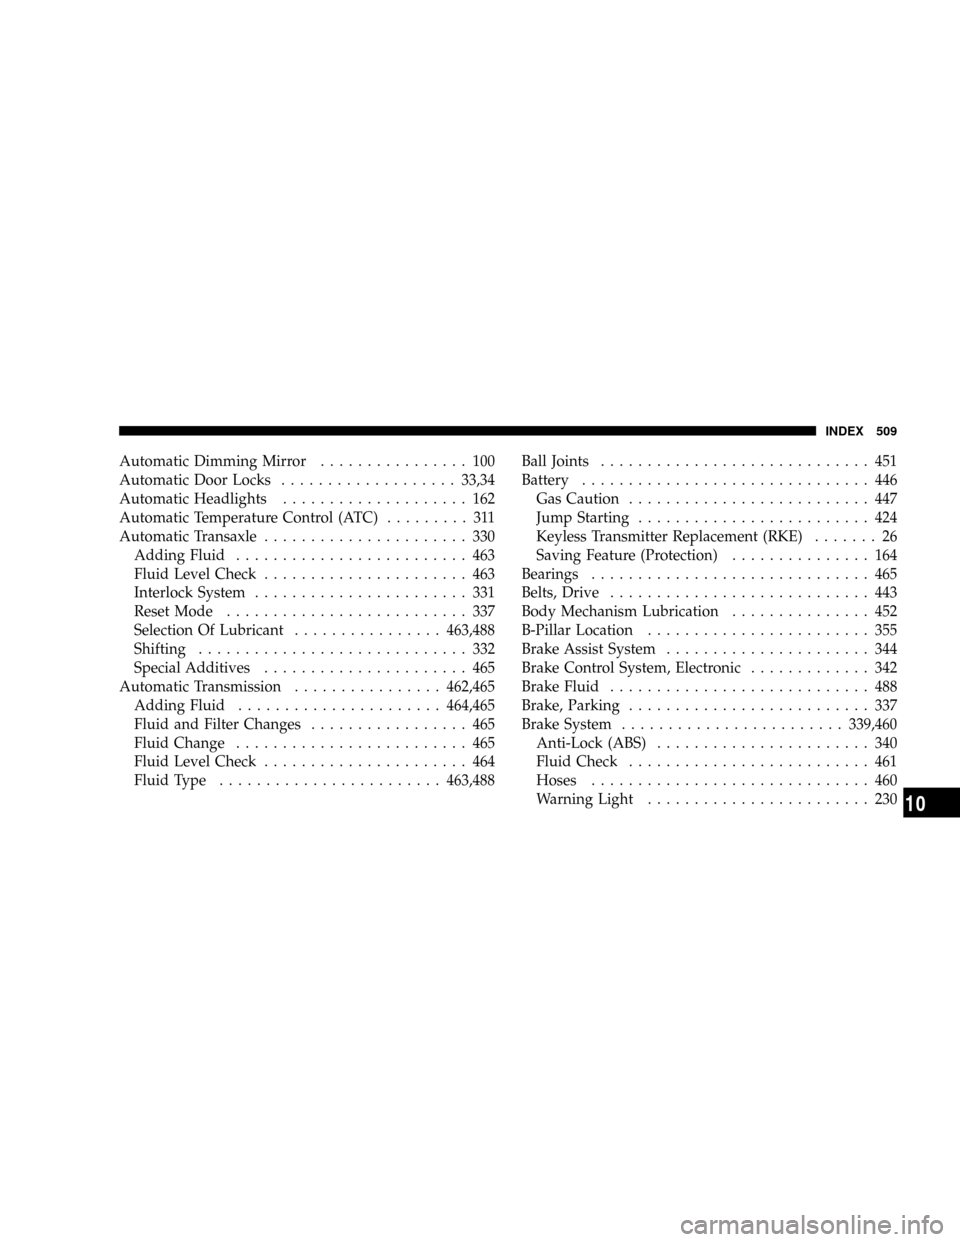
Automatic Dimming Mirror................ 100
Automatic Door Locks...................33,34
Automatic Headlights.................... 162
Automatic Temperature Control (ATC)......... 311
Automatic Transaxle...................... 330
Adding Fluid......................... 463
Fluid Level Check...................... 463
Interlock System....................... 331
Reset Mode.......................... 337
Selection Of Lubricant................463,488
Shifting............................. 332
Special Additives...................... 465
Automatic Transmission................462,465
Adding Fluid......................464,465
Fluid and Filter Changes................. 465
Fluid Change......................... 465
Fluid Level Check...................... 464
Fluid Type........................463,488Ball Joints............................. 451
Battery............................... 446
Gas Caution.......................... 447
Jump Starting......................... 424
Keyless Transmitter Replacement (RKE)....... 26
Saving Feature (Protection)............... 164
Bearings.............................. 465
Belts, Drive............................ 443
Body Mechanism Lubrication............... 452
B-Pillar Location........................ 355
Brake Assist System...................... 344
Brake Control System, Electronic............. 342
Brake Fluid............................ 488
Brake, Parking.......................... 337
Brake System........................339,460
Anti-Lock (ABS)....................... 340
Fluid Check.......................... 461
Hoses.............................. 460
Warning Light........................ 230
INDEX 509
10
Page 519 of 531

Key, Sentry (Immobilizer)................... 15
Key-In Reminder......................... 15
Keyless Entry System...................... 21
Keys................................. 12
Knee Bolster............................ 67
Lap/Shoulder Belts....................... 56
LATCH
(Lower Anchors and Tether for CHildren)....... 85
Latches
Hood............................... 156
Lead Free Gasoline...................... 379
Life of Tires............................ 366
Liftgate................................ 47
Lights..............................94,159
Airbag......................66,72,77,93,233
Alarm.............................. 231
Anti-Lock.........................231,342
Automatic Headlights................... 162Back-Up............................. 484
Battery Saver......................... 164
Brake Assist Warning................... 346
Brake Warning........................ 230
Bulb Replacement...................480,481
Center Mounted Stop................... 485
Daytime Running...................... 161
Dimmer Switch, Headlight.............160,168
Engine Temperature Warning.............. 229
Fog ..........................164,232,483
Hazard Warning Flasher................. 410
Headlight Switch...................... 161
Headlights........................... 481
Headlights On Reminder................. 164
Headlights On With Wipers............... 163
High Beam........................... 168
High Beam Indicator.................... 232
High Beam/Low Beam Select............. 168
Illuminated Entry....................... 20
INDEX 517
10
Page 527 of 531
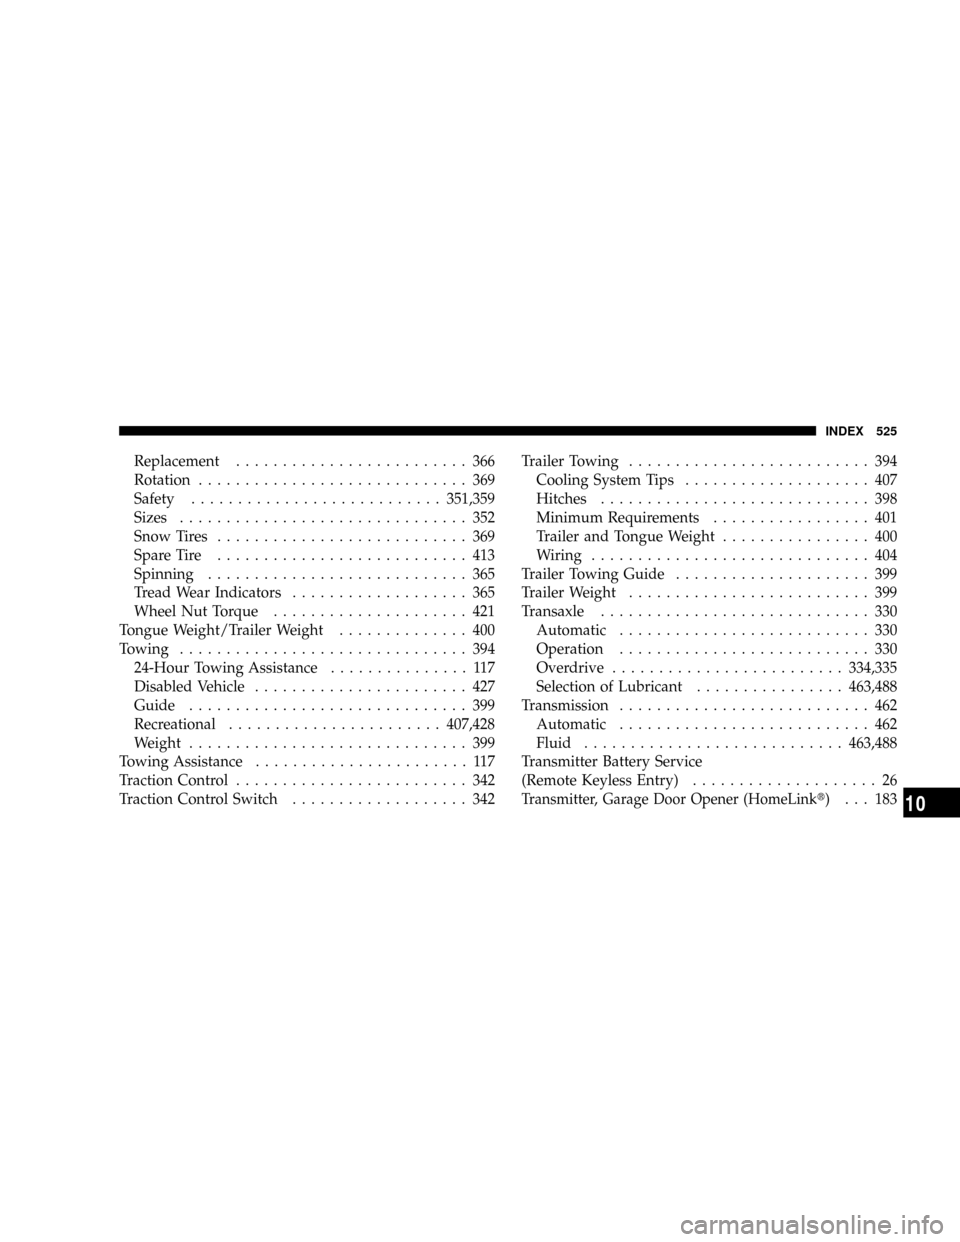
Replacement......................... 366
Rotation............................. 369
Safety...........................351,359
Sizes............................... 352
Snow Tires........................... 369
Spare Tire........................... 413
Spinning............................ 365
Tread Wear Indicators................... 365
Wheel Nut Torque..................... 421
Tongue Weight/Trailer Weight.............. 400
Towing............................... 394
24-Hour Towing Assistance............... 117
Disabled Vehicle....................... 427
Guide.............................. 399
Recreational.......................407,428
Weight.............................. 399
Towing Assistance....................... 117
Traction Control......................... 342
Traction Control Switch................... 342Trailer Towing.......................... 394
Cooling System Tips.................... 407
Hitches............................. 398
Minimum Requirements................. 401
Trailer and Tongue Weight................ 400
Wiring.............................. 404
Trailer Towing Guide..................... 399
Trailer Weight.......................... 399
Transaxle............................. 330
Automatic........................... 330
Operation........................... 330
Overdrive.........................334,335
Selection of Lubricant................463,488
Transmission........................... 462
Automatic........................... 462
Fluid............................463,488
Transmitter Battery Service
(Remote Keyless Entry).................... 26
Transmitter, Garage Door Opener (HomeLinkt)... 183
INDEX 525
10