Page 238 of 494

Operating Instructions - Satellite Mode
NOTE:The ignition switch must be in the ON or ACC
position to operate the radio.
SEEK Buttons
Press and release the SEEK buttons to search for the next
channel in Satellite mode. Press the right switch to seek
up and the left switch to seek down. The radio will
remain tuned to the new channel until you make another
selection. Holding either button will bypass channels
without stopping until you release it.
SCAN Button
Pressing the SCAN button causes the tuner to search for
the next channel, pausing for eight seconds before con-
tinuing to the next. To stop the search, press the SCAN
button a second time.
INFO Button
Pressing the INFO button will cycle between Artist, Song
Title, and Composer (if available) information. Also,
pressing and holding the INFO button for an additional
three seconds will make the radio display the Song Title
all of the time (press and hold again to return to normal
display).
RW/FF
Pressing the RW (Rewind) or FF (Fast Forward) buttons
causes the tuner to search for the next channel in the
direction of the arrows.
TUNE Control (Rotary)
Turn the rotary TUNE/SCROLL control knob clockwise
to increase or counterclockwise to decrease the channel.
MUSIC TYPE Button
Pressing this button once will turn on the Music Type
mode for five seconds. Pressing the MUSIC TYPE button
236 UNDERSTANDING YOUR INSTRUMENT PANEL
Page 239 of 494

or turning the TUNE/SCROLL control knob within five
seconds will allow the program format type to be se-
lected.
Toggle the MUSIC TYPE button again to select the music
type.
By pressing the SEEK button when the Music Type
function is active, the radio will be tuned to the next
channel with the same selected Music Type name.
If a preset button is activated while in the Music Type
(Program Type) mode, the Music Type mode will be
exited and the radio will tune to the preset channel.
SETUP Button
Pressing the SETUP button allows you to select the
following items:
•Display Sirius ID number — Press the AUDIO/
SELECT button to display the Sirius ID number. This
number is used to activate, deactivate, or change the
Sirius subscription.
SET Button – To Set the Pushbutton Memory
When you are receiving a channel that you wish to
commit to pushbutton memory, press the SET button.
The symbol SET 1 will now show in the display window.
Select the button (1-6) you wish to lock onto this channel
and press and release that button. If a button is not
selected within five seconds after pressing the SET but-
ton, the channel will continue to play but will not be
stored into pushbutton memory.
You may add a second channel to each pushbutton by
repeating the above procedure with this exception: Press
the SET button twice and SET 2 will show in the display
window. Each button can be set for SET 1 and SET 2. This
allows a total of 12 Satellite channels to be stored into
UNDERSTANDING YOUR INSTRUMENT PANEL 237
4
Page 240 of 494
pushbutton memory. The channels stored in SET 2
memory can be selected by pressing the pushbutton
twice.
Every time a preset button is used, a corresponding
button number will display.
Buttons1-6
These buttons tune the radio to the channels that you
commit to pushbutton memory (12 Satellite stations).
Operating Instructions - Hands-Free Phone (If
Equipped)
Refer to “Hands-Free Communication (UConnect�)” in
Section 3.
Operating Instructions - Video Entertainment
System (VES�) (If Equipped)
Refer to separate “Video Entertainment System (VES�)
Guide.”
REMOTE SOUND SYSTEM CONTROLS — IF
EQUIPPED
The remote sound system controls are located on the rear
surface of the steering wheel. Reach behind the wheel to
access the switches.
Remote Sound Controls
238 UNDERSTANDING YOUR INSTRUMENT PANEL
Page 241 of 494

The right hand control is a rocker type switch with a push
button in the center. Pressing the top of the switch will
increase the volume and pressing the bottom of the
switch will decrease the volume.
The button located in the center of the right hand control
will switch modes to Radio or CD.
The left hand control is a rocker type switch with a push
button in the center. The function of the left hand control
is different depending on mode.
The following describes the left hand control operation in
each mode.
Radio Operation
Pressing the top of the switch will SEEK up for the next
listenable station and pressing the bottom of the switch
will SEEK down for the next listenable station.The button located in the center of the left hand control
will tune to the next pre-set station that you have
programmed in the radio pre-set push-buttons.
CD Player
Pressing the top of the switch once will go to the next
track on the CD. Pressing the bottom of the switch once
will go to the beginning of the current track or to the
beginning of the previous track if it is within one second
after the current track begins to play.
If you press the switch up or down twice it plays the
second track, three times, it will play the third, etc.
The button in the center of the left hand switch changes
CDs on the Six-Disc in-dash CD changer radio. This
button does not function for all other radios.
UNDERSTANDING YOUR INSTRUMENT PANEL 239
4
Page 242 of 494
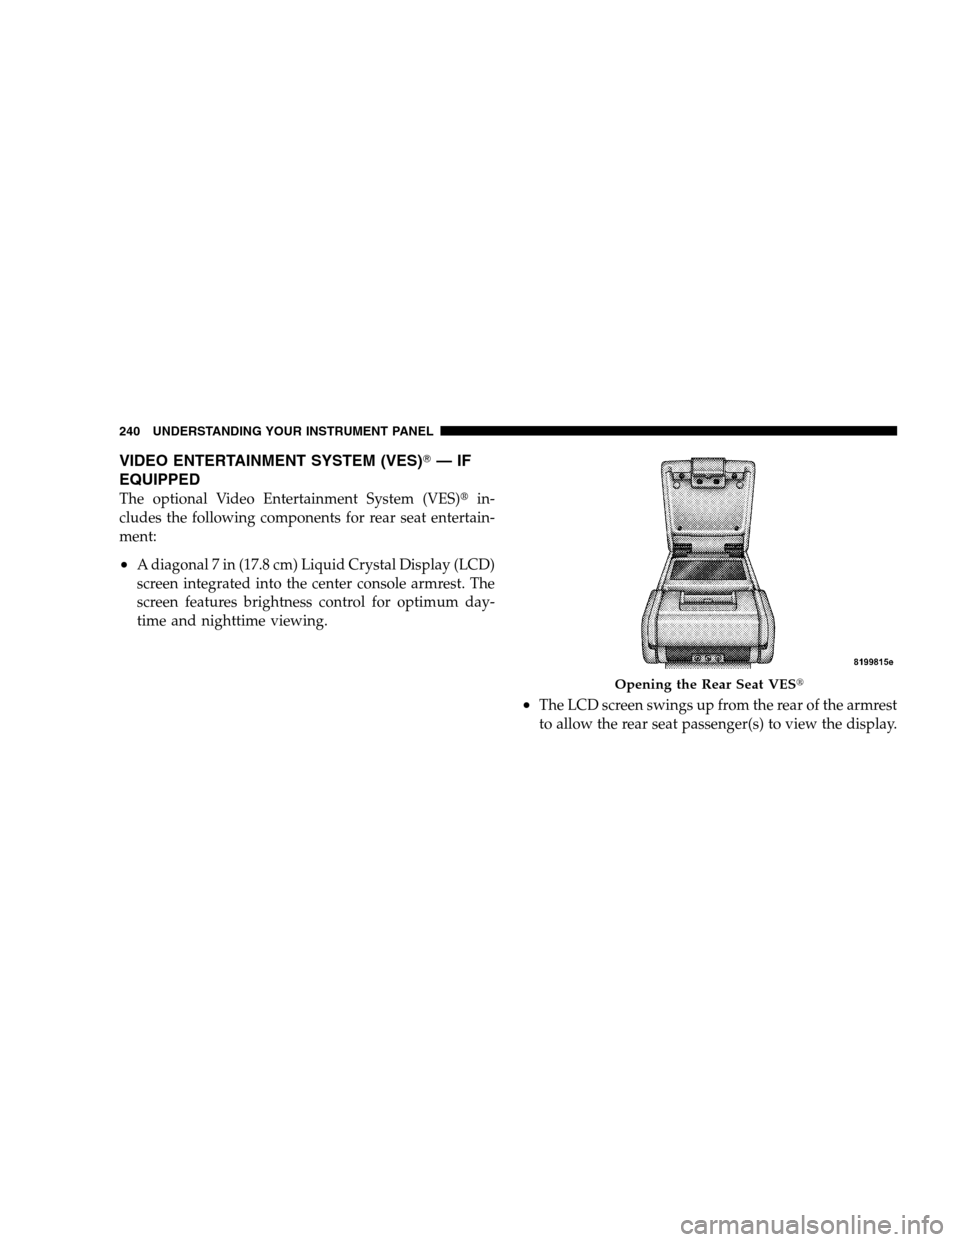
VIDEO ENTERTAINMENT SYSTEM (VES)�—IF
EQUIPPED
The optional Video Entertainment System (VES)�in-
cludes the following components for rear seat entertain-
ment:
•A diagonal 7 in (17.8 cm) Liquid Crystal Display (LCD)
screen integrated into the center console armrest. The
screen features brightness control for optimum day-
time and nighttime viewing.
•The LCD screen swings up from the rear of the armrest
to allow the rear seat passenger(s) to view the display.
Opening the Rear Seat VES�
240 UNDERSTANDING YOUR INSTRUMENT PANEL
Page 243 of 494
NOTE:Close the armrest after the LCD screen has been
raised to its viewing position.
•The touch screen radio and DVD player controls allow
front seat operation for easy setup in the case of
younger rear seat passengers.
•A battery-powered infrared remote control snaps into
a molded compartment in the center console armrest
upper storage bin.
•Two wireless infrared headsets allow rear seat passen-
gers to listen to the same or individual audio sources.
VES�Video Screen
VES�Remote Control
UNDERSTANDING YOUR INSTRUMENT PANEL 241
4
Page 244 of 494

on the rear of the center console enable
the monitor to display video directly
from a video camera, connect video
games for display on the screen, or
play music direc")
Audio/Video RCA Jacks (AUX Jacks)
on the rear of the center console enable
the monitor to display video directly
from a video camera, connect video
games for display on the screen, or
play music directly from an MP3
player.
1. Video in (yellow)
2. Left audio in (white)
3. Right audio in (red)
NOTE:Refer to your “Vehicle Entertainment System
(VES)�Users Manual” for detailed operating instruc-
tions.RADIO OPERATION AND CELLULAR PHONES
Under certain conditions, the cellular phone being ON in
your vehicle can cause erratic or noisy performance from
your radio. This condition may be lessened or eliminated
by relocating the cellular phone antenna. This condition
is not harmful to the radio. If your radio performance
does not satisfactorily “clear” by the repositioning of the
antenna, it is recommended that the radio volume be
turned down or off during cellular phone operation.
CD/DVD DISC MAINTENANCE
To keep the CD/DVD discs in good condition, take the
following precautions:
1. Handle the disc by its edge; avoid touching the
surface.
2. If the disc is stained, clean the surface with a soft cloth,
wiping from center to edge.
242 UNDERSTANDING YOUR INSTRUMENT PANEL
Page 245 of 494
3. Do not apply paper, paper CD labels, or tape to the
disc; avoid scratching the disc.
4. Do not use solvents such as benzine, thinner, cleaners,
or antistatic sprays.
5. Store the disc in its case after playing.
6. Do not expose the disc to direct sunlight.
7. Do not store the disc where temperatures may become
too high.
8. Do not play discs that are small in size or have
irregular shapes.CLIMATE CONTROLS
The Air Conditioning and Heating System is designed to
make you comfortable in all types of weather.
Manual Air Conditioning and Heating System
The Manual Temperature Controls consist of a series of
outer rotary dials and inner push knobs.
UNDERSTANDING YOUR INSTRUMENT PANEL 243
4