Page 20 of 358
If the vehicle cannot be locked or unlocked by pressing
the transmit button, then it may be necessary to change
the batteries in the remote control.Panic Alarm
The panic alarm unlocks the driver's door, turns on the
interior lights, flashes the foglights and sounds the horn
for about three minutes or until the alarm is turned off.
The vehicle can be driven while in the PANIC mode.
To Use the Panic Alarm
Press and hold the PANIC button to activate the alarm.
Press and hold the PANIC button or unlock the door with
the key to deactivate the alarm. The alarm will also shut
off after three minutes or when vehicle speed reaches 15
mph (24 km/h).
18 THINGS TO KNOW BEFORE STARTING YOUR VEHICLE
Page 68 of 358

NVanity Mirrors........................88
mSeats.................................88
NManual Seat Adjustments (If Equipped)......89
NDriver Eight-Way Power Seat (If Equipped)....91
NPassenger Four-Way Power Seat (If Equipped) . .92
NHeated Seats (If Equipped)...............92
mTo Open And Close The Hood..............93
mInterior Lights..........................94
NFront Map/Reading Lights...............95
NBattery Saver Feature...................95
NInstrument Panel Lighting................96
NNight Security Illumination...............96mExterior Lights..........................97
NHeadlights And Parking Lights............97
NDaytime Running Lights (Where Applicable) . . .97
NFog Lights (If Equipped).................98
NStanding Lights.......................98
mMultifunction Control Lever................99
NTurn Signals..........................99
NHeadlight Dimmer Switch...............100
NPassing Light........................101
NWindshield Wipers And Washer...........101
NMist Function........................103
mTelescoping Steering Column..............104
mRear Spoiler..........................106
66 UNDERSTANDING THE FEATURES OF YOUR VEHICLE
Page 100 of 358

For nighttime driving, the exterior lights switch should
be in the low beam position to permit activation of the
high beam headlights.
Fog Lights (If Equipped)
To operate the fog lights, pull the headlight
switch out one stop, with the parking lights
and/or low beam headlights on. A light to the
lower left of the headlight switch will illumi-
nate when the fog lights are on.
To turn off the fog lights, push the headlight switch in
fully. Selecting high beam headlights will also turn off the
fog lights.
Standing Lights
When the vehicle is parked on the street, the standing
lights (left or right side parking lights) can be turned on,
making your vehicle more visible to passing vehicles.To operate the standing lights, turn the headlight switch
counterclockwise one stop (right lamps) or two stops (left
lamps) from the OFF position. To turn off the standing
lights, return the headlight switch to the OFF position.
The standing lights cannot be operated when the ignition
switch is in the ON/RUN position.
CAUTION!
Standing lamps are intended for short term use when
parking. If these lights are left on for a long period of
time, your car's battery may drain, causing a possible
starting problem. Assure that the headlamp switch is
in the OFF position when leaving the vehicle.
98 UNDERSTANDING THE FEATURES OF YOUR VEHICLE
Page 159 of 358

Basic Setting - Heater
Select a temperature for each side of the pas-
senger compartment. Select air volume with
the fan control switch and set the fan control at
least to position 2 to prevent windows from
fogging up. Set the air distribution control switch to the
tri-level setting. Turn the defroster outlets for the side
windows to the detent positions. Open center air outlets
as desired.
Select a temperature for each side of the pas-
senger compartment. Select air volume with
the fan control switch. Then select the panel
setting on the air distribution control switch to
force air from the panel outlets.Select a temperature for each side of the pas-
senger compartment. Select air volume with
the fan control switch. Then select the Bi-Level
setting on the air distribution control switch to
force air from both the upper panel outlets and the floor
outlets.
Basic Setting - Air Conditioner
Press the air conditioning ON/OFF switch. The
light in the switch will illuminate. Select a
temperature for each side of the passenger
compartment. Select the air volume with the
fan control switch, at least to position 1. Set the air
distribution control switch to one of the positions shown
above. Open center air outlets. Open left and right side
air outlets.
UNDERSTANDING YOUR INSTRUMENT PANEL 157
4
Page 161 of 358

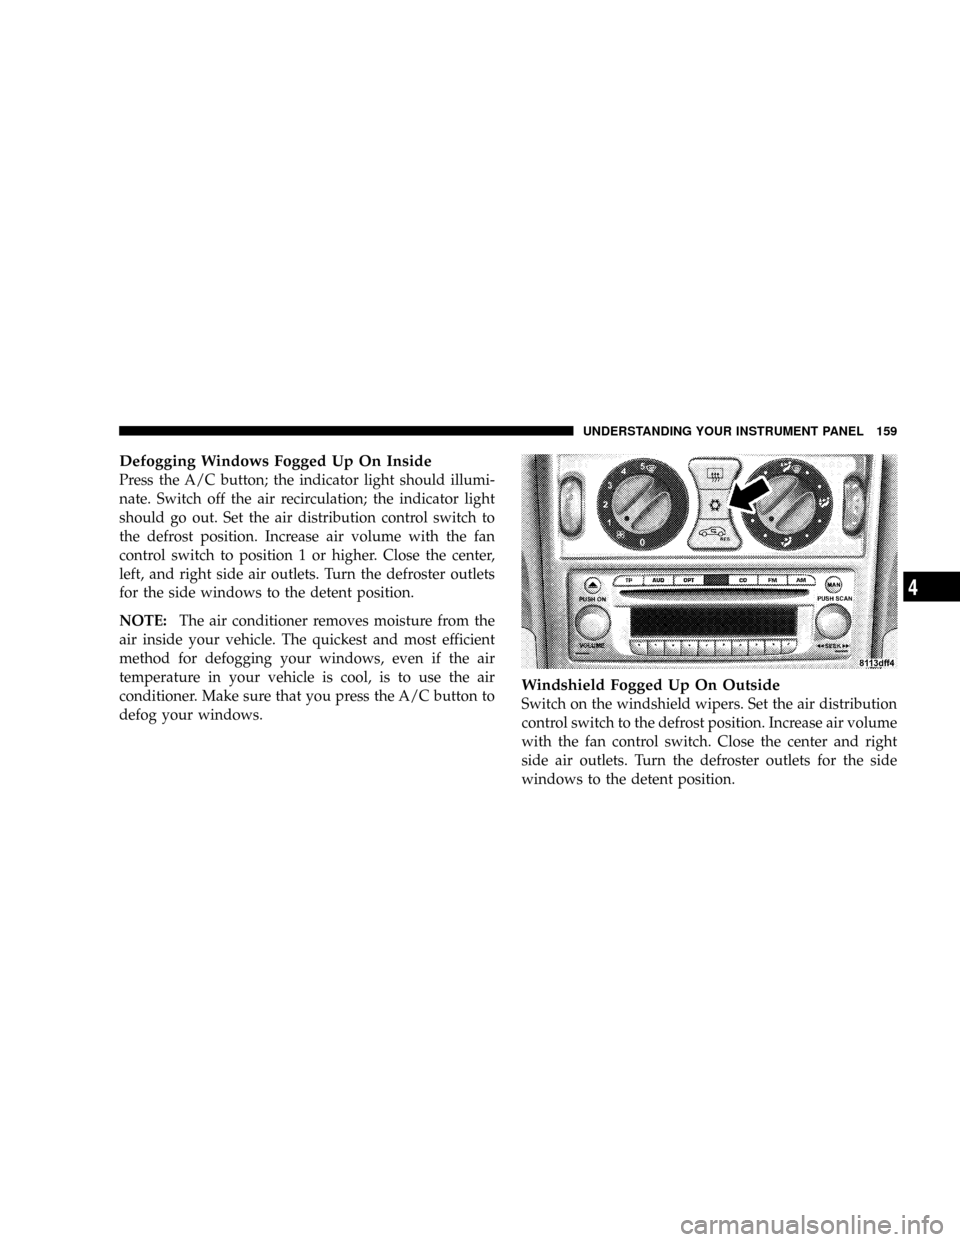
Defogging Windows Fogged Up On Inside
Press the A/C button; the indicator light should illumi-
nate. Switch off the air recirculation; the indicator light
should go out. Set the air distribution control switch to
the defrost position. Increase air volume with the fan
control switch to position 1 or higher. Close the center,
left, and right side air outlets. Turn the defroster outlets
for the side windows to the detent position.
NOTE:The air conditioner removes moisture from the
air inside your vehicle. The quickest and most efficient
method for defogging your windows, even if the air
temperature in your vehicle is cool, is to use the air
conditioner. Make sure that you press the A/C button to
defog your windows.
Windshield Fogged Up On Outside
Switch on the windshield wipers. Set the air distribution
control switch to the defrost position. Increase air volume
with the fan control switch. Close the center and right
side air outlets. Turn the defroster outlets for the side
windows to the detent position.
UNDERSTANDING YOUR INSTRUMENT PANEL 159
4
Page 162 of 358

Ventilation
To receive outside air through the panel outlets, turn off
the Air Conditioning ON/OFF switch. The light in the
switch should be off. Set the controls as above for basic
air conditioning.
Climate Control - OFF
To switch the climate control off, set the air volume
control switch to position 0. The fresh air supply to the
vehicle interior is shut off. While driving, use this setting
only temporarily, otherwise the windshield could fog up.
Rear Window Defroster
Turn the key in the ignition switch to the
ON/RUN position. To select, press the rear
window defroster button once and release. The
indicator light in the switch should illuminate.
To cancel, press the rear window defroster button again
and release.
NOTE:Heavy accumulation of snow and ice should be
removed before activating the defroster. The rear win-
dow defroster uses a large amount of power. To keep the
battery drain to a minimum, turn off the defroster as soon
as the window is clear. The defroster is automatically
turned off after a maximum of 12 minutes of operation.
160 UNDERSTANDING YOUR INSTRUMENT PANEL
Page 307 of 358
Cavity Fuse Circuits
9 15 Amp
BlueFog Light
10 7.5 Amp
BrownLeft Parking/Tail Light Side
Marker
11 7.5 Amp
BrownLicense Plate/Instrument Cluster
Lighting/Symbol Lighting
12 Not Used - Spare Fuse
13 Not Used - Spare Fuse
14 Not Used - Spare Fuse
REPLACEMENT BULBS
Interior Light Bulbs
For lighted switches and interior lights, see your autho-
rized dealer for servicing requirements.
Exterior Light Bulbs
Bulb Bulb No.
Headlight - High and Low Beam......12V55W H7U
Front Turn Signal.......................Y21W
Front Parking/Standing Light.............. W5W
Front Side Marker Light.................. W5W
Rear Marker Light...................... W5W
Center High-Mounted Stop Light (CHMSL)..... LED
Front Fog Lights.....................HB455W
Rear Turn Signal Light...................Y21W
Rear Tail and Stop Light.................21/5W
Backup Light........................... 21W
License................................ 168
MAINTAINING YOUR VEHICLE 305
7
Page 349 of 358

Lap/Shoulder Belts....................... 27
Life of Tires............................ 212
Light Bulbs............................ 305
Lights
Airbag............................38,140
Anti-Lock Warning..................... 134
Back-Up............................. 308
Daytime Running....................... 97
Exterior.............................. 97
Exterior Check......................... 63
Fog ................................. 98
Hazard Warning Flasher................. 232
Headlights............................ 97
Instrument Cluster...................... 96
Interior...........................94,305
License............................. 309
Lights On Reminder..................... 97
Malfunction Indicator (Check Engine)........ 141
Map Reading.......................... 95Park.............................97,307
Rear Tail............................ 308
Seat Belt Reminder..................... 135
Turn Signal........................307,308
Loading Vehicle
Capacities........................... 227
Tires ............................... 203
Lubrication, Body....................... 276
Maintenance Free Battery.................. 271
Maintenance Procedures................... 264
Maintenance Schedules.................... 322
Malfunction Indicator Light (Check Engine) . . 141,262
Manual Override, Convertible Top............ 249
Manual, Service......................... 338
Manual Transmission..................171,289
Fluid Level Check...................... 289
Frequency of Fluid Change............... 290
Lubricant Selection..................... 289
INDEX 347
10