Page 247 of 476

Playing the Radio
Top Knob (Power/Volume):Press to turn the system
on and off. Turn clockwise or counterclockwise to
increase or to decrease the volume.
4(Information):For RDS, press to change what
displays while using RDS. The display options are
station name, RDS station frequency, PTY (program
type), and the name of the program (if available).
For XM™ (if equipped), press while in XM™ mode to
retrieve four different categories of information related
to the current song or channel: Artist, Song Title,
Category or PTY, Channel Number/Channel Name.
To change the default on the display, press until the
desired display appears, then hold for two seconds.
The radio produces one beep and the selected display
becomes the default.
AUTO
n(Automatic Volume):Automatic volume
adjusts the audio system automatically to make up
for road and wind noise while driving, by increasing
the volume as the vehicle speed increases.
Set the volume at the desired level. Press this button to
select AUTO VOLUME MIN (minimum), AUTO VOLUME
MED (medium), or AUTO VOLUME MAX (maximum).
Each higher setting provides more volume compensation
at faster vehicle speeds. To turn automatic volume off,
press this button until AUTO VOLUME OFF displays.MUTE:Press to silence the system. Press again to turn
the sound on.
This button is not available on the Radio with
Six-Disc CD.
Finding a Station
BAND:Press to switch between FM1, FM2, AM, or
XM1 or XM2 (if equipped). The selection displays.
O/e(Tune):Turn to select radio stations.
tSEEKu:Press the arrows to go to the previous
or to the next station and stay there.
The radio seeks stations only with a strong signal that
are in the selected band.
tSCANu:Press and hold either arrow for
two seconds until FREQUENCY SCAN displays.
The radio goes to a station, plays for a few seconds,
then goes to the next station. Press either arrow again
to stop scanning.
To scan preset stations, press and hold either arrow for
four seconds until PRESET SCAN displays. The radio
goes to the next preset station, plays for a few seconds,
then goes to the next preset station. Press either arrow
again or one of the pushbuttons to stop scanning presets.
The radio scans stations only with a strong signal that are
in the selected band.
3-87
Page 257 of 476

CD Messages
CHECK CD:If this message displays and/or the CD
comes out, it could be for one of the following reasons:
It is very hot. When the temperature returns to
normal, the CD should play.
You are driving on a very rough road. When the
road becomes smoother, the CD should play.
The CD is dirty, scratched, wet, or upside down.
The air is very humid. If so, wait about an hour and
try again.
There may have been a problem while burning
the CD.
The label may be caught in the CD player.
If the CD is not playing correctly, for any other reason,
try a known good CD.
If any error occurs repeatedly or if an error cannot
be corrected, contact your dealer/retailer. If the radio
displays an error message, write it down and provide
it to your dealer/retailer when reporting the problem.
Using the Auxiliary Input Jack
The radio system has an auxiliary input jack located on
the upper right side of the faceplate. This is not an
audio output; do not plug the headphone set into thefront auxiliary input jack. However, an external audio
device such as an iPod, laptop computer, MP3 player,
CD changer, or cassette tape player, etc. can be
connected to the auxiliary input jack for use as another
source for audio listening.
Drivers are encouraged to set up any auxiliary device
while the vehicle is in PARK (P). SeeDefensive Driving
on page 4-2.
To use a portable audio player, connect a 3.5 mm
(1/8 inch) cable to the radio’s front auxiliary input jack.
When a device is connected, the radio displays AUX
INPUT DEVICE and begins playing audio from
that device.
Top Knob (Power/Volume):Turn clockwise or
counterclockwise to increase or decrease the volume
of the portable player. Additional volume adjustments
might need to be made from the portable device.
BAND:Press to listen to the radio while a portable audio
device is playing. The portable audio device continues
playing, so you might want to stop it or turn it off.
CD/AUX (CD/Auxiliary):Press to play a CD or
other optional remote audio features, while a portable
audio device is playing. If the external audio device is
disconnected from the faceplate, the radio automatically
returns to the last station that was set.
3-97
Page 293 of 476

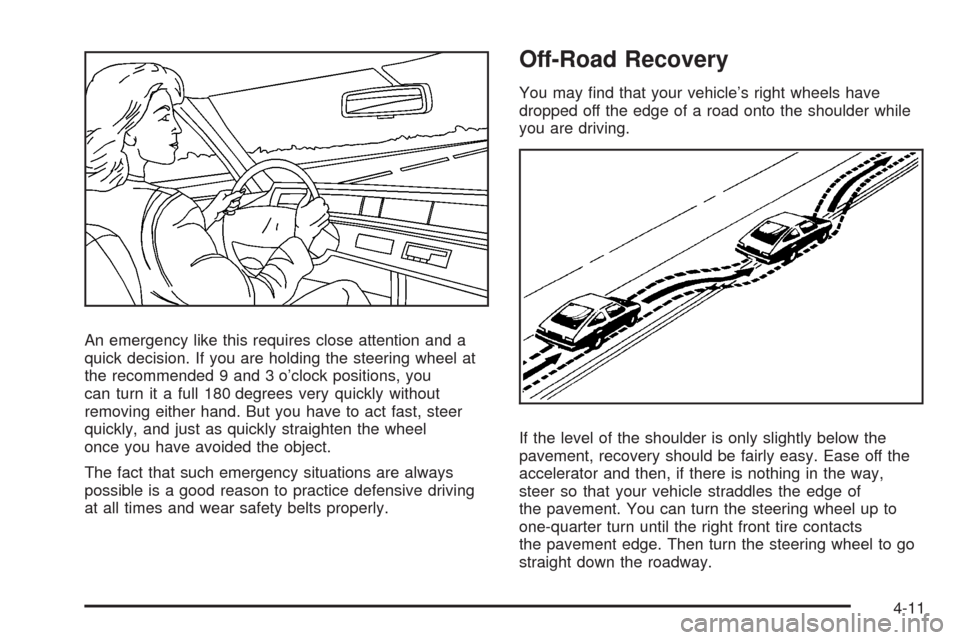
An emergency like this requires close attention and a
quick decision. If you are holding the steering wheel at
the recommended 9 and 3 o’clock positions, you
can turn it a full 180 degrees very quickly without
removing either hand. But you have to act fast, steer
quickly, and just as quickly straighten the wheel
once you have avoided the object.
The fact that such emergency situations are always
possible is a good reason to practice defensive driving
at all times and wear safety belts properly.
Off-Road Recovery
You may �nd that your vehicle’s right wheels have
dropped off the edge of a road onto the shoulder while
you are driving.
If the level of the shoulder is only slightly below the
pavement, recovery should be fairly easy. Ease off the
accelerator and then, if there is nothing in the way,
steer so that your vehicle straddles the edge of
the pavement. You can turn the steering wheel up to
one-quarter turn until the right front tire contacts
the pavement edge. Then turn the steering wheel to go
straight down the roadway.
4-11
Page 329 of 476

{CAUTION:
Fuel can spray out on you if you open the fuel
cap too quickly. If you spill fuel and then
something ignites it, you could be badly burned.
This spray can happen if your tank is nearly full,
and is more likely in hot weather. Open the fuel
cap slowly and wait for any hiss noise to stop.
Then unscrew the cap all the way.
Be careful not to spill fuel. Do not top off or over�ll the
tank and wait a few seconds after you have �nished
pumping before removing the nozzle. Clean fuel
from painted surfaces as soon as possible.
SeeWashing Your Vehicle on page 5-93.
When replacing the fuel cap, turn it clockwise until it
clicks. Make sure the cap is fully installed. The diagnostic
system can determine if the fuel cap has been left off or
improperly installed. This would allow fuel to evaporate
into the atmosphere. SeeMalfunction Indicator Lamp on
page 3-44.The CHECK GAS CAP message will be displayed in the
Driver Information Center (DIC) if the fuel cap is not
properly installed. SeeDIC Warnings and Messages on
page 3-58for more information.
{CAUTION:
If a �re starts while you are refueling, do not
remove the nozzle. Shut off the �ow of fuel by
shutting off the pump or by notifying the
station attendant. Leave the area immediately.
Notice:If you need a new fuel cap, be sure to get
the right type. Your dealer/retailer can get one
for you. If you get the wrong type, it may not �t
properly. This may cause your malfunction indicator
lamp to light and may damage your fuel tank and
emissions system. SeeMalfunction Indicator Lamp
on page 3-44.
5-9
Page 349 of 476

If the overheat warning continues, there is one more
thing you can try. You can add the proper coolant
mixture directly to the radiator, but be sure the cooling
system is cool before you do it.
{CAUTION:
Steam and scalding liquids from a hot cooling
system can blow out and burn you badly.
They are under pressure, and if you turn the
radiator pressure cap — even a little — they
can come out at high speed. Never turn the
cap when the cooling system, including the
radiator pressure cap, is hot. Wait for the
cooling system and radiator pressure cap to
cool if you ever have to turn the pressure cap.
How to Add Coolant to the Radiator
Notice:Your engine has a speci�c radiator �ll
procedure. Failure to follow this procedure could
cause your engine to overheat and be severely
damaged.
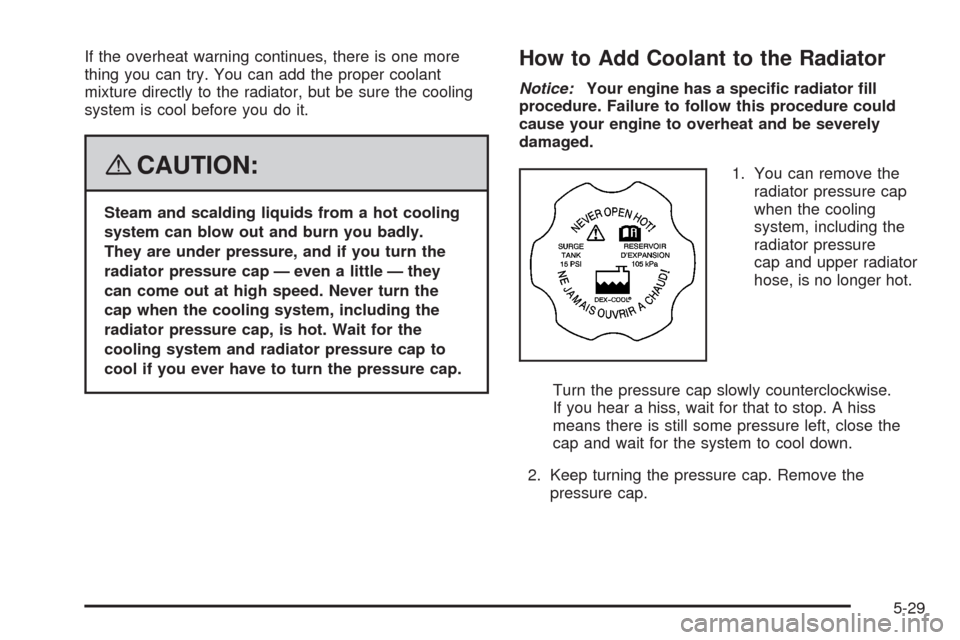
1. You can remove the
radiator pressure cap
when the cooling
system, including the
radiator pressure
cap and upper radiator
hose, is no longer hot.
Turn the pressure cap slowly counterclockwise.
If you hear a hiss, wait for that to stop. A hiss
means there is still some pressure left, close the
cap and wait for the system to cool down.
2. Keep turning the pressure cap. Remove the
pressure cap.
5-29
Page 363 of 476
To replace one of these bulbs:
1. Open the hood. SeeHood Release on page 5-11
for more information.
2. Remove the headlamp retainer pin (A) by turning it
towards the headlamp assembly and pulling it
straight out.3. Remove the screw (B) from the top of the headlamp
assembly.
4. Pull the assembly away from the vehicle.
5. Disconnect the socket wiring harness connector
from the headlamp assembly.
6. Turn the bulb socket counterclockwise to remove
from the assembly.
7. To replace a headlamp bulb, disconnect the bulb
socket wiring harness and connect to the new
bulb socket.
To replace a sidemarker bulb, pull the old bulb out
and push a new bulb in.
8. Reinstall the bulb socket by inserting into the bulb
assembly and turning it clockwise to secure.
9. Reverse the steps to reinstall the headlamp
assembly.
5-43
Page 364 of 476
Front Turn Signal, Parking and
Daytime Running Lamps (DRL)
To replace one of these bulbs (A):
1. Follow the Steps 1 through 4 to remove the
headlamp assembly. SeeHeadlamps and
Sidemarker Lamps on page 5-42for more
information.
2. Turn the bulb socket counterclockwise to remove
from the assembly.
3. Pull the old bulb out from the bulb socket.
4. Replace with a new bulb
5. Reinstall the bulb socket by inserting into the bulb
assembly and turning it clockwise to secure.
6. Reverse the steps to reinstall the headlamp
assembly.
Taillamps, Turn Signal, Stoplamps
and Back-up Lamps
To change a stoplamp/taillamp, turn signal or back-up
lamp bulb:
1. Open the liftgate. SeeLiftgate on page 2-22for
more information.
2. Remove the two screws
from the taillamp
housing on the
inboard side.
3. Pull out the taillamp housing.
4. Disconnect the wiring harness connector from the
taillamp assembly.
5-44
Page 365 of 476
A. Stoplamp/Taillamp
B. Turn Signal Lamp
C. Back-up Lamp Bulb5. Turn the bulb socket counterclockwise to remove.
6. Replace the bulb by pulling the old bulb out of
the socket and gently pushing in a new bulb.
7. Replace the bulb socket by inserting and turning
clockwise to secure.
8. Reinstall the taillamp assembly by inserting the
outboard locating/retaining pins until the lamp is
seated.
9. Secure with the inboard screws.
5-45