2008 CHEVROLET UPLANDER battery
[x] Cancel search: batteryPage 148 of 476
Read the instructions completely before attempting to
program the Universal Home Remote. Because of
the steps involved, it may be helpful to have another
person available to assist you in the programming
the Universal Home Remote.
Keep the original hand-held transmitter for use in other
vehicles as well as for future Universal Home Remote
programming. It is also recommended that upon the sale
of the vehicle, the programmed Universal Home
Remote buttons should be erased for security purposes.
See “Erasing Universal Home Remote Buttons” later
in this section.
When programming a garage door, park outside of the
garage. Park directly in line with and facing the
garage door opener motor-head or gate motor-head. Be
sure that people and objects are clear of the garage
door or gate you are programming.
It is recommended that a new battery be installed in
your hand-held transmitter for quicker and more
accurate transmission of the radio-frequency signal.Programming the Universal Home
Remote System
If you have questions or need help programming the
Universal Home Remote System, call 1-800-355-3515 or
go to www.homelink.com.
Programming a garage door opener involves
time-sensitive actions, so read the entire procedure
before you begin. If you do not follow these actions, the
device will time out and you will have to repeat the
procedure.
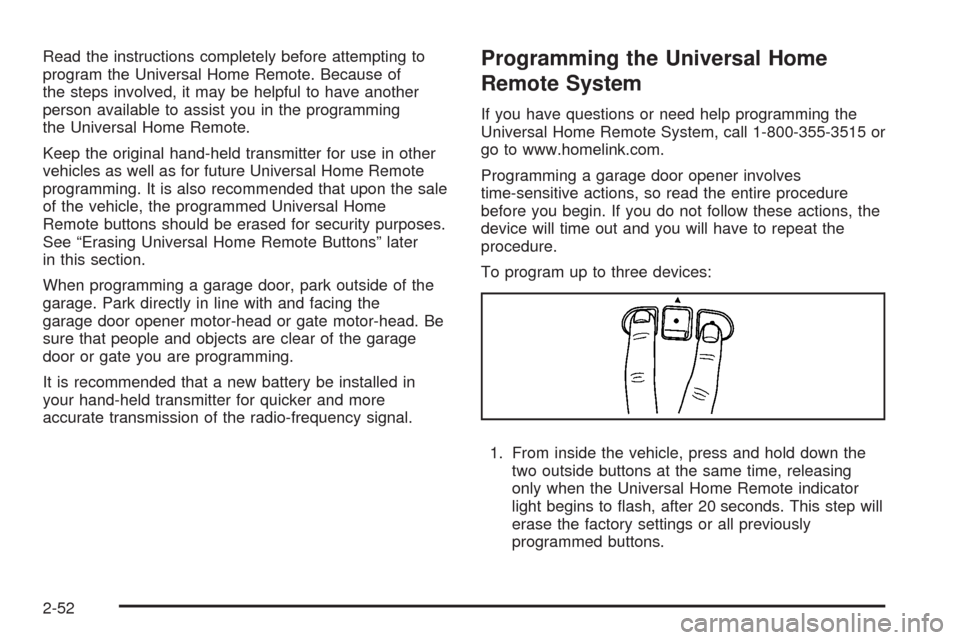
To program up to three devices:
1. From inside the vehicle, press and hold down the
two outside buttons at the same time, releasing
only when the Universal Home Remote indicator
light begins to �ash, after 20 seconds. This step will
erase the factory settings or all previously
programmed buttons.
2-52
Page 161 of 476

Instrument Panel Overview...............................3-4
Hazard Warning Flashers................................3-6
Other Warning Devices...................................3-6
Horn.............................................................3-6
Tilt Wheel.....................................................3-6
Turn Signal/Multifunction Lever.........................3-7
Turn and Lane-Change Signals........................3-7
Headlamp High/Low-Beam Changer..................3-8
Flash-to-Pass.................................................3-8
Windshield Wipers..........................................3-9
Windshield Washer.........................................3-9
Rear Window Wiper/Washer...........................3-10
Cruise Control..............................................3-10
Exterior Lamps.............................................3-14
Wiper Activated Headlamps............................3-15
Headlamps on Reminder................................3-15
Daytime Running Lamps (DRL)/Automatic
Headlamp System......................................3-16
Instrument Panel Brightness...........................3-17
Interior Lamps Control...................................3-17Dome Lamp.................................................3-18
Entry Lighting...............................................3-18
Delayed Lighting...........................................3-18
Exit Lighting.................................................3-19
Front Reading Lamps....................................3-19
Rear Reading Lamps....................................3-19
Cargo Lamp.................................................3-19
Electric Power Management...........................3-20
Battery Run-Down Protection..........................3-21
Overhead Console Switchbank.......................3-21
Accessory Power Outlet(s).............................3-22
Power Outlet 115 Volt Alternating Current........3-23
Cigarette Lighter...........................................3-24
Climate Controls............................................3-24
Climate Control System
.................................3-24
Dual Climate Control System..........................3-27
Outlet Adjustment.........................................3-30
Rear Climate Control System.........................3-30
Passenger Compartment Air Filter...................3-32
Section 3 Instrument Panel
3-1
Page 180 of 476

Electric Power Management
The vehicle has Electric Power Management (EPM)
that estimates the battery’s temperature and state
of charge. It then adjusts the voltage for best
performance and extended life of the battery.
When the battery’s state of charge is low, the voltage is
raised slightly to quickly put the charge back in. When
the state of charge is high, the voltage is lowered slightly
to prevent overcharging. If the vehicle has a voltmeter
gage or a voltage display on the Driver Information
Center (DIC), you may see the voltage move up
or down. This is normal. If there is a problem,
an alert will be displayed.
The battery can be discharged at idle if the electrical
loads are very high. This is true for all vehicles.
This is because the generator (alternator) may
not be spinning fast enough at idle to produce all
the power that is needed for very high electrical loads.A high electrical load occurs when several of the
following loads are on: headlamps, high beams, fog
lamps, rear window defogger, climate control fan at
high speed, heated seats, engine cooling fans, trailer
loads, and loads plugged into accessory power outlets.
EPM works to prevent excessive discharge of the
battery. It does this by balancing the generator’s output
and the vehicle’s electrical needs. It can increase engine
idle speed to generate more power, whenever needed.
It can temporarily reduce the power demands of some
accessories.
Normally, these actions occur in steps or levels, without
being noticeable. In rare cases at the highest levels of
corrective action, this action may be noticeable to the
driver. If so, a Driver Information Center (DIC) message
might be displayed, such as Battery Saver Active or
Service Battery Charging System. If this message is
displayed, it is recommended that the driver reduce the
electrical loads as much as possible. SeeDIC Warnings
and Messages on page 3-58.
3-20
Page 181 of 476
Battery Run-Down Protection
Your vehicle has a feature to help prevent you from
draining the battery, in case you accidentally leave the
interior lamps on. If you leave any interior lamps on
while the ignition is in lock or off, they will automatically
turn off after 10 minutes. The lamps will not come
back on again until you do one of the following:
Turn the ignition to RUN or ACCESSORY
Open a closed door, or close and reopen a door.
Turn the interior lamps on if they are in the door or
override position.
Turn the interior lamps to the door or override
position and then to on again if the interior
lamp control is in the on position.
If your vehicle has less than 15 miles (25 km) on the
odometer, the battery saver will turn off the lamps after
only three minutes.
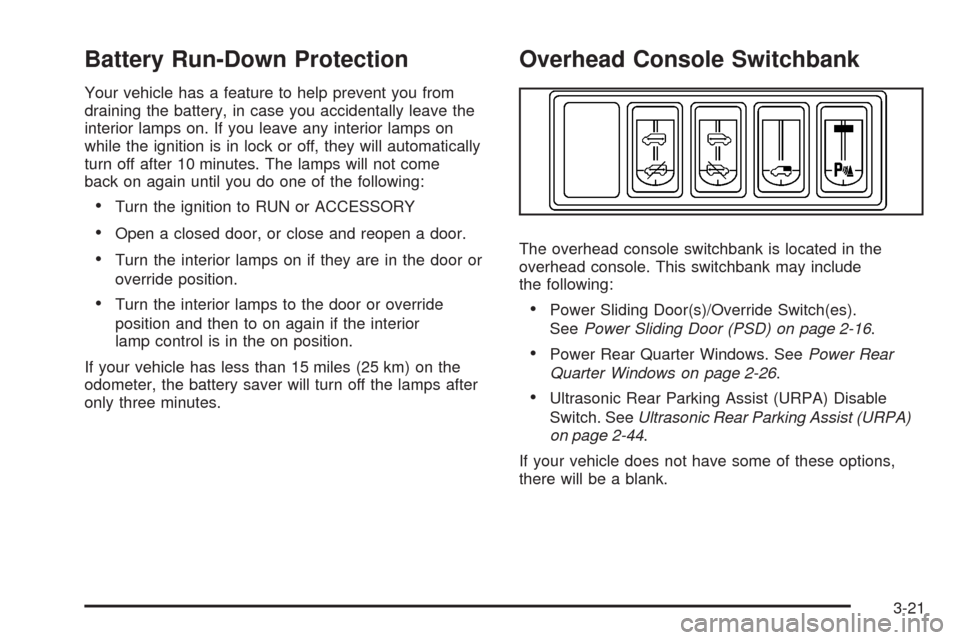
Overhead Console Switchbank
The overhead console switchbank is located in the
overhead console. This switchbank may include
the following:
Power Sliding Door(s)/Override Switch(es).
SeePower Sliding Door (PSD) on page 2-16.
Power Rear Quarter Windows. SeePower Rear
Quarter Windows on page 2-26.
Ultrasonic Rear Parking Assist (URPA) Disable
Switch. SeeUltrasonic Rear Parking Assist (URPA)
on page 2-44.
If your vehicle does not have some of these options,
there will be a blank.
3-21
Page 182 of 476
Accessory Power Outlet(s)
The accessory power outlets can be used to plug in
electrical equipment such as a cellular telephone or
CB radio.
Your vehicle may have two accessory power outlets.
There may be one outlet located below the climate
controls on the instrument panel and one outlet located
in the rear compartment on the driver’s side.
Pull the cover down to use the accessory power outlet.
When not in use, keep the cover on.
To remove the rear accessory power outlet cover, pull
the tab on the cover and pull it off. To put the cover back
on, line up the tabs at the back of the cover and put
the cover in place. Push down the tab to secure
the cover. When not in use, always cover the rear
accessory power outlet with the protective cap.
Notice:Leaving electrical equipment on for
extended periods will drain the battery. Always
unplug electrical equipment when not in use and do
not plug in equipment that exceeds the maximum
amperage rating of 20 amperes.Certain electrical accessories may not be compatible with
the accessory power outlet and could result in blown
vehicle or adapter fuses. If you experience a problem see
your dealer for additional information on accessory power
outlets.
Notice:Adding any electrical equipment to your
vehicle may damage it or keep other components
from working as they should. The repairs would not
be covered by your warranty. Do not use equipment
exceeding maximum amperage rating of 20 amperes.
Check with your dealer/retailer before adding
electrical equipment.
When adding electrical equipment, be sure to follow
the proper installation instructions included with
the equipment.
Notice:Improper use of the power outlet can cause
damage not covered by your warranty. Do not
hang any type of accessory or accessory bracket
from the plug because the power outlets are
designed for accessory power plugs only.
3-22
Page 207 of 476

Emissions Inspection and Maintenance
Programs
Some state/provincial and local governments have or
might begin programs to inspect the emission control
equipment on your vehicle. Failure to pass this
inspection could prevent you from getting a vehicle
registration.
Here are some things you need to know to help your
vehicle pass an inspection:
Your vehicle will not pass this inspection if the check
engine light is on or not working properly.
Your vehicle will not pass this inspection if the OBD
(on-board diagnostic) system determines that critical
emission control systems have not been completely
diagnosed by the system. The vehicle would be
considered not ready for inspection. This can happen if
you have recently replaced the battery or if the battery
has run down. The diagnostic system is designed to
evaluate critical emission control systems during normal
driving. This can take several days of routine driving. If
you have done this and your vehicle still does not pass
the inspection for lack of OBD system readiness, your
dealer/retailer can prepare the vehicle for inspection.
Oil Pressure Light
{CAUTION:
Do not keep driving if the oil pressure is low. If
you do, your engine can become so hot that it
catches �re. You or others could be burned.
Check your oil as soon as possible and have
your vehicle serviced.
Notice:Lack of proper engine oil maintenance may
damage the engine. The repairs would not be covered
by your warranty. Always follow the maintenance
schedule in this manual for changing engine oil.
This light will come on
brie�y when you start
your engine. If it does
not, have your vehicle
serviced.
3-47
Page 211 of 476
DIC Buttons
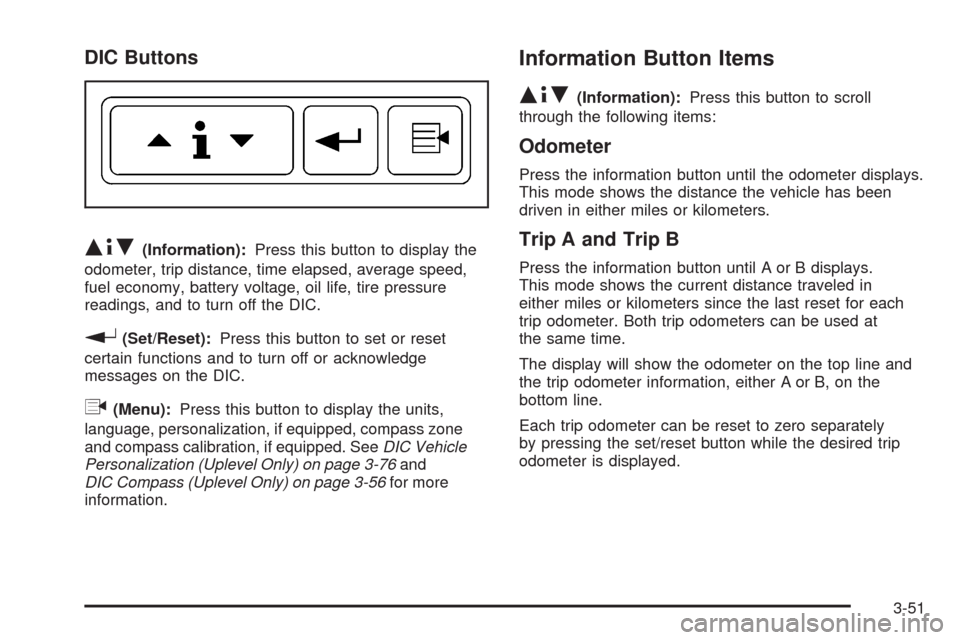
Q4R(Information):Press this button to display the
odometer, trip distance, time elapsed, average speed,
fuel economy, battery voltage, oil life, tire pressure
readings, and to turn off the DIC.
r(Set/Reset):Press this button to set or reset
certain functions and to turn off or acknowledge
messages on the DIC.
q(Menu):Press this button to display the units,
language, personalization, if equipped, compass zone
and compass calibration, if equipped. SeeDIC Vehicle
Personalization (Uplevel Only) on page 3-76and
DIC Compass (Uplevel Only) on page 3-56for more
information.
Information Button Items
Q4R
(Information):Press this button to scroll
through the following items:
Odometer
Press the information button until the odometer displays.
This mode shows the distance the vehicle has been
driven in either miles or kilometers.
Trip A and Trip B
Press the information button until A or B displays.
This mode shows the current distance traveled in
either miles or kilometers since the last reset for each
trip odometer. Both trip odometers can be used at
the same time.
The display will show the odometer on the top line and
the trip odometer information, either A or B, on the
bottom line.
Each trip odometer can be reset to zero separately
by pressing the set/reset button while the desired trip
odometer is displayed.
3-51
Page 213 of 476
Fuel Range
Press the information button until FUEL RANGE
displays. This mode shows the approximate number
of remaining miles or kilometers the vehicle can
be driven without refueling.
Fuel range is based on several factors, including
distance travelled, fuel used, fuel capacity, etc.
This estimate will change if driving conditions change.
For example, if driving in traffic and making frequent
stops, this mode may read one number, but if the vehicle
is driven on a freeway, the number may change even
though the same amount of fuel is in the fuel tank.
This is because different driving conditions produce
different fuel economies. Generally, freeway driving
produces better fuel economy than city driving.
Fuel range cannot be reset.
If your vehicle is low on fuel, FUEL RANGE LOW
will display followed by the LOW FUEL message.
See “LOW FUEL” underDIC Warnings and Messages
on page 3-58for more information.
Average Fuel Economy
Press the information button until AVG ECONOMY
displays. This mode shows the approximate average
miles per gallon (mpg) or liters per 100 kilometers
(L/100 km). This number is calculated based on the
number of mpg (L/100 km) recorded since the last time
this menu item was reset. To reset AVG ECONOMY,
press and hold the set/reset button. The display
will return to zero.
Battery
Press the information button until BATTERY displays.
This mode shows the current battery voltage.
Your vehicle’s charging system regulates voltage based
on the state of the battery. The battery voltage may
�uctuate when viewing this information on the DIC.
This is normal.
If there is a problem with the battery charging system,
a DIC message will display. SeeDIC Warnings and
Messages on page 3-58andElectric Power
Management on page 3-20for more information.
3-53