2008 CHEVROLET UPLANDER ESP
[x] Cancel search: ESPPage 215 of 476

Menu Button Items
q
(Menu):Press this button to scroll through the
following items:
Units
Press the menu button until UNITS displays. This mode
allows you to select between English or Metric units
of measurement. Once in this mode, press the set/reset
button to select between ENGLISH or METRIC.
Language
Press the menu button until the language screen
displays. This mode allows you to select the language in
which the DIC messages will appear. Once in this mode,
press the set/reset button to select among the following
choices:
English
Francais (French)
Espanol (Spanish)
Personalization (Uplevel Only)
Press the menu button until PERSONAL PROGRAM
displays. Your vehicle may have personalization
capabilities that allow you to program certain features
to a preferred setting for up to two drivers.
Your vehicle may also have customization capabilities
that allow you to program certain features to one
preferred setting. Customization features can only be
programmed to one setting on the vehicle and cannot be
programmed to a preferred setting for up to two drivers.
SeeDIC Vehicle Personalization (Uplevel Only) on
page 3-76for additional information on personal
programming.
Compass Zone (Uplevel Only)
To change the compass zone through the DIC,
seeDIC Compass (Uplevel Only) on page 3-56.
Compass Calibration (Uplevel Only)
The compass can be manually calibrated. To calibrate
the compass through the DIC, seeDIC Compass
(Uplevel Only) on page 3-56.
3-55
Page 236 of 476
DIC Vehicle Personalization
(Uplevel Only)
Your vehicle may have customization capabilities that
allow you to program certain features to one preferred
setting. Customization features can only be programmed
to one setting on the vehicle and cannot be programmed
to a preferred setting for two different drivers.
The customization features include the following:
Exterior lighting delay
Interior lighting delay
Delayed locking
Content theft
Remote keyless entry feedback
Remote start
Rear park chime
Your vehicle may also have personalization capabilities
that allow you to program certain features to a preferred
setting for up to two drivers. The �rst personalized key
corresponds to driver 1 and the second personalized
key corresponds to driver 2. The driver number also
corresponds to the numbers, 1 or 2, on the back of
the Remote Keyless Entry (RKE) transmitters.The personalization features include the following:
Radio station presets
Auto door unlock preferences
Remote keyless entry unlock preferences
All of the customization and personalization options
may not be available on your vehicle. Only the options
available will be displayed on your DIC.
The default settings for the customization and
personalization features were set when your vehicle left
the factory, but may have been changed from their
default setting since then.
The customization preferences are automatically
recalled.
The driver’s personalization preferences are recalled
by using the key programmed for driver 1 or 2. The
driver number also corresponds to the numbers, 1 or 2,
on the back of the RKE transmitters.
To change customization and personalization
preferences, use the following procedure.
3-76
Page 242 of 476
Personalization Menu Items
The following are personalization features that allow you
to program setting for up to two drivers:
PERSONALIZE KEY
If you are using a key that has already been
personalized to be recognized as key 1 or 2, this screen
will not display. This feature allows you to personalize
a key to be recognized as key 1 or 2. A personalized key
allows you to program personalization features to a
preferred setting to correspond to key 1 or 2.
Press the menu button until PERSONALIZE KEY
appears on the DIC display. Press the set/reset
button to scroll through the following choices:
NO (default):The key will not be personalized.
YES:The key will be personalized.
To select a setting and move on to the next feature,
press the menu button while the desired setting is
displayed on the DIC.
REPLACE KEY
This screen displays only if YES was selected for the
PERSONALIZE KEY feature, keys 1 and 2 have already
been personalized, and the current key being used is
not key 1 or 2. This feature allows you to program a key
to be recognized as key 1 or 2 in the event that the
previously programmed key needs to be replaced.
1:The key will be programmed to be recognized as
key 1.
2:The key will be programmed to be recognized as
key 2.
CANCEL (default):The key will not be programmed.
RADIO STATIONS PERSONALIZED
This screen displays only if YES was selected for the
PERSONALIZE KEY feature. This feature allows you
to set the radio station presets to be recognized for the
key, 1 or 2, that is being used. Once this message
displays, set the radio station presets. If the presets are
not set at this time, the presets will not be recognized for
key 1 or 2, however, the vehicle radio station presets will
be maintained.
3-82
Page 252 of 476

Playing a CD (Single CD Player)
Insert a CD partway into the slot, label side up. The
player pulls it in and the CD should begin playing.
If the ignition or radio is turned off with a CD in the
player, it stays in the player. When the ignition or radio
is turned on, the CD starts playing where it stopped,
if it was the last selected audio source.
When a CD is inserted, CD and the CD symbol displays.
As each new track starts to play the track number
displays.
The CD player can play the smaller 3 inch (8 cm) single
CDs with an adapter ring. Full-size CDs and the
smaller CDs are loaded in the same manner.
Playing a CD(s) (Six-Disc CD Player)
M
(Load):Press to load CDs into the CD player.
This CD player holds up to six CDs.
To insert one CD, do the following:
1. Turn the ignition on.
2. Press and release the load button.
3. When INSERT CD # displays, load a CD. Insert the
CD partway into the slot, label side up. The player
pulls the CD in.To insert multiple CDs, do the following:
1. Turn the ignition on.
2. Press and hold the load button for two seconds.
A beep sounds and LOAD ALL DISC displays.
3. When INSERT CD # displays, load a CD. Insert the
CD partway into the slot, label side up. The player
pulls the CD in.
Once the CD is loaded, wait for INSERT CD # to
display, then load the next CD. The CD player takes
up to six CDs. Do not try to load more than six.
To load more than one CD but less than six, complete
Steps 1 through 3. When �nished loading CDs, press this
button to cancel the loading function. The radio begins to
play the last CD loaded.
If more than one CD has been loaded, a number for
each CD displays.
Playing a Speci�c Loaded CD
A number displays for every CD that is loaded into the
player. To play a speci�c CD press the numbered
pushbutton that corresponds to the CD.
3-92
Page 264 of 476
Wired Headphones
There is a right and left wired headphone jack.
To adjust the volume, do the following:
1. Plug the headphone into the corresponding jack,
located behind the video screen, next to the
auxiliary jacks.
2. Press the headphone volume control button until
Wired Headset Volume displays and the Left wired
headphone is highlighted for selection. Press the
volume control button again to select the Right
volume control.
Another way to select either the Left or Right
Wired Headset Volume is to press the up or
down arrows on the DVD faceplate.
3. Press the right and left arrow buttons on the DVD
faceplate to increase or to decrease the volume.
Press the headphone volume control button again or
wait for a few seconds until the screen disappears.
The wired headphones work as follows:
DVD on / RSA off: The wired headphones plays
RSE audio.
DVD off / RSA on: The wired headphones plays
RSA audio.
DVD on / RSA on: The wired headphones plays
RSA audio.
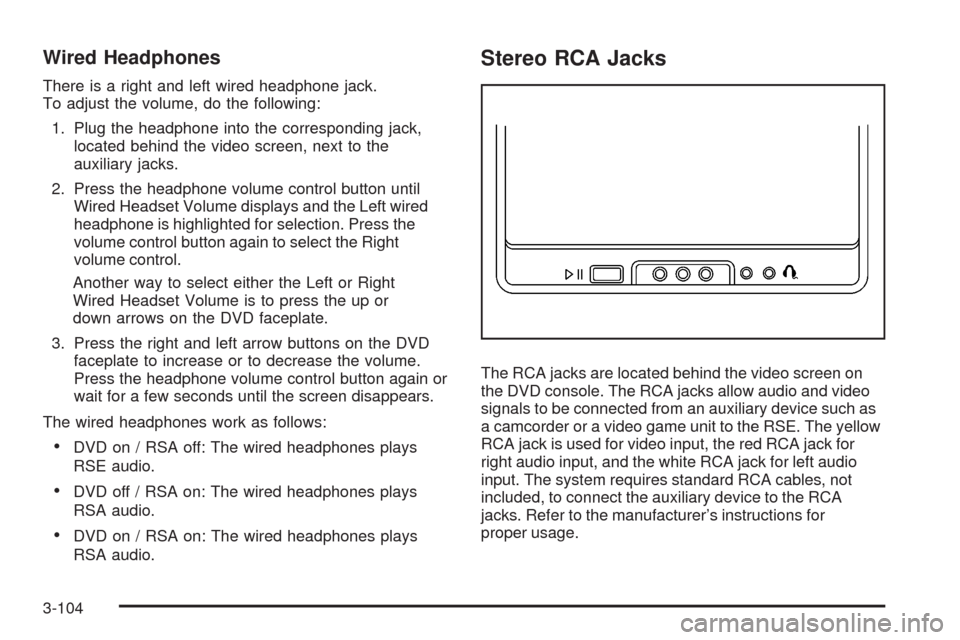
Stereo RCA Jacks
The RCA jacks are located behind the video screen on
the DVD console. The RCA jacks allow audio and video
signals to be connected from an auxiliary device such as
a camcorder or a video game unit to the RSE. The yellow
RCA jack is used for video input, the red RCA jack for
right audio input, and the white RCA jack for left audio
input. The system requires standard RCA cables, not
included, to connect the auxiliary device to the RCA
jacks. Refer to the manufacturer’s instructions for
proper usage.
3-104
Page 280 of 476
Radio Reception
Frequency interference and static during normal radio
reception can occur if items such as cellphone chargers,
vehicle convenience accessories, and external electronic
devices are plugged into the accessory power outlet.
If there is interference or static, unplug the item from the
accessory power outlet.
AM
The range for most AM stations is greater than for FM,
especially at night. The longer range can cause station
frequencies to interfere with each other. For better radio
reception, most AM radio stations boost the power levels
during the day, and then reduce these levels during the
night. Static can also occur when things like storms and
power lines interfere with radio reception. When this
happens, try reducing the treble on your radio.
FM Stereo
FM stereo gives the best sound, but FM signals reach
only about 10 to 40 miles (16 to 65 km). Tall buildings or
hills can interfere with FM signals, causing the sound
to fade in and out.
XM™ Satellite Radio Service
XM™ Satellite Radio Service gives digital radio
reception from coast-to-coast in the 48 contiguous
United States, and in Canada. Just as with FM,
tall buildings or hills can interfere with satellite radio
signals, causing the sound to fade in and out.
In addition, traveling or standing under heavy foliage,
bridges, garages, or tunnels may cause loss of the
XM™ signal for a period of time. The radio may display
NO SIGNAL to indicate interference.
3-120
Page 285 of 476
Drunk Driving
{CAUTION:
Drinking and then driving is very dangerous.
Your re�exes, perceptions, attentiveness, and
judgment can be affected by even a small
amount of alcohol. You can have a serious — or
even fatal — collision if you drive after drinking.
Do not drink and drive or ride with a driver who
has been drinking. Ride home in a cab; or if you
are with a group, designate a driver who will not
drink.
Death and injury associated with drinking and driving is
a global tragedy.
Alcohol affects four things that anyone needs to drive a
vehicle: judgment, muscular coordination, vision, and
attentiveness.Police records show that almost 40 percent of all motor
vehicle-related deaths involve alcohol. In most cases,
these deaths are the result of someone who was
drinking and driving. In recent years, more than
17,000 annual motor vehicle-related deaths have been
associated with the use of alcohol, with about
250,000 people injured.
For persons under 21, it is against the law in every U.S.
state to drink alcohol. There are good medical,
psychological, and developmental reasons for these
laws.
The obvious way to eliminate the leading highway
safety problem is for people never to drink alcohol and
then drive.
Medical research shows that alcohol in a person’s
system can make crash injuries worse, especially
injuries to the brain, spinal cord, or heart. This means
that when anyone who has been drinking — driver
or passenger — is in a crash, that person’s chance of
being killed or permanently disabled is higher than if the
person had not been drinking.
4-3
Page 288 of 476
Braking in Emergencies
With ABS, you can steer and brake at the same time. In
many emergencies, steering can help you more than
even the very best braking.
Traction Control System (TCS)
Your vehicle may have a traction control system that
limits wheel spin. This is especially useful in slippery
road conditions. The system operates if it senses that
one or both of the front wheels are spinning or beginning
to lose traction. When this happens, the system
brakes the spinning wheel(s) and/or reduces engine
power to limit wheel spin.
The TRACTION CONTROL ACTIVE message will come
on in the Driver Information Center (DIC) when the
traction control system is limiting wheel spin. You may
feel or hear the system working, but this is normal.
If your vehicle is in cruise control when the traction
control system begins to limit wheel spin, the cruise
control will automatically disengage. When road
conditions allow you to safely use it again, you may
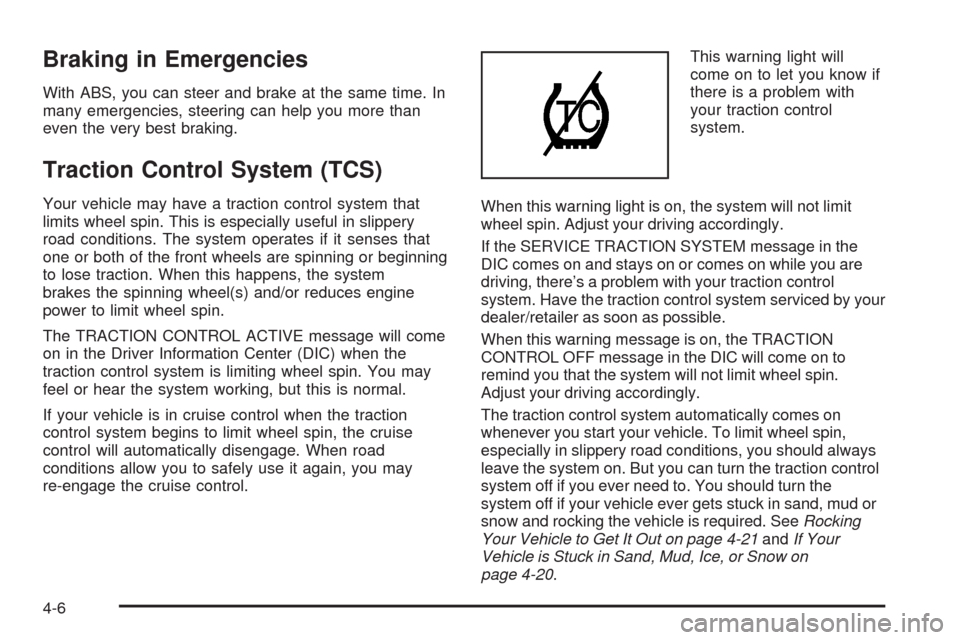
re-engage the cruise control.This warning light will
come on to let you know if
there is a problem with
your traction control
system.
When this warning light is on, the system will not limit
wheel spin. Adjust your driving accordingly.
If the SERVICE TRACTION SYSTEM message in the
DIC comes on and stays on or comes on while you are
driving, there’s a problem with your traction control
system. Have the traction control system serviced by your
dealer/retailer as soon as possible.
When this warning message is on, the TRACTION
CONTROL OFF message in the DIC will come on to
remind you that the system will not limit wheel spin.
Adjust your driving accordingly.
The traction control system automatically comes on
whenever you start your vehicle. To limit wheel spin,
especially in slippery road conditions, you should always
leave the system on. But you can turn the traction control
system off if you ever need to. You should turn the
system off if your vehicle ever gets stuck in sand, mud or
snow and rocking the vehicle is required. SeeRocking
Your Vehicle to Get It Out on page 4-21andIf Your
Vehicle is Stuck in Sand, Mud, Ice, or Snow on
page 4-20.
4-6