2008 CHEVROLET SUBURBAN ECU
[x] Cancel search: ECUPage 333 of 538
{CAUTION:
Things you put inside your vehicle can
strike and injure people in a sudden stop
or turn, or in a crash.
Put things in the cargo area of your
vehicle. Try to spread the weight
evenly.
Never stack heavier things, like
suitcases, inside the vehicle so that
some of them are above the tops of
the seats.
Do not leave an unsecured child
restraint in your vehicle.
When you carry something inside the
vehicle, secure it whenever you can.
Do not leave a seat folded down
unless you need to.
There is also important loading information for
off-road driving in this manual. See “Loading Your
Vehicle for Off-Road Driving” underOff-Road
Driving on page 4-13.
Adding a Snow Plow or Similar
Equipment
Before installing a snow plow on your vehicle, here are
some things you will need to know:
Notice:If your vehicle does not have the snow
plow prep package, adding a plow can damage your
vehicle, and the repairs would not be covered by
warranty. Unless your vehicle was built to carry
a snow plow, do not add one to your vehicle. If your
vehicle has the snow plow prep package, called
RPO VYU, then the payload your vehicle can carry
will be reduced when a snow plow is installed. Your
vehicle can be damaged if either the front or rear
axle ratings or the Gross Vehicle Weight (GVW) are
exceeded.
Some vehicles are built with a special snow plow prep
package, called RPO VYU. If your vehicle has this
option, you can add a plow to it, provided certain
weights, such as the weights on the vehicle’s axles and
the Gross Vehicle Weight (GVW), are not exceeded.
4-41
Page 334 of 538
The plow your vehicle can carry depends on many
things, such as:
The options your vehicle came with, and the weight
of those options.
The weight and number of passengers you intend
to carry.
The weight of items you have added to your
vehicle.
The total weight of any additional cargo you intend
to carry.
Say, for example, you have a 700 lb (318 kg) snow
plow. The total weight of all occupants and cargo inside
the cab should not exceed 300 lb (135 kg). This
means that you may only be able to carry one
passenger. But, even this may be too much if you have
got other equipment already adding to the weight of
your vehicle.
Here are some guidelines for safely carrying a snow
plow on your vehicle:
Make sure the weight on the front and rear axles
does not exceed the axle rating for each.
For the front axle, if more cargo or passengers must
be carried, appropriate counter ballast must be
installed rear of the rear axle. Counter ballast must
be properly secured so it will not move during driving.
Follow the snow plow manufacturer’s
recommendations regarding rear ballast. Rear
ballast may be required to ensure a proper front and
rear weight distribution ratio, even though the actual
weight at the front axle may be less than the front
axle rating.
The snow plow manufacturer or installer can assist
you in determining the amount of rear ballast
required, to help make sure your snowplow/vehicle
combination does not exceed the GVW rating, the
front and rear axle ratings, and the front and rear
weight distribution ratio.
The total vehicle must not exceed the GVW rating.
Front axle reserve capacity is the difference between
your front Gross Axle Weight Rating (GAWR) and the
front axle weight of your vehicle with full fuel and
passengers. Basically, it is the amount of weight you can
add to your front axle before reaching your front GAWR.
The front axle reserve capacity for your vehicle can be
found in the lower right corner of the Certi�cation/Tire
label, as shown.
4-42
Page 339 of 538
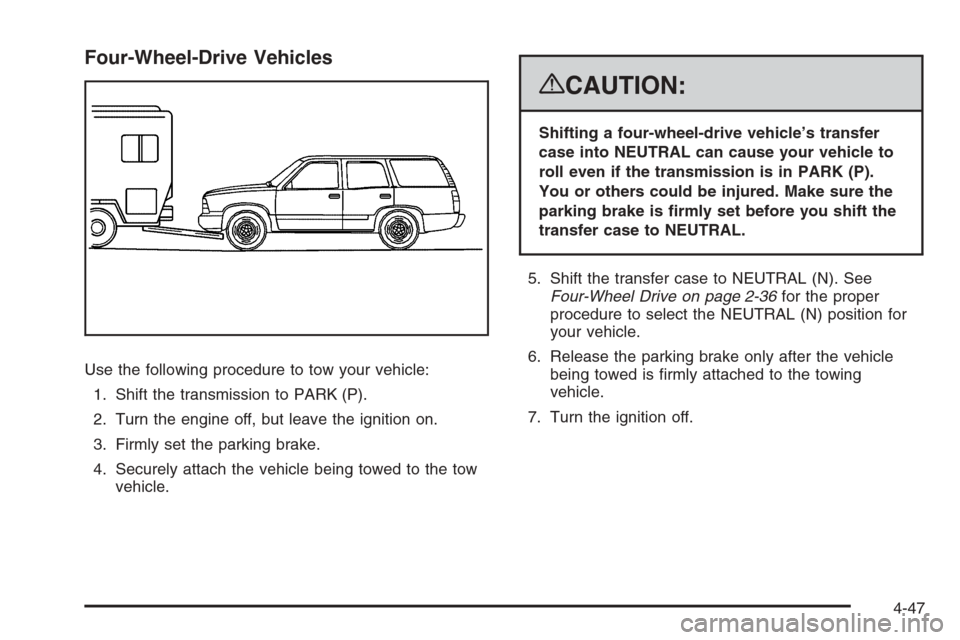
Four-Wheel-Drive Vehicles
Use the following procedure to tow your vehicle:
1. Shift the transmission to PARK (P).
2. Turn the engine off, but leave the ignition on.
3. Firmly set the parking brake.
4. Securely attach the vehicle being towed to the tow
vehicle.
{CAUTION:
Shifting a four-wheel-drive vehicle’s transfer
case into NEUTRAL can cause your vehicle to
roll even if the transmission is in PARK (P).
You or others could be injured. Make sure the
parking brake is �rmly set before you shift the
transfer case to NEUTRAL.
5. Shift the transfer case to NEUTRAL (N). See
Four-Wheel Drive on page 2-36for the proper
procedure to select the NEUTRAL (N) position for
your vehicle.
6. Release the parking brake only after the vehicle
being towed is �rmly attached to the towing
vehicle.
7. Turn the ignition off.
4-47
Page 344 of 538
K-1500 (AWD) Axle Ratio Maximum Trailer Weight *GCWR
5.3L V8 without NHT** 3.73 6,200 lbs (2 812 kg) 12,000 lbs (5 443 kg)
5.3L V8 with NHT**3.73
4.107,200 lbs (3 266 kg)
8,200 lbs (3 719 kg)13,000 lbs (5 897 kg)
14,000 lbs (6 350 kg)
5.3L V8 (Extended
Models)3.73
4.107,000 lbs (3 175 kg)
8,000 lbs (3 629 kg)13,000 lbs (5 897 kg)
14,000 lbs (6 350 kg)
6.0L V8 (Extended
Models)4.10 8,000 lbs (3 629 kg) 14,000 lbs (6 350 kg)
C-2500 (2WD) Axle Ratio Maximum Trailer Weight *GCWR
6.0L V8 (Extended
Models)3.73 9,700 lbs (4 400 kg) 16,000 lbs (7 258 kg)
K-2500 (4WD Axle Ratio Maximum Trailer Weight *GCWR
6.0L V8 (Extended
Models)3.73 9,300 lbs (4 218 kg) 16,000 lbs (7 258 kg)
*The Gross Combination Weight Rating (GCWR) is the
total allowable weight of the completely loaded
vehicle and trailer including any passengers, cargo,
equipment and conversions. The GCWR for your vehicle
should not be exceeded.
**NHT is the option code for Enhanced Heavy Duty
Trailering Package. See your dealer/retailer for vehicle
option content.Ask your dealer/retailer for our trailering information or
advice, or write us at our Customer Assistance
Offices. SeeCustomer Assistance Offices on page 7-6
for more information.
4-52
Page 352 of 538
Driving with a Trailer
{CAUTION:
If you have a rear-most window open and you
pull a trailer with your vehicle, carbon
monoxide (CO) could come into your vehicle.
You cannot see or smell CO. It can cause
unconsciousness or death. SeeEngine
Exhaust on page 2-46. To maximize your safety
when towing a trailer:
Have your exhaust system inspected for
leaks, and make necessary repairs before
starting on your trip.
Keep the rear-most windows closed.
If exhaust does come into your vehicle
through a window in the rear or another
opening, drive with your front, main
heating or cooling system on and with the
fan on any speed. This will bring fresh,
outside air into your vehicle. Do not use
the climate control setting for maximum air
because it only recirculates the air inside
your vehicle. SeeClimate Control System
on page 3-22.Towing a trailer requires a certain amount of experience.
Before setting out for the open road, you’ll want to get
to know your rig. Acquaint yourself with the feel of
handling and braking with the added weight of the trailer.
And always keep in mind that the vehicle you are
driving is now a good deal longer and not nearly as
responsive as your vehicle is by itself.
Before you start, check all trailer hitch parts and
attachments, safety chains, electrical connector, lamps,
tires and mirror adjustment. If the trailer has electric
brakes, start your vehicle and trailer moving and then
apply the trailer brake controller by hand to be sure
the brakes are working. This lets you check your
electrical connection at the same time.
During your trip, check occasionally to be sure that the
load is secure, and that the lamps and any trailer
brakes are still working.Following Distance
Stay at least twice as far behind the vehicle ahead as
you would when driving your vehicle without a trailer.
This can help you avoid situations that require
heavy braking and sudden turns.
4-60
Page 392 of 538
Adding Coolant
If more coolant is needed, add the proper DEX-COOL®
coolant mixture at the surge tank, but only when the
engine is cool.
{CAUTION:
You can be burned if you spill coolant on hot
engine parts. Coolant contains ethylene glycol,
and it will burn if the engine parts are hot
enough. Do not spill coolant on a hot engine.
When replacing the pressure cap, make sure it is
hand-tight and fully seated.
Coolant Surge Tank Pressure Cap
If your vehicle is a Two-mode Hybrid, see the Two-mode
Hybrid manual for more information.
Notice:If the pressure cap is not tightly installed,
coolant loss and possible engine damage may
occur. Be sure the cap is properly and tightly
secured.
The coolant surge tank pressure cap must be fully
installed on the coolant surge tank. SeeEngine
Compartment Overview on page 5-16for more
information on location.
Engine Overheating
There is a coolant temperature gage on your vehicle’s
instrument panel. SeeEngine Coolant Temperature
Gage on page 3-43.
In addition, ENGINE OVERHEATED STOP ENGINE,
ENGINE OVERHEATED IDLE ENGINE, and a ENGINE
POWER IS REDUCED message comes on in the Driver
Information Center (DIC) on the instrument panel.
SeeDIC Warnings and Messages on page 3-59.
5-34
Page 439 of 538
Reset the Tire Pressure Monitor System. SeeTire
Pressure Monitor Operation on page 5-77.
Make certain that all wheel nuts are properly
tightened. See “Wheel Nut Torque” under
Capacities and Specifications on page 5-126.
{CAUTION:
Rust or dirt on a wheel, or on the parts to
which it is fastened, can make wheel nuts
become loose after time. The wheel could
come off and cause an accident. When
you change a wheel, remove any rust or
dirt from places where the wheel attaches
to the vehicle. In an emergency, you can
use a cloth or a paper towel to do this;
but be sure to use a scraper or wire brush
later, if needed, to get all the rust or dirt
off. SeeChanging a Flat Tire on page 5-90.
Make sure the spare tire is stored securely. Push,
pull, and then try to rotate or turn the tire. If it
moves, tighten the cable. SeeStoring a Flat or
Spare Tire and Tools on page 5-105.
When It Is Time for New Tires
Various factors, such as maintenance, temperatures,
driving speeds, vehicle loading, and road conditions,
in�uence when you need new tires.
One way to tell when it
is time for new tires is to
check the treadwear
indicators, which appear
when your tires have only
1/16 inch (1.6 mm) or less
of tread remaining. Some
commercial truck tires may
not have treadwear
indicators.
5-81
Page 446 of 538
Tire Chains
If your vehicle is a Two-mode Hybrid, see the Two-mode
Hybrid manual for more information.
{CAUTION:
If your vehicle has P265/65R18 or P275/55R20
size tires, do not use tire chains. They can
damage your vehicle because there is not
enough clearance. Tire chains used on a
vehicle without the proper amount of clearance
can cause damage to the brakes, suspension,
or other vehicle parts. The area damaged by
the tire chains could cause you to lose control
of your vehicle and you or others may be
injured in a crash.
Use another type of traction device only if its
manufacturer recommends it for use on your
vehicle and tire size combination and road
conditions. Follow that manufacturer’s
CAUTION: (Continued)
CAUTION: (Continued)
instructions. To help avoid damage to your
vehicle, drive slowly, readjust or remove the
device if it is contacting your vehicle, and do
not spin your vehicle’s wheels.
If you do �nd traction devices that will �t,
install them on the rear tires.
Notice:If your vehicle has P265/70R17 size tires,
use tire chains only where legal and only when you
must. Use chains that are the proper size for your
vehicle’s tires. Install them on the rear tires only.
Do not use chains on the front tires.
Tighten them as tightly as possible with the ends
securely fastened. Drive slowly and follow the chain
manufacturer’s instructions. If you can hear the
chains contacting your vehicle, stop and retighten
them. If the contact continues, slow down until
it stops. Driving too fast or spinning the wheels
with chains on will damage your vehicle.
5-88