Page 454 of 538
3. Use the wheel wrench to loosen all the wheel nuts.
Turn the wheel wrench counterclockwise to loosen
the wheel nuts. Do not remove the wheel nuts yet.A. Front Position
B. Rear Position
4. Position the jack under the vehicle as shown.Jacking Locations (Overall View)
5-96
Page 455 of 538
Front Tire Flat:If the �at tire is on a front tire of the
vehicle, you will need to use the jack handle and only
one jack handle extension. Attach the wheel wrench
to the jack handle extension. Attach the jack handle
to the jack (A). Position the jack on the frame behind
the �at tire where the frame sections overlap. Turn
the wheel wrench clockwise to raise the vehicle.
Raise the vehicle far enough off the ground so there
is enough room for the spare tire to clear the ground. Front Position — 1500 Models
Front Position — 2500 Models
5-97
Page 456 of 538
Rear Tire Flat:If the �at tire is on a rear tire of the
vehicle, you will need to use the jack handle (B) and
both jack handle extensions (C). Attach the wheel
wrench (D) to the jack handle extensions (C). Attach
the jack handle (B) to the jack (A). Use the jacking
pad provided on the rear axle. Turn the wheel
wrench (D) clockwise to raise the vehicle. Raise the
vehicle far enough off the ground so there is enough
room for the spare tire to clear the ground. Rear Position – 1500 Models
Rear Position – All Other Models
5-98
Page 458 of 538

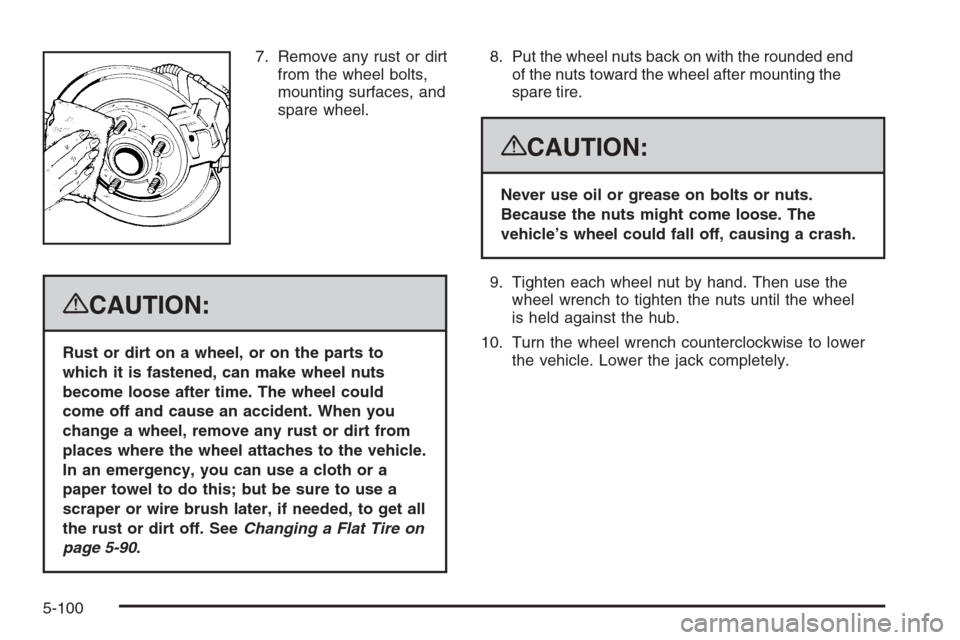
7. Remove any rust or dirt
from the wheel bolts,
mounting surfaces, and
spare wheel.
{CAUTION:
Rust or dirt on a wheel, or on the parts to
which it is fastened, can make wheel nuts
become loose after time. The wheel could
come off and cause an accident. When you
change a wheel, remove any rust or dirt from
places where the wheel attaches to the vehicle.
In an emergency, you can use a cloth or a
paper towel to do this; but be sure to use a
scraper or wire brush later, if needed, to get all
the rust or dirt off. SeeChanging a Flat Tire on
page 5-90.8. Put the wheel nuts back on with the rounded end
of the nuts toward the wheel after mounting the
spare tire.
{CAUTION:
Never use oil or grease on bolts or nuts.
Because the nuts might come loose. The
vehicle’s wheel could fall off, causing a crash.
9. Tighten each wheel nut by hand. Then use the
wheel wrench to tighten the nuts until the wheel
is held against the hub.
10. Turn the wheel wrench counterclockwise to lower
the vehicle. Lower the jack completely.
5-100
Page 459 of 538

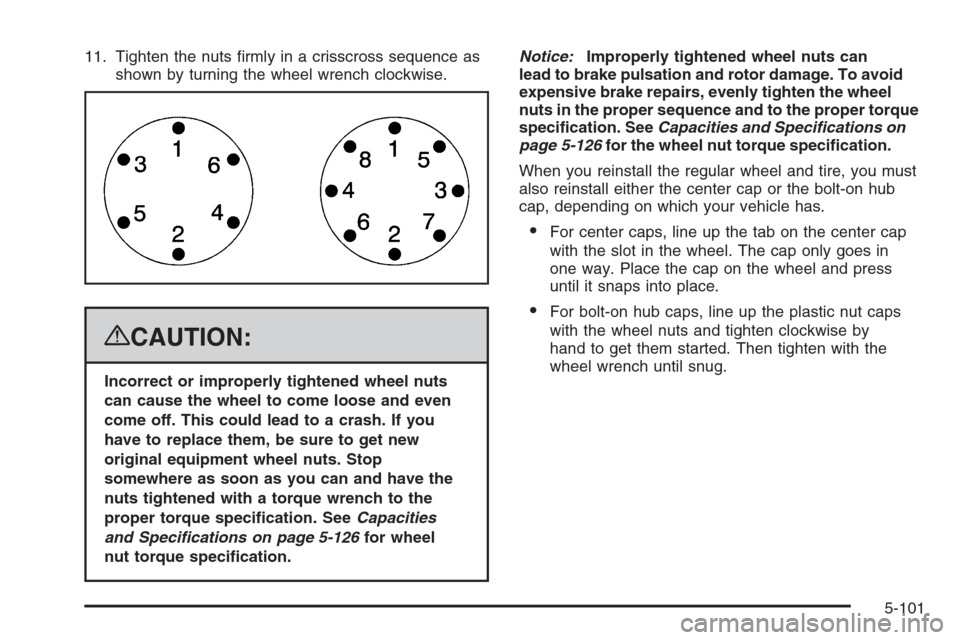
11. Tighten the nuts �rmly in a crisscross sequence as
shown by turning the wheel wrench clockwise.
{CAUTION:
Incorrect or improperly tightened wheel nuts
can cause the wheel to come loose and even
come off. This could lead to a crash. If you
have to replace them, be sure to get new
original equipment wheel nuts. Stop
somewhere as soon as you can and have the
nuts tightened with a torque wrench to the
proper torque speci�cation. SeeCapacities
and Specifications on page 5-126for wheel
nut torque speci�cation.Notice:Improperly tightened wheel nuts can
lead to brake pulsation and rotor damage. To avoid
expensive brake repairs, evenly tighten the wheel
nuts in the proper sequence and to the proper torque
speci�cation. SeeCapacities and Specifications on
page 5-126for the wheel nut torque speci�cation.
When you reinstall the regular wheel and tire, you must
also reinstall either the center cap or the bolt-on hub
cap, depending on which your vehicle has.
For center caps, line up the tab on the center cap
with the slot in the wheel. The cap only goes in
one way. Place the cap on the wheel and press
until it snaps into place.
For bolt-on hub caps, line up the plastic nut caps
with the wheel nuts and tighten clockwise by
hand to get them started. Then tighten with the
wheel wrench until snug.
5-101
Page 460 of 538

Secondary Latch System
Your vehicle has an underbody-mounted tire hoist
assembly equipped with a secondary latch system.
It is designed to stop the spare tire from suddenly falling
off your vehicle. For the secondary latch to work, the
spare must be installed with the valve stem pointing
down. SeeStoring a Flat or Spare Tire and Tools
on page 5-105.
{CAUTION:
Before beginning this procedure read all the
instructions. Failure to read and follow the
instructions could damage the hoist assembly
and you and others could get hurt. Read and
follow the instructions listed next.To release the spare tire from the secondary latch:
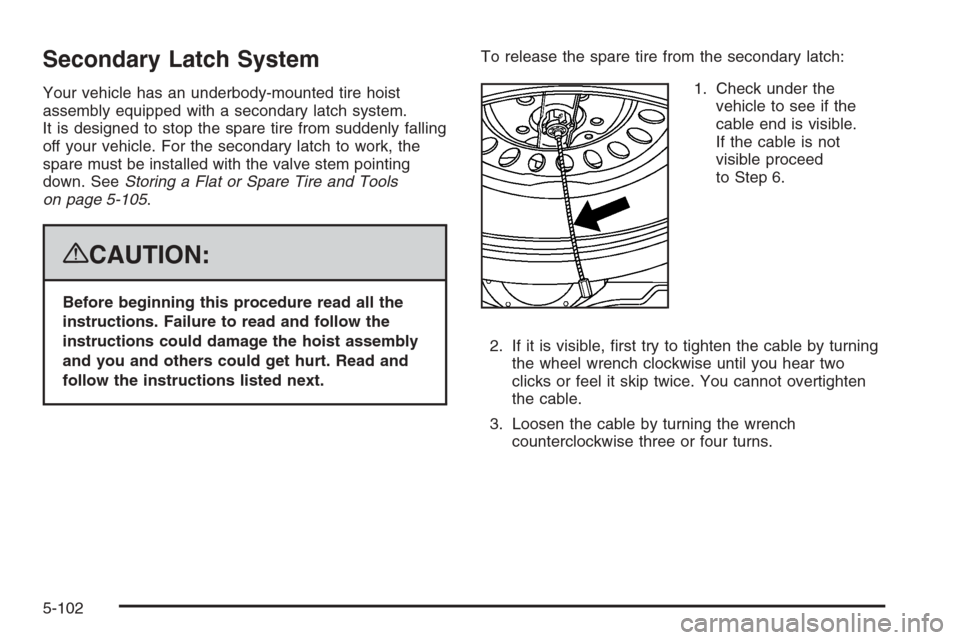
1. Check under the
vehicle to see if the
cable end is visible.
If the cable is not
visible proceed
to Step 6.
2. If it is visible, �rst try to tighten the cable by turning
the wheel wrench clockwise until you hear two
clicks or feel it skip twice. You cannot overtighten
the cable.
3. Loosen the cable by turning the wrench
counterclockwise three or four turns.
5-102
Page 461 of 538
4. Repeat this procedure at least two times. If the
spare tire lowers to the ground, continue with
Step 5 ofRemoving the Spare Tire and Tools
on page 5-91.
5. If the spare does not lower, turn the wrench
counterclockwise until approximately 6 inches
(15 cm) of cable is exposed.
6. Stand the wheel blocks on their shortest ends,
with the backs facing each other.
7. Place the bottom
edge of the jack (A) on
the wheel blocks (B),
separating them so that
the jack is balanced
securely.
8. Attach the jack handle, extension, and wheel
wrench to the jack and place it (with the wheel
blocks) under the vehicle toward the front of the
rear bumper.
5-103
Page 462 of 538

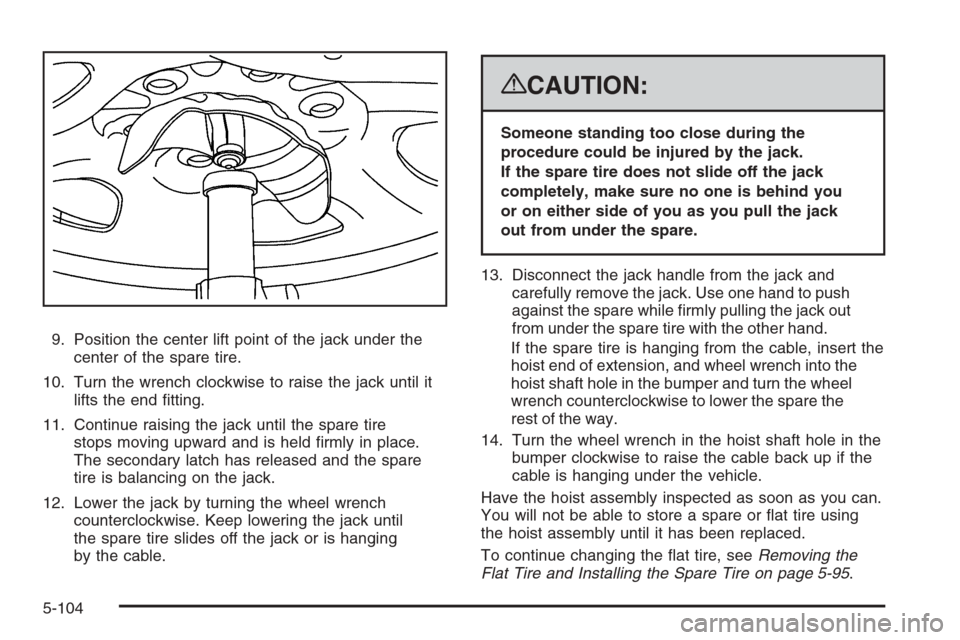
9. Position the center lift point of the jack under the
center of the spare tire.
10. Turn the wrench clockwise to raise the jack until it
lifts the end �tting.
11. Continue raising the jack until the spare tire
stops moving upward and is held �rmly in place.
The secondary latch has released and the spare
tire is balancing on the jack.
12. Lower the jack by turning the wheel wrench
counterclockwise. Keep lowering the jack until
the spare tire slides off the jack or is hanging
by the cable.
{CAUTION:
Someone standing too close during the
procedure could be injured by the jack.
If the spare tire does not slide off the jack
completely, make sure no one is behind you
or on either side of you as you pull the jack
out from under the spare.
13. Disconnect the jack handle from the jack and
carefully remove the jack. Use one hand to push
against the spare while �rmly pulling the jack out
from under the spare tire with the other hand.
If the spare tire is hanging from the cable, insert the
hoist end of extension, and wheel wrench into the
hoist shaft hole in the bumper and turn the wheel
wrench counterclockwise to lower the spare the
rest of the way.
14. Turn the wheel wrench in the hoist shaft hole in the
bumper clockwise to raise the cable back up if the
cable is hanging under the vehicle.
Have the hoist assembly inspected as soon as you can.
You will not be able to store a spare or �at tire using
the hoist assembly until it has been replaced.
To continue changing the �at tire, seeRemoving the
Flat Tire and Installing the Spare Tire on page 5-95.
5-104