2008 CHEVROLET SUBURBAN instrument panel
[x] Cancel search: instrument panelPage 113 of 538
CAUTION: (Continued)
If you have air outlets on or under the
instrument panel, open them all the way.
If your vehicle has a power liftgate, disable
the power liftgate function.
SeeEngine Exhaust on page 2-46.
If your vehicle has a power liftgate, seePower Liftgate
on page 2-14.
To unlock the liftgate, use the power door lock switch or
press the door unlock button on the Remote Keyless
Entry (RKE) transmitter twice. SeeRemote Keyless
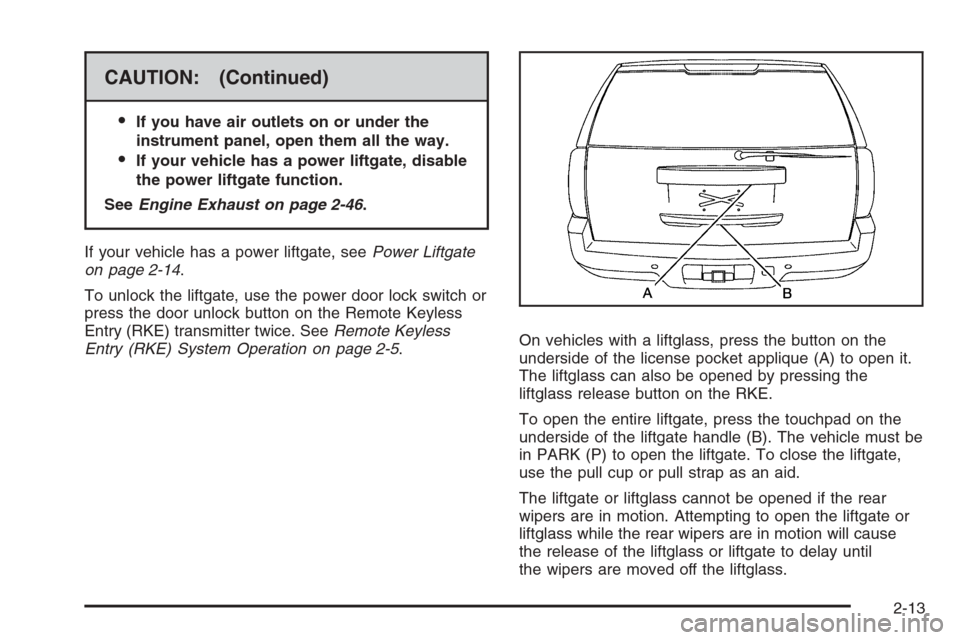
Entry (RKE) System Operation on page 2-5.On vehicles with a liftglass, press the button on the
underside of the license pocket applique (A) to open it.
The liftglass can also be opened by pressing the
liftglass release button on the RKE.
To open the entire liftgate, press the touchpad on the
underside of the liftgate handle (B). The vehicle must be
in PARK (P) to open the liftgate. To close the liftgate,
use the pull cup or pull strap as an aid.
The liftgate or liftglass cannot be opened if the rear
wipers are in motion. Attempting to open the liftgate or
liftglass while the rear wipers are in motion will cause
the release of the liftglass or liftgate to delay until
the wipers are moved off the liftglass.
2-13
Page 114 of 538
Both the liftglass and liftgate have an electric latch. If
the battery is disconnected or has low voltage, the
liftglass and liftgate will not open. The liftglass
and liftgate will resume operation when the battery is
reconnected and charged.
If the battery is properly connected and has adequate
voltage, and the liftgate or liftglass still will not function,
your vehicle should be taken to a dealership for
service.
Power Liftgate
Power Liftgate Operation
{CAUTION:
It can be dangerous to drive with the liftgate
open because carbon monoxide (CO) gas can
come into your vehicle. You cannot see or
smell CO. It can cause unconsciousness and
even death.
CAUTION: (Continued)
CAUTION: (Continued)
If you must drive with the liftgate open, or if
electrical wiring or other cable connections
must pass through the seal between the body
and the liftgate:
Make sure all other windows are shut.
Turn the fan on your heating or cooling
system to its highest speed with the
recirculation mode off. That will force
outside air into your vehicle. See Climate
Control System in the index.
If you have air outlets on or under the
instrument panel, open them all the way.
If your vehicle has a power liftgate, disable
the power liftgate function.
SeePower Liftgate on page 2-14.
On vehicles with a power liftgate the button is located
on the overhead console.
The vehicle must be in PARK (P) to use the power
liftgate feature.
&:Press the top of the button to open or close the
power liftgate.
2-14
Page 123 of 538
PASS-Key®III+ Electronic
Immobilizer Operation
Your vehicle has PASS-Key®III+ (Personalized
Automotive Security System) theft-deterrent system.
PASS-Key
®III+ is a passive theft-deterrent system.
The system is automatically armed when the key
is removed from the ignition.
The system is automatically disarmed when the key is
turned to ON/RUN, ACC/ACCESSORY or START
from the LOCK/OFF position.
You do not have to manually arm or disarm the system.
The security light will come on if there is a problem
with arming or disarming the theft-deterrent system.
When the PASS-Key
®III+ system senses that someone
is using the wrong key, it prevents the vehicle from
starting. Anyone using a trial-and-error method to start
the vehicle will be discouraged because of the high
number of electrical key codes.
If the engine does not start and the security light on the
instrument panel cluster comes on when trying to
start the vehicle, there may be a problem with your
theft-deterrent system. Turn the ignition off and try again.If the engine still does not start, and the key appears to
be undamaged, try another ignition key. At this time,
you may also want to check the fuse, seeFuses
and Circuit Breakers on page 5-119. If the engine still
does not start with the other key, your vehicle needs
service. If your vehicle does start, the �rst key may be
faulty. See your dealer/retailer who can service the
PASS-Key
®III+ to have a new key made. In an
emergency, contact Roadside Assistance.
It is possible for the PASS-Key
®III+ decoder to learn
the transponder value of a new or replacement key. Up
to 10 keys may be programmed for the vehicle. The
following procedure is for programming additional keys
only. If all the currently programmed keys are lost or
do not operate, you must see your dealer/retailer
or a locksmith who can service PASS-Key
®III+ to have
keys made and programmed to the system.
See your dealer/retailer or a locksmith who can service
PASS-Key
®III+ to get a new key blank that is cut
exactly as the ignition key that operates the system.
2-23
Page 128 of 538
Adjustable Throttle and Brake Pedal
On vehicles with this feature, you can change the
position of the throttle and brake pedals.
This feature is designed for shorter drivers, since the
pedals cannot move farther away from the standard
position, but can move toward the driver for better
pedal reach.
No adjustment to the pedals can be made when
the vehicle is in REVERSE (R) or while using the
cruise control.
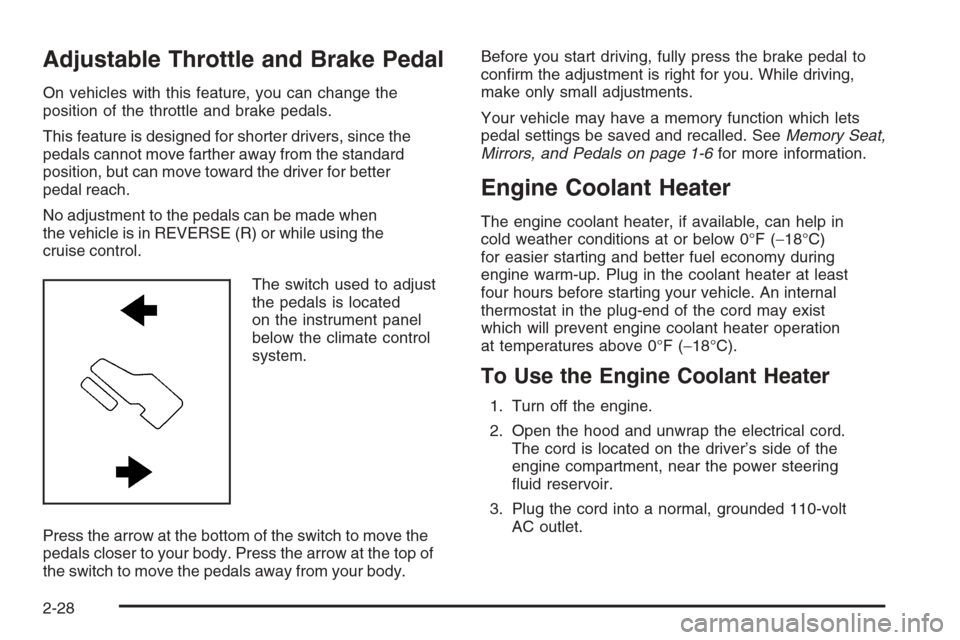
The switch used to adjust
the pedals is located
on the instrument panel
below the climate control
system.
Press the arrow at the bottom of the switch to move the
pedals closer to your body. Press the arrow at the top of
the switch to move the pedals away from your body.Before you start driving, fully press the brake pedal to
con�rm the adjustment is right for you. While driving,
make only small adjustments.
Your vehicle may have a memory function which lets
pedal settings be saved and recalled. SeeMemory Seat,
Mirrors, and Pedals on page 1-6for more information.
Engine Coolant Heater
The engine coolant heater, if available, can help in
cold weather conditions at or below 0°F (−18°C)
for easier starting and better fuel economy during
engine warm-up. Plug in the coolant heater at least
four hours before starting your vehicle. An internal
thermostat in the plug-end of the cord may exist
which will prevent engine coolant heater operation
at temperatures above 0°F (−18°C).
To Use the Engine Coolant Heater
1. Turn off the engine.
2. Open the hood and unwrap the electrical cord.
The cord is located on the driver’s side of the
engine compartment, near the power steering
�uid reservoir.
3. Plug the cord into a normal, grounded 110-volt
AC outlet.
2-28
Page 130 of 538

Automatic Transmission Operation
If your vehicle is a Two-mode Hybrid, see the Two-mode
Hybrid manual for more information.
If your vehicle is has an automatic transmission,
it has an electronic shift position indicator within the
instrument panel cluster. This display comes on when
the ignition key is turned to the ON/RUN position.
There are several different positions for the shift lever.
See “Range Selection Mode” later in this section.
PARK (P):This position locks your rear wheels. It is
the best position to use when you start the engine
because your vehicle cannot move easily. When parked
on a hill, especially when the vehicle has a heavy
load, you might notice an increase in the effort to shift
out of Park. See Torque Lock (Automatic Transmission)
underShifting Into Park on page 2-43for more
information.
Hydra-Matic
®4-Speed
Automatic Transmission
Allison Transmission®or Hydra-Matic®6-Speed
Automatic Transmission
2-30
Page 137 of 538
Front Axle
The front axle engages and disengages automatically
when you shift the transfer case. Some delay for
the axle to engage or disengage is normal.
Automatic Transfer Case
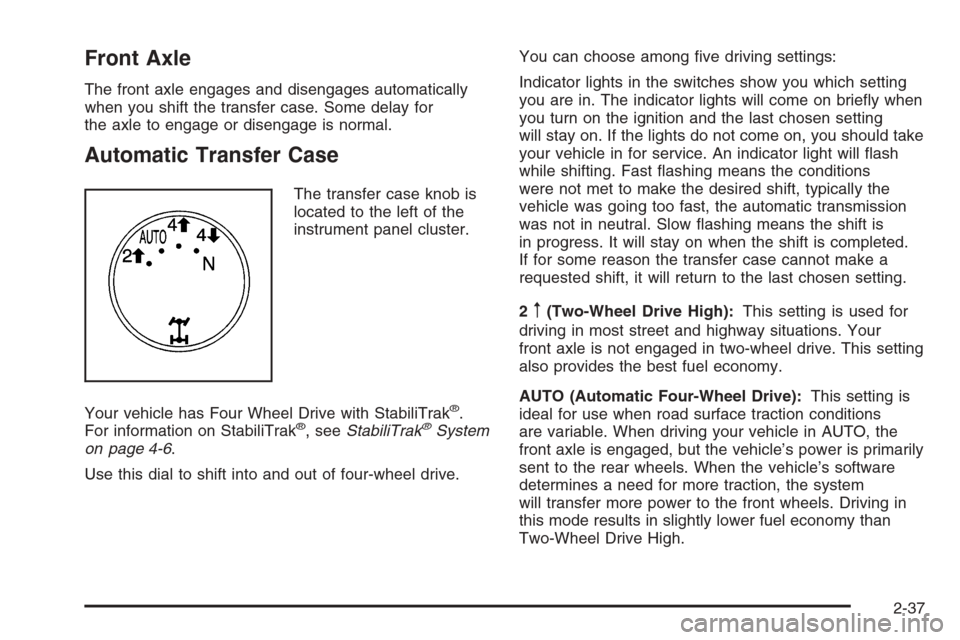
The transfer case knob is
located to the left of the
instrument panel cluster.
Your vehicle has Four Wheel Drive with StabiliTrak
®.
For information on StabiliTrak®, seeStabiliTrak®System
on page 4-6.
Use this dial to shift into and out of four-wheel drive.You can choose among �ve driving settings:
Indicator lights in the switches show you which setting
you are in. The indicator lights will come on brie�y when
you turn on the ignition and the last chosen setting
will stay on. If the lights do not come on, you should take
your vehicle in for service. An indicator light will �ash
while shifting. Fast �ashing means the conditions
were not met to make the desired shift, typically the
vehicle was going too fast, the automatic transmission
was not in neutral. Slow �ashing means the shift is
in progress. It will stay on when the shift is completed.
If for some reason the transfer case cannot make a
requested shift, it will return to the last chosen setting.
2
m(Two-Wheel Drive High):This setting is used for
driving in most street and highway situations. Your
front axle is not engaged in two-wheel drive. This setting
also provides the best fuel economy.
AUTO (Automatic Four-Wheel Drive):This setting is
ideal for use when road surface traction conditions
are variable. When driving your vehicle in AUTO, the
front axle is engaged, but the vehicle’s power is primarily
sent to the rear wheels. When the vehicle’s software
determines a need for more traction, the system
will transfer more power to the front wheels. Driving in
this mode results in slightly lower fuel economy than
Two-Wheel Drive High.
2-37
Page 175 of 538
Instrument Panel Overview...............................3-4
Hazard Warning Flashers................................3-6
Other Warning Devices...................................3-6
Horn .............................................................3-6
Tilt Wheel.....................................................3-6
Turn Signal/Multifunction Lever.........................3-7
Turn and Lane-Change Signals........................3-7
Headlamp High/Low-Beam Changer..................3-8
Flash-to-Pass.................................................3-8
Windshield Wipers..........................................3-9
Rainsense™ II Wipers.....................................3-9
Windshield Washer.......................................3-10
Rear Window Wiper/Washer...........................3-11
Cruise Control..............................................3-12
Exterior Lamps.............................................3-14
Headlamps on Reminder................................3-15
Daytime Running Lamps (DRL).......................3-16
Automatic Headlamp System..........................3-16
Fog Lamps ..................................................3-17
Auxiliary Roof Mounted Lamp.........................3-18
Instrument Panel Brightness...........................3-18
Dome Lamps ...............................................3-18
Dome Lamp Override....................................3-19
Entry Lighting...............................................3-19
Exit Lighting.................................................3-19
Reading Lamps............................................3-19
Electric Power Management...........................3-19Battery Run-Down Protection..........................3-20
Accessory Power Outlet(s).............................3-20
Ashtray(s) and Cigarette Lighter......................3-21
Climate Controls............................................3-22
Climate Control System.................................3-22
Dual Automatic Climate Control System...........3-24
Outlet Adjustment.........................................3-30
Rear Air Conditioning and Heating System.......3-31
Rear Air Conditioning and Heating System
and Electronic Climate Controls...................3-32
Warning Lights, Gages, and Indicators............3-34
Instrument Panel Cluster................................3-35
Speedometer and Odometer...........................3-36
Trip Odometer..............................................3-36
Tachometer.................................................3-36
Safety Belt Reminders...................................3-36
Airbag Readiness Light..................................3-37
Passenger Airbag Status Indicator...................3-38
Charging System Light..................................3-40
Voltmeter Gage............................................3-40
Brake System Warning Light..........................3-41
Antilock Brake System (ABS) Warning Light.....3-42
StabiliTrak
®Indicator Light.............................3-43
Engine Coolant Temperature Gage..................3-43
Tire Pressure Light.......................................3-44
Malfunction Indicator Lamp.............................3-44
Section 3 Instrument Panel
3-1
Page 176 of 538
Oil Pressure Gage........................................3-47
Oil Pressure Light.........................................3-48
Security Light...............................................3-48
Fog Lamp Light............................................3-48
Cruise Control Light......................................3-49
Highbeam On Light.......................................3-49
Tow/Haul Mode Light....................................3-49
Fuel Gage...................................................3-49
Low Fuel Warning Light.................................3-50
Driver Information Center (DIC).......................3-51
DIC Operation and Displays
(With DIC Buttons)....................................3-51
DIC Operation and Displays
(Without DIC Buttons)................................3-56
DIC Warnings and Messages.........................3-59
DIC Vehicle Customization (With DIC Buttons). . . .3-67Audio System(s).............................................3-75
Setting the Clock..........................................3-76
Radio(s) (MP3).............................................3-78
Using an MP3 (Radio with CD
or Six-Disc CD Player)...............................3-95
Using an MP3 (Radio with CD
and DVD Player).......................................3-99
XM Radio Messages...................................3-104
Navigation/Radio System..............................3-105
Rear Seat Entertainment (RSE) System.........3-105
Rear Seat Audio (RSA)................................3-114
Theft-Deterrent Feature................................3-116
Audio Steering Wheel Controls......................3-116
Radio Reception.........................................3-117
Rear Side Window Antenna..........................3-118
XM™ Satellite Radio Antenna System............3-118
Section 3 Instrument Panel
3-2