2008 CHEVROLET SILVERADO service indicator
[x] Cancel search: service indicatorPage 1 of 596

Seats and Restraint Systems........................... 1-1
Front Seats
............................................... 1-2
Rear Seats
..............................................1-12
Safety Belts
.............................................1-14
Child Restraints
.......................................1-35
Airbag System
.........................................1-69
Restraint System Check
............................1-88
Features and Controls..................................... 2-1
Keys
........................................................ 2-3
Doors and Locks
......................................2-10
Windows
.................................................2-15
Theft-Deterrent Systems
............................2-18
Starting and Operating Your Vehicle
...........2-22
Mirrors
....................................................2-56
Object Detection Systems
..........................2-64
OnStar
®System
......................................2-67
Universal Home Remote System
................2-71
Storage Areas
.........................................2-78
Sunroof
..................................................2-82
Instrument Panel............................................. 3-1
Instrument Panel Overview
.......................... 3-4
Climate Controls
......................................3-25
Warning Lights, Gages, and Indicators
........3-36
Driver Information Center (DIC)
..................3-56
Audio System(s)
.......................................3-84Driving Your Vehicle....................................... 4-1
Your Driving, the Road, and Your Vehicle
..... 4-2
Towing
...................................................4-50
Service and Appearance Care.......................... 5-1
Service
..................................................... 5-4
Fuel
......................................................... 5-6
Checking Things Under the Hood
...............5-12
Rear Axle
...............................................5-52
Four-Wheel Drive
.....................................5-54
Front Axle
...............................................5-56
Noise Control System
...............................5-57
Headlamp Aiming
.....................................5-58
Bulb Replacement
....................................5-61
Windshield Wiper Blade Replacement
.........5-67
Tires
......................................................5-68
Appearance Care
...................................5-114
Vehicle Identi�cation
...............................5-124
Electrical System
....................................5-125
Capacities and Speci�cations
...................5-133
Maintenance Schedule..................................... 6-1
Maintenance Schedule
................................ 6-2
Customer Assistance Information.................... 7-1
Customer Assistance and Information
........... 7-2
Reporting Safety Defects
...........................7-14
Vehicle Data Recording and Privacy
...........7-16
Index................................................................ 1
2008 Chevrolet Silverado Owner ManualM
Page 135 of 596
Shifting In or Out of NEUTRAL
1. With the vehicle running and the engine at an idle
set the parking brake.
2. Place the transmission into NEUTRAL (N).
Shift the transfer case in one continuous motion into or
out of the NEUTRAL position.
Electronic Transfer Case
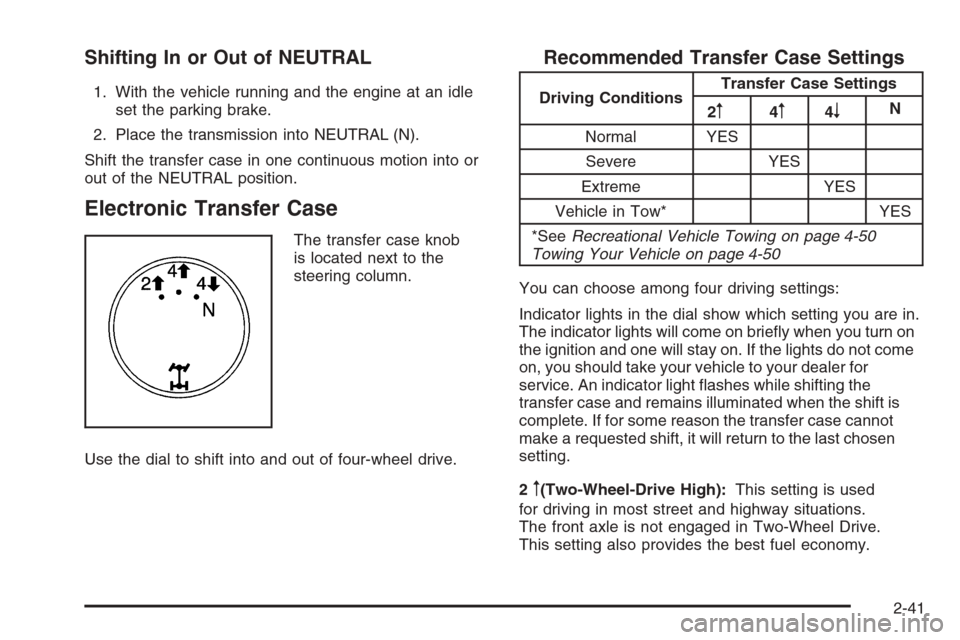
The transfer case knob
is located next to the
steering column.
Use the dial to shift into and out of four-wheel drive.
Recommended Transfer Case Settings
Driving ConditionsTransfer Case Settings
2m4m4nN
Normal YES
Severe YES
Extreme YES
Vehicle in Tow* YES
*SeeRecreational Vehicle Towing on page 4-50
Towing Your Vehicle on page 4-50
You can choose among four driving settings:
Indicator lights in the dial show which setting you are in.
The indicator lights will come on brie�y when you turn on
the ignition and one will stay on. If the lights do not come
on, you should take your vehicle to your dealer for
service. An indicator light �ashes while shifting the
transfer case and remains illuminated when the shift is
complete. If for some reason the transfer case cannot
make a requested shift, it will return to the last chosen
setting.
2
m(Two-Wheel-Drive High):This setting is used
for driving in most street and highway situations.
The front axle is not engaged in Two-Wheel Drive.
This setting also provides the best fuel economy.
2-41
Page 139 of 596
Shifting Out of NEUTRAL
To shift out of NEUTRAL do the following:
1. Set the parking brake and apply the regular
brake pedal.
2. Shift the transmission to NEUTRAL (N) and turn the
ignition to RUN with the engine off.
3. Turn the transfer case dial to Two-Wheel-Drive High.
After the transfer case has shifted out of NEUTRAL
the NEUTRAL light will go out.
4. Release the parking brake prior to moving the
vehicle.
Notice:Shifting the transmission into gear
before the requested mode indicator light has
stopped �ashing could damage the transfer case.
To help avoid damaging your vehicle, always
wait for the mode indicator lights to stop �ashing
before shifting the transmission into gear.
5. Start the engine and shift the transmission to the
desired position.
Excessively shifting the transfer case into or out of the
different modes may cause the transfer case to enter the
shift protection mode. This will protect the transfer case
from possible damage and will only allow the transfer
case to respond to one shift per 10 seconds. The transfer
case may stay in this mode for up to three minutes.
Automatic Transfer Case
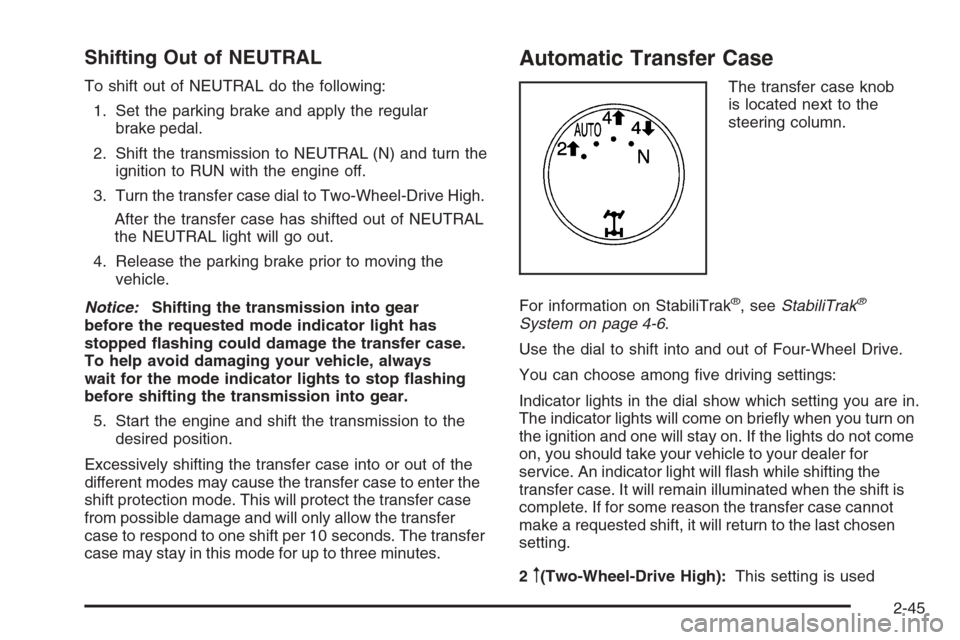
The transfer case knob
is located next to the
steering column.
For information on StabiliTrak
®, seeStabiliTrak®
System on page 4-6.
Use the dial to shift into and out of Four-Wheel Drive.
You can choose among �ve driving settings:
Indicator lights in the dial show which setting you are in.
The indicator lights will come on brie�y when you turn on
the ignition and one will stay on. If the lights do not come
on, you should take your vehicle to your dealer for
service. An indicator light will �ash while shifting the
transfer case. It will remain illuminated when the shift is
complete. If for some reason the transfer case cannot
make a requested shift, it will return to the last chosen
setting.
2
m(Two-Wheel-Drive High):This setting is used
2-45
Page 150 of 596
Mirrors
Manual Rearview Mirror
Adjust the mirror to see clearly behind your vehicle.
Hold the mirror in the center to move it up or down and
side to side. Adjust the mirror to avoid glare from the
lamps behind you. Push the tab forward for daytime
use and pull it for nighttime use.
Automatic Dimming Rearview Mirror
with OnStar
®, Compass and
Temperature Display
Your vehicle may have this feature. When on, the
automatic dimming mirror dims to the proper level to
minimize glare from lights behind you after dark.
The mirror has a dual display in the upper right corner
of the mirror face that shows the compass reading
and the outside temperature.
Control buttons for the OnStar
®system are at the bottom
of the mirror. SeeOnStar®System on page 2-67for more
information about the services OnStar®provides.
P(On/Off):This is the on/off button.
Temperature and Compass Display
Press the on/off button, located to the far left, brie�y to
turn the compass/temperature display on or off.
If the display reads CAL, the compass needs to be
calibrated. For more information, see “Compass
Calibration” following.
To adjust between Fahrenheit and Celsius:
1. Press and hold the on/off button for approximately
four seconds until either a �ashing F or C appears.
2. Press the button again to change the display to the
desired unit of measurement. After approximately
four seconds of inactivity, the new unit will be locked
in and the compass/temperature display will return.
If an abnormal temperature reading is displayed for
an extended period of time, see your dealer/retailer.
Under certain circumstances, a delay in updating
the temperature is normal.
Automatic Dimming Mirror Operation
The automatic dimming mirror comes on each time
the ignition is turned to start. To turn the automatic
dimming feature off or back on, press the on/off button.
The indicator light on the mirror is lit when the
automatic dimming feature is on.
2-56
Page 165 of 596
Universal Home Remote
System
The Universal Home Remote System provides a way to
replace up to three hand-held Radio-Frequency (RF)
transmitters used to activate devices such as garage
door openers, security systems, and home lighting.
This device complies with Part 15 of the FCC Rules.
Operation is subject to the following two conditions:
1. This device may not cause harmful interference.
2. This device must accept any interference received,
including interference that may cause undesired
operation.
This device complies with RSS-210 of Industry Canada.
Operation is subject to the following two conditions:
1. This device may not cause interference.
2. This device must accept any interference received,
including interference that may cause undesired
operation of the device.
Changes or modi�cations to this system by other than
an authorized service facility could void authorization to
use this equipment.
Universal Home Remote System
Operation (With Three Round LED)
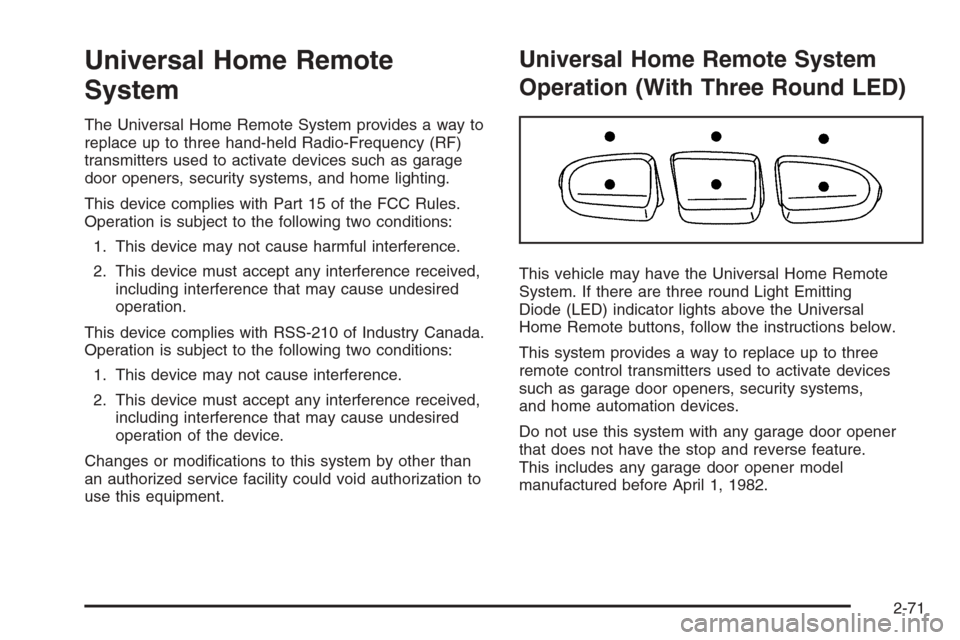
This vehicle may have the Universal Home Remote
System. If there are three round Light Emitting
Diode (LED) indicator lights above the Universal
Home Remote buttons, follow the instructions below.
This system provides a way to replace up to three
remote control transmitters used to activate devices
such as garage door openers, security systems,
and home automation devices.
Do not use this system with any garage door opener
that does not have the stop and reverse feature.
This includes any garage door opener model
manufactured before April 1, 1982.
2-71
Page 198 of 596
Puddle Lamps
If your vehicle has puddle lamps, they come on when
the unlock button on the Remote Keyless Entry (RKE)
Transmitter is pressed. The lamps time out or turn
off once the engine is started.
Fog Lamps
-(Fog Lamps):If your vehicle has fog lamps, the
control is located next to the exterior lamps control
on the instrument panel, to the left of the steering
column.
The ignition must be in the ON/RUN position for the fog
lamps to come on.
Press the button to turn the fog lamps on or off. A light
will come on in the instrument panel cluster.
When the fog lamps are turned on, the parking lamps
automatically turn on.
When the headlamps are changed to high-beam, the
fog lamps also go off. When the high-beam headlamps
are turned off, the fog lamps will come on again.
Some localities have laws that require the headlamps to
be on along with the fog lamps.
Auxiliary Roof Mounted Lamp
If your vehicle has this feature, this button includes
wiring provisions for a dealer or a quali�ed service
center to install an auxiliary roof lamp.
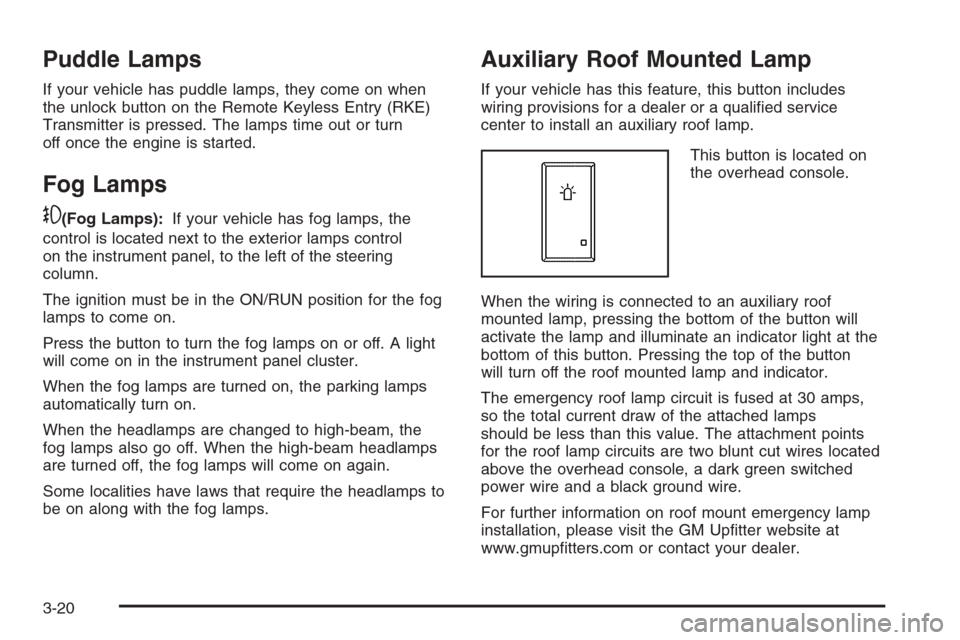
This button is located on
the overhead console.
When the wiring is connected to an auxiliary roof
mounted lamp, pressing the bottom of the button will
activate the lamp and illuminate an indicator light at the
bottom of this button. Pressing the top of the button
will turn off the roof mounted lamp and indicator.
The emergency roof lamp circuit is fused at 30 amps,
so the total current draw of the attached lamps
should be less than this value. The attachment points
for the roof lamp circuits are two blunt cut wires located
above the overhead console, a dark green switched
power wire and a black ground wire.
For further information on roof mount emergency lamp
installation, please visit the GM Up�tter website at
www.gmup�tters.com or contact your dealer.
3-20
Page 220 of 596
When you manually turn the right front passenger’s
airbag off using the airbag on-off switch in the glove box,
the indicator light OFF or the off symbol will come on
and stay on to remind you that the airbag has been
turned off. This light will go off when you turn the airbag
on. SeeAirbag Off Switch on page 1-78for more on
this, including important safety information.
{CAUTION:
If the right front passenger’s airbag is turned off
for a person who is not in a risk group identi�ed
by the national government, that person will not
have the extra protection of an airbag. In a
crash, the airbag will not be able to in�ate and
help protect the person sitting there.
Do not turn off the passenger’s airbag unless
the person sitting there is in a risk group
identi�ed by the national government.
SeeAirbag Off Switch on page 1-78for more on
this, including important safety information.
{CAUTION:
If the airbag readiness light ever comes on
when you have turned off the airbag, it means
that something may be wrong with the airbag
system. The right front passenger’s airbag
could in�ate even though the switch is off.
If this ever happens, do not let anyone whom
the national government has identi�ed as a
member of a passenger airbag risk group
sit in the right front passenger’s position
(for example, do not secure a rear-facing child
restraint in the right front passenger’s seat)
until you have your vehicle serviced. SeeAirbag
Off Switch on page 1-78andAirbag Readiness
Light on page 3-40for more on this, including
important safety information.
If the word ON or the on symbol is lit, it means that
the right front passenger’s frontal airbag is enabled
(may in�ate). SeeAirbag Off Switch on page 1-78for
more on this, including important safety information.
If, after several seconds, both status indicator lights
remain on, or if there are no lights at all, there may be
a problem with the lights or the airbag on-off switch.
See your dealer/retailer for service.
3-42
Page 222 of 596
{CAUTION:
Even though the passenger sensing system is
designed to turn off the right front passenger’s
frontal airbag if the system detects a rear-facing
child restraint, no system is fail-safe, and no
one can guarantee that an airbag will not deploy
under some unusual circumstance, even
though it is turned off. We recommend that
rear-facing child restraints be secured in the
rear seat, even if the airbag is off.
If the word OFF or the off symbol is lit on the airbag
status indicator, it means that the passenger sensing
system has turned off the right front passenger’s frontal
airbag. SeePassenger Sensing System on page 1-81
for more on this, including important safety information.If, after several seconds, both status indicator lights
remain on, or if there are no lights at all, there may be
a problem with the lights or the passenger sensing
system. See your dealer/retailer for service.
{CAUTION:
If the airbag readiness light in the instrument
panel cluster ever comes on and stays on,
it means that something may be wrong with
the airbag system. If this ever happens,
have the vehicle serviced promptly, because
an adult-size person sitting in the right front
passenger’s seat may not have the protection of
the airbag(s). SeeAirbag Readiness Light on
page 3-40for more on this, including important
safety information.
3-44