2008 CHEVROLET MALIBU change time
[x] Cancel search: change timePage 219 of 412
Antilock Brake System (ABS)
Your vehicle has the Antilock Brake System (ABS), an
advanced electronic braking system that will help
prevent a braking skid.
When you start the engine and begin to drive away,
ABS will check itself. You might hear a momentary
motor or clicking noise while this test is going on, and
you might even notice that the brake pedal moves
a little. This is normal.
If there is a problem with
ABS, this warning light will
stay on. SeeAntilock Brake
System (ABS) Warning
Light on page 3-38.
Let us say the road is wet and you are driving safely.
Suddenly, an animal jumps out in front of you. You slam
on the brakes and continue braking. Here is what
happens with ABS:
A computer senses that wheels are slowing down.
If one of the wheels is about to stop rolling, the computer
will separately work the brakes at each wheel.ABS can change the brake pressure faster than any
driver could. The computer is programmed to make the
most of available tire and road conditions. This can
help you steer around the obstacle while braking hard.
As you brake, the computer keeps receiving updates
on wheel speed and controls braking pressure
accordingly.
Remember: ABS does not change the time you need to
get your foot up to the brake pedal or always decrease
stopping distance. If you get too close to the vehicle
in front of you, you will not have time to apply the brakes
if that vehicle suddenly slows or stops. Always leave
enough room up ahead to stop, even though you
have ABS.
Using ABS
Do not pump the brakes. Just hold the brake pedal
down �rmly and let antilock work for you. You might
hear the antilock pump or motor operate, and feel the
brake pedal pulsate, but this is normal.
Braking in Emergencies
With ABS, you can steer and brake at the same time.
In many emergencies, steering can help you more than
even the very best braking.
4-5
Page 244 of 412
Towing a Trailer
{CAUTION:
If you do not use the correct equipment and
drive properly, you can lose control when you
pull a trailer. For example, if the trailer is too
heavy, the brakes may not work well — or even
at all. You and your passengers could be
seriously injured. You may also damage your
vehicle; the resulting repairs would not be
covered by your warranty. Pull a trailer only if
you have followed all the steps in this section.
Ask your dealer/retailer for advice and
information about towing a trailer with your
vehicle.
Notice:Pulling a trailer improperly can damage
your vehicle and result in costly repairs not covered
by your warranty. To pull a trailer correctly, follow
the advice in this part and see your dealer/retailer
for important information about towing a trailer with
your vehicle.Your vehicle can tow a trailer if it is equipped with the
proper trailer towing equipment. To identify the trailering
capacity of your vehicle, you should read the information
in “Weight of the Trailer” that appears later in this
section. Trailering is different than just driving your
vehicle by itself. Trailering means changes in handling,
durability and fuel economy. Successful, safe trailering
takes correct equipment, and it has to be used properly.
That’s the reason for this part. In it are many
time-tested, important trailering tips and safety rules.
Many of these are important for your safety and that of
your passengers. So please read this section carefully
before you pull a trailer.
Load-pulling components such as the engine,
transmission, rear axle, wheel assemblies and tires are
forced to work harder against the drag of the added
weight. The engine is required to operate at relatively
higher speeds and under greater loads, generating extra
heat. What’s more, the trailer adds considerably to
wind resistance, increasing the pulling requirements.
4-30
Page 248 of 412
Before you start, check the trailer hitch and platform
(and attachments), safety chains, electrical connector,
lamps, tires and mirror adjustment. If the trailer has
electric brakes, start your vehicle and trailer moving and
then apply the trailer brake controller by hand to be
sure the brakes are working. This lets you check your
electrical connection at the same time.
During your trip, check occasionally to be sure that the
load is secure, and that the lamps and any trailer
brakes are still working.
Following Distance
Stay at least twice as far behind the vehicle ahead as
you would when driving your vehicle without a trailer.
This can help you avoid situations that require
heavy braking and sudden turns.
Passing
You’ll need more passing distance up ahead when
you’re towing a trailer. And, because you’re a good deal
longer when towing a trailer, you’ll need to go much
farther beyond the passed vehicle before you can return
to your lane.
Backing Up
Hold the bottom of the steering wheel with one hand.
Then, to move the trailer to the left, just move that hand
to the left. To move the trailer to the right, move your
hand to the right. Always back up slowly and, if possible,
have someone guide you.
Making Turns
Notice:Making very sharp turns while trailering
could cause the trailer to come in contact with the
vehicle. Your vehicle could be damaged. Avoid
making very sharp turns while trailering.
When you’re turning with a trailer, make wider turns than
normal. Do this so your trailer won’t strike soft shoulders,
curbs, road signs, trees or other objects. Avoid jerky or
sudden maneuvers. Signal well in advance.
Turn Signals When Towing a Trailer
When you tow a trailer, your vehicle may need a
different turn signal �asher and/or extra wiring. See your
retailer if you need information. The arrows on your
instrument panel will �ash whenever you signal a turn or
lane change. Properly hooked up, the trailer lamps will
also �ash, telling other drivers you’re about to turn,
change lanes or stop.
4-34
Page 272 of 412
Engine Oil Additives
Do not add anything to the oil. The recommended
oils with the starburst symbol that meet GM Standard
GM6094M are all you need for good performance and
engine protection.
Engine Oil Life System
When to Change Engine Oil
Your vehicle has a computer system that lets you know
when to change the engine oil and �lter. This is based
on engine revolutions and engine temperature, and not
on mileage. Based on driving conditions, the mileage
at which an oil change will be indicated can vary
considerably. For the oil life system to work properly,
you must reset the system every time the oil is changed.When the system has calculated that oil life has been
diminished, it will indicate that an oil change is necessary.
A CHANGE OIL SOON message will come on. SeeDIC
Warnings and Messages on page 3-48. Change the oil
as soon as possible within the next 600 miles (1 000 km).
It is possible that, if you are driving under the best
conditions, the oil life system might not indicate that an oil
change is necessary for over a year. However, the engine
oil and �lter must be changed at least once a year and at
this time the system must be reset. Your dealer/retailer
has trained service people who will perform this work
using genuine parts and reset the system. It is also
important to check the oil regularly and keep it at the
proper level.
If the system is ever reset accidentally, you must
change the oil at 3,000 miles (5 000 km) since your
last oil change. Remember to reset the oil life system
whenever the oil is changed.
5-22
Page 292 of 412
Replacing Brake System Parts
The braking system on a vehicle is complex. Its many
parts have to be of top quality and work well together if
the vehicle is to have really good braking. Your vehicle
was designed and tested with top-quality brake parts.
When you replace parts of the braking system — for
example, when the brake linings wear down and you
need new ones put in — be sure you get new approved
replacement parts. If you do not, the brakes might not
work properly. For example, if someone puts in brake
linings that are wrong for your vehicle, the balance
between the front and rear brakes can change — for
the worse. The braking performance you have come to
expect can change in many other ways if someone puts
in the wrong replacement brake parts.
Battery
Your vehicle has a maintenance free battery. When
it is time for a new battery, see your dealer/retailer
for one that has the replacement number shown on
the original battery’s label. SeeEngine Compartment
Overview on page 5-14for battery location.
Warning:Battery posts, terminals, and related
accessories contain lead and lead compounds,
chemicals known to the State of California to cause
cancer and reproductive harm. Wash hands after
handling.
Vehicle Storage
{CAUTION:
Batteries have acid that can burn you and
gas that can explode. You can be badly hurt
if you are not careful. SeeJump Starting on
page 5-43for tips on working around a battery
without getting hurt.
Infrequent Usage: If you drive your vehicle infrequently,
remove the black, negative (−) cable from the battery.
This will help keep the battery from running down.
Extended Storage: For extended storage of your vehicle,
remove the black, negative (−) cable from the battery
or use a battery trickle charger. This will help maintain
the charge of the battery over an extended period
of time.
5-42
Page 318 of 412
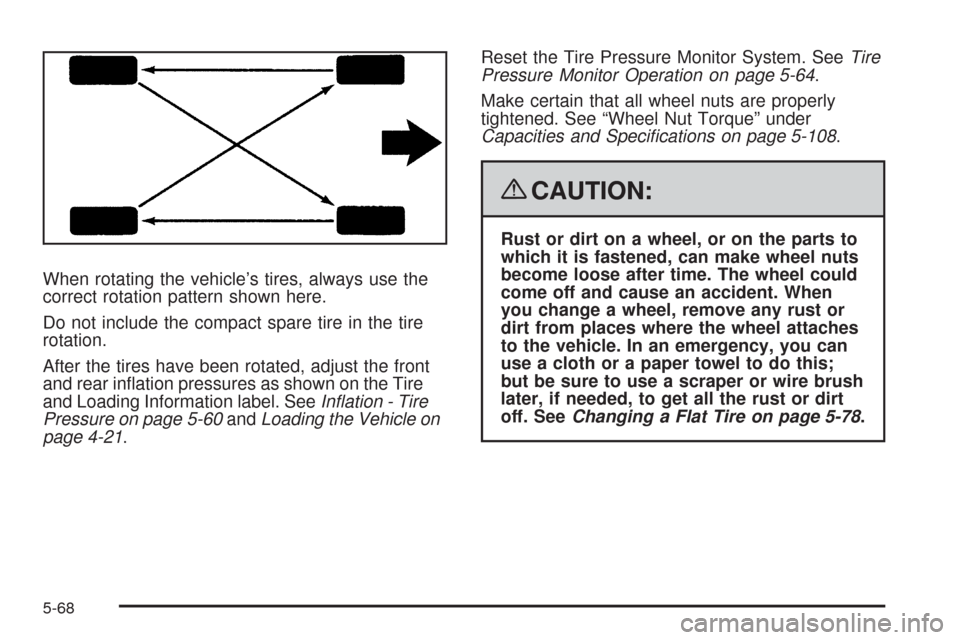
When rotating the vehicle’s tires, always use the
correct rotation pattern shown here.
Do not include the compact spare tire in the tire
rotation.
After the tires have been rotated, adjust the front
and rear in�ation pressures as shown on the Tire
and Loading Information label. SeeInflation - Tire
Pressure on page 5-60andLoading the Vehicle on
page 4-21.Reset the Tire Pressure Monitor System. SeeTire
Pressure Monitor Operation on page 5-64.
Make certain that all wheel nuts are properly
tightened. See “Wheel Nut Torque” under
Capacities and Specifications on page 5-108.
{CAUTION:
Rust or dirt on a wheel, or on the parts to
which it is fastened, can make wheel nuts
become loose after time. The wheel could
come off and cause an accident. When
you change a wheel, remove any rust or
dirt from places where the wheel attaches
to the vehicle. In an emergency, you can
use a cloth or a paper towel to do this;
but be sure to use a scraper or wire brush
later, if needed, to get all the rust or dirt
off. SeeChanging a Flat Tire on page 5-78.
5-68
Page 334 of 412
{CAUTION:
Rust or dirt on a wheel, or on the parts to
which it is fastened, can make wheel nuts
become loose after time. The wheel could
come off and cause an accident. When you
change a wheel, remove any rust or dirt from
places where the wheel attaches to the vehicle.
In an emergency, you can use a cloth or a
paper towel to do this; but be sure to use a
scraper or wire brush later, if needed, to get all
the rust or dirt off. SeeChanging a Flat Tire on
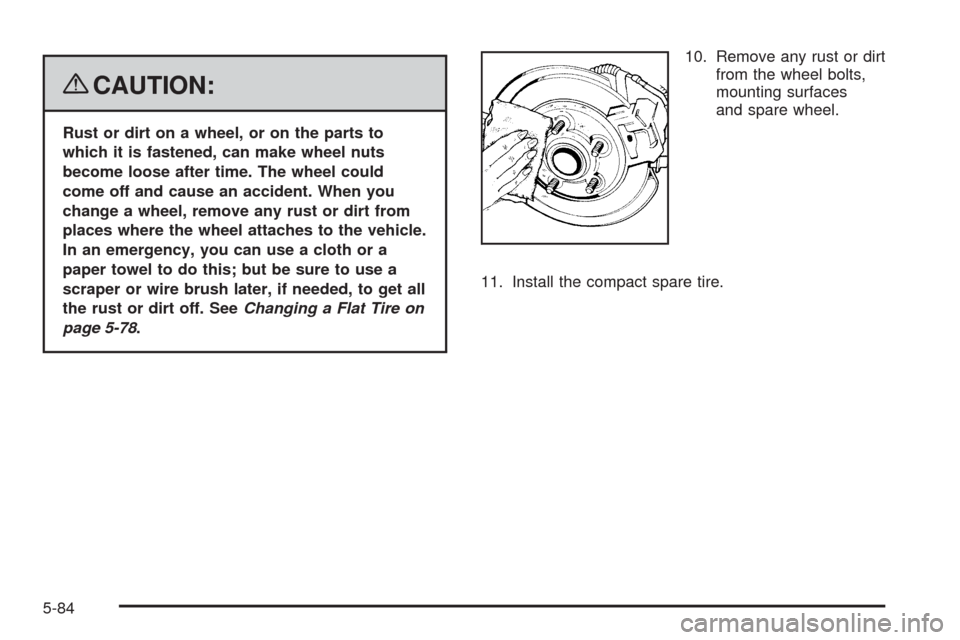
page 5-78.10. Remove any rust or dirt
from the wheel bolts,
mounting surfaces
and spare wheel.
11. Install the compact spare tire.
5-84
Page 341 of 412
To clean:
1. Saturate a lint-free, clean white cloth with water or
club soda.
2. Wring the cloth to remove excess moisture.
3. Start on the outside edge of the soil and gently rub
toward the center. Continue cleaning, using a clean
area of the cloth each time it becomes soiled.
4. Continue to gently rub the soiled area until the
cleaning cloth remains clean.
5. If the soil is not completely removed, use a mild
soap solution and repeat the cleaning process
that was used with plain water.
If any of the soil remains, a commercial fabric cleaner
or spot lifter may be necessary. When a commercial
upholstery cleaner or spot lifter is to be used, test
a small hidden area for colorfastness �rst. If the
locally cleaned area gives any impression that a
ring formation may result, clean the entire surface.
After the cleaning process has been completed, a paper
towel can be used to blot excess moisture from the
fabric or carpet.Instrument Panel, Vinyl, and Other
Plastic Surfaces
A soft cloth dampened with water may be used to
remove dust. If a more thorough cleaning is necessary, a
clean soft cloth dampened with a mild soap solution can
be used to gently remove dust and dirt. Never use spot
lifters or removers on plastic surfaces. Many commercial
cleaners and coatings that are sold to preserve and
protect soft plastic surfaces may permanently change
the appearance and feel of your interior and are not
recommended. Do not use silicone or wax-based
products, or those containing organic solvents to
clean your vehicle’s interior because they can alter
the appearance by increasing the gloss in a non-uniform
manner.
Some commercial products may increase gloss on
your instrument panel. The increase in gloss may cause
annoying re�ections in the windshield and even make it
difficult to see through the windshield under certain
conditions.
5-91