2008 CHEVROLET EXPRESS PASSANGER radiator
[x] Cancel search: radiatorPage 278 of 414

If the overheat warning continues, there is one more
thing you can try. You can add the proper coolant
mixture directly to the radiator, but be sure the cooling
system is cool before you do it.
{CAUTION:
Steam and scalding liquids from a hot cooling
system can blow out and burn you badly. They
are under pressure, and if you turn the radiator
pressure cap — even a little — they can come
out at high speed. Never turn the cap when the
cooling system, including the radiator pressure
cap, is hot. Wait for the cooling system and
radiator pressure cap to cool if you ever have
to turn the pressure cap.
How to Add Coolant to the Radiator for
Gasoline Engines
If your vehicle has a diesel engine, see “How to Add
Coolant to the Radiator” under “Van Models” in the
Cooling System section of the DURAMAX
®Diesel
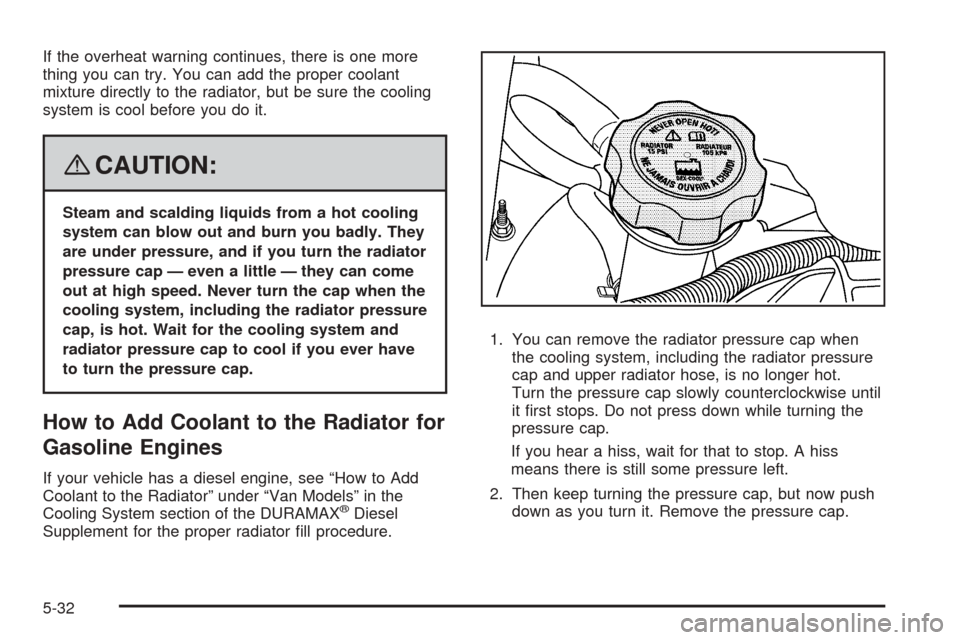
Supplement for the proper radiator fill procedure.1. You can remove the radiator pressure cap when
the cooling system, including the radiator pressure
cap and upper radiator hose, is no longer hot.
Turn the pressure cap slowly counterclockwise until
it first stops. Do not press down while turning the
pressure cap.
If you hear a hiss, wait for that to stop. A hiss
means there is still some pressure left.
2. Then keep turning the pressure cap, but now push
down as you turn it. Remove the pressure cap.
5-32
Page 279 of 414

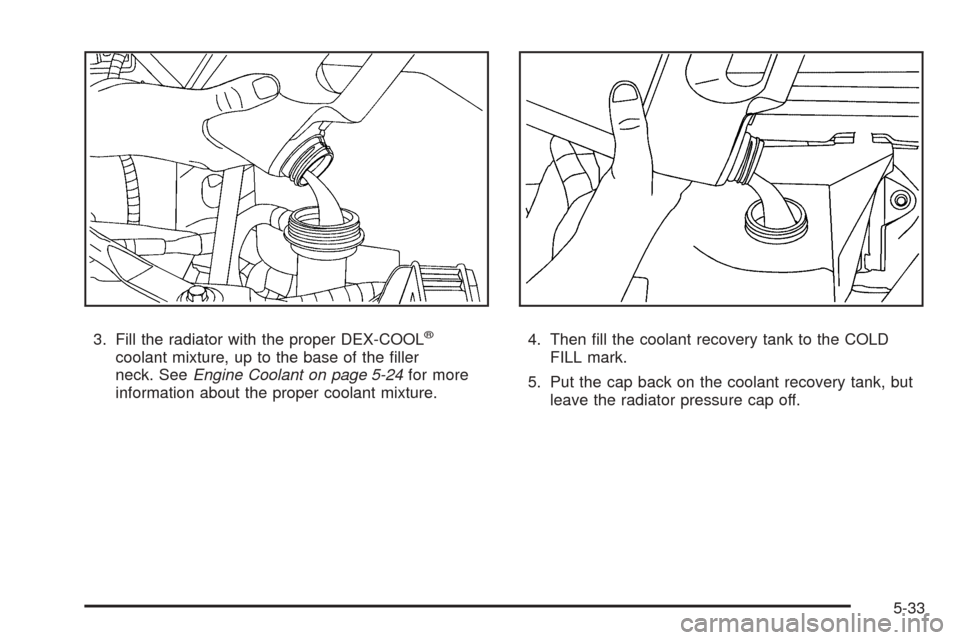
3. Fill the radiator with the proper DEX-COOL®
coolant mixture, up to the base of the filler
neck. SeeEngine Coolant on page 5-24for more
information about the proper coolant mixture.4. Then fill the coolant recovery tank to the COLD
FILL mark.
5. Put the cap back on the coolant recovery tank, but
leave the radiator pressure cap off.
5-33
Page 280 of 414

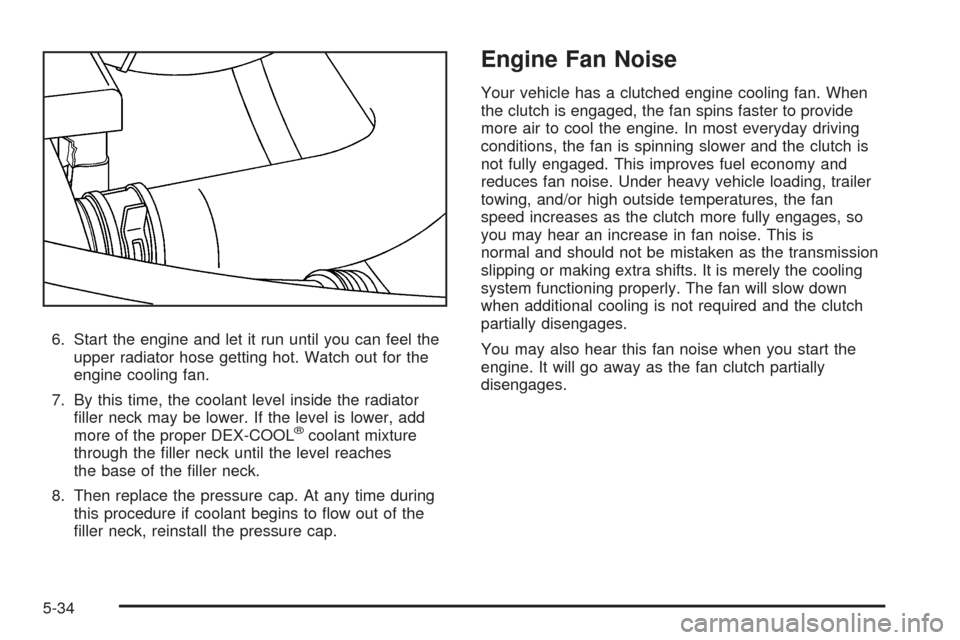
6. Start the engine and let it run until you can feel the
upper radiator hose getting hot. Watch out for the
engine cooling fan.
7. By this time, the coolant level inside the radiator
filler neck may be lower. If the level is lower, add
more of the proper DEX-COOL
®coolant mixture
through the filler neck until the level reaches
the base of the filler neck.
8. Then replace the pressure cap. At any time during
this procedure if coolant begins to flow out of the
filler neck, reinstall the pressure cap.
Engine Fan Noise
Your vehicle has a clutched engine cooling fan. When
the clutch is engaged, the fan spins faster to provide
more air to cool the engine. In most everyday driving
conditions, the fan is spinning slower and the clutch is
not fully engaged. This improves fuel economy and
reduces fan noise. Under heavy vehicle loading, trailer
towing, and/or high outside temperatures, the fan
speed increases as the clutch more fully engages, so
you may hear an increase in fan noise. This is
normal and should not be mistaken as the transmission
slipping or making extra shifts. It is merely the cooling
system functioning properly. The fan will slow down
when additional cooling is not required and the clutch
partially disengages.
You may also hear this fan noise when you start the
engine. It will go away as the fan clutch partially
disengages.
5-34
Page 297 of 414

4. Lift the inboard side of the headlamp to release the
inboard tab from the radiator support.
5. Lift the outboard side of the headlamp to release
the outboard tab from the radiator support.
6. Lower the headlamp to allow the vertical adjustor to
clear the tie bar.
7. Turn the headlamp forward and upward to remove
it from the grille.
8. Turn the bulb connector counterclockwise and pull it
out of the housing.
9. Without removing the headlamp assembly itself,
remove the bulb socket from the back of the
headlamp on the driver’s side.
10. Turn the bulb counterclockwise one quarter turn to
remove it from the socket.
11. On the passenger’s side, turn the bulb clockwise
one turn.12. Install the new bulb into the socket then reinstall it
into the headlamp assembly.
13. Reverse the steps to reinstall the headlamp
assembly.
5-51
Page 372 of 414

Maintenance Footnotes
(Gasoline Engine)
This maintenance section applies to vehicles with a
gasoline engine. If your vehicle has a diesel engine, see
the maintenance schedule section in the DURAMAX
®
Diesel manual.
†The U.S. Environmental Protection Agency or the
California Air Resources Board has determined that the
failure to perform this maintenance item will not nullify
the emission warranty or limit recall liability prior to the
completion of the vehicle’s useful life. We, however, urge
that all recommended maintenance services be
performed at the indicated intervals and the maintenance
be recorded.
#Lubricate the front suspension, kingpin bushings,
steering linkage, and rear driveline center splines.
(a)Visually inspect brake lines and hoses for proper
hook-up, binding, leaks, cracks, chafing, etc. Inspect
disc brake pads for wear and rotors for surface
condition. Inspect other brake parts, including calipers,
parking brake, etc.
(b)Visually inspect front and rear suspension and
steering system for damaged, loose, or missing parts,
signs of wear, or lack of lubrication. Inspect power
steering lines and hoses for proper hook-up, binding,
leaks, cracks, chafing, etc.(c)Visually inspect hoses and have them replaced if
they are cracked, swollen, or deteriorated. Inspect all
pipes, fittings, and clamps; replace with genuine parts as
needed. To help ensure proper operation, a pressure test
of the cooling system and pressure cap and cleaning the
outside of the radiator and air conditioning condenser is
recommended at least once a year.
(d)Inspect wiper blades for wear, cracking, or
contamination. Clean the windshield and wiper blades, if
contaminated. Replace wiper blades that are worn or
damaged. See Windshield Wiper Blade Replacement on
page 5-54andWindshield and Wiper Blades on
page 5-104for more information.
(e)Make sure the safety belt reminder light and safety
belt assemblies are working properly. Look for any
other loose or damaged safety belt system parts. If you
see anything that might keep a safety belt system from
doing its job, have it repaired. Have any torn or frayed
safety belts replaced. Also see Checking the Restraint
Systems on page 1-75.
(f)Lubricate all key lock cylinders, hood hinges, hood
prop rod pivot, hood latch assembly, secondary latch,
pivots, spring anchor, release pawl, rear compartment
hinges, latches, locks, fuel door hinge, and any moving
seat hardware. More frequent lubrication may be required
when exposed to a corrosive environment. Applying
silicone grease on weatherstrips with a clean cloth will
make them last longer, seal better, and not stick
or squeak.
6-8
Page 373 of 414

(g)Vehicles with Gross Vehicle Weight Rating (GVWR)
above 10,000 lbs (4 536 kg) only: Inspect shields for
damage or looseness. Adjust or replace as required.
This is a Noise Emission Control Service. Applicable to
vehicles sold in the United States and recommended
for vehicles sold in Canada.
(h)Change automatic transmission fluid and filter if the
vehicle is mainly driven under one or more of these
conditions:
-In heavy city traffic where the outside temperature
regularly reaches 90°F (32°C) or higher.
-In hilly or mountainous terrain.
-When doing frequent trailer towing.
-Uses such as found in taxi, police, or delivery
service.
(i)Drain, flush, and refill cooling system. This service
can be complex; you should have your dealer/retailer
perform this service. See Engine Coolant on page 5-24
for what to use. Inspect hoses. Clean radiator,
condenser, pressure cap, and filler neck. Pressure test
the cooling system and pressure cap.
(j)A fluid loss in any vehicle system could indicate a
problem. Have the system inspected and repaired and
the fluid level checked. Add fluid if needed.(k)Inspect system. Check all fuel and vapor lines and
hoses for proper hook-up, routing, and condition. Check
that the purge valve works properly, if equipped.
Replace as needed.
(l)If you drive regularly under dusty conditions, inspect
the filter at each engine oil change.
(m)Check system for interference or binding and for
damaged or missing parts. Replace parts as needed.
Replace any components that have high effort or
excessive wear. Do not lubricate accelerator or cruise
control cables.
(n)Visually inspect belt for fraying, excessive cracks, or
obvious damage. Replace belt if necessary.
Owner Checks and Services
These owner checks and services should be performed
at the intervals specified to help ensure the safety,
dependability, and emission control performance of your
vehicle. Your dealer/retailer can assist you with these
checks and services.
Be sure any necessary repairs are completed at once.
Whenever any fluids or lubricants are added to your
vehicle, make sure they are the proper ones, as shown
inRecommended Fluids and Lubricants on page 6-13.
6-9
Page 411 of 414

Power
Door Locks.................................................. 2-7
Retained Accessory (RAP)............................2-21
Seat............................................................ 1-3
Steering Fluid.............................................5-35
Windows....................................................2-14
Privacy..........................................................7-16
Event Data Recorders..................................7-17
Navigation System.......................................7-18
OnStar.......................................................7-18
Radio Frequency Identification.......................7-18
Programmable Automatic Door Locks.................. 2-7
R
Radiator Pressure Cap....................................5-27
Radio Frequency Identification (RFID), Privacy....7-18
Radios..........................................................3-66
Radio(s)........................................................3-70
Radios
Reception...................................................3-88
Setting the Clock.........................................3-68
Theft-Deterrent............................................3-86
Reading Lamps..............................................3-17
Rear Air Conditioning and Heating System.........3-23
Rear Axle......................................................5-47
Locking........................................................ 4-5
Rear Door Security Locks.................................. 2-8
Rear Doors....................................................2-12Rear Heating System......................................3-22
Rear Seat Operation......................................... 1-6
Rearview Mirrors.............................................2-33
Reclining Seatbacks.......................................... 1-3
Recommended Fluids and Lubricants.................6-13
Recreational Vehicle Towing.............................4-26
Remote Keyless Entry (RKE) System.................. 2-3
Remote Keyless Entry (RKE) System,
Operation..................................................... 2-4
Removing the Flat Tire and Installing the
Spare Tire..................................................5-86
Removing the Spare Tire and Tools...................5-83
Replacement Bulbs.........................................5-54
Replacement Parts, Maintenance......................6-15
Reporting Safety Defects
Canadian Government..................................7-14
General Motors...........................................7-14
United States Government............................7-14
Restraint System Check
Checking the Restraint Systems....................1-75
Replacing Restraint System Parts After
a Crash..................................................1-76
Retained Accessory Power (RAP)......................2-21
Roadside
Assistance Program....................................... 7-6
Rocking Your Vehicle to Get it Out....................4-20
Routing, Engine Drive Belt...............................6-16
Running the Engine While Parked.....................2-32
9