2008 CHEVROLET EXPRESS CARGO VAN air condition
[x] Cancel search: air conditionPage 29 of 414
Safety Belt Pretensioners
If the GVWR (Gross Vehicle Weight Rating) of your
vehicle is below 8,500 lb (3 855 kg) then your vehicle
has safety belt pretensioners for the front occupants.
You can find the GVWR on the certification label on the
rear edge of the driver’s door. SeeLoading Your
Vehicle on page 4-20for more information.
Although you cannot see them, they are part of the
safety belt assembly. They can help tighten the safety
belts during the early stages of a moderate to severe
frontal, near frontal, or rear crash if the threshold
conditions for pretensioner activation are met. And, if
your vehicle has side impact airbags, safety belt
pretensioners can help tighten the safety belts in a side
crash or a rollover event.
Pretensioners work only once. If they activate in a
crash, you will need to get new ones, and probably other
new parts for your safety belt system. SeeReplacing
Restraint System Parts After a Crash on page 1-76.
Rear Safety Belt Comfort Guides
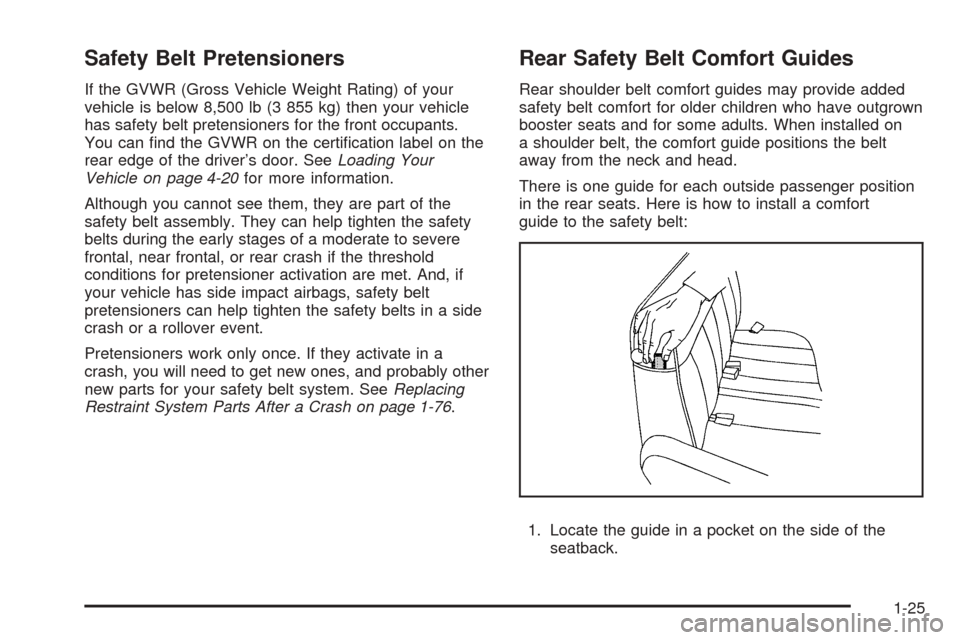
Rear shoulder belt comfort guides may provide added
safety belt comfort for older children who have outgrown
booster seats and for some adults. When installed on
a shoulder belt, the comfort guide positions the belt
away from the neck and head.
There is one guide for each outside passenger position
in the rear seats. Here is how to install a comfort
guide to the safety belt:
1. Locate the guide in a pocket on the side of the
seatback.
1-25
Page 52 of 414
7. Push and pull the child restraint in different
directions to be sure it is secure.
To remove the child restraint, unbuckle the vehicle’s
safety belt and let it go back all the way. If the top tether
is attached to a top tether anchor, disconnect it.
Securing a Child Restraint in the
Right Front Seat Position (With
Passenger Sensing System)
Your vehicle has airbags. A rear seat is a safer place to
secure a forward-facing child restraint. SeeWhere to
Put the Restraint on page 1-38.
In addition, your vehicle has a passenger sensing
system which is designed to turn off the right front
passenger’s frontal airbag under certain conditions. See
Passenger Sensing System on page 1-69and
Passenger Airbag Status Indicator on page 3-31for
more information on this, including important safety
information.
A label on your sun visor says, “Never put a rear-facing
child seat in the front.” This is because the risk to the
rear-facing child is so great, if the airbag deploys.
{CAUTION:
A child in a rear-facing child restraint can be
seriously injured or killed if the right front
passenger’s airbag in�ates. This is because
the back of the rear-facing child restraint
would be very close to the in�ating airbag.
Even though the passenger sensing system is
designed to turn off the right front passenger’s
frontal airbag if the system detects a
rear-facing child restraint, no system is
fail-safe, and no one can guarantee that an
airbag will not deploy under some unusual
circumstance, even though it is turned off. We
recommend that rear-facing child restraints be
secured in a rear seat, even if the airbag is off.
If you secure a forward-facing child restraint in
the right front seat, always move the front
passenger seat as far back as it will go. It is
better to secure the child restraint in a rear seat.
SeePassenger Sensing System on page 1-69
for additional information.
1-48
Page 70 of 414
Airbag Off Switch
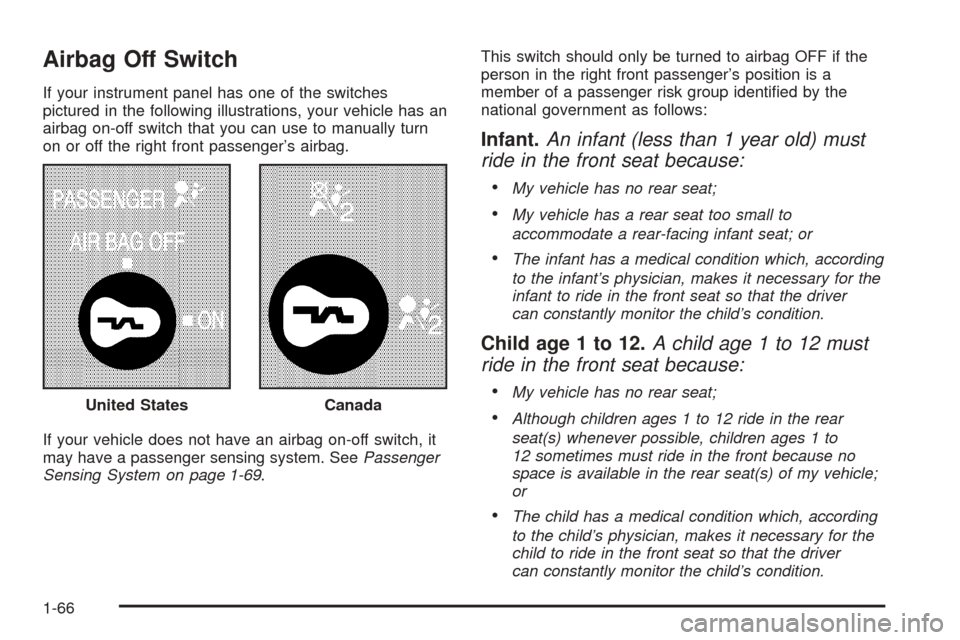
If your instrument panel has one of the switches
pictured in the following illustrations, your vehicle has an
airbag on-off switch that you can use to manually turn
on or off the right front passenger’s airbag.
If your vehicle does not have an airbag on-off switch, it
may have a passenger sensing system. SeePassenger
Sensing System on page 1-69.This switch should only be turned to airbag OFF if the
person in the right front passenger’s position is a
member of a passenger risk group identified by the
national government as follows:
Infant.An infant (less than 1 year old) must
ride in the front seat because:
•
My vehicle has no rear seat;
•My vehicle has a rear seat too small to
accommodate a rear-facing infant seat; or
•The infant has a medical condition which, according
to the infant’s physician, makes it necessary for the
infant to ride in the front seat so that the driver
can constantly monitor the child’s condition.
Child age 1 to 12.A child age 1 to 12 must
ride in the front seat because:
•
My vehicle has no rear seat;
•Although children ages 1 to 12 ride in the rear
seat(s) whenever possible, children ages 1 to
12 sometimes must ride in the front because no
space is available in the rear seat(s) of my vehicle;
or
•The child has a medical condition which, according
to the child’s physician, makes it necessary for the
child to ride in the front seat so that the driver
can constantly monitor the child’s condition. United States
Canada
1-66
Page 71 of 414
Medical Condition.A passenger has a
medical condition which, according to his or
her physician:
•
Causes the passenger airbag to pose a special risk
for the passenger; and
•Makes the potential harm from the passenger
airbag in a crash greater than the potential
harm from turning off the airbag and allowing the
passenger, even if belted, to hit the dashboard
or windshield in a crash.
{CAUTION:
If the right front passenger’s airbag is turned
off for a person who is not in a risk group
identi�ed by the national government, that
person will not have the extra protection of an
airbag. In a crash, the airbag will not be able to
in�ate and help protect the person sitting there.
Do not turn off the passenger’s airbag unless
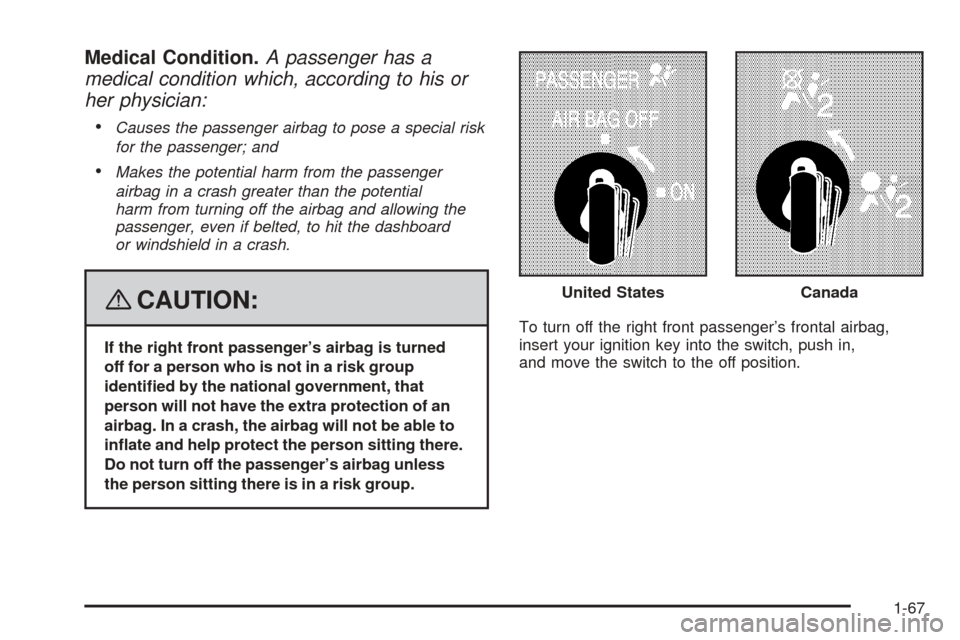
the person sitting there is in a risk group.To turn off the right front passenger’s frontal airbag,
insert your ignition key into the switch, push in,
and move the switch to the off position.United States
Canada
1-67
Page 73 of 414
Passenger Sensing System
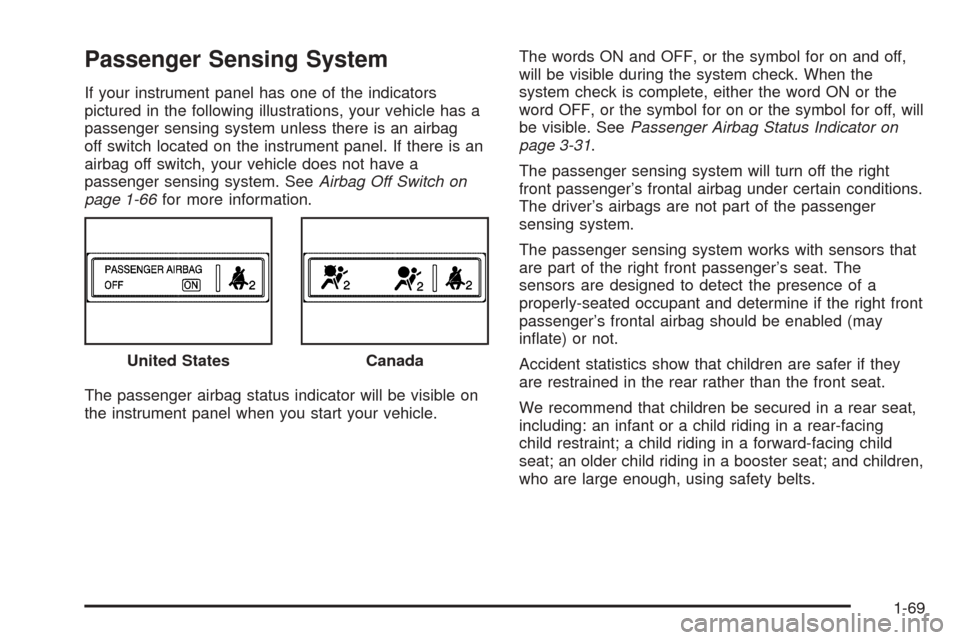
If your instrument panel has one of the indicators
pictured in the following illustrations, your vehicle has a
passenger sensing system unless there is an airbag
off switch located on the instrument panel. If there is an
airbag off switch, your vehicle does not have a
passenger sensing system. SeeAirbag Off Switch on
page 1-66for more information.
The passenger airbag status indicator will be visible on
the instrument panel when you start your vehicle.The words ON and OFF, or the symbol for on and off,
will be visible during the system check. When the
system check is complete, either the word ON or the
word OFF, or the symbol for on or the symbol for off, will
be visible. SeePassenger Airbag Status Indicator on
page 3-31.
The passenger sensing system will turn off the right
front passenger’s frontal airbag under certain conditions.
The driver’s airbags are not part of the passenger
sensing system.
The passenger sensing system works with sensors that
are part of the right front passenger’s seat. The
sensors are designed to detect the presence of a
properly-seated occupant and determine if the right front
passenger’s frontal airbag should be enabled (may
inflate) or not.
Accident statistics show that children are safer if they
are restrained in the rear rather than the front seat.
We recommend that children be secured in a rear seat,
including: an infant or a child riding in a rear-facing
child restraint; a child riding in a forward-facing child
seat; an older child riding in a booster seat; and children,
who are large enough, using safety belts. United States
Canada
1-69
Page 106 of 414
DRIVE (D):This position is for normal driving. It
provides the best fuel economy for your vehicle. If you
need more power for passing, and you are:
•Going less than about 35 mph (55 km/h), push your
accelerator pedal about halfway down.
•Going about 35 mph (55 km/h) or more, push the
accelerator all the way down.
You will shift down to the next gear and have more
power.
Downshifting the transmission in slippery road conditions
could result in skidding, see “Skidding” underLoss of
Control on page 4-11.
THIRD (3):This position is also used for normal driving.
However it reduces vehicle speed more than DRIVE (D)
without using your brakes. You might choose
THIRD (3) instead of DRIVE (D) when driving on hilly,
winding roads, when towing a trailer, so there is
less shifting between gears and when going down a
steep hill.
You should use THIRD (3) (or, as you need to, a lower
gear) when towing a trailer to minimize heat build-up
and extend the life of your transmission.SECOND (2):This position reduces vehicle speed even
more than THIRD (3) without using your brakes. You
can use SECOND (2) on hills. It can help control
your speed as you go down steep mountain roads, but
then you would also want to use your brakes off
and on.
You may use this feature for reducing torque to the rear
wheels when you are trying to start your vehicle from
a stop on slippery road surfaces.
FIRST (1): This position reduces vehicle speed even
more than SECOND (2) without using your brakes. You
can use it on very steep hills, or in deep snow or
mud. If the shift lever is put in FIRST (1) while the
vehicle is moving forward, the transmission will not shift
into first gear until the vehicle is going slowly enough.
Notice:Spinning the tires or holding the vehicle in
one place on a hill using only the accelerator
pedal may damage the transmission. The repair will
not be covered by your warranty. If you are stuck,
do not spin the tires. When stopping on a hill,
use the brakes to hold the vehicle in place.
2-26
Page 117 of 414
Instrument Panel Overview...............................3-4
Hazard Warning Flashers................................3-6
Other Warning Devices...................................3-6
Horn.............................................................3-6
Tilt Wheel.....................................................3-6
Turn Signal/Multifunction Lever.........................3-7
Turn and Lane-Change Signals........................3-8
Headlamp High/Low-Beam Changer..................3-9
Flash-to-Pass.................................................3-9
Windshield Wipers..........................................3-9
Windshield Washer.......................................3-10
Cruise Control..............................................3-11
Exterior Lamps.............................................3-14
Headlamps on Reminder................................3-15
Daytime Running Lamps (DRL).......................3-15
Automatic Headlamp System..........................3-16
Instrument Panel Brightness...........................3-16
Dome Lamps...............................................3-17
Dome Lamp Override....................................3-17
Entry/Exit Lighting.........................................3-17
Reading Lamps............................................3-17
Electric Power Management...........................3-17
Battery Run-Down Protection..........................3-18
Accessory Power Outlet(s).............................3-18
Ashtray(s) and Cigarette Lighter......................3-19Climate Controls............................................3-19
Climate Control System.................................3-19
Outlet Adjustment.........................................3-22
Rear Heating System....................................3-22
Rear Air Conditioning and Heating System.......3-23
Warning Lights, Gages, and Indicators............3-25
Instrument Panel Cluster................................3-26
Speedometer and Odometer...........................3-27
Trip Odometer..............................................3-27
Safety Belt Reminders...................................3-28
Airbag Readiness Light..................................3-29
Airbag Off Light............................................3-30
Passenger Airbag Status Indicator...................3-31
Charging System Light..................................3-33
Voltmeter Gage............................................3-34
Brake System Warning Light..........................3-34
Antilock Brake System Warning Light...............3-35
StabiliTrak
®Indicator Light..............................3-36
Engine Coolant Temperature Gage..................3-36
Tire Pressure Light.......................................3-37
Malfunction Indicator Lamp.............................3-38
Oil Pressure Gage........................................3-41
Oil Pressure Light.........................................3-42
Security Light...............................................3-42
Cruise Control Light......................................3-42
Section 3 Instrument Panel
3-1
Page 136 of 414
To change the current mode, select one of the following:
9(Off):This turns the system off.
H(Vent):This mode directs air to the instrument
panel outlets.
)(Bi-Level):This mode directs about half of the air
to the instrument panel outlets, then directs most of
the remaining air to the floor outlets. Some air may be
directed toward the windshield.
6(Floor):This mode directs most of the air to the
floor outlets with some air directed to the outboard
outlets (for the side windows) and some air directed to
the windshield.
The right knob can also be used to select the defrost
and defog modes. Information on defogging and
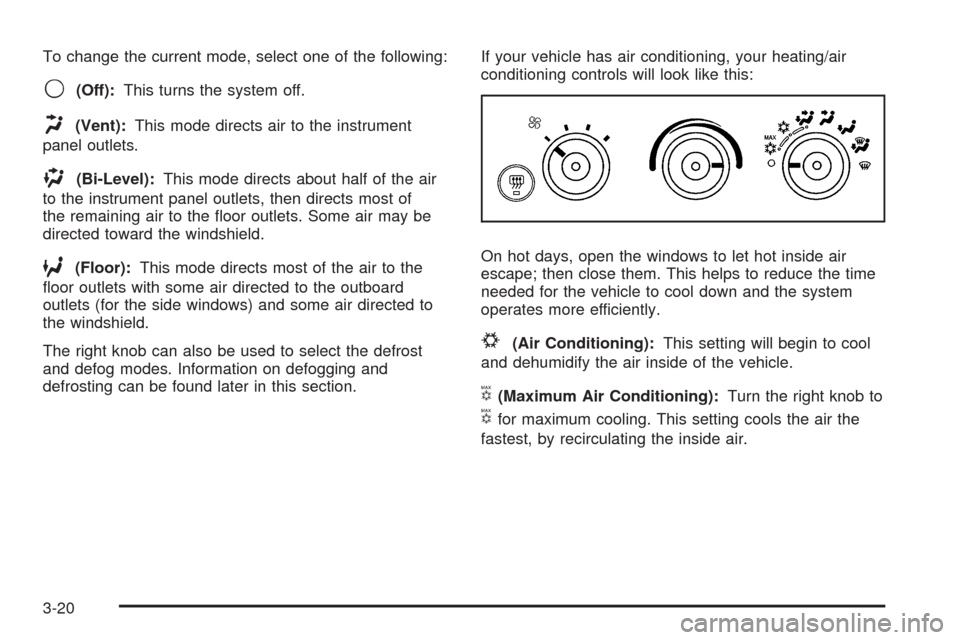
defrosting can be found later in this section.If your vehicle has air conditioning, your heating/air
conditioning controls will look like this:
On hot days, open the windows to let hot inside air
escape; then close them. This helps to reduce the time
needed for the vehicle to cool down and the system
operates more efficiently.
#(Air Conditioning):This setting will begin to cool
and dehumidify the air inside of the vehicle.
V(Maximum Air Conditioning):Turn the right knob to
Vfor maximum cooling. This setting cools the air the
fastest, by recirculating the inside air.
3-20