2008 CHEVROLET AVEO clutch
[x] Cancel search: clutchPage 243 of 384
If the fluid level is low, add only enough of the proper
fluid to bring the level into the area between the
two dimples in the hot range on the dipstick.
1. Pull out the dipstick.
2. Using a long-neck funnel, add enough fluid at the
dipstick hole to bring it to the proper level.
It does not take much fluid, generally less than
one pint (0.5 L). Do not overfill.
Notice:Use of the incorrect automatic transmission
�uid may damage your vehicle, and the damages may
not be covered by your warranty. Always use the
automatic transmission �uid listed inPart D:
Recommended Fluids and Lubricants on page 6-23.
3. After adding fluid, recheck the fluid level as
described under “How to Check Automatic
Transmission Fluid,” earlier in this section.
4. When the correct fluid level is obtained, push the
dipstick back in all the way.Manual Transmission Fluid
It is not necessary to check the transmission fluid level.
A transmission fluid leak is the only reason for fluid loss.
If a leak occurs, take the vehicle to the dealer/retailer
service department and have it repaired as soon as
possible. SeePart D: Recommended Fluids and
Lubricants on page 6-23for the proper fluid to use.
Hydraulic Clutch
There is one reservoir for both the brake and the
hydraulic clutch fluid. SeeBrakes on page 5-32for
more information.
The hydraulic clutch linkage in your vehicle is
self-adjusting. The master cylinder reservoir is filled
with hydraulic fluid.
A fluid loss in this system could indicate a problem.
Have the system inspected and repaired.
When to Check and What to Use
Refer to the Maintenance Schedule to determine
how often you should check the fluid level in your
master cylinder reservoir and for the proper fluid.
SeePart B: Owner Checks and Services on page 6-18
andPart D: Recommended Fluids and Lubricants
on page 6-23.
5-21
Page 254 of 384
Adding Washer Fluid
Open the cap with the
washer symbol on it.
Add washer fluid until the
tank is full. SeeEngine
Compartment Overview on
page 5-12for reservoir
location.
Notice:
When using concentrated washer �uid, follow
the manufacturer’s instructions for adding
water.
Do not mix water with ready-to-use washer �uid.
Water can cause the solution to freeze and
damage your washer �uid tank and other parts
of the washer system. Also, water does not
clean as well as washer �uid.
Fill the washer �uid tank only three-quarters full
when it is very cold. This allows for �uid
expansion if freezing occurs, which could
damage the tank if it is completely full.
Do not use engine coolant (antifreeze) in your
windshield washer. It can damage the vehicle’s
windshield washer system and paint.
Brakes
Brake Fluid
Your vehicle has one
reservoir for both the brake
and clutch hydraulic
systems. It is filled with
DOT-3 brake fluid.
SeeEngine Compartment
Overview on page 5-12
for the location of the
reservoir.
There are only two reasons why the brake fluid level in
the reservoir might go down. The first is that the
brake fluid goes down to an acceptable level during
normal brake lining wear. When new linings are put in,
the fluid level goes back up. The other reason is
that fluid is leaking out of the brake or clutch hydraulic
system. If it is, you should have the brake/clutch
hydraulic system fixed, since a leak means that sooner
or later the brakes will not work well.
5-32
Page 255 of 384
It is not a good idea to top off the brake fluid. Adding
brake fluid will not correct a leak. If fluid is added when
the linings are worn, there will be too much fluid
when new brake linings are installed. Add or remove
brake fluid, as necessary, only when work is done on the
brake hydraulic system.
{CAUTION:
If your vehicle has too much brake �uid, it can
spill on the engine. The �uid will burn if the
engine is hot enough. You or others could be
burned, and your vehicle could be damaged.
Add brake �uid only when work is done on the
brake and/or clutch hydraulic system.
When the brake fluid falls to a low level, the brake
warning light will come on. SeeBrake System Warning
Light on page 3-33.
What to Add
When you do need brake fluid, use only DOT-3 brake
fluid. Use new brake fluid from a sealed container
only. SeePart D: Recommended Fluids and Lubricants
on page 6-23.Always clean the brake fluid reservoir cap and the area
around the cap before removing it. This helps keep
dirt from entering the reservoir.
{CAUTION:
With the wrong kind of �uid in the brake or
clutch hydraulic system, the brakes or clutch
might not work well. This could cause a crash.
Always use the proper brake �uid.
Notice:
Using the wrong �uid can badly damage brake
or clutch hydraulic system parts. For example,
just a few drops of mineral-based oil, such
as engine oil, in the brake or clutch hydraulic
system can damage brake or clutch hydraulic
system parts so badly that they will have
to be replaced. Do not let someone put in the
wrong kind of �uid.
If you spill brake �uid on your vehicle’s painted
surfaces, the paint �nish can be damaged.
Be careful not to spill brake �uid on your
vehicle. If you do, wash it off immediately.
SeeWashing Your Vehicle on page 5-83.
5-33
Page 343 of 384
Wiper Blade Check
Inspect wiper blades for wear, cracking, or
contamination. Clean the windshield and wiper blades,
if contaminated. Replace wiper blades that are worn
or damaged. SeeWindshield Wiper Blade Replacement
on page 5-49andWindshield and Wiper Blades on
page 5-84for more information.
Weatherstrip Lubrication
Silicone grease on weatherstrips will make them last
longer, seal better, and not stick or squeak. Apply
silicone grease with a clean cloth. During very cold,
damp weather more frequent application may be
required. SeePart D: Recommended Fluids and
Lubricants on page 6-23.
Manual Transmission Check
It is not necessary to check the transmission fluid level.
Check for leaks. A fluid leak is the only reason for fluid
loss. Have the system inspected and repaired if needed.
Automatic Transmission Check
Check the transmission fluid level; add if needed.
A fluid loss may indicate a problem. Check the
system and repair if needed.
Hydraulic Clutch System Check
Check the fluid level in the brake/clutch reservoir.
SeeHydraulic Clutch on page 5-21. A fluid loss in
this system could indicate a problem. Have the
system inspected and repaired at once.
At Least Once a Year
Key Lock Cylinders Service
Lubricate the key lock cylinders with the lubricant
specified in Part D.
Body Lubrication Service
Lubricate all hood latch assemblies, secondary latch,
pivots, spring anchor, release pawl, hood and body
door hinges, rear compartment, and any folding
seat hardware. Part D tells you what to use.
More frequent lubrication may be required when
exposed to a corrosive environment.
6-19
Page 344 of 384
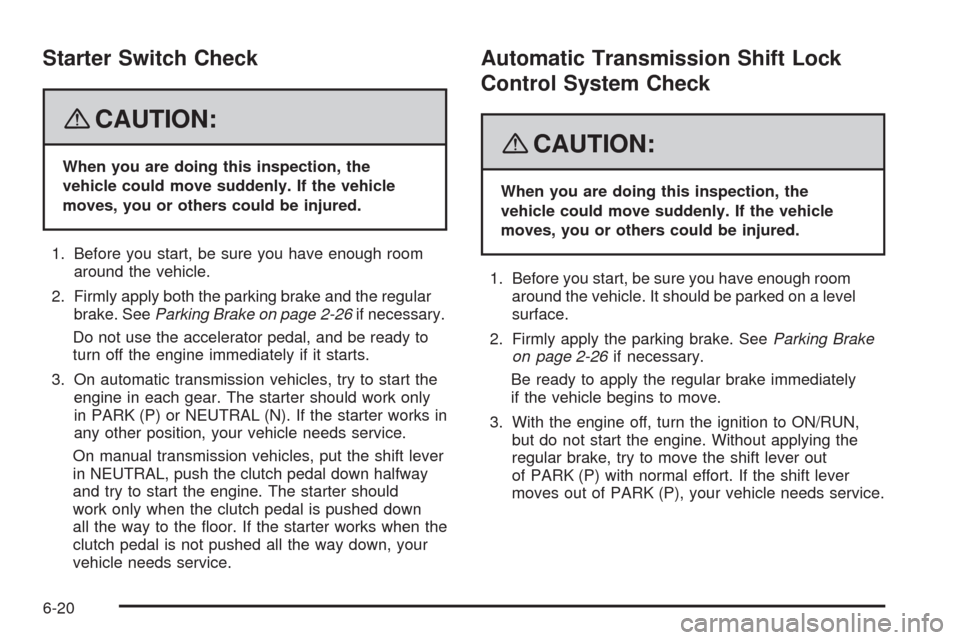
Starter Switch Check
{CAUTION:
When you are doing this inspection, the
vehicle could move suddenly. If the vehicle
moves, you or others could be injured.
1. Before you start, be sure you have enough room
around the vehicle.
2. Firmly apply both the parking brake and the regular
brake. SeeParking Brake on page 2-26if necessary.
Do not use the accelerator pedal, and be ready to
turn off the engine immediately if it starts.
3. On automatic transmission vehicles, try to start the
engine in each gear. The starter should work only
in PARK (P) or NEUTRAL (N). If the starter works in
any other position, your vehicle needs service.
On manual transmission vehicles, put the shift lever
in NEUTRAL, push the clutch pedal down halfway
and try to start the engine. The starter should
work only when the clutch pedal is pushed down
all the way to the floor. If the starter works when the
clutch pedal is not pushed all the way down, your
vehicle needs service.
Automatic Transmission Shift Lock
Control System Check
{CAUTION:
When you are doing this inspection, the
vehicle could move suddenly. If the vehicle
moves, you or others could be injured.
1. Before you start, be sure you have enough room
around the vehicle. It should be parked on a level
surface.
2. Firmly apply the parking brake. SeeParking Brake
on page 2-26if necessary.
Be ready to apply the regular brake immediately
if the vehicle begins to move.
3. With the engine off, turn the ignition to ON/RUN,
but do not start the engine. Without applying the
regular brake, try to move the shift lever out
of PARK (P) with normal effort. If the shift lever
moves out of PARK (P), your vehicle needs service.
6-20
Page 373 of 384
Check
Engine Light.......................................3-36, 3-49
Checking Things Under the Hood......................5-10
Chemical Paint Spotting...................................5-86
Child Restraints
Child Restraint Systems...............................1-38
Infants and Young Children...........................1-34
Lower Anchors and Tethers for Children..........1-42
Older Children.............................................1-32
Securing a Child Restraint in a
Rear Seat Position...................................1-49
Securing a Child Restraint in the
Right Front Seat Position..........................1-52
Where to Put the Restraint...........................1-40
Cigarette Lighter.............................................3-19
Cleaning
Aluminum Wheels........................................5-85
Exterior Lamps/Lenses.................................5-83
Fabric/Carpet..............................................5-80
Finish Care.................................................5-83
Instrument Panel, Vinyl, and Other
Plastic Surfaces.......................................5-82
Interior.......................................................5-79
Leather......................................................5-81
Tires..........................................................5-85
Underbody Maintenance...............................5-86Cleaning (cont.)
Washing Your Vehicle...................................5-83
Weatherstrips..............................................5-82
Windshield and Wiper Blades........................5-84
Climate Control System...................................3-20
Air Filter, Passenger Compartment.................3-24
Outlet Adjustment........................................3-24
Clock....................................................3-20, 3-44
Clutch, Hydraulic.............................................5-21
Collision Damage Repair..................................7-13
Compact Spare Tire........................................5-78
Control of a Vehicle.......................................... 4-3
Coolant
Engine Temperature Gage
............................3-35
Heater, Engine............................................2-20
Surge Tank Pressure Cap.............................5-25
Cooling System..............................................5-26
Cruise Control................................................3-13
Cruise Control Light................................3-40, 3-53
Cupholder(s)..................................................2-35
Customer Assistance Information
Courtesy Transportation................................7-11
Customer Assistance for Text
Telephone (TTY) Users............................... 7-6
Customer Assistance Offices........................... 7-6
Customer Satisfaction Procedure..................... 7-2
3
Page 376 of 384
G
Gage
Engine Coolant Temperature.........................3-35
Fuel..........................................................3-41
Speedometer..............................................3-29
Tachometer.................................................3-29
Gasoline
Octane........................................................ 5-5
Specifications............................................... 5-5
Glove Box.....................................................2-34
GM Mobility Reimbursement Program.................. 7-7
H
Hazard Warning Flashers................................... 3-8
Head Restraints............................................... 1-6
Headlamp
Aiming.......................................................5-40
Headlamp Wiring............................................5-89
Headlamps............................................5-41, 5-42
Bulb Replacement.......................................5-41
Daytime Running Lamps...............................3-16
Exterior Lamps............................................3-15
Flash-to-Pass..............................................3-10Headlamps (cont.)
Front Turn Signal and Parking Lamps.......5-43, 5-44
Halogen Bulbs............................................5-41
High/Low Beam Changer..............................3-10
On Reminder..............................................3-16
Turn Signal Lamps......................................5-45
Heater...........................................................3-20
Height Adjuster, Driver Seat............................... 1-3
Highbeam On Light.........................................3-40
Highway Hypnosis...........................................4-12
Hill and Mountain Roads..................................4-12
Hold Mode Light.....................................3-35, 3-48
Hood
Checking Things Under................................5-10
Release.....................................................5-10
Horn............................................................... 3-8
How to Wear Safety Belts Properly...................1-19
Hydraulic Clutch.............................................5-21
I
Ignition Positions.............................................2-18
Immobilizer....................................................2-16
Immobilizer Operation......................................2-16
Inadvertent Power Battery Saver.......................3-18
6