2008 CHEVROLET AVALANCHE wiring
[x] Cancel search: wiringPage 78 of 528
Servicing Your Airbag-Equipped
Vehicle
Airbags affect how your vehicle should be serviced.
There are parts of the airbag system in several places
around your vehicle. Your dealer/retailer and the service
manual have information about servicing your vehicle
and the airbag system. To purchase a service manual,
seeService Publications Ordering Information on
page 7-15.
{CAUTION:
For up to 10 seconds after the ignition is
turned off and the battery is disconnected, an
airbag can still in�ate during improper service.
You can be injured if you are close to an
airbag when it in�ates. Avoid yellow
connectors. They are probably part of the
airbag system. Be sure to follow proper
service procedures, and make sure the person
performing work for you is quali�ed to do so.
Adding Equipment to Your
Airbag-Equipped Vehicle
Q:Is there anything I might add to or change
about the vehicle that could keep the airbags
from working properly?
A:Yes. If you add things that change your vehicle’s
frame, bumper system, height, front end or side
sheet metal, they may keep the airbag system from
working properly. Changing or moving any parts
of the front seats, safety belts, the airbag sensing
and diagnostic module, steering wheel, instrument
panel, roof-rail airbag modules, ceiling headliner
or pillar garnish trim, overhead console, front
sensors, side impact sensors, rollover sensor
module, or airbag wiring can affect the operation of
the airbag system.
In addition, your vehicle has a passenger sensing
system for the right front passenger’s position,
which includes sensors that are part of the
passenger’s seat. The passenger sensing system
may not operate properly if the original seat trim is
replaced with non-GM covers, upholstery or trim,
1-74
Page 79 of 528

or with GM covers, upholstery or trim designed for a
different vehicle. Any object, such as an aftermarket
seat heater or a comfort enhancing pad or device,
installed under or on top of the seat fabric, could also
interfere with the operation of the passenger sensing
system. This could either prevent proper deployment
of the passenger airbag(s) or prevent the passenger
sensing system from properly turning off the
passenger airbag(s). SeePassenger Sensing
System on page 1-69.
If you have any questions about this, you should
contact Customer Assistance before you modify
your vehicle. The phone numbers and addresses for
Customer Assistance are in Step Two of the
Customer Satisfaction Procedure in this manual.
SeeCustomer Satisfaction Procedure on page 7-2.
If your vehicle has rollover roof-rail airbags, see
Different Size Tires and Wheels on page 5-74
for additional important information.Q:Because I have a disability, I have to get my
vehicle modi�ed. How can I �nd out whether
this will affect my airbag system?
A:If you have questions, call Customer Assistance.
The phone numbers and addresses for Customer
Assistance are in Step Two of the Customer
Satisfaction Procedure in this manual. See
Customer Satisfaction Procedure on page 7-2.
In addition, your dealer/retailer and the service manual
have information about the location of the airbag
sensors, sensing and diagnostic module and airbag
wiring.
1-75
Page 94 of 528
When you want to open a rear door when the security
lock is on, do the following:
1. Unlock the door by lifting the rear door manual lock,
using the power door lock switch, or the Remote
Keyless Entry (RKE) transmitter, if the vehicle
has one.
2. Open the door from the outside.
To cancel the rear door security lock, do the following:
1. Unlock the door and open it from the outside.
2. Insert the key into the security lock slot and turn it
so the slot is in the vertical position.
Lockout Protection
This feature protects you from locking your key in the
vehicle when the key is in the ignition and a door
is open.
If the power lock switch is pressed when a door is open
and the key is in the ignition, all of the doors will lock
and then the driver’s door will unlock.
Midgate®
{CAUTION:
It can be dangerous to drive with the cargo
area covered and the tailgate and the Midgate®
open because carbon monoxide (CO) gas can
come into your vehicle. You can not see or
smell CO. It can cause unconsciousness and
even death. If you must drive with the cargo
covers on and the tailgate and Midgate
®
open or if electrical wiring or other cable
connections must pass through the seal
between the body and the Midgate
®:
Make sure all windows are shut.
Turn the fan on your heating or cooling
system to its highest speed on the setting
that brings in outside air. This will force
outside air into your vehicle. SeeDual
Automatic Climate Control System on
page 3-24.
If you have air outlets on or under the
instrument panel, open them all the way.
SeeEngine Exhaust on page 2-48.
2-12
Page 215 of 528

Passenger Safety Belt Reminder Light
Several seconds after the engine is started, a chime will
sound for several seconds to remind the front passenger
to buckle their safety belt. This would only occur if the
passenger airbag is enabled. SeePassenger Sensing
System on page 1-69for more information. The
passenger safety belt light, located on the instrument
panel, will come on and stay on for several seconds and
then �ash for several more.
This chime and light are
repeated if the passenger
remains unbuckled and
the vehicle is in motion.
If the passenger’s safety belt is buckled, neither the
chime nor the light will come on.
Airbag Readiness Light
There is an airbag readiness light on the instrument
panel cluster, which shows the airbag symbol.
The system checks the airbag’s electrical system for
malfunctions. The light tells you if there is an electrical
problem. The system check includes the airbag sensor,
the pretensioners, the airbag modules, the wiring and
the crash sensing and diagnostic module. For more
information on the airbag system, seeAirbag System
on page 1-60.
This light will come on
when you start your
vehicle, and it will �ash for
a few seconds. The light
should go out and the
system is ready.
3-35
Page 359 of 528
Trailer Wiring Harness
Heavy-Duty Trailer Wiring Package
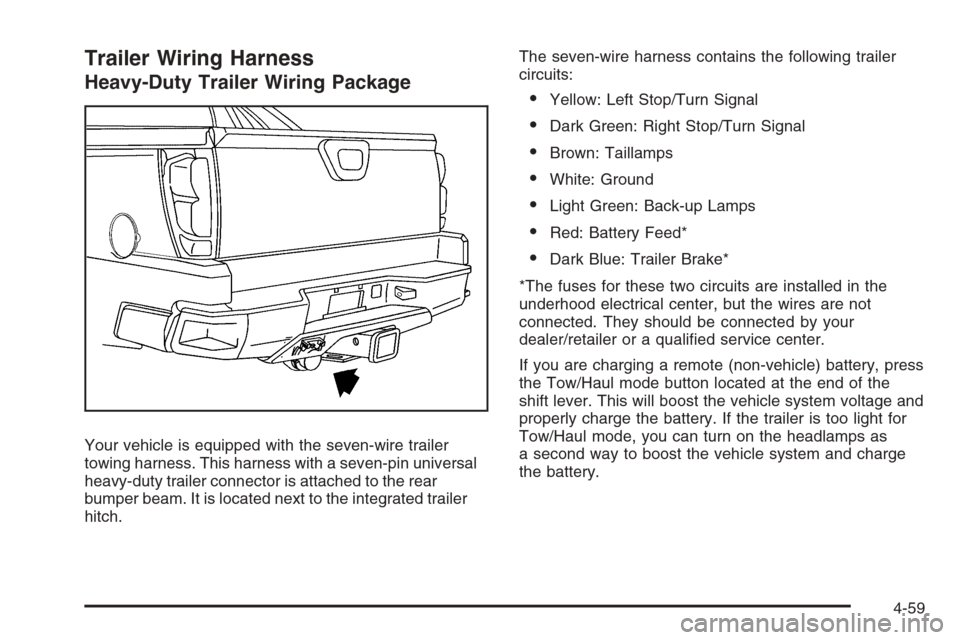
Your vehicle is equipped with the seven-wire trailer
towing harness. This harness with a seven-pin universal
heavy-duty trailer connector is attached to the rear
bumper beam. It is located next to the integrated trailer
hitch.The seven-wire harness contains the following trailer
circuits:
Yellow: Left Stop/Turn Signal
Dark Green: Right Stop/Turn Signal
Brown: Taillamps
White: Ground
Light Green: Back-up Lamps
Red: Battery Feed*
Dark Blue: Trailer Brake*
*The fuses for these two circuits are installed in the
underhood electrical center, but the wires are not
connected. They should be connected by your
dealer/retailer or a quali�ed service center.
If you are charging a remote (non-vehicle) battery, press
the Tow/Haul mode button located at the end of the
shift lever. This will boost the vehicle system voltage and
properly charge the battery. If the trailer is too light for
Tow/Haul mode, you can turn on the headlamps as
a second way to boost the vehicle system and charge
the battery.
4-59
Page 360 of 528
Electric Brake Control Wiring
Provisions
These wiring provisions are included with your vehicle
as part of the heavy-duty trailer wiring package.
These provisions are for an electric brake controller.
The instrument panel contains blunt cut wires near
the data link connector for the trailer brake controller.
The harness contains the following wires:
Dark Blue: Auxiliary
Red/Black: Battery
Light Blue: Brake Switch
White: Ground
The trailer brake controller should be installed by your
dealer/retailer or a quali�ed service center.
Trailer Recommendations
You must subtract your hitch loads from the Cargo
Weight Rating (CWR). CWR is the maximum weight
of the load your vehicle can carry. It doesn’t include the
weight of the people inside, but you can �gure about
150 lbs. (68 kg) for each seat. The total cargo load
must not be more than your vehicles CWR.
Weigh your vehicle with your trailer attached, so that
you won’t go over the GVWR or GAWR. If you are using
a weight-distributing hitch, weigh the vehicle without
the spring bars in place.
You’ll get the best performance if you spread out the
weight of your load the right way, and if you choose the
correct hitch and trailer brakes.
For more information seeTowing a Trailer on page 4-47.
4-60
Page 468 of 528
Electrical System
Add-On Electrical Equipment
Notice:Do not add anything electrical to your
vehicle unless you check with your dealer/retailer
�rst. Some electrical equipment can damage
your vehicle and the damage would not be covered
by your warranty. Some add-on electrical equipment
can keep other components from working as they
should.
Add-on equipment can drain your vehicle’s battery, even
if your vehicle is not operating.
Your vehicle has an airbag system. Before attempting to
add anything electrical to your vehicle, seeServicing
Your Airbag-Equipped Vehicle on page 1-74.
Windshield Wiper Fuses
The windshield wiper motor is protected by a circuit
breaker and a fuse. If the motor overheats due to heavy
snow, etc., the wiper will stop until the motor cools.
If the overload is caused by some electrical problem,
have it �xed.
Power Windows and Other Power
Options
Circuit breakers protect the power windows and other
power accessories. If the current load is too heavy,
the circuit breaker opens and then closes after a cool
down period, protecting the circuit until the problem
is �xed or goes away.
Fuses and Circuit Breakers
The wiring circuits in your vehicle are protected from
short circuits by a combination of fuses, circuit breakers
and fusible thermal links. This greatly reduces the
chance of �res caused by electrical problems.
Look at the silver-colored band inside the fuse. If the
band is broken or melted, replace the fuse. Be sure you
replace a bad fuse with a new one of the identical
size and rating.
Fuses of the same amperage can be temporarily
borrowed from another fuse location, if a fuse goes out.
Replace the fuse as soon as you can.
5-108