2008 CHEVROLET AVALANCHE ECO mode
[x] Cancel search: ECO modePage 151 of 528
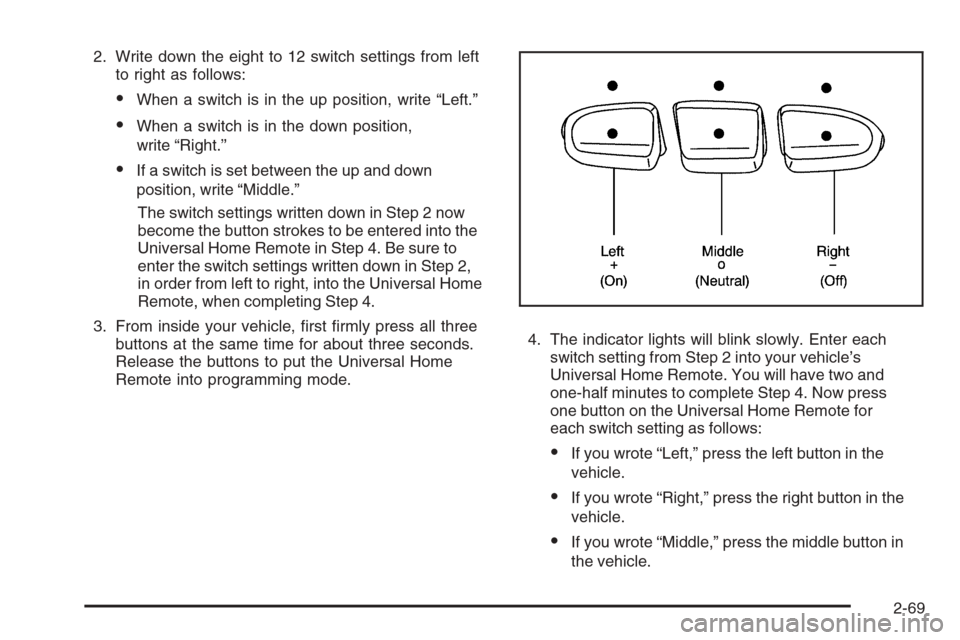
2. Write down the eight to 12 switch settings from left
to right as follows:
When a switch is in the up position, write “Left.”
When a switch is in the down position,
write “Right.”
If a switch is set between the up and down
position, write “Middle.”
The switch settings written down in Step 2 now
become the button strokes to be entered into the
Universal Home Remote in Step 4. Be sure to
enter the switch settings written down in Step 2,
in order from left to right, into the Universal Home
Remote, when completing Step 4.
3. From inside your vehicle, �rst �rmly press all three
buttons at the same time for about three seconds.
Release the buttons to put the Universal Home
Remote into programming mode.4. The indicator lights will blink slowly. Enter each
switch setting from Step 2 into your vehicle’s
Universal Home Remote. You will have two and
one-half minutes to complete Step 4. Now press
one button on the Universal Home Remote for
each switch setting as follows:
If you wrote “Left,” press the left button in the
vehicle.
If you wrote “Right,” press the right button in the
vehicle.
If you wrote “Middle,” press the middle button in
the vehicle.
2-69
Page 188 of 528
Turn and Lane-Change Signals
The turn signal has two upward (for right) and two
downward (for left) positions. These positions allow you
to signal a turn or a lane change.
To signal a turn, move the lever all the way up or
down. When the turn is �nished, the lever will return
automatically.
To signal a lane change, raise or lower the lever for
less than one second until the arrow starts to �ash.
This will cause the turn signals to automatically
�ash three times. It will �ash six times if the tow-haul
mode is active. Holding the turn signal lever for
more than one second will cause the turn signals to
�ash until you release the lever. The lever will return
by itself when it is released.
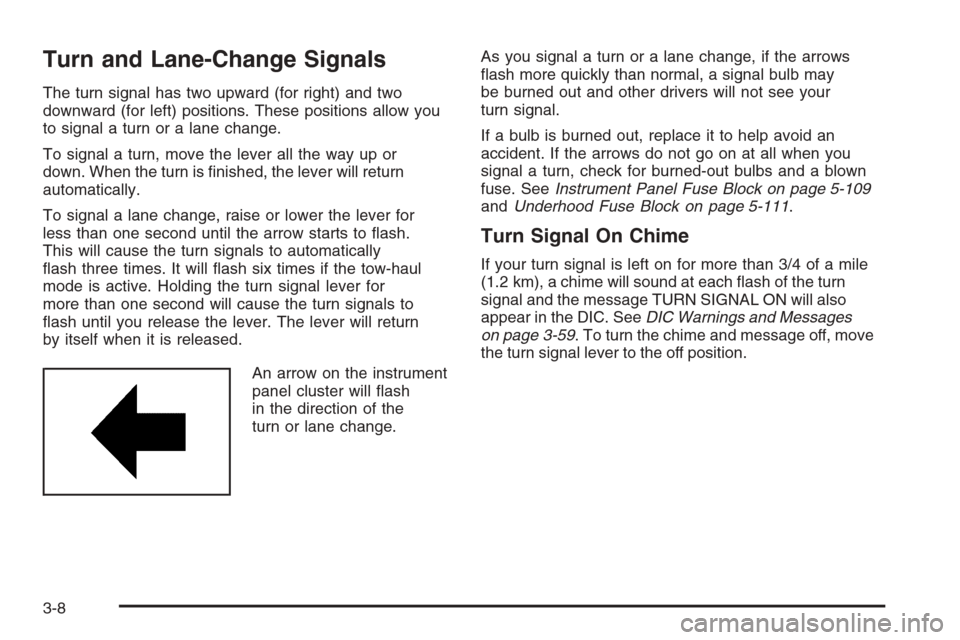
An arrow on the instrument
panel cluster will �ash
in the direction of the
turn or lane change.As you signal a turn or a lane change, if the arrows
�ash more quickly than normal, a signal bulb may
be burned out and other drivers will not see your
turn signal.
If a bulb is burned out, replace it to help avoid an
accident. If the arrows do not go on at all when you
signal a turn, check for burned-out bulbs and a blown
fuse. SeeInstrument Panel Fuse Block on page 5-109
andUnderhood Fuse Block on page 5-111.
Turn Signal On Chime
If your turn signal is left on for more than 3/4 of a mile
(1.2 km), a chime will sound at each �ash of the turn
signal and the message TURN SIGNAL ON will also
appear in the DIC. SeeDIC Warnings and Messages
on page 3-59. To turn the chime and message off, move
the turn signal lever to the off position.
3-8
Page 190 of 528

Turn the band with the wiper symbol to control the
windshield wipers.
8(Mist):Turn the band to mist for a single wiping
cycle. Hold it there until the wipers start. Then let
go. The wipers stop after one wipe. Hold the band
on mist longer, for more wipe cycles.
9(Off):To stop the wipers, move the band to off.
6(Delay):Turn the band to adjust the delay time.
The delay between wiping cycles becomes shorter as
the band is moved to the top of the lever. This can
be very useful in light rain or snow.
6(Low Speed):Turn the band away from you to
the �rst solid band past the delay settings, for steady
wiping at low speed.
?(High Speed):Turn the band further, to the
second solid band past the delay settings, for
high-speed wiping.
Rainsense™ II Wipers
If your vehicle has Rainsense™ II windshield wipers,
the moisture sensor is located next to the inside rearview
mirror and is mounted on the windshield. When active,
these sensors are able to detect moisture on the
windshield and automatically turn on the wipers.
To turn on the Rainsense™ feature, the wipers must be
set to one of the �ve delay settings on the multifunction
lever. Each of the �ve settings adjusts the sensitivity
of the rainsensor.
Since different drivers have different setting preferences,
it is recommended that the mid-range setting (position 3)
be used initially. For more wipes, select the higher
settings; for fewer wipes, select the lower settings located
closer to the off position on the multifunction lever.
The rainsensor will automatically control the frequency
of the wipes from the off setting to the high speed setting
according to the weather conditions. The wipers can be
left in a rainsense mode even when it is not raining.
When Rainsense™ is active, the headlamps will turn
on automatically if the exterior lamp control is in
the AUTO position and the wipers are active.
Notice:Going through an automatic car wash with
the wipers on can damage them. Turn the wipers
off when going through an automatic car wash.
3-10
Page 201 of 528
Climate Controls
Climate Control System
The heating, cooling, defrost, defog and ventilation of
your vehicle can be controlled with this system.
Manual Operation
Turn the right knob clockwise or counterclockwise to
direct the air�ow inside of the vehicle.
To change the current mode, select one of the following:
H(Vent):This mode directs air to the instrument
panel outlets.
)(Bi-Level):This mode directs half of the air to the
instrument panel outlets and to the �oor outlets. The
�ow can be divided between vent and �oor outlets
depending upon where the knob is placed between the
settings. A little air is directed towards the windshield
and side window outlets. Cooler air is directed to
the upper outlets and warmer air to the �oor outlets.
6(Floor):This mode directs most of the air to
the �oor outlets, with some of the air directed to the
windshield, side window outlets, and second row �oor
outlets. In this mode, the system will automatically select
outside air. Recirculation cannot be selected when in
Floor Mode.
The right knob can also be used to select defog or
defrost mode. For more information, see “Defogging
and Defrosting” later in this section.
By positioning the right knob between two modes,
a combination of those two modes is selected.
The air conditioning compressor will be on unless the
outside temperature is close to freezing.
9(Fan):Turn the left knob clockwise or
counterclockwise to increase or decrease the fan speed.
Turn the knob all the way counterclockwise to turn the
front system off.
:(Outside Air):Press this button to turn on the
outside air mode. When this mode is selected, air from
outside the vehicle will circulate throughout your vehicle.
An indicator light on the button comes on to show that it
is activated. The outside air mode can be used with
all modes, but it cannot be used with the recirculation
mode. Pressing this button again will cancel the
recirculation mode.
3-21
Page 205 of 528
Passenger’s Side Temperature Control
The passenger’s temperature buttons can be used to
change the temperature of the air coming through the
system on the passenger’s side of the vehicle. The
temperature can be adjusted even if the system is turned
off. This is possible since outside air will always �ow
through the system as the vehicle is moving forward
unless it is set to recirculation mode. See “Recirculation”
later in this section.
Press the + or−buttons to increase or decrease the
cabin temperature. The passenger side display will show
the temperature setting decreasing or increasing.
The passenger’s temperature setting can be set to
match the driver’s temperature setting by pressing the
PASS button and turning off the PASS indicator. When
the passenger’s temperature setting is set different than
the driver’s setting, the indicator on the PASS button will
illuminate and both the driver’s side and passenger’s side
temperature displays will be shown.
Automatic Operation
AUTO (Automatic):When automatic operation is
active the system will control the inside temperature,
the air delivery, and the fan speed.
Use the steps below to place the entire system in
automatic mode:
1. Press the AUTO button.
When AUTO is selected, the display will change
to show the current temperature(s) and AUTO will
be lit on the display. The current delivery mode
and fan speed will also be displayed for
approximately 5 seconds.
When AUTO is selected, the air conditioning
operation and air inlet will be automatically
controlled. The air conditioning compressor
will run when the outside temperature is over
about 40°F (4°C). The air inlet will normally be
set to outside air. If it is hot outside, the air inlet
may automatically switch to recirculate inside air
to help quickly cool down your vehicle. The light
on the button will illuminate in recirculation.
3-25
Page 207 of 528
Manual Operation
You may manually adjust the air delivery mode or fan
speed.
y9 z(Fan):The buttons with the fan symbols
allow you to manually adjust the fan speed. Press the
up arrow to increase fan speed and the down arrow
to decrease fan speed.
Pressing one of these buttons when the system is off
will turn the system on. Pressing one of these buttons
when in automatic control will place the fan under
manual control. The fan setting will remain displayed
and the AUTO light will turn off. The air delivery
mode will remain under automatic control.
yNz(Mode):Press the mode up and down buttons
to manually change the direction of the air�ow in your
vehicle. Repeatedly press the button until the desired
mode appears on the display. Pressing one of these
buttons when the system is off will change air delivery
mode without turning the system on. Pressing one of
these buttons when in automatic control will place the
mode under manual control.
The air delivery mode setting will be displayed and
the AUTO light will turn off. The fan will remain under
automatic control.
H(Vent):This setting will deliver air to the instrument
panel outlets.
)(Bi-Level):This mode directs half of the air to the
instrument panel outlets and to the �oor outlets. The �ow
can be divided between vent and �oor outlets depending
upon where the knob is placed between the settings.
A little air is directed towards the windshield and side
window outlets. Cooler air is directed to the upper outlets
and warmer air to the �oor outlets.
6(Floor):This mode directs most of the air to
the �oor outlets, with some of the air directed to the
windshield, side window outlets, and second row �oor
outlets. In this mode, the system will automatically select
outside air.
-(Defog):See “Defogging and Defrosting” later in
this section.
3-27
Page 219 of 528
Voltmeter Gage
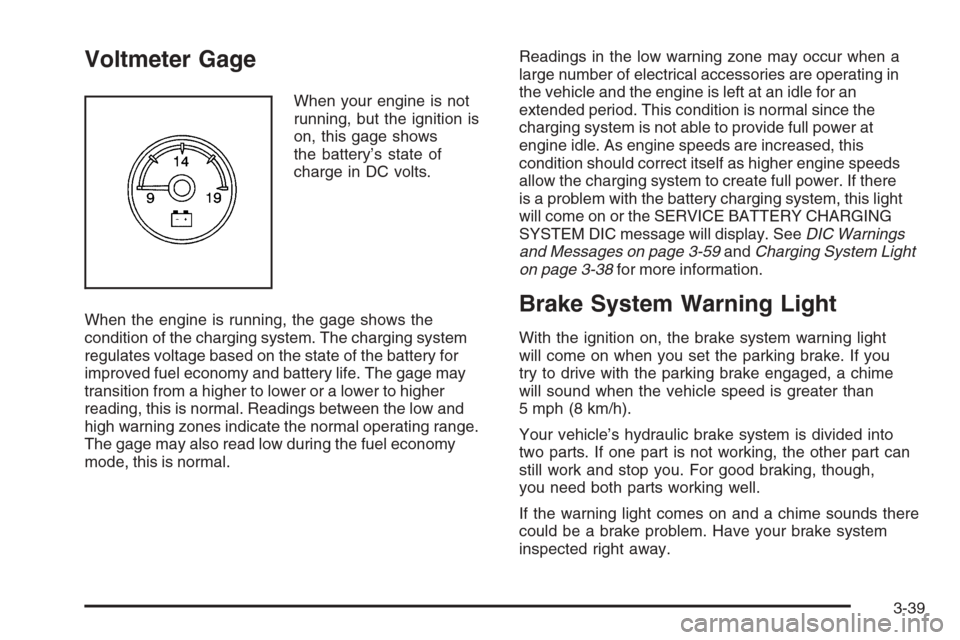
When your engine is not
running, but the ignition is
on, this gage shows
the battery’s state of
charge in DC volts.
When the engine is running, the gage shows the
condition of the charging system. The charging system
regulates voltage based on the state of the battery for
improved fuel economy and battery life. The gage may
transition from a higher to lower or a lower to higher
reading, this is normal. Readings between the low and
high warning zones indicate the normal operating range.
The gage may also read low during the fuel economy
mode, this is normal.Readings in the low warning zone may occur when a
large number of electrical accessories are operating in
the vehicle and the engine is left at an idle for an
extended period. This condition is normal since the
charging system is not able to provide full power at
engine idle. As engine speeds are increased, this
condition should correct itself as higher engine speeds
allow the charging system to create full power. If there
is a problem with the battery charging system, this light
will come on or the SERVICE BATTERY CHARGING
SYSTEM DIC message will display. SeeDIC Warnings
and Messages on page 3-59andCharging System Light
on page 3-38for more information.
Brake System Warning Light
With the ignition on, the brake system warning light
will come on when you set the parking brake. If you
try to drive with the parking brake engaged, a chime
will sound when the vehicle speed is greater than
5 mph (8 km/h).
Your vehicle’s hydraulic brake system is divided into
two parts. If one part is not working, the other part can
still work and stop you. For good braking, though,
you need both parts working well.
If the warning light comes on and a chime sounds there
could be a brake problem. Have your brake system
inspected right away.
3-39
Page 234 of 528
Transmission Temperature
Press the trip/fuel button until TRANS TEMP displays.
This display shows the temperature of the automatic
transmission �uid in either degrees Fahrenheit (°F) or
degrees Celsius (°C).
Instantaneous Economy and Active Fuel
Management™ Indicator
If your vehicle has this display, press the trip/fuel button
until INST ECONOMY V8 MODE displays. This display
shows the current fuel economy at a particular moment
and will change frequently as driving conditions change.
This display shows the instantaneous fuel economy
in miles per gallon (mpg) or liters per 100 kilometers
(L/100 km). Unlike average economy, this screen
cannot be reset.
An Active Fuel Management™ indicator will display on
the right side of the DIC, while INST ECONOMY displays
on the left side. Active Fuel Management™ allows the
engine to operate on either four or eight cylinders,
depending on your driving demands. When Active Fuel
Management™ is active, V4 MODE will display on the
DIC. When Active Fuel Management™ is inactive,
V8 MODE will display. SeeActive Fuel Management™
on page 2-35for more information.
Blank Display
This display shows no information.
Vehicle Information Menu Items
T
(Vehicle Information):Press this button to scroll
through the following menu items:
Oil Life
Press the vehicle information button until OIL LIFE
REMAINING displays. This display shows an estimate of
the oil’s remaining useful life. If you see 99% OIL LIFE
REMAINING on the display, that means 99% of the
current oil life remains. The engine oil life system will alert
you to change the oil on a schedule consistent with your
driving conditions.
When the remaining oil life is low, the CHANGE
ENGINE OIL SOON message will appear on the
display. See “CHANGE ENGINE OIL SOON” under
DIC Warnings and Messages on page 3-59. You should
change the oil as soon as you can. SeeEngine Oil on
page 5-15. In addition to the engine oil life system
monitoring the oil life, additional maintenance is
recommended in the Maintenance Schedule in this
manual. SeeScheduled Maintenance on page 6-4
for more information.
Remember, you must reset the OIL LIFE display
yourself after each oil change. It will not reset itself. Also,
be careful not to reset the OIL LIFE display accidentally at
any time other than when the oil has just been changed.
It cannot be reset accurately until the next oil change.
To reset the engine oil life system, seeEngine Oil Life
System on page 5-18.
3-54