2008 BMW Z4 COUPE 3.0SI wheel
[x] Cancel search: wheelPage 57 of 132
Reference
At a glance
Controls
Driving tips
Mobility
55
Warning of low tire inflation pressure
The warning lamp lights up in yellow. A
signal also sounds. There is a flat tire or
a significant loss of tire pressure in one
or more tires.
1.Cautiously reduce speed to 50 mph/
80 km/h or lower. Avoid strong braking and
steering maneuvers. Do not exceed a maxi-
mum speed of 50 mph/80 km/h.
If the car is not equipped with Run-
Flat Tires, which is the standard
equipment by design, refer to page88, then
do not continue driving. Doing so after a tire
puncture may result in a severe accident.<
2.In the event of complete tire pressure loss,
0 psi/0 kilopascal, you can estimate how far
you can continue driving on the basis of the
following guidelines:
>With a light load:
1 person without luggage:
approx. 155 miles/250 km
>With a medium load:
1 person, cargo bay full,
or
2 persons without luggage:
approx. 90 miles/150 km
>With a full load:
2 persons, cargo bay full:
approx. 30 miles/50 km
Drive cautiously. Do not exceed a speed
of 50 mph/80 km/h. Driving characteris-
tics change if there is a loss of tire pressure.
This includes reduced tracking stability in brak-
ing, extended braking distance and altered nat-
ural steering characteristics.
If unusual vibration or loud noises occur during
the journey, this may be an indication that the
damaged tire has finally failed. Reduce your
speed and pull over to the side of the road at a
suitable location at the earliest opportunity.
Otherwise, parts of the tire could come loose
and cause an accident. Do not continue driving.
Contact a BMW center.<
Malfunction
The yellow warning lamp flashes and
then lights up continuously. A flat tire
cannot be detected.
This warning is displayed under the following
circumstances:
>If there is a malfunction;
have the system checked.
>If a wheel without TPM electronics is
mounted.
>If other systems or devices that use the
same radio frequency temporarily interfere
with the TPM.
Declaration according to NHTSA/
FMVSS 138 Tire Pressure Monitoring
System
Each tire should be checked monthly when cold
and inflated to the inflation pressure recom-
mended by the vehicle manufacturer on the
vehicle placard or tire inflation pressure label. If
your vehicle has tires of a different size than the
size indicated on the vehicle placard or tire infla-
tion pressure label, you should determine the
proper tire inflation pressure for those tires. As
an added safety feature, your vehicle has been
equipped with a tire pressure monitoring sys-
tem, TPMS, that illuminates a low tire pressure
telltale when one or more of your tires are signif-
icantly under-inflated. Accordingly, when the
low tire pressure telltale illuminates, you should
stop and check your tires as soon as possible,
and inflate them to the proper pressure. Driving
on a significantly underinflated tire causes the
tire to overheat and can lead to tire failure.
Under-inflation also reduces fuel efficiency and
tire tread life, and may affect the vehicle's han-
dling and stopping ability. Please note that the
TPMS is not a substitute for proper tire mainte-
nance, and it is the driver's responsibility to
maintain correct tire pressure, even if under-
inflation has not reached the level to trigger illu-
mination of the TPMS low tire pressure telltale.
The TPMS malfunction indicator is combined
with the low tire pressure telltale. When the sys-
tem detects a malfunction, the telltale will flash
for approximately one minute and then remain
Page 58 of 132
Technology for driving comfort and safety
56 continuously illuminated. This sequence will
continue upon subsequent vehicle startups as
long as the malfunction exists. When the mal-
function indicator is illuminated, the system
may not be able to detect or signal low tire pres-
sure as intended. TPMS malfunctions may
occur for a variety of reasons, including the
installation of replacement or alternate tires or
wheels on the vehicle that prevent the TPMS
from functioning properly. Always check the
TPMS malfunction telltale after replacing one or
more tires or wheels on your vehicle to ensure
that the replacement or alternate tires and
wheels allow the TPMS to continue to function
properly.
Electric Power Steering EPS
The concept
The electric power steering is a direct, sporting
steering system. A special combination of elec-
tric motor and transmission helps you steer
more easily. As your speed increases, steering
power assistance is reduced.
Malfunction
The indicator lamp stays lit:
The system is malfunctioning or defec-
tive.
Steering remains operational.
Have the system checked as soon as possible.
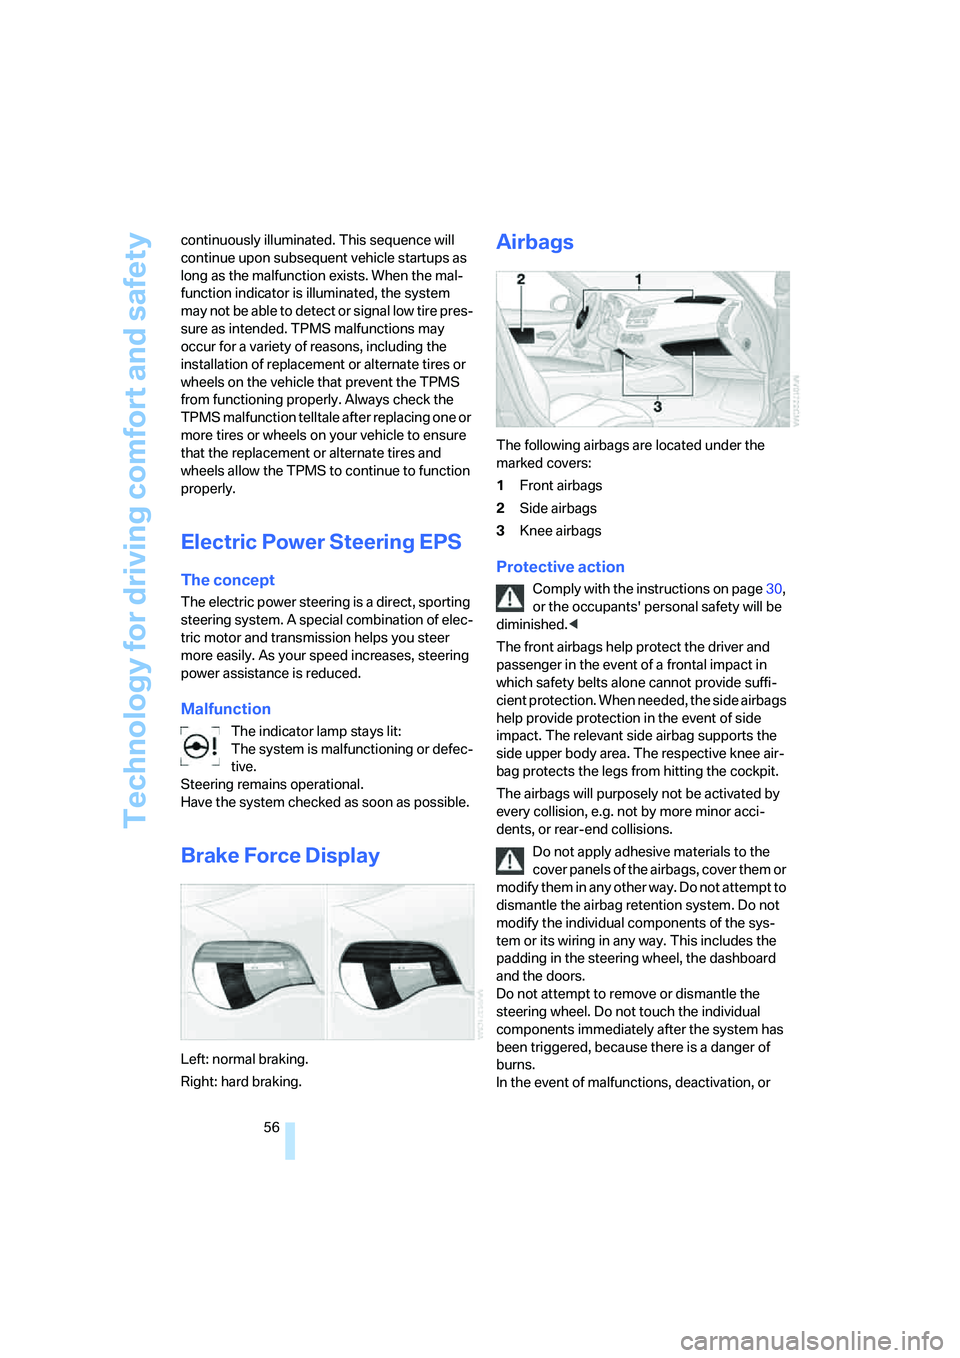
Brake Force Display
Left: normal braking.
Right: hard braking.
Airbags
The following airbags are located under the
marked covers:
1Front airbags
2Side airbags
3Knee airbags
Protective action
Comply with the instructions on page30,
or the occupants' personal safety will be
diminished.<
The front airbags help protect the driver and
passenger in the event of a frontal impact in
which safety belts alone cannot provide suffi-
cient protection. When needed, the side airbags
help provide protection in the event of side
impact. The relevant side airbag supports the
side upper body area. The respective knee air-
bag protects the legs from hitting the cockpit.
The airbags will purposely not be activated by
every collision, e.g. not by more minor acci-
dents, or rear-end collisions.
Do not apply adhesive materials to the
cover panels of the airbags, cover them or
modify them in any other way. Do not attempt to
dismantle the airbag retention system. Do not
modify the individual components of the sys-
tem or its wiring in any way. This includes the
padding in the steering wheel, the dashboard
and the doors.
Do not attempt to remove or dismantle the
steering wheel. Do not touch the individual
components immediately after the system has
been triggered, because there is a danger of
burns.
In the event of malfunctions, deactivation, or
Page 65 of 132
Reference
At a glance
Controls
Driving tips
Mobility
63
Air distribution
Direct the flow of air to the windows
, to the upper body area and to
the footwell . Intermediate settings
are possible.
Switching cooling function on/off
When the cooling function is on, the
air is cooled, dehumidified, then
reheated depending on the tempera-
ture setting.
Depending on the weather, the windshield may
fog over briefly when the engine is started.
Recirculated-air mode
If the air outside the car has an
unpleasant odor or contains pollut-
ants, temporarily shut off the supply
to the interior of the car. The system
recirculates the air within the vehicle.
If the windows fog over in the recircu-
lated-air mode, you should switch it off
and, if necessary, increase the air flow rate.
The manually controlled recirculated-air mode
should not be used continuously for lengthy
periods, otherwise the quality of the air inside
the car will gradually deteriorate.<
Temperature
For a higher temperature, turn the
rotary switch clockwise towards red.
For a lower temperature, turn the
rotary switch counterclockwise
towards blue.
Air flow rate
Adjust the air flow rate. The higher
the rate, the more effective the heat-
ing or cooling will be.
Switching the system on/off
Set the air flow rate to 0. Blower and air condi-
tioning are switched off and the air supply is cut
off.
To switch on the heater or air conditioning, set
any desired air flow rate.
Rear window defroster
The defroster switches off automati-
cally after a certain time.
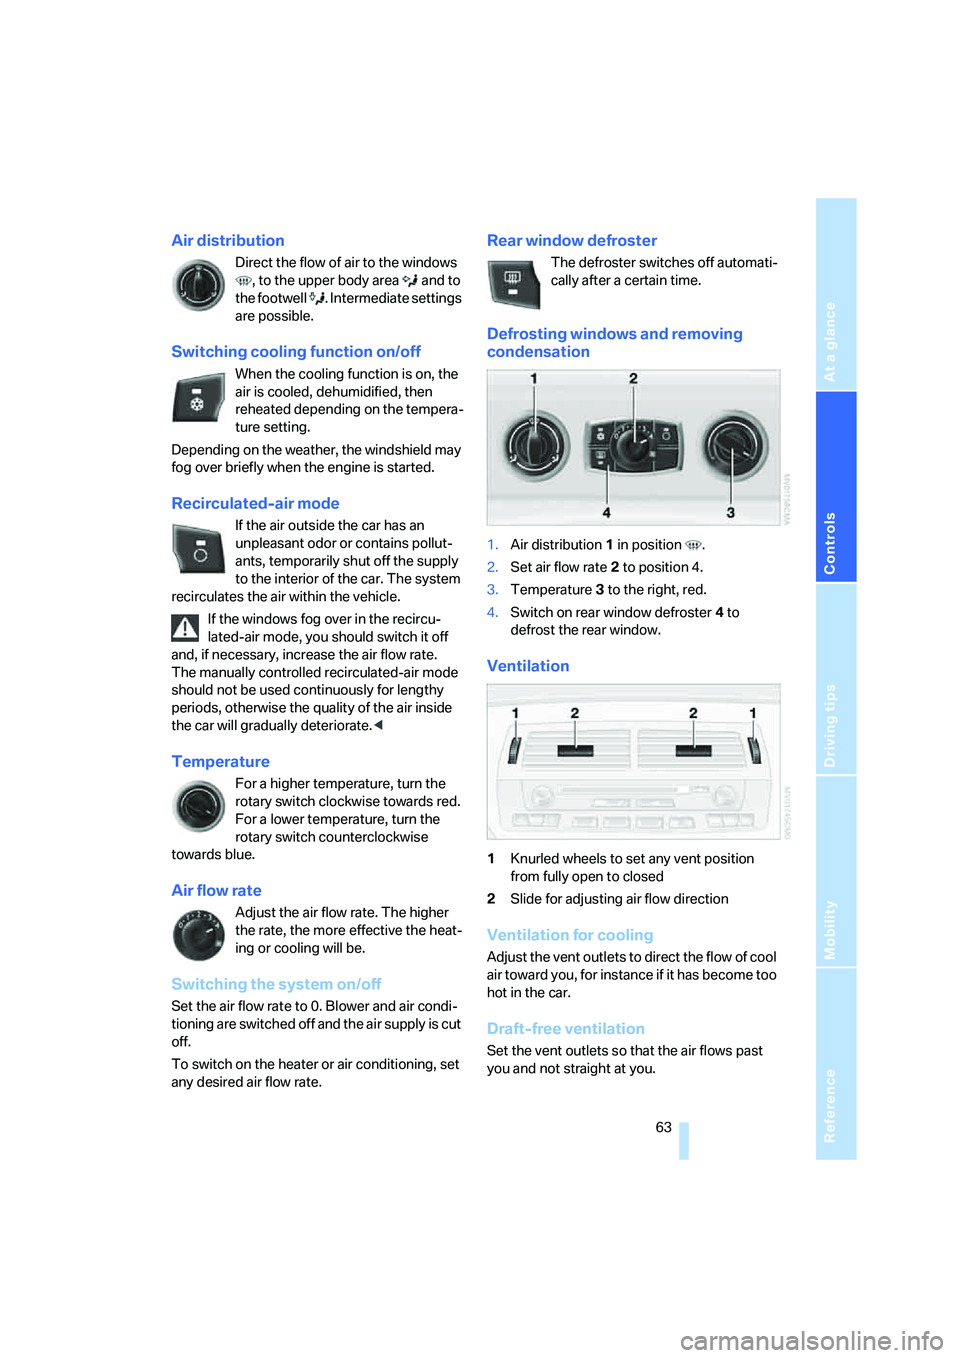
Defrosting windows and removing
condensation
1.Air distribution1 in position .
2.Set air flow rate 2 to position 4.
3.Temperature3 to the right, red.
4.Switch on rear window defroster 4 to
defrost the rear window.
Ventilation
1Knurled wheels to set any vent position
from fully open to closed
2Slide for adjusting air flow direction
Ventilation for cooling
Adjust the vent outlets to direct the flow of cool
air toward you, for instance if it has become too
hot in the car.
Draft-free ventilation
Set the vent outlets so that the air flows past
you and not straight at you.
Page 69 of 132
Reference
At a glance
Controls
Driving tips
Mobility
67
automatic climate control does not have
enough time to achieve the set temperature.<
AUC Automatic recirculated-air
control/Recirculated-air mode
Switch on the desired operating
mode by pressing this button repeat-
edly:
>LEDs off: outside air flows in continuously.
>Left-hand LED on, AUC mode: a sensor
detects pollutants in the outside air. If nec-
essary, the system blocks the supply of out-
side air and recirculates the inside air. As
soon as the concentration of pollutants in
the outside air has decreased sufficiently,
the system automatically switches back to
outside air supply.
>Right-hand LED on, recirculated-air mode:
the inflow of outside air is shut off perma-
nently. The system recirculates the air
within the vehicle.
If the windows fog over in the recircu-
lated-air mode, you should switch it off
and, if necessary, increase the air flow rate.
The recirculated-air mode should not be used
over an extended period of time, otherwise the
air quality inside the car will deteriorate contin-
uously.<
Rear window defroster
The defroster switches off automati-
cally after a certain time.
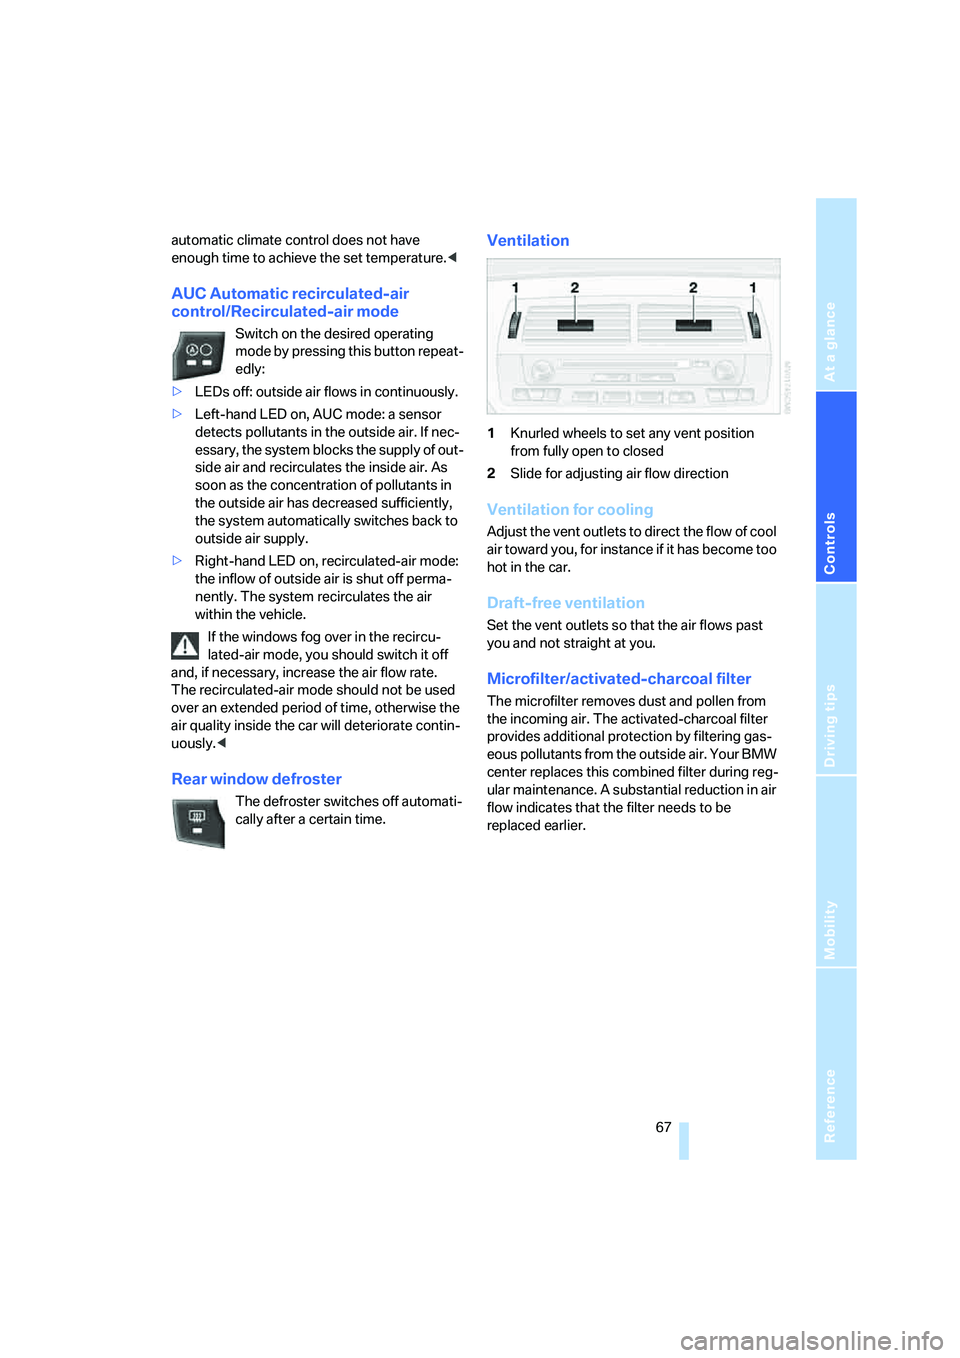
Ventilation
1Knurled wheels to set any vent position
from fully open to closed
2Slide for adjusting air flow direction
Ventilation for cooling
Adjust the vent outlets to direct the flow of cool
air toward you, for instance if it has become too
hot in the car.
Draft-free ventilation
Set the vent outlets so that the air flows past
you and not straight at you.
Microfilter/activated-charcoal filter
The microfilter removes dust and pollen from
the incoming air. The activated-charcoal filter
provides additional protection by filtering gas-
eous pollutants from the outside air. Your BMW
center replaces this combined filter during reg-
ular maintenance. A substantial reduction in air
flow indicates that the filter needs to be
replaced earlier.
Page 83 of 132
Mobility
This section helps you maintain your car's
mobility by supplying important information
on vital topics including fuels and lubricants,
wheels and tires, service, maintenance and
breakdown assistance.
Mobility
Page 86 of 132
Wheels and tires
84
Wheels and tires
Tire inflation pressure
Information for your safety
It is not merely the tire's service life, but also
driving safety and driving comfort that largely
depend on the condition of the tires and the
maintenance of the specified tire pressure.
Check tire inflation pressures regularly
and correct them if necessary: at least
every two weeks and before every extended
journey. If you fail to observe this precaution
you may be driving on tires with incorrect tire
pressures, a condition that can not only com-
promise your vehicle's driving stability, but also
lead to tire damage and the risk of an accident.
Do not drive with deflated, i.e. flat tires, except
when using Run-Flat Tires. A flat tire will seri-
ously impair your vehicle's handling and braking
response. Attempts to drive on a flat tire can
lead to loss of control over the vehicle.<
Checking pressure
Check the tire inflation pressures only when the
tires are cold. This means after a maximum of
1.25 miles/2 km driving or when the vehicle has
been parked for at least 2 hours. Warm tires
have higher inflation pressures.
Inflation pressure specifications
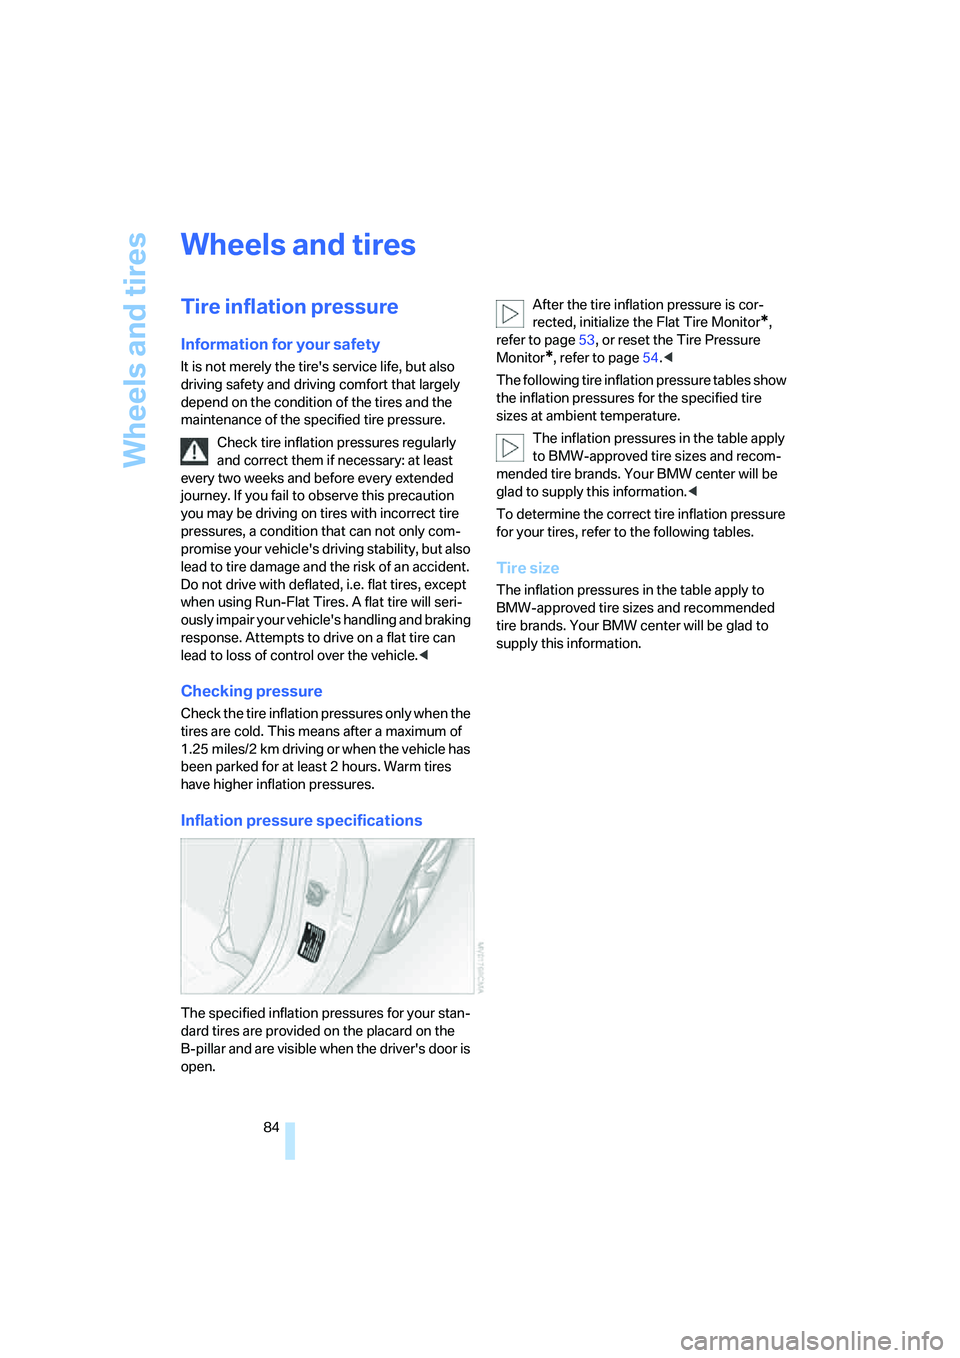
The specified inflation pressures for your stan-
dard tires are provided on the placard on the
B-pillar and are visible when the driver's door is
open.After the tire inflation pressure is cor-
rected, initialize the Flat Tire Monitor
*,
refer to page53, or reset the Tire Pressure
Monitor
*, refer to page54.<
The following tire inflation pressure tables show
the inflation pressures for the specified tire
sizes at ambient temperature.
The inflation pressures in the table apply
to BMW-approved tire sizes and recom-
mended tire brands. Your BMW center will be
glad to supply this information.<
To determine the correct tire inflation pressure
for your tires, refer to the following tables.
Tire size
The inflation pressures in the table apply to
BMW-approved tire sizes and recommended
tire brands. Your BMW center will be glad to
supply this information.
Page 88 of 132
Wheels and tires
86
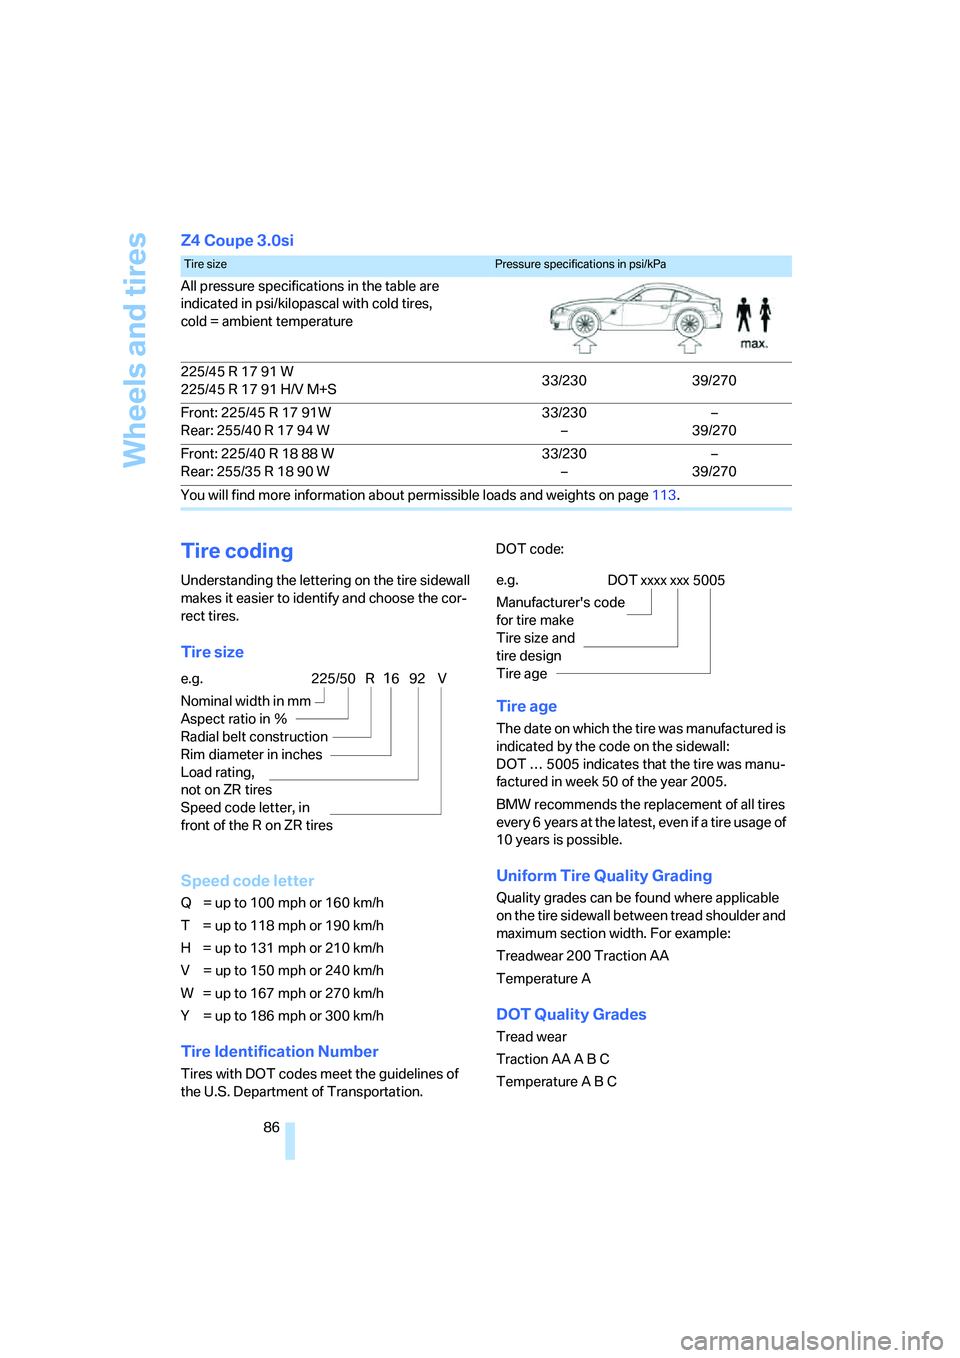
Z4 Coupe 3.0si
Tire coding
Understanding the lettering on the tire sidewall
makes it easier to identify and choose the cor-
rect tires.
Tire size
Speed code letter
Q = up to 100mph or 160km/h
T = up to 118mph or 190km/h
H = up to 131mph or 210km/h
V = up to 150mph or 240km/h
W = up to 167mph or 270km/h
Y = up to 186mph or 300km/h
Tire Identification Number
Tires with DOT codes meet the guidelines of
the U.S. Department of Transportation.DOT code:
Tire age
The date on which the tire was manufactured is
indicated by the code on the sidewall:
DOT … 5005 indicates that the tire was manu-
factured in week 50 of the year 2005.
BMW recommends the replacement of all tires
every 6 years at the latest, even if a tire usage of
10 years is possible.
Uniform Tire Quality Grading
Quality grades can be found where applicable
on the tire sidewall between tread shoulder and
maximum section width. For example:
Treadwear 200 Traction AA
Temperature A
DOT Quality Grades
Tread wear
Traction AA A B C
Temperature A B C
Tire sizePressure specifications in psi/kPa
All pressure specifications in the table are
indicated in psi/kilopascal with cold tires,
cold = ambient temperature
225/45 R 17 91 W
225/45 R 17 91 H/V M+S33/230 39/270
Front: 225/45 R 17 91W
Rear: 255/40 R 17 94 W33/230
––
39/270
Front: 225/40 R 18 88 W
Rear: 255/35 R 18 90 W33/230
––
39/270
You will find more information about permissible loads and weights on page113.
e.g.
Nominal width in mm
Aspect ratio in Ξ
Radial belt construction
Rim diameter in inches
Load rating,
not on ZR tires
Speed code letter, in
front of the R on ZR tires225/50 R1692 V
e.g.
Manufacturer's code
for tire make
Tire size and
tire design
Tire ageDOT xxxx xxx 5005
Page 89 of 132
Reference
At a glance
Controls
Driving tips
Mobility
87
All passenger car tires must conform to
Federal Safety Requirements in addition
to these grades.<
Tread wear
The tread wear grade is a comparative rating
based on the wear rate of the tire when tested
under controlled conditions on a specified gov-
ernment test course.
For example, a tire graded 150 would wear one
and one-half, 1 γ, times as well on the govern-
ment course as a tire graded 100. The relative
performance of tires depends upon the actual
conditions of their use, however, and may
depart significantly from the norm due to varia-
tions in driving habits, service practices and dif-
ferences in road characteristics and climate.
Traction
The traction grades, from highest to lowest, are
AA, A, B and C.
Those grades represent the tire's ability to stop
on wet pavement as measured under controlled
conditions on specified government test sur-
faces of asphalt and concrete. A tire marked C
may have poor traction performance.
The traction grade assigned to this tire is
based on straight-ahead braking traction
tests, and does not include acceleration, cor-
nering, hydroplaning, or peak traction charac-
teristics.<
Temperature
The temperature grades are A, the highest, B
and C, representing the tire's resistance to the
generation of heat and its ability to dissipate
heat when tested under controlled conditions
on a specified indoor laboratory test wheel.
Sustained high temperature can cause the
material of the tire to degenerate and reduce
tire life, and excessive temperature can lead to
sudden tire failure. The grade C corresponds to
a level of performance which all passenger car
tires must meet under the Federal Motor Vehi-
cle Safety Standard No. 109. Grades B and A
represent higher levels of performance on the
laboratory test wheel than the minimum
required by law.The temperature grade for this tire is
established for a tire that is properly
inflated and not overloaded. Excessive speed,
underinflation, or excessive loading, either sep-
arately or in combination, can cause heat
buildup and possible tire failure.<
RSC: Run-Flat Tires
Run-Flat tires are labeled on the sidewall with a
circular symbol containing the letters RSC.
Refer to page88.
M+S
Winter and all-season tires.
These have better winter performance proper-
ties than summer tires.
Tire condition
Inspect your tires frequently for tread wear,
signs of damage and for foreign objects lodged
in the tread. Check the tread depth.
Minimum tread depth
The tread depth should not drop below 1/8 in/
3 mm, although, for example, European legisla-
tion only specifies a minimum tread depth of
1/16 in/1.6 mm. At tread depths below 1/8 in/
3 mm there is an increased risk of high-speed
hydroplaning, even when only small amounts of
water are present on the road surface.
When winter tires wear down past a tread depth
of 1/6 in/4 mm, they become perceptibly less
suitable for winter conditions. In the interest of
safety, new tires should be installed.
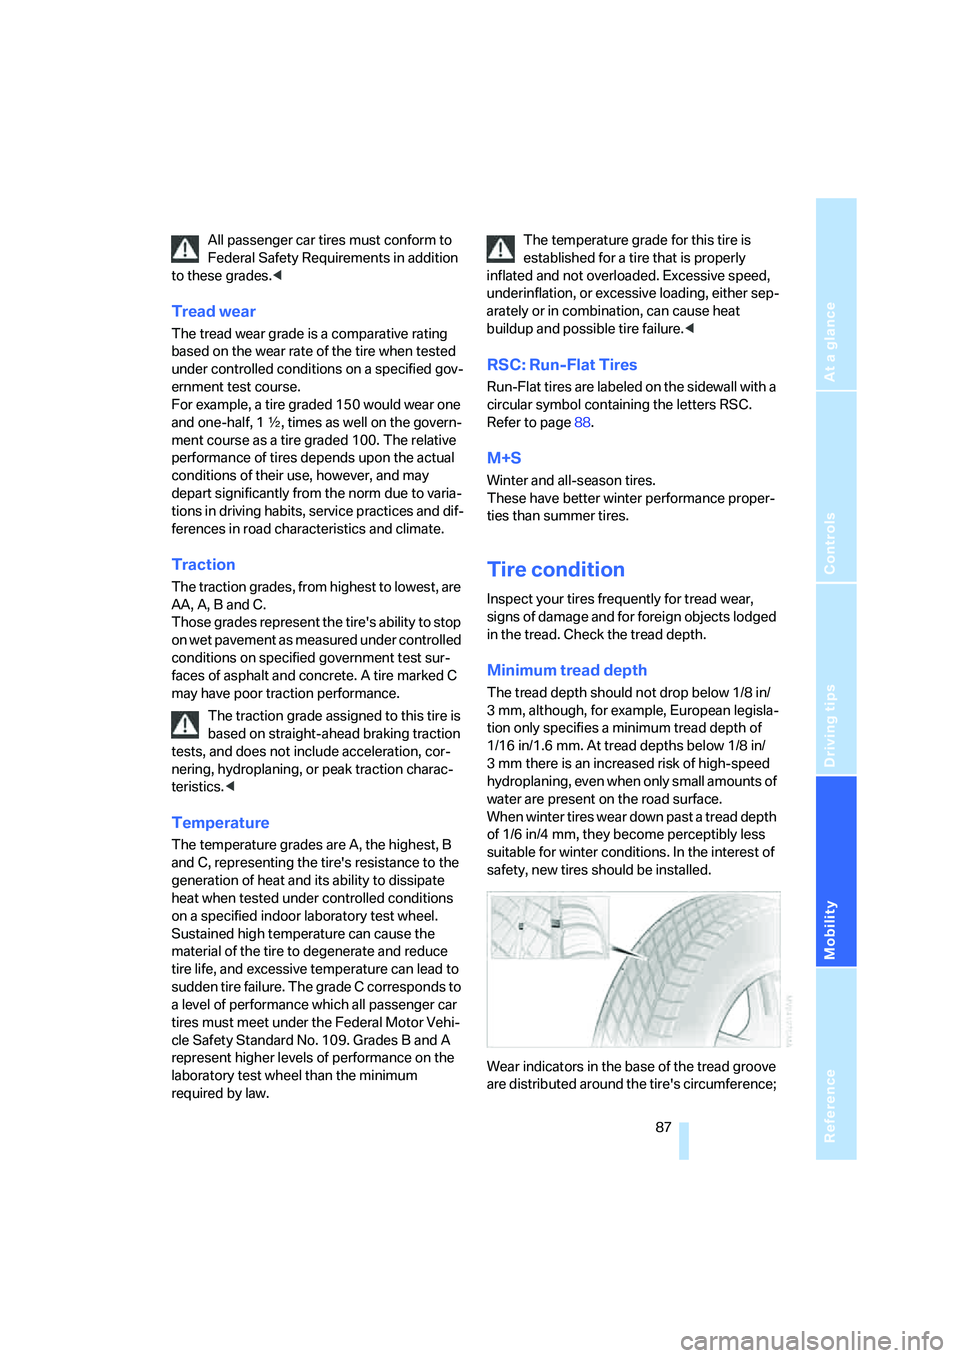
Wear indicators in the base of the tread groove
are distributed around the tire's circumference;