Page 67 of 165
with OE BMW Motorrad Integ-
ral ABS:If you switch on the ig-
nition while the brakes
are applied, then start the
engine and ride off immedi-
ately, the BMW Integral ABS
remains in residual braking
function mode. Self-diagnosis
is performed as soon as the
brake levers are in their fully
released positions for the first
time. Until this completes the
ABS function is not available;
the same applies to power
assistance for the brakes.
When you start the engine,
wait for the ABS to complete
its self-diagnosis.
Switch on the ignition.
Pre-ride check is
performed. ( 65)
ABS self-diagnosis is per-
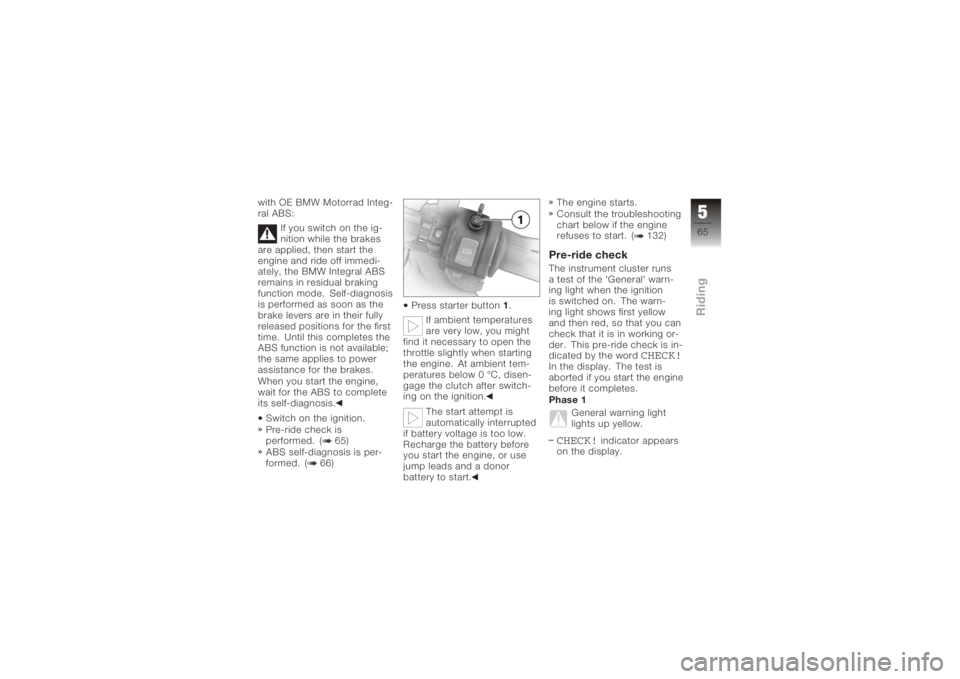
formed. ( 66) Press starter button
1.
If ambient temperatures
are very low, you might
find it necessary to open the
throttle slightly when starting
the engine. At ambient tem-
peratures below 0 °C, disen-
gage the clutch after switch-
ing on the ignition.
The start attempt is
automatically interrupted
if battery voltage is too low.
Recharge the battery before
you start the engine, or use
jump leads and a donor
battery to start. The engine starts.
Consult the troubleshooting
chart below if the engine
refuses to start. ( 132)
Pre-ride checkThe instrument cluster runs
a test of the 'General' warn-
ing light when the ignition
is switched on. The warn-
ing light shows first yellow
and then red, so that you can
check that it is in working or-
der. This pre-ride check is in-
dicated by the word
CHECK!
In the display. The test is
aborted if you start the engine
before it completes.
Phase 1
General warning light
lights up yellow.CHECK!
indicator appears
on the display.
565zRiding
Page 68 of 165
Phase 2General warning light
lights up red.CHECK!
indicator appears
on the display.
If the 'General' warning light is
not displayed:
Some malfunctions can-
not be indicated if the
'General' warning light cannot
be displayed.
Check that the 'General'
warning light comes on, and
that it lights up yellow and
then red.
Have the fault rectified as
soon as possible by a spe-
cialist workshop, preferably
an authorised BMW Motor-
rad dealer.
ABS warning lights
OE
There are two country-
dependent versions of the
ABS warning light:
Country-dependent ver-
sion 1.
Country-dependent ver-
sion 2.
The description below is
based on country-dependent
version 1.ABS self-diagnosis
OE
BMW Integral ABS performs
self-diagnosis and a
pull-away test to ensure its
operability. Self-diagnosis
is performed automatically
when you switch on the
ignition. Self-diagnosis is
not performed unless both
brake levers are in their fully
released positions. Phase 1
Self-diagnosis is in progress.
General warning light
lights up red.
ABS warning light
flashes four times per
second.
Phase 2
Self-diagnosis is complete.
ABS warning light
flashes once per
second.
If self-diagnosis did not com-
plete:
Release the brake levers as
soon as possible.
If an error message appears
when self-diagnosis com-
pletes: See the section entitled
"Status indicators" for in-
formation on how to inter-
pret these messages.
566zRiding
Page 69 of 165
The ABS warning light
does not go out until the
pull-away test completes.
Pulling away with
BMW Integral ABS
OE
Starting on gradientsSelect a gear.
Release the clutch lever and
both brake levers.
Switch on the ignition.
Wait for ABS self-diagnosis
to complete.
Apply the brakes and disen-
gage the clutch.
Start the engine.ABS warning lightsThere are two country-
dependent versions of the
ABS warning light:
Country-dependent ver-
sion 1. Country-dependent ver-
sion 2.
The description below is
based on country-dependent
version 1.
ABS pull-away testWhen you pull away, the
BMW Integral ABS checks the
ABS sensors. ABS warning light
flashes once per
second.
The ABS warning light goes
out when the pull-away test
completes.
If an error message appears
when the pull-away test com-
pletes: See the section entitled
"Status indicators" for in-
formation on how to inter-
pret these messages.
Running inThe first 1000 kmWhile running in the mo-
torcycle, vary the throttle
opening and engine-speed
range frequently.
Try to do most of your rid-
ing during this initial period
on twisting, fairly hilly roads,
avoiding high-speed main
roads and highways if pos-
sible.
Exceeding the specified
engine speeds while run-
ning in will lead to increased
engine wear.
Keep to the specified engine
speeds for running in.
Do not exceed the rpm lim-
its recommended for run-
ning in.
Running-in speeds
7000 min
-1
No full-load acceleration.
567zRiding
Page 70 of 165
Avoid low engine speeds at
full load.
Do not omit the first inspec-
tion after 500 - 1200 km.Brake padsNew brake pads must "bed
down" and therefore do not
achieve their optimum friction
levels during the first 500 km.
You can compensate for this
initial reduction in braking ef-
ficiency by exerting greater
pressure on the levers.New brake pads can ex-
tend stopping distance
by a significant margin.
Apply the brakes in good
time.TyresNew tyres have a smooth
surface. This must be
roughened by riding in a
restrained manner at various
heel angles until the tyres are run in. This running in
procedure is essential if the
tyres are to achieve maximum
grip.
Tyres do not have their
full grip when new and
there is a risk of accident at
extreme angles of heel.
Avoid extreme angles of
heel.
568zRiding
Page 73 of 165
Parking your motor-
cycle
Placing motorcycle on
side stand
If the ground is soft or
uneven, there is no guar-
antee that the motorcycle will
rest firmly on the stand.
Always check that the ground
under the stand is level and
firm.
Switch off the engine.
Pull the handbrake lever.
Hold the motorcycle upright
and balanced.
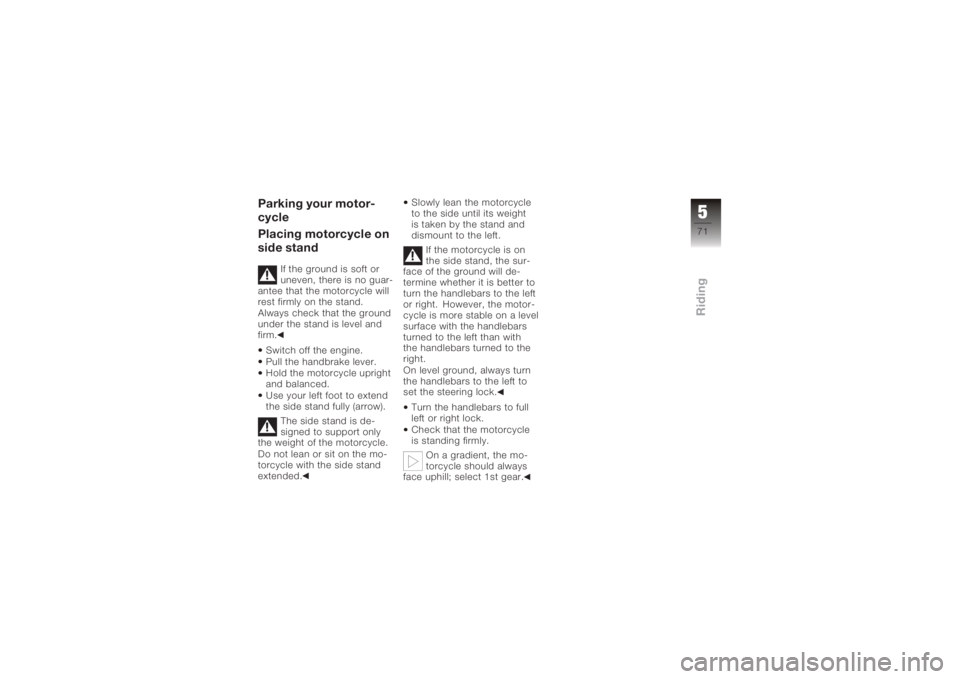
Use your left foot to extend
the side stand fully (arrow). The side stand is de-
signed to support only
the weight of the motorcycle.
Do not lean or sit on the mo-
torcycle with the side stand
extended. Slowly lean the motorcycle
to the side until its weight
is taken by the stand and
dismount to the left.
If the motorcycle is on
the side stand, the sur-
face of the ground will de-
termine whether it is better to
turn the handlebars to the left
or right. However, the motor-
cycle is more stable on a level
surface with the handlebars
turned to the left than with
the handlebars turned to the
right.
On level ground, always turn
the handlebars to the left to
set the steering lock.
Turn the handlebars to full
left or right lock.
Check that the motorcycle
is standing firmly. On a gradient, the mo-
torcycle should always
face uphill; select 1st gear.
571zRiding
Page 75 of 165
Removing motorcycle
from side standUnlock the steering lock.
with OE BMW Motorrad Integ-
ral ABS:
Brake servo assistance
is not available when the
ignition is off; the motorcycle
can start to roll.
Particularly when the motor-
cycle is parked on a gradi-
ent, switch on the ignition and
wait for the ABS to complete
its self-diagnosis.
Switch on the ignition.
Wait for ABS self-diagnosis
to complete.
From the left, grip the
handlebars with both hands.
Pull the handbrake lever.
Swing your right leg over
the seat and lift the motor- cycle to the upright posi-
tion.
Hold the motorcycle upright
and balanced.
An extended side stand
can catch on the ground
when the motorcycle is mov-
ing and lead to a fall.
Retract the side stand before
moving the motorcycle.
Sit on the motorcycle and
use your left foot to retract
the side stand.
573zRiding
Page 79 of 165
Removing motorcycle
from centre stand
OA
Unlock the steering lock.
with OE BMW Motorrad Integ-
ral ABS:
Brake servo assistance
is not available when the
ignition is off; the motorcycle
can start to roll.
Particularly when the motor-
cycle is parked on a gradi-
ent, switch on the ignition and
wait for the ABS to complete
its self-diagnosis.
Switch on the ignition.
Wait for ABS self-diagnosis
to complete.
Place your left hand on the
left handlebar grip.
Grip the rear grab handle
with your right hand.
Push the motorcycle for-
ward off the centre stand. Check that the centre stand
has fully retracted.
577zRiding
Page 81 of 165
Brake system, generalDescending mountain
passes
There is a danger of the
brakes fading if you use
only the rear brakes when
descending mountain passes.
Under extreme conditions,
the brakes could overheat
and suffer severe damage.
Use both front and rear
brakes, and make use of the
engine's braking effect as
well.
Wet brakes
After the motorcycle has
been washed, ridden
through water or ridden in
the rain, the brake discs and
pads might be wet and the
brakes might not take effect
immediately.
Apply the brakes in good time until the brakes have dried
out.
Salt on brakes
The brakes may fail to
take effect immediately
if the motorcycle was ridden
on salt-covered roads and the
brakes were not applied for
some time.
Apply the brakes in good
time until the salt layer on the
brake discs and brake pads
has been removed.
Oil or grease on brakes
Oil and grease on the
brake discs and pads
considerably diminish braking
efficiency.
Especially after repair and
maintenance work, make
sure that the brake discs and
brake pads are free of oil and
grease.
Dirt or mud on brakes
When riding on loose
surfaces or muddy
roads, the brakes may fail
to take effect immediately
because of dirt or moisture on
the discs or brake pads.
Apply brakes in good time
until the brakes have been
cleaned.
Brake system with
BMW Integral ABS
OE
Sensitive electronic con-
trolIt takes skill and sensitive
control of the brakes to pull
up safely on a motorcycle. If
the front brakes lock and the
wheel skids, the necessary
longitudinal and lateral stabil-
ising forces are lost, and a fall
can result. For this reason,
the rider seldom makes full
579zRiding