2008 BMW M5 SEDAN fold seats
[x] Cancel search: fold seatsPage 47 of 260

Controls
45Reference
At a glance
Driving tips
Communications
Navigation
Entertainment
Mobility
Have the active head restraints reset after they
are triggered in a rear-end collision. Only have
this work carried out by a BMW center or a
workshop that works according to BMW repair
procedures with correspondingly trained per-
sonnel. Otherwise, this safety equipment will
not function properly.<
Please contact a BMW center if you wish
to have the front head restraints removed
and installed.<
Front seats: height adjustment
Front seats: adjusting distance to the
back of the head
>Forward: pull up.
>Back: push the button and slide the head-
rest cushion toward the rear.
Do not place any objects behind the
headrest cushion. Otherwise, you can
impair the proper function of the head
restraint.<
On seats with a shoulder support
* you adjust
the distance to the back of the head with the
shoulder support, refer to page42.
Adjusting side extensions*
You can fold the side extensions on the head
restraint forward for increased lateral support in
the resting position.
Rear seats: height adjustment
>To raise: pull up.
>To lower: press the button, arrow1, and
push the head restraint downward.
Removing
1.Pull the head restraint upward to the stop.
2.Press the button, arrow1, and pull the head
restraint all the way out.
Safety belts
To ensure that the safety systems con-
tinue to provide optimized protection,
please observe the adjustment instructions on
page41.<
Before every drive, make sure that safety belts
are being worn at all of the occupied seats. Air-
bags complement the safety belt as an addi-
tional safety device, but they do not represent a
substitute.
Page 56 of 260

Transporting children safely
54
Unlocking safety belt
1.Open the belt buckle.
2.Remove the child restraint system.
3.Allow the belt webbing to be pulled in com-
pletely.
LATCH child restraint fixing system
LATCH: Lower Anchor and Tethers for CHil-
dren.
Follow the system manufacturer's
instructions on installation and use of
LATCH child restraint systems in order not to
impair their protective function.<
Before attaching the LATCH child's seat, pull
the belt away from the region of the child
restraint fixing system.
Make sure that the LATCH mounts have
properly clicked into place and that the
child restraint system is resting snugly against
the backrest. Otherwise, the protective action
may be impeded.<
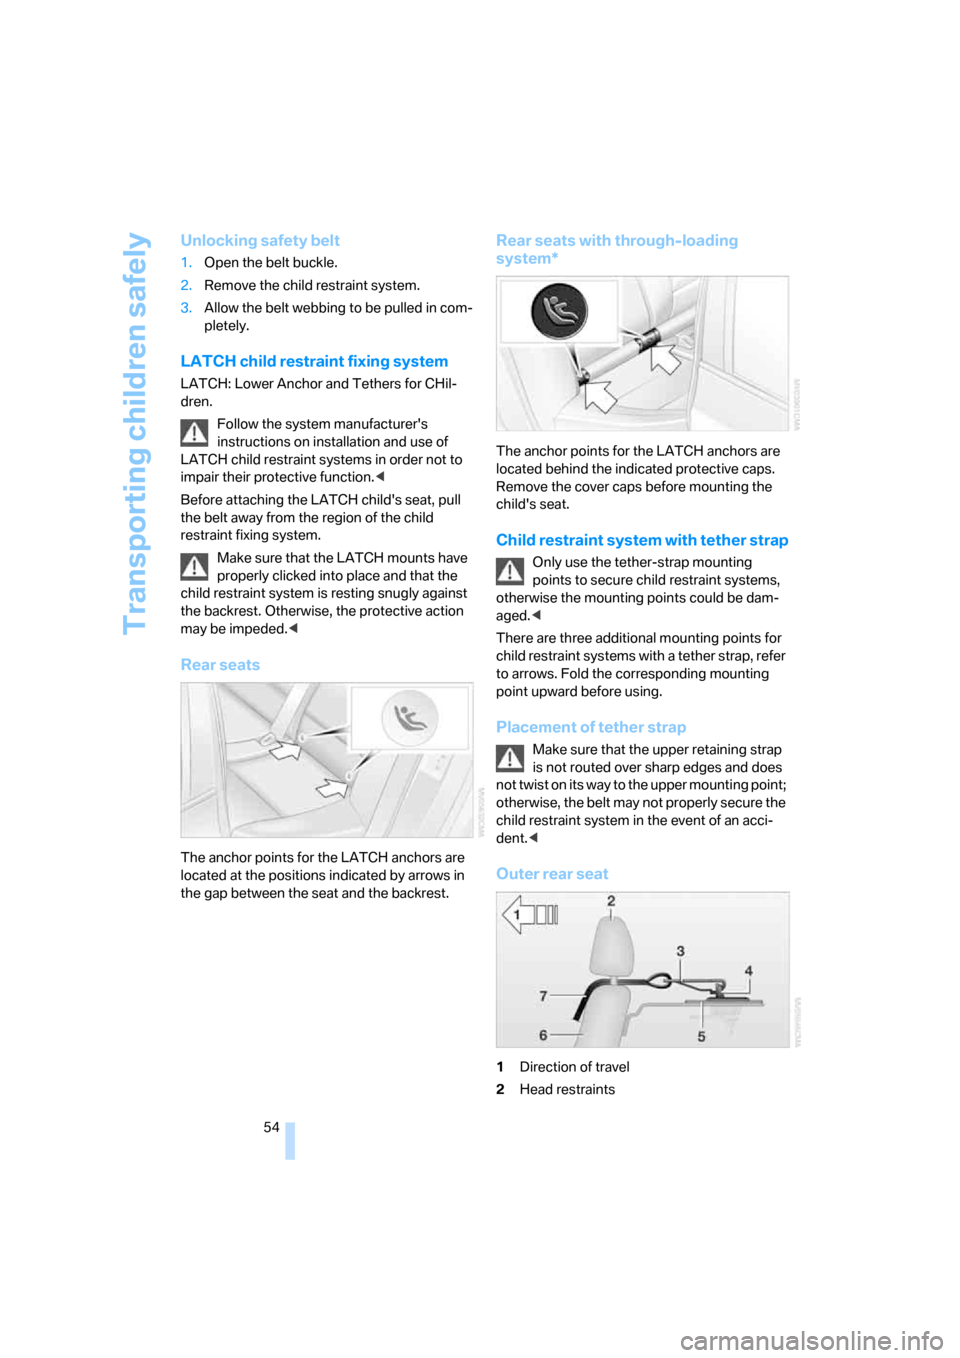
Rear seats
The anchor points for the LATCH anchors are
located at the positions indicated by arrows in
the gap between the seat and the backrest.
Rear seats with through-loading
system*
The anchor points for the LATCH anchors are
located behind the indicated protective caps.
Remove the cover caps before mounting the
child's seat.
Child restraint system with tether strap
Only use the tether-strap mounting
points to secure child restraint systems,
otherwise the mounting points could be dam-
aged.<
There are three additional mounting points for
child restraint systems with a tether strap, refer
to arrows. Fold the corresponding mounting
point upward before using.
Placement of tether strap
Make sure that the upper retaining strap
is not routed over sharp edges and does
not twist on its way to the upper mounting point;
otherwise, the belt may not properly secure the
child restraint system in the event of an acci-
dent.<
Outer rear seat
1Direction of travel
2Head restraints
Page 109 of 260

Controls
107Reference
At a glance
Driving tips
Communications
Navigation
Entertainment
Mobility
Opening upper compartment
Press button and fold cover upward.
Accessing lower compartment
Press the button at the front and fold the upper
compartment or the telephone cradle upward.
Ventilating lower compartment*
Push the slide in the lower compartment
upward.
Depending on the automatic climate con-
trol setting, the temperature inside the
ventilated compartment may be higher than in
the rest of the interior. Should this be the case,
push the slide downward to close off the venti-
lation.<
Adjusting
Push the illustrated section of the center arm-
rest into the desired position.
Connection for external audio device
You can connect an external audio device such
as a CD or MP3 player and play audio tracks
over the vehicle's loudspeaker system:
>AUX-In connection, refer to page168.
>USB/audio interface
*, refer to page169.
Storage compartments
Storage compartments are located in the cen-
ter console and in the rear.
Storage nets are located on the backrests of the
front seats, and a net
* is provided in the front
passenger footwell.
Do not stow hard or sharp-edged objects
in the storage nets or the net, otherwise
there is an increased risk of injury in an acci-
dent.<
Page 113 of 260

Controls
111Reference
At a glance
Driving tips
Communications
Navigation
Entertainment
Mobility
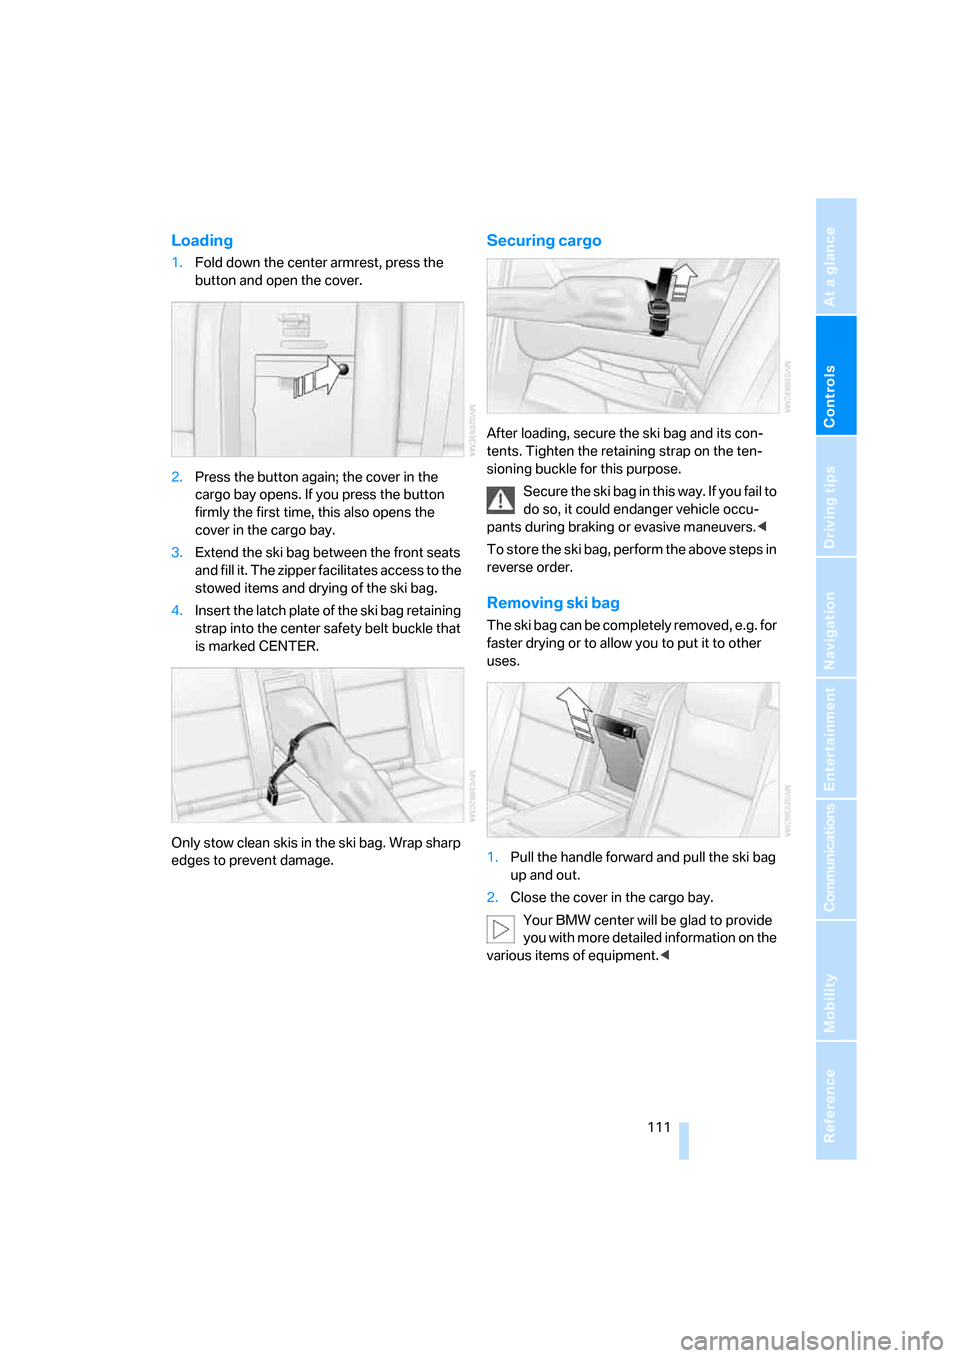
Loading
1.Fold down the center armrest, press the
button and open the cover.
2.Press the button again; the cover in the
cargo bay opens. If you press the button
firmly the first time, this also opens the
cover in the cargo bay.
3.Extend the ski bag between the front seats
and fill it. The zipper facilitates access to the
stowed items and drying of the ski bag.
4.Insert the latch plate of the ski bag retaining
strap into the center safety belt buckle that
is marked CENTER.
Only stow clean skis in the ski bag. Wrap sharp
edges to prevent damage.
Securing cargo
After loading, secure the ski bag and its con-
tents. Tighten the retaining strap on the ten-
sioning buckle for this purpose.
Secure the ski bag in this way. If you fail to
do so, it could endanger vehicle occu-
pants during braking or evasive maneuvers.<
To store the ski bag, perform the above steps in
reverse order.
Removing ski bag
The ski bag can be completely removed, e.g. for
faster drying or to allow you to put it to other
uses.
1.Pull the handle forward and pull the ski bag
up and out.
2.Close the cover in the cargo bay.
Your BMW center will be glad to provide
you with more detailed information on the
various items of equipment.<
Page 252 of 260

Everything from A to Z
250 "Random", random play
sequence165
"Random all" in audio
mode166
"Random directory" in audio
mode165
"RDS"155
Reading lamps96
Rear armrest, refer to Center
armrest, rear110
Rear lamps, refer to Tail
lamps216
– replacing bulbs216
Rear seats
– adjusting head restraints45
– folding over backrest110
– heating47
– removing head restraints45
Rear socket109
Rear ventilation101
Rearview mirror48
Rear window
– heating99
– roller sun blind, refer to Sun
blinds105
Rear window safety switch38
"Received calls"182
Reception
– quality155
– radio stations155
– regional station154
Reception level of mobile
phone, refer to Status
information20
Rechargeable flashlight106
Recirculated-air mode100
– air recirculation100
– AUC Automatic
recirculated-air control100
Reclining seat, refer to
Seats42
Recording times, refer to
Stopwatch74
"Redial" for mobile phone182
Redialing with mobile
phone187
Reflectors, refer to Tail
lamps216Refueling198
Releasing
– hood206
– locks, refer to Unlocking36
"Relock door if not
opened"32
Remaining distance, refer to
Cruising range68
Remaining distance to
destination, refer to
Computer68
Remote control28
– comfort access36
– garage door opener
104
– luggage compartment lid31
– malfunction31,37
– replacing battery37
Removing condensation on
the windows99
"Repeat directory" in audio
mode165
"Repeat" in audio mode165
"Repeat track" in audio
mode165
Replacement fuses222
Replacement of tires, refer to
Changing wheels219
Replacement remote control,
refer to New remote
controls28
Replacing bulbs, refer to
Lamps and bulbs214
Replacing tires203
Replacing wheels/tires, refer
to New wheels and tires203
Reporting safety defects7
Reserve warning, refer to Fuel
gauge67
"Reset"84,85
– stopwatch74
– tone settings151
Reset, refer to Resetting tone
settings151
"resetting FTM …"84
"Reset to default" with
MDrive51
Residual heat100Restraint systems
– for children53
– refer to Safety belts45
Retreaded tires203
Reverse, fast
– CD changer166
– CD player166
Reverse gear60
– manual transmission58
Road map138
"Roadside
Assistance"184,190
Roadside Assistance224
Roadside assistance190
Roadside parking lamps94
Roof load capacity232
Roof-mounted luggage
rack118
Rope, refer to Tow-starting
and towing225
Rotary/pushbutton, refer to
iDrive16
Route134
– bypassing sections
140
– changing140
– changing criteria134
– displaying137
– displaying arrow display137
– displaying map view138
– displaying streets or towns/
cities139
– selecting134
Route information, refer to
Destination guidance with
voice instructions139
Route map, refer to Displaying
map view138
"Route preference",
changing134
Route selection134
Rubber parts, refer to Caring
for your vehicle brochure