Page 89 of 172

Reference
At a glance
Controls
Driving tips
Mobility
87
>The compass direction shown does not
change although the direction of travel
does.
>Not all compass directions are shown.
Procedure
1.Make sure that no large metal objects or
overhead power lines are in the vicinity of
your vehicle and that you have enough
space to drive in a circle.
2.Set the currently valid compass zone.
3.Press the adjustment button for approx.
6-7 seconds to call up C. Then drive in at
least one full circle at a speed of no more
than 4 mph or 7 km/h.
If calibration is successful, the display
changes from C to a compass direction.
Setting right-hand/left-hand steering
Your digital compass is factory-set to right-
hand or left-hand steering, in accordance with
your vehicle.
Setting the language
You can set the language of the display:
Press the adjustment button for approx.
12-13 seconds. Briefly press the adjustment
button again to switch between English, "E",
and German, "O".
The setting is automatically saved after approx.
10 seconds.
Coupe:
Roller sun blind*
Tap the button in the center console to raise or
lower the roller sun blind.
Glove compartment
Opening
Pull the handle.
The light in the glove compartment comes on.
To prevent injury in the event of an acci-
dent while the vehicle is being driven,
close the glove compartment immediately after
use.<
Closing
Fold cover up.
Locking
To lock the glove compartment, use the inte-
grated key of the remote control, refer to
page18.
Convertible: when you lock the vehicle from the
outside, the glove compartment is locked as
well.
Page 90 of 172

Practical interior accessories
88
LED hand lamp
In a holder on the left side of the glove compart-
ment.
Insert the hand lamp into the holder with
the lens pointing toward the passenger
compartment to ensure that the lamp cannot be
switched on accidentally.<
Center armrest
Storage compartment
The center armrest between the front seats
contains either a compartment or the cover for
the snap-in adapter
*, depending on the equip-
ment version. For more information about this
mobile phone base plate refer to the separate
Owner's Manual.
Convertible: when you lock the vehicle from the
outside, the center armrest is locked as well.
Opening
Press the button, see arrow.
Ventilated storage compartment
The storage compartment in the center armrest
can be ventilated: slide the switch backwards.
The temperature is controlled via the knurled
wheel for adjusting the temperature of air venti-
lating the rear of the passenger compartment,
refer to page83.
Connection for external audio device
You can connect an external audio device such
as a CD or MP3 player and play audio tracks
over the car's loudspeaker system. You can set
the volume and tone by means of the car radio,
refer to the separate Owner's Manual for Radio.
Connecting
Lift up the center armrest.
Connection for audio playback:
TRS connector 1/8 in/3.5 mm
To play audio tracks over the car's loudspeaker
system, connect the headset or line-out port of
the external device to the connector.
Page 91 of 172

Reference
At a glance
Controls
Driving tips
Mobility
89
Storage compartments inside
the vehicle
Depending on your vehicle's equipment, you
will find compartments beside the steering col-
umn
*, in the front doors and in the center con-
sole
*.
There are nets
on the front-seat backrests.
Storage compartments in the rear
console
Depending on your vehicle's equipment ver-
sion, the following storage compartments can
be found in the rear console:
>Storage tray
>Storage compartment with cover
>Cup holders
Coupe: clothes hooks
Press the upper edge to flip open.
Items of clothing hung from the hooks
must not obstruct the driver's view. Do
not hang heavy objects from the hooks, other-
wise they could endanger the car's occupants,
e.g. in case of heavy braking or sudden swerv-
ing.<
Cup holders
Use lightweight and shatterproof contain-
ers and do not transport hot beverages,
otherwise there is an increased risk of injury in
the event of the accident. Do not force contain-
ers that are too large into the cup holders, oth-
erwise damage could result.<
Front
Opening
Briefly press the center of the cover.
Closing
Briefly press the cover in the center and push in
the cup holder.
Rear*
There are two additional cup holders in the rear
console.
Press the button to open.
Before folding down the rear seat back-
rest or using the transport bag, remove all
containers from the cup holder and close it. Do
not place objects into the cup holder and do not
use force to close it. Do not use the cup holder
as a grab handle.<
Page 92 of 172

Practical interior accessories
90
Ashtray, front
Opening
Push the ridge on the cover.
Emptying
Lift out the insert.
Lighter
With the engine running or the ignition switched
on, press in the cigarette lighter.
The lighter can be pulled out as soon as it pops
back out.
Hold or touch the hot cigarette lighter by
the knob only. Holding or touching it in
other areas could result in burns.
When leaving the car, always remove the remote control so that children cannot operate
the cigarette lighter and burn themselves.<
Ashtray, rear
Opening
Push the ridge on the cover.
Emptying
Lift out the insert.
Connecting electrical
appliances
In your BMW, when the engine is running or the
ignition is switched on, you can use electrical
devices such as a flashlight, car vacuum
cleaner, etc., up to approx. 200 watts at
12 volts, as long as one of the following sockets
is available. Avoid damaging the sockets by
attempting to insert plugs of unsuitable shape
or size.
Cigarette lighter socket*
To access the socket: take the cigarette lighter
out of the socket.
Socket in the center armrest
External audio device, refer to page88.
Page 93 of 172

Reference
At a glance
Controls
Driving tips
Mobility
91
Coupe: socket in the cargo bay*
Open the cap.
Coupe:
Through-loading system
Opening
1.To release the rear seat backrest, pull the
corresponding lever in the cargo bay.
2.The unlocked rear seat backrest moves for-
ward slightly. Fold the backrest forward by
the head restraint.
Closing
Return the rear seat backrest to its upright posi-
tion and engage it.When returning the backrest into its seat-
ing position, make sure that the seat's
locking mechanism engages properly. Other-
wise, cargo could be thrown around in the event
of sharp braking or swerving and endanger the
occupants.<
The lashing eyes in the cargo bay provide you
with a way to attach cargo bay nets
* or draw
straps for securing suitcases and luggage, refer
to page101.
Convertible:
Cargo loading
Enlarging the cargo bay
When the hardtop is closed you can enlarge the
cargo bay:
To do so, push the cargo bay partition upward.
Before opening the hardtop, push the cargo bay
partition down until it engages on both sides.
Before moving the hardtop, ensure that
there are no objects on or next to the
cargo bay partition, otherwise parts of the hard-
top may be damaged. Do not exceed the maxi-
mum loading height; refer to the sticker in the
cargo bay showing a line indicating the maxi-
mum height. Do not use force to push down the
cargo bay partition.<
The retractable hardtop can only be
opened if the cargo bay partition is in its
lowermost position and engaged on both
sides.<
Page 94 of 172

Practical interior accessories
92
Folding down the rear seat backrest
You can fold down the rear seat backrest to
transport light objects in the rear without dam-
aging the seats. Depending on the vehicle
equipment, the mounting points for the cargo
bay net
* are found on the back of the seat back-
rest. To unlock the rear seat backrest: press the
button on the driver's or the opposite side.
Bag holder*
When the rear seat backrest is folded down, you
will find two bag holders on the cargo bay wall:
1.Fold open the holder by pressing the but-
ton.
2.Press the handles of the bag onto the
holder from above.
Only hang light shopping bags or other
suitable objects from the holders, other-
wise braking maneuvers and swerving may lead
to a safety hazard due to objects flying about
the passenger compartment. Only transport
heavy luggage in the cargo bay if it has been
appropriately secured.<
For more information on loading the vehicle,
refer to page100.
Storage compartment behind the rear
seat backrest
A storage compartment is located behind the
rear seat backrest. To access the storage com-
partment: remove the insert or fold down the
rear seat backrest.
When the rear seat backrest is folded
down or the insert has been removed,
only transport small light objects in the storage
compartment, otherwise braking maneuvers
and swerving may lead to a safety hazard due to
objects flying about the passenger compart-
ment. Only transport heavy luggage in the
cargo bay if it has been appropriately secured.<
Storage compartments inside
the cargo bay
Coupe
Depending on your vehicle's equipment, the
following storage spaces can be found in the
cargo bay:
>Left storage compartment, e.g. for storing a
box of cleaning tissues or up to 12 CD jack-
ets, depending on vehicle equipment ver-
sion
>Net
* for securing smaller objects, to be
attached to the fixtures on the floor panel
>Hooks for hanging up, e.g., shopping bags
or tote bags
>Rubber strap on the left trim panel for
securing small objects such as a folding
umbrella
>Net for small objects on the right trim panel
of the cargo bay
Page 95 of 172

Reference
At a glance
Controls
Driving tips
Mobility
93
Convertible
Depending on your vehicle's equipment, the
following storage spaces can be found in the
cargo bay:
>Storage compartment on the left side of the
cargo bay. To open turn handle by 90°
>Net
* for securing smaller objects, to be
attached to the fixtures on the floor panel
>Rubber band
* to be attached to the lateral
lashing eyes
>Stowage compartment under the floor
panel
Folding up the floor panel
Do not exceed the maximum permissible
load of 55 lbs/25 kg for the storage com-
partment under the floor panel, otherwise dam-
age could result.<
Coupe
Press the floor panel up and secure it with the
catch.
Convertible
To lift, grab hold of the floor panel at the open-
ing at the rear of the panel.
Lashing eyes
You will find lashing eyelets in the cargo bay for
securing luggage items with nets or tensioning
straps, refer to page101.
Coupe: ski bag*
The ski bag is designed for safe, clean transport
of up to 4 pairs of standard skis or up to
2snowboards.
With the ski bag you can stow skis with a length
of up to 6ft 10in/2.10m. When skis of 6ft 10in/
2.10 m length are loaded, the overall capacity of
the ski bag is reduced due to its tapered design.
Loading
1.Take out the filler piece.
2.Press the button, reach into the recess and
fold down the cover.
3.Open the Velcro fastener, spread the ski
bag between the front seats and insert the
skis or snowboards.
The zip fastener makes objects in the ski
bag easier to reach.
4.Clip the hooks of the ski bag retaining strap
into the eyelet.
Only place clean skis in the ski bag. Wrap sharp
edges to prevent damage.
Securing cargo
After loading, secure the ski bag and its con-
tents. Tighten the retaining strap on the ten-
sioning buckle for this purpose.
Page 96 of 172

Practical interior accessories
94 Secure the ski bag in the manner
described, otherwise it could endanger
the car's occupants, e.g. in case of heavy brak-
ing or sudden swerving.<
To store the ski bag, perform the steps
described for loading in reverse order.
Removing the ski bag
The ski bag can be completely removed, e.g. for
faster drying or to allow you to use other inserts.
1.Fold down the center panel in the rear seat
backrest.
2.Pull the handle, arrow1.
3.Pull out the insert, arrow 2.
For more information on the various
inserts available, contact your BMW cen-
ter.<
Convertible: through-loading
opening with integrated
transport bag*
The transport bag is designed for safe, clean
transport of up to 4 pairs of standard skis or up
to 2 snowboards.
When the rear seat backrest is folded up, you
can remove the insert and use the transport bag
with the regular through-loading opening. To
transport larger objects, you can fold down the
rear seat backrest to create an expanded
through-loading opening.
With the transport bag you can stow skis with a
length of up to 6 ft 2 in/1.90 m. When skis of 6 ft
2 in/1.90 m length are loaded, the overall capac-
ity of the transport bag is reduced due to its
tapered design.
Loading
1.For loading using the regular through-load-
ing opening:
Press the button down and remove the
insert from the front.
For loading with the through-loading open-
ing expanded:
Fold down the rear seat backrest, refer to
page92.
2.Front cover: press the two recesses
together and fold the cover down until it
engages.
3.In the cargo bay: press the two recesses
together and fold down the cover.
4.Undo the Velcro fastener and spread out
the transport bag between the front seats.
 1
1 2
2 3
3 4
4 5
5 6
6 7
7 8
8 9
9 10
10 11
11 12
12 13
13 14
14 15
15 16
16 17
17 18
18 19
19 20
20 21
21 22
22 23
23 24
24 25
25 26
26 27
27 28
28 29
29 30
30 31
31 32
32 33
33 34
34 35
35 36
36 37
37 38
38 39
39 40
40 41
41 42
42 43
43 44
44 45
45 46
46 47
47 48
48 49
49 50
50 51
51 52
52 53
53 54
54 55
55 56
56 57
57 58
58 59
59 60
60 61
61 62
62 63
63 64
64 65
65 66
66 67
67 68
68 69
69 70
70 71
71 72
72 73
73 74
74 75
75 76
76 77
77 78
78 79
79 80
80 81
81 82
82 83
83 84
84 85
85 86
86 87
87 88
88 89
89 90
90 91
91 92
92 93
93 94
94 95
95 96
96 97
97 98
98 99
99 100
100 101
101 102
102 103
103 104
104 105
105 106
106 107
107 108
108 109
109 110
110 111
111 112
112 113
113 114
114 115
115 116
116 117
117 118
118 119
119 120
120 121
121 122
122 123
123 124
124 125
125 126
126 127
127 128
128 129
129 130
130 131
131 132
132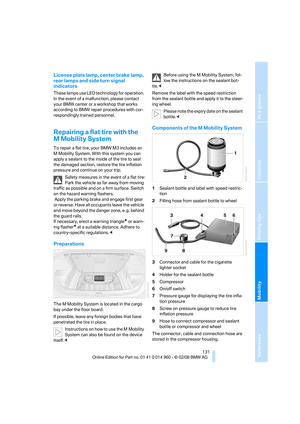 133
133 134
134 135
135 136
136 137
137 138
138 139
139 140
140 141
141 142
142 143
143 144
144 145
145 146
146 147
147 148
148 149
149 150
150 151
151 152
152 153
153 154
154 155
155 156
156 157
157 158
158 159
159 160
160 161
161 162
162 163
163 164
164 165
165 166
166 167
167 168
168 169
169 170
170 171
171