2008 BMW 760LI SEDAN height adjustment
[x] Cancel search: height adjustmentPage 46 of 254
Adjusting
44 Also on the passenger side, do not recline the
backrest too far to the rear while the vehicle is
being driven; otherwise, there is a danger in the
event of an accident of 'sliding under' the safety
belt, eliminating the protection normally pro-
vided by the belt.<
Please note the information on damage to
safety belts provided on page49 and the infor-
mation on the active head restraints on
page47.
The concept
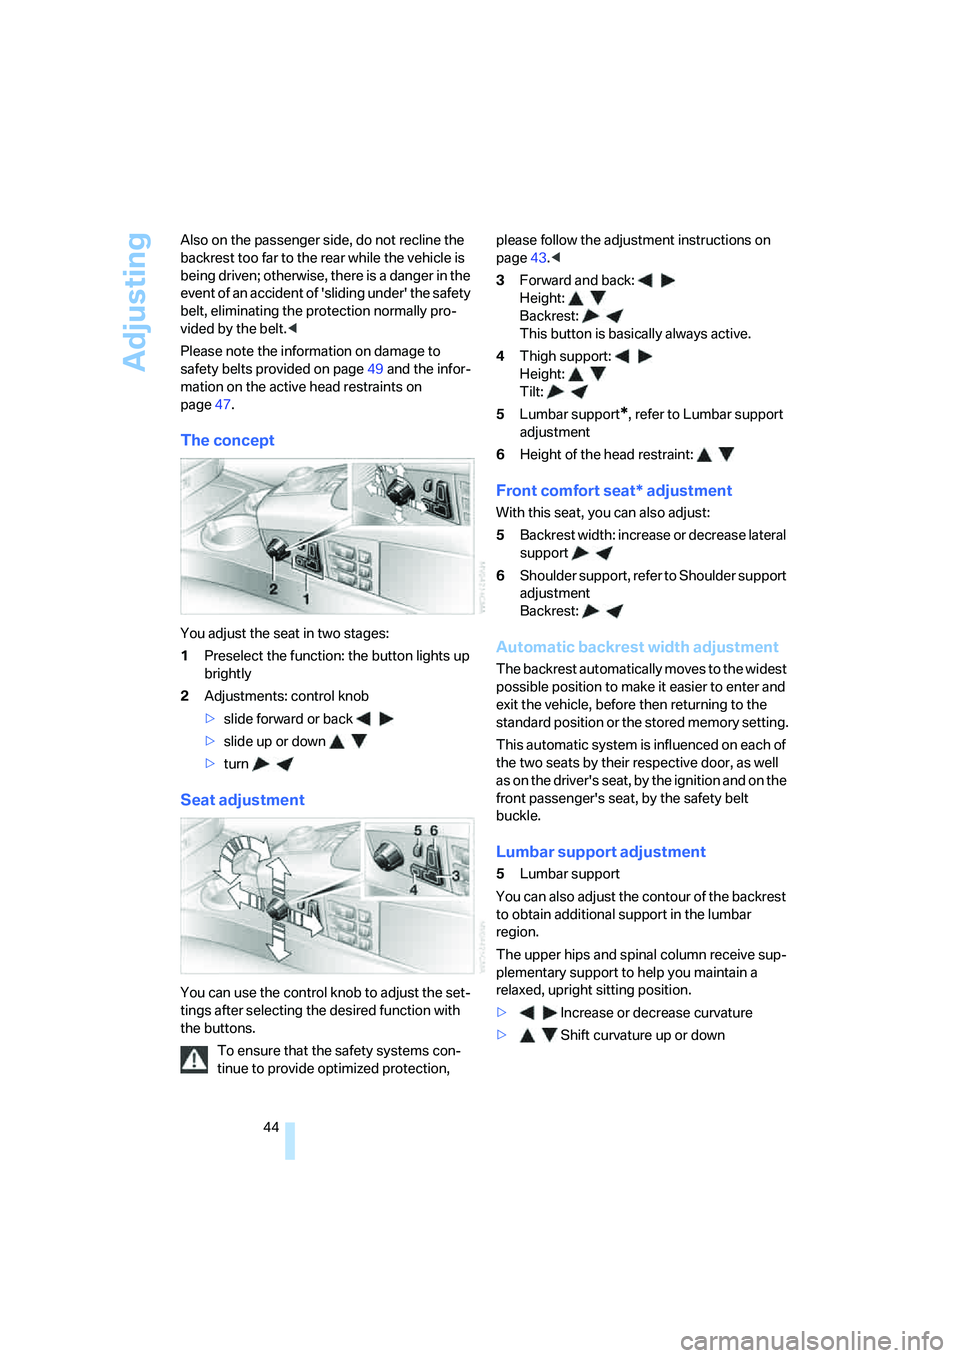
You adjust the seat in two stages:
1Preselect the function: the button lights up
brightly
2Adjustments: control knob
>slide forward or back
>slide up or down
>turn
Seat adjustment
You can use the control knob to adjust the set-
tings after selecting the desired function with
the buttons.
To ensure that the safety systems con-
tinue to provide optimized protection, please follow the adjustment instructions on
page43.<
3Forward and back:
Height:
Backrest:
This button is basically always active.
4Thigh support:
Height:
Tilt:
5Lumbar support
*, refer to Lumbar support
adjustment
6Height of the head restraint:
Front comfort seat* adjustment
With this seat, you can also adjust:
5Backrest width: increase or decrease lateral
support
6Shoulder support, refer to Shoulder support
adjustment
Backrest:
Automatic backrest width adjustment
The backrest automatically moves to the widest
possible position to make it easier to enter and
exit the vehicle, before then returning to the
standard position or the stored memory setting.
This automatic system is influenced on each of
the two seats by their respective door, as well
as on the driver's seat, by the ignition and on the
front passenger's seat, by the safety belt
buckle.
Lumbar support adjustment
5Lumbar support
You can also adjust the contour of the backrest
to obtain additional support in the lumbar
region.
The upper hips and spinal column receive sup-
plementary support to help you maintain a
relaxed, upright sitting position.
>Increase or decrease curvature
>Shift curvature up or down
Page 47 of 254
Controls
45Reference
At a glance
Driving tips
Communications
Navigation
Entertainment
Mobility
Shoulder support adjustment
6Adjustment of the tilt angle of the shoulder
support:
The shoulder support provides support to your
back in the shoulder region as well. This pro-
vides a relaxed driving position and helps
relieve stress on the shoulder muscles.
Rear comfort seat* adjustment
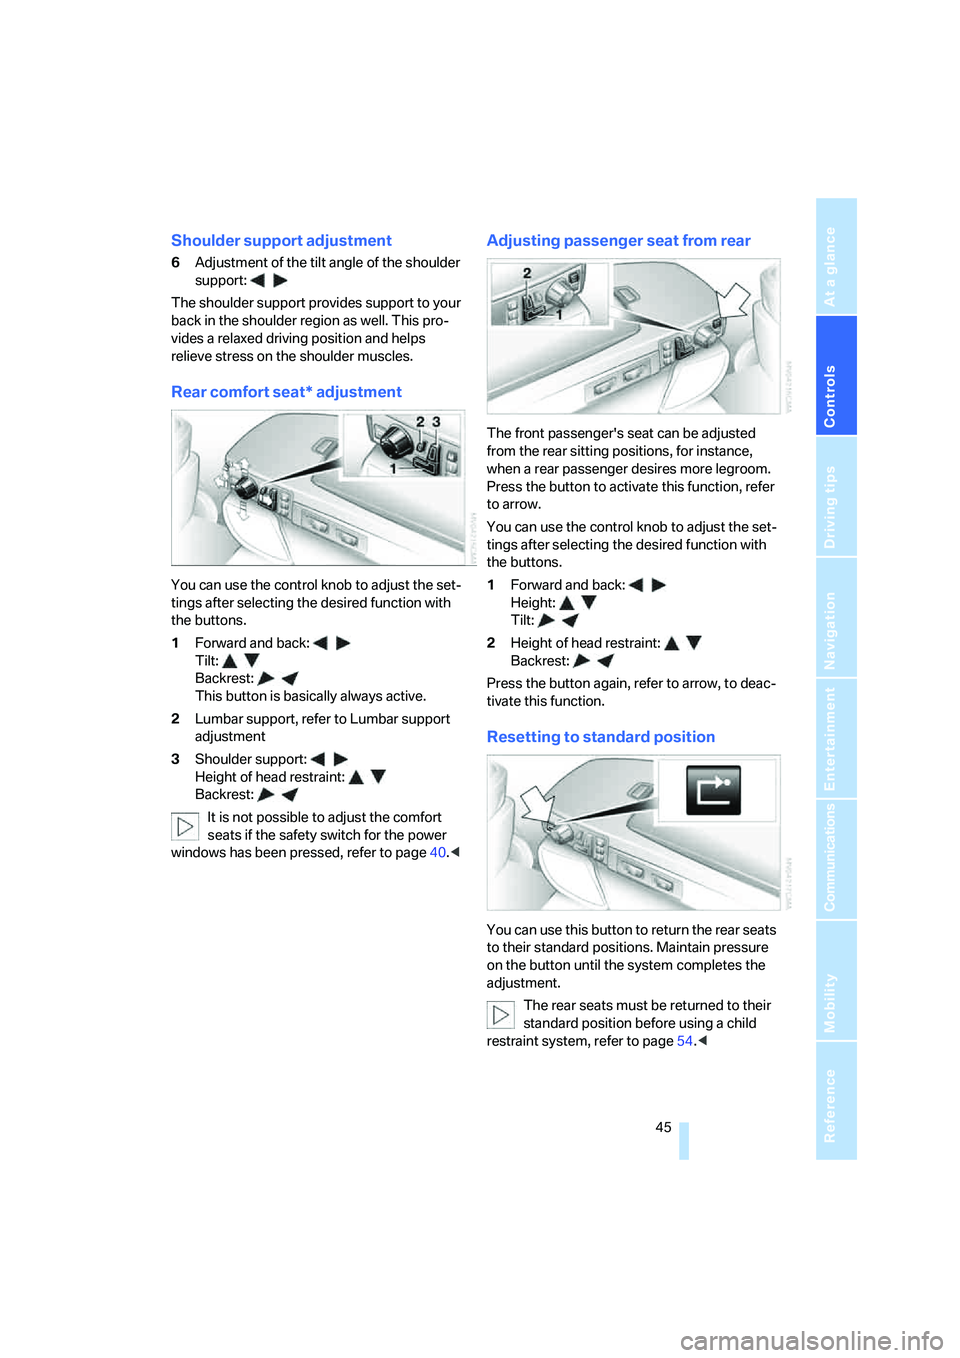
You can use the control knob to adjust the set-
tings after selecting the desired function with
the buttons.
1Forward and back:
Tilt:
Backrest:
This button is basically always active.
2Lumbar support, refer to Lumbar support
adjustment
3Shoulder support:
Height of head restraint:
Backrest:
It is not possible to adjust the comfort
seats if the safety switch for the power
windows has been pressed, refer to page40.<
Adjusting passenger seat from rear
The front passenger's seat can be adjusted
from the rear sitting positions, for instance,
when a rear passenger desires more legroom.
Press the button to activate this function, refer
to arrow.
You can use the control knob to adjust the set-
tings after selecting the desired function with
the buttons.
1Forward and back:
Height:
Tilt:
2Height of head restraint:
Backrest:
Press the button again, refer to arrow, to deac-
tivate this function.
Resetting to standard position
You can use this button to return the rear seats
to their standard positions. Maintain pressure
on the button until the system completes the
adjustment.
The rear seats must be returned to their
standard position before using a child
restraint system, refer to page54.<
Page 48 of 254
Adjusting
46
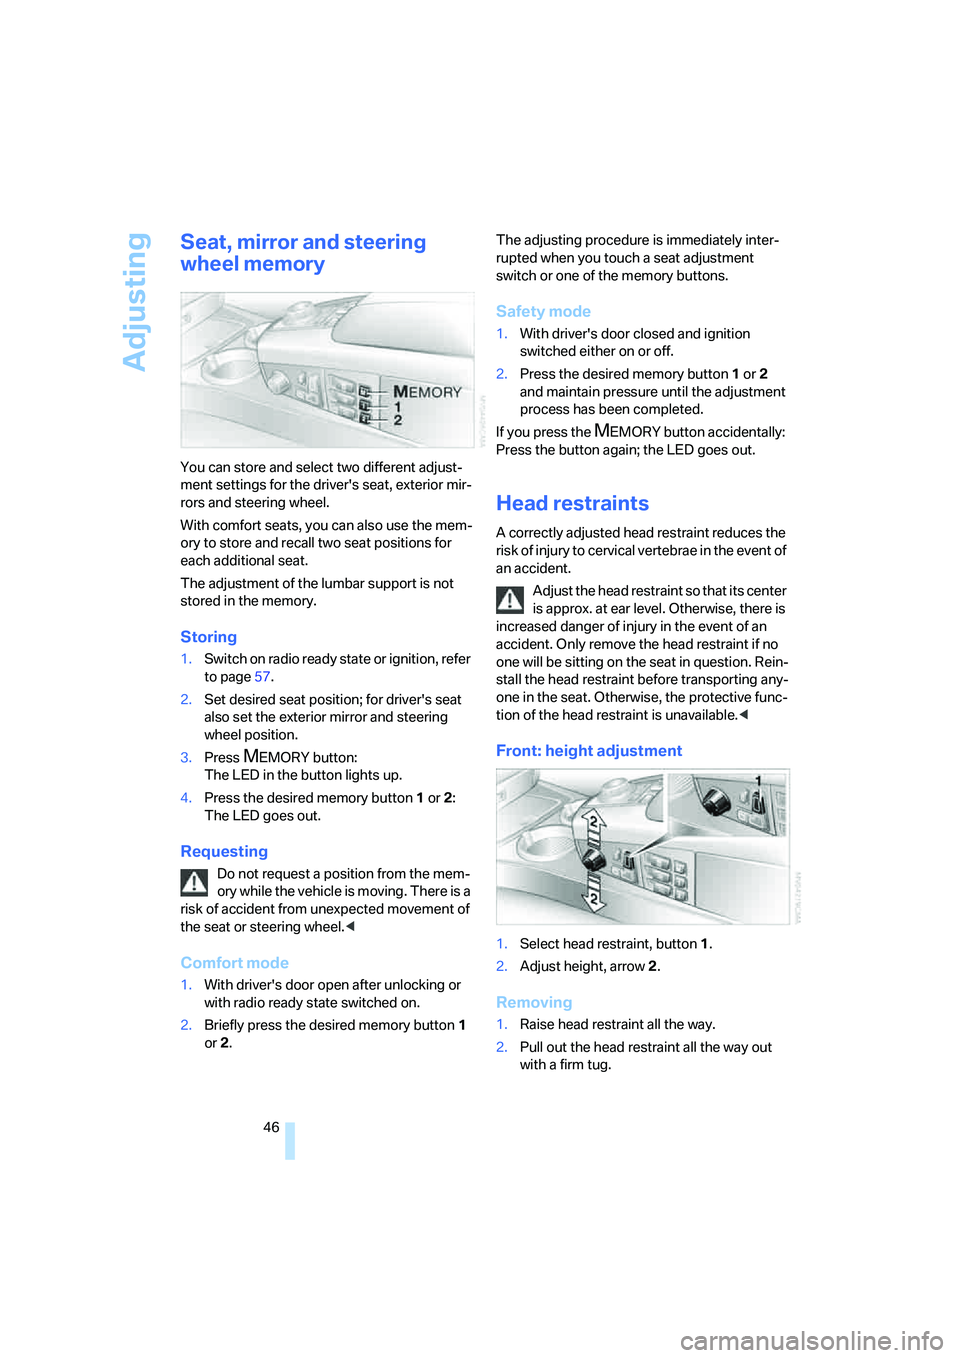
Seat, mirror and steering
wheel memory
You can store and select two different adjust-
ment settings for the driver's seat, exterior mir-
rors and steering wheel.
With comfort seats, you can also use the mem-
ory to store and recall two seat positions for
each additional seat.
The adjustment of the lumbar support is not
stored in the memory.
Storing
1.Switch on radio ready state or ignition, refer
to page57.
2.Set desired seat position; for driver's seat
also set the exterior mirror and steering
wheel position.
3.Press
MEMORY button:
The LED in the button lights up.
4.Press the desired memory button1 or2:
The LED goes out.
Requesting
Do not request a position from the mem-
ory while the vehicle is moving. There is a
risk of accident from unexpected movement of
the seat or steering wheel.<
Comfort mode
1.With driver's door open after unlocking or
with radio ready state switched on.
2.Briefly press the desired memory button 1
or2.The adjusting procedure is immediately inter-
rupted when you touch a seat adjustment
switch or one of the memory buttons.
Safety mode
1.With driver's door closed and ignition
switched either on or off.
2.Press the desired memory button 1or2
and maintain pressure until the adjustment
process has been completed.
If you press the
MEMORY button accidentally:
Press the button again; the LED goes out.
Head restraints
A correctly adjusted head restraint reduces the
risk of injury to cervical vertebrae in the event of
an accident.
Adjust the head restraint so that its center
is approx. at ear level. Otherwise, there is
increased danger of injury in the event of an
accident. Only remove the head restraint if no
one will be sitting on the seat in question. Rein-
stall the head restraint before transporting any-
one in the seat. Otherwise, the protective func-
tion of the head restraint is unavailable.<
Front: height adjustment
1.Select head restraint, button1.
2.Adjust height, arrow2.
Removing
1.Raise head restraint all the way.
2.Pull out the head restraint all the way out
with a firm tug.
Page 49 of 254
Controls
47Reference
At a glance
Driving tips
Communications
Navigation
Entertainment
Mobility
Installing
1.Press the button upward, refer to arrow2,
for a maximum of approx. 10 seconds, but if
possible, only until the humming sound
changes, indicating that the mounting
socket has reached the top.
2.Insert the head restraint and press down
until you hear and feel it engage on both
sides.
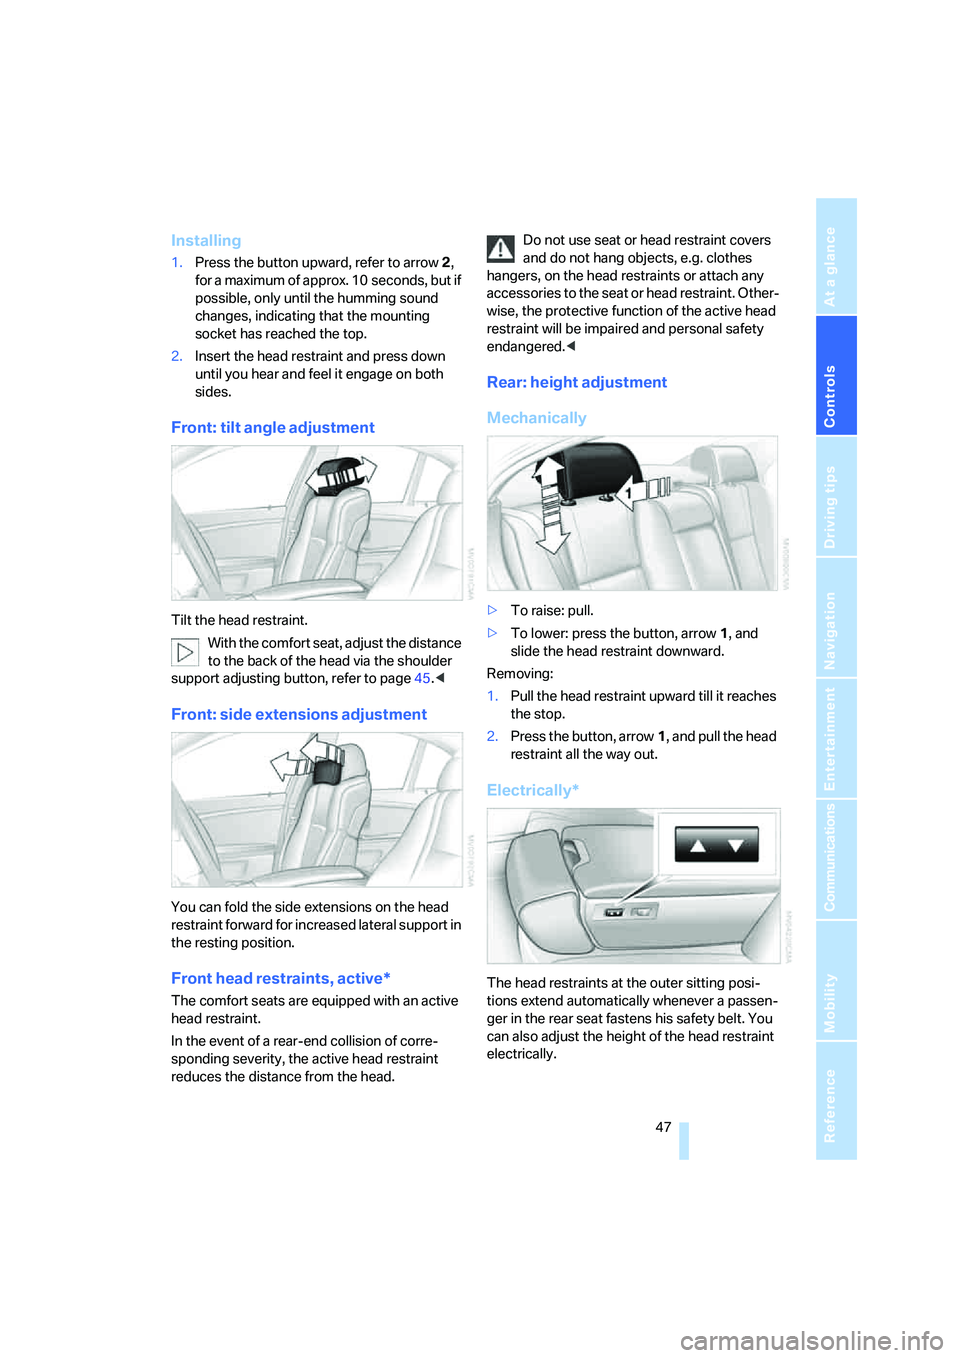
Front: tilt angle adjustment
Tilt the head restraint.
With the comfort seat, adjust the distance
to the back of the head via the shoulder
support adjusting button, refer to page45.<
Front: side extensions adjustment
You can fold the side extensions on the head
restraint forward for increased lateral support in
the resting position.
Front head restraints, active*
The comfort seats are equipped with an active
head restraint.
In the event of a rear-end collision of corre-
sponding severity, the active head restraint
reduces the distance from the head.Do not use seat or head restraint covers
and do not hang objects, e.g. clothes
hangers, on the head restraints or attach any
accessories to the seat or head restraint. Other-
wise, the protective function of the active head
restraint will be impaired and personal safety
endangered.<
Rear: height adjustment
Mechanically
>To raise: pull.
>To lower: press the button, arrow1, and
slide the head restraint downward.
Removing:
1.Pull the head restraint upward till it reaches
the stop.
2.Press the button, arrow1, and pull the head
restraint all the way out.
Electrically*
The head restraints at the outer sitting posi-
tions extend automatically whenever a passen-
ger in the rear seat fastens his safety belt. You
can also adjust the height of the head restraint
electrically.
Page 50 of 254
Adjusting
48 To prevent possible personal injury and
property damage, always ensure that the
area above the head restraints is clear and
unobstructed before extending them upward.<
You can use the safety switch, refer to
page40, to deactivate the height adjust-
ment of the head restraints.<
Removal and installation: the same as with the
front head restraints.
Middle head restraint
Pull out the lowered head restraint until it
engages before the center rear seat is
occupied. Otherwise, the level of occupant pro-
tection can be reduced.<
Rear: side extension adjustment*
You can fold the side extensions on the head
restraint forward for increased lateral support in
the resting position.
Safety belts
To ensure that the safety systems con-
tinue to provide optimized protection,
please follow the adjustment instructions on
page43.<
Fasten safety belts on all occupied seats before
every trip. Although airbags enhance safety by
providing added protection, they are not a sub-
stitute for safety belts.
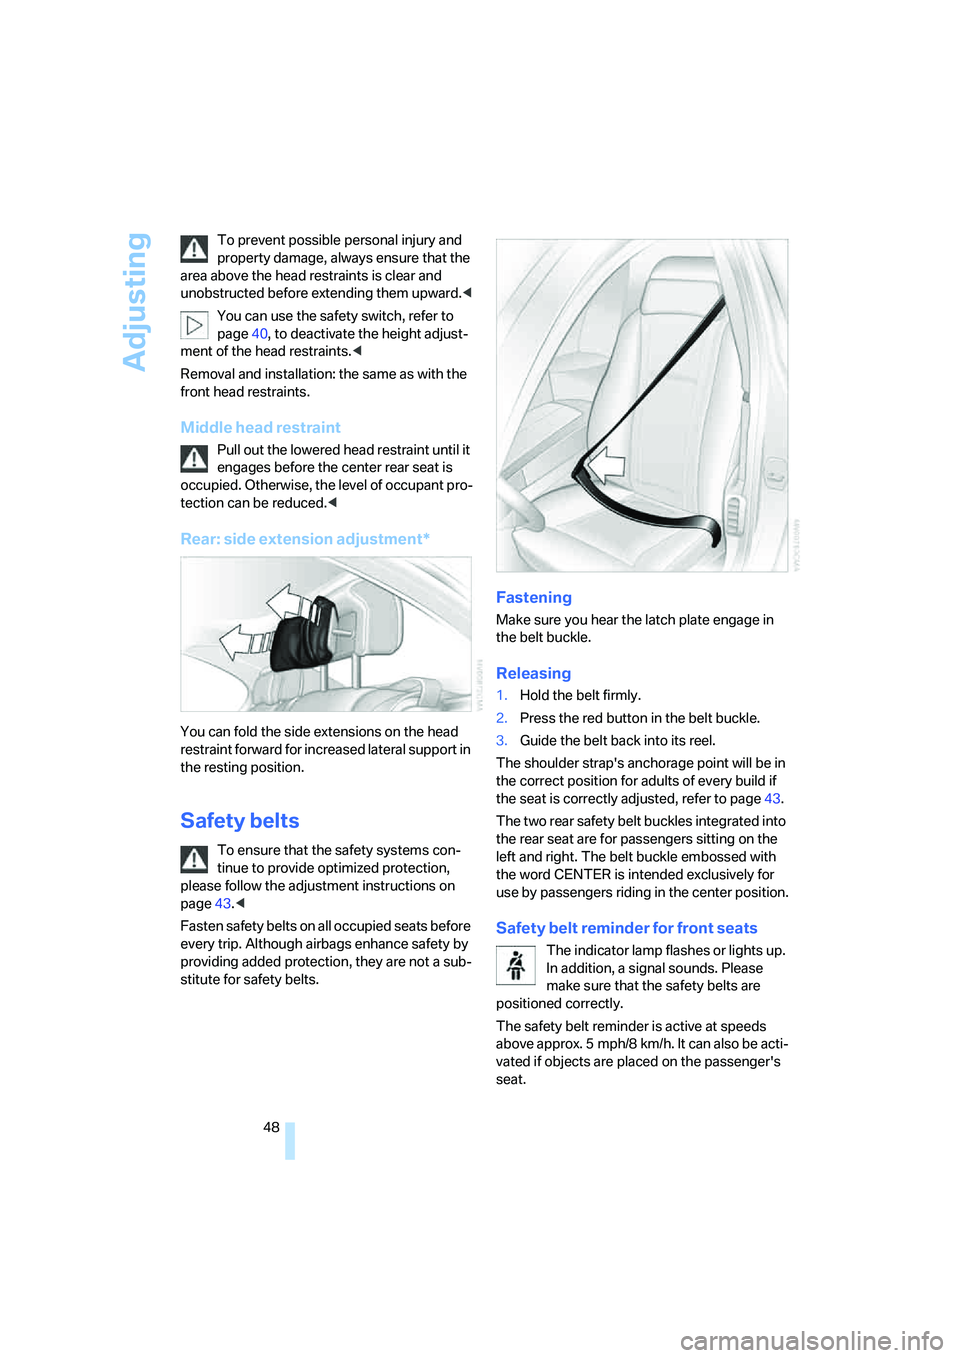
Fastening
Make sure you hear the latch plate engage in
the belt buckle.
Releasing
1.Hold the belt firmly.
2.Press the red button in the belt buckle.
3.Guide the belt back into its reel.
The shoulder strap's anchorage point will be in
the correct position for adults of every build if
the seat is correctly adjusted, refer to page43.
The two rear safety belt buckles integrated into
the rear seat are for passengers sitting on the
left and right. The belt buckle embossed with
the word CENTER is intended exclusively for
use by passengers riding in the center position.
Safety belt reminder for front seats
The indicator lamp flashes or lights up.
In addition, a signal sounds. Please
make sure that the safety belts are
positioned correctly.
The safety belt reminder is active at speeds
above approx. 5 mph/8 km/h. It can also be acti-
vated if objects are placed on the passenger's
seat.
Page 56 of 254
Transporting children safely
54
Transporting children safely
The right place for children
Do not leave children unattended in the
vehicle; otherwise, they could endanger
themselves and other persons, e.g. by opening
the doors.<
Children always in the rear
Accident research shows that the safest place
for children is in the back seat.
Children younger than 13 years of age or
with a height under 5 ft/150 cm may only
be transported in the rear in child restraint sys-
tems which correspond to the age, weight and
height of the child. Otherwise, there is an
increased danger of injury in an accident.<
Children 13 years of age or older must wear a
safety belt as soon as a suitable child restraint
system can no longer be used due to their age,
size, and weight.
Exception for front passenger seat
Should it be necessary to use a child
restraint system on the front passenger
seat, the front, knee and side airbag on the front
passenger side must be deactivated. Other-
wise, there is an increased risk of injury for the
child if the airbags are triggered, even with a
child restraint system. <
More information on Automatic deactivation of
front passenger airbags, refer to page95.
Installing child restraint
systems
Follow the child restraint system manu-
facturer's instructions when selecting,
installing and using child restraint systems.
Otherwise the protective effect may be dimin-
ished.<
In the front passenger seat
Before installing a child restraint system
in the front passenger seat, make sure
that the front, knee, and side airbags on the
passenger side are deactivated. Otherwise,
there is an increased risk of injury when the air-
bags are triggered.<
Backrest width*
The passenger seat backrest width set-
ting must be open all the way. After
installing the child's seat, no memory position
may be called up; otherwise, the stability of the
child's seat on the front passenger seat is
reduced.<
1.Open backrest width completely, refer to
Front comfort seat adjustment on page44.
2.Mount child's seat.
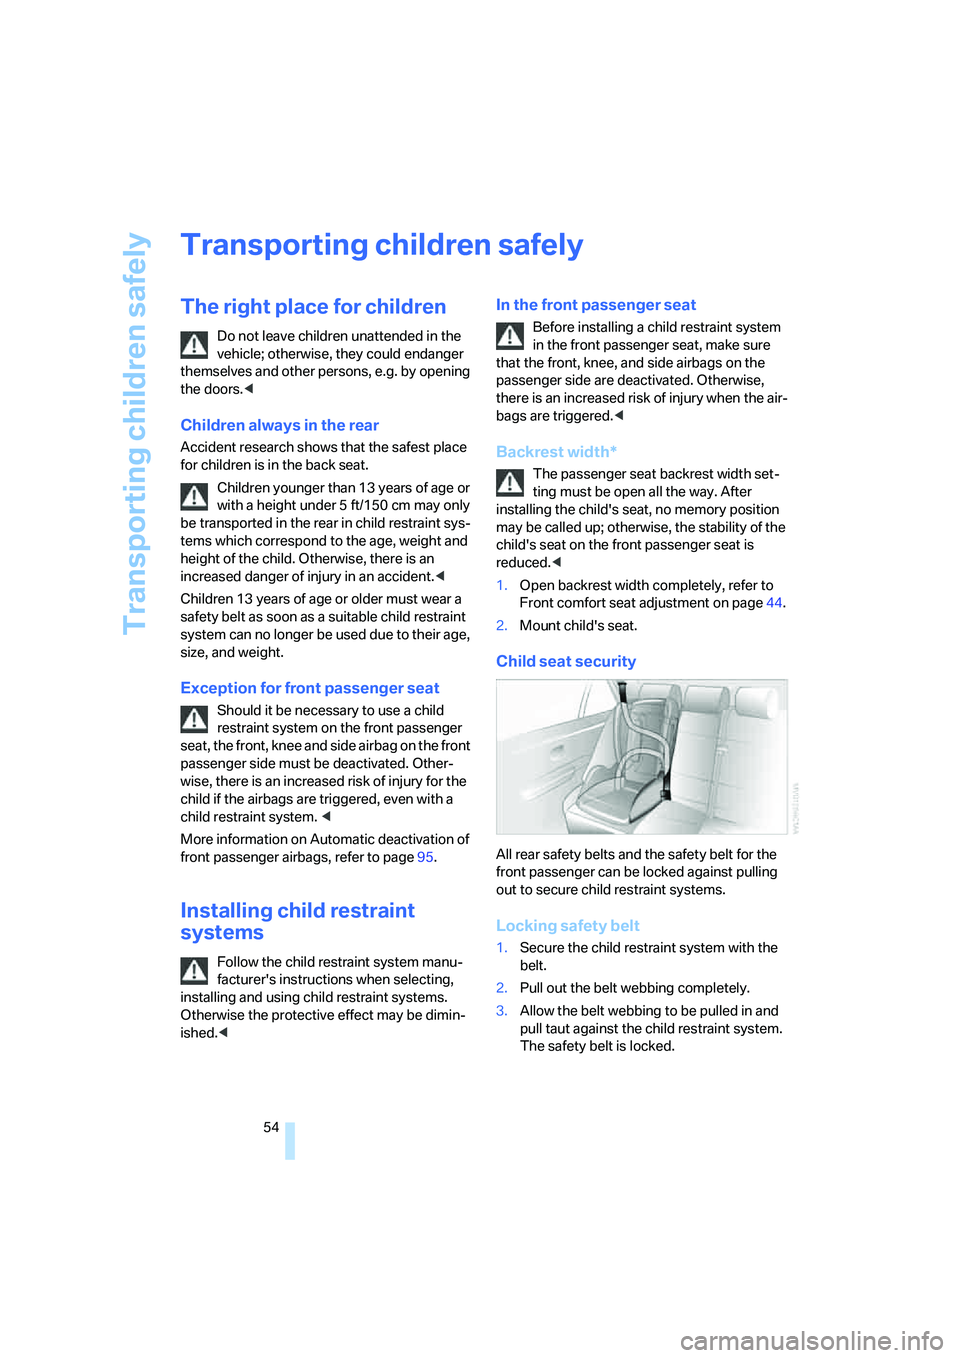
Child seat security
All rear safety belts and the safety belt for the
front passenger can be locked against pulling
out to secure child restraint systems.
Locking safety belt
1.Secure the child restraint system with the
belt.
2.Pull out the belt webbing completely.
3.Allow the belt webbing to be pulled in and
pull taut against the child restraint system.
The safety belt is locked.
Page 241 of 254
Reference 239
At a glance
Controls
Driving tips
Communications
Navigation
Entertainment
Mobility
H
Handbrake, refer to Parking
brake58
– Automatic Hold59
– manual operation58
Hands-free system179
Hazard warning flashers15
"HD", High Definition
Radio162
Head airbags95
Headlamp control,
automatic100
Headlamp flasher65
– indicator lamp13
Headlamps100
– care, refer to Caring for your
vehicle brochure
– cleaning, refer to Wiper
system65
– replacing bulbs213
Head light, refer to Adaptive
Head Light100
Headphones22
Head restraints46
– front head restraints,
active47
– installation, front47
– removal, front46
– sitting safely43
Heating103
– exterior mirrors51
– mirrors51
– rear window, refer to Rear
window defroster107
– residual heat106
– seats49
– steering wheel52
– when parked, refer to
Residual heat106
– windshield, refer to
Defrosting windows and
removing condensation106
– windshield washer
nozzles66
Heating and ventilation103Heavy cargo, refer to Stowing
cargo124
Height, refer to
Dimensions227
Height adjustment
– seats44
– steering wheel51
"Help"
– assistance window21
– menu guidance19
"Help text", assistance
window21
Help text on Control
Display21
"Hide map icons",
navigation137
"high", automatic climate
control105
High beams101
– headlamp flasher101
– indicator lamp11
High Definition Radio162
Hills123
Holder for cups115
Home address
– selecting141
– storing140
Hood207
Horn11
Hotel function, refer to
Locking separately35
Hot exhaust system122
Hour signal activation85
"House number",
navigation134
Hydraulic brake assistant,
refer to Brake assistant87
Hydroplaning123
I
ID3 tag, refer to Displaying
track information167
iDrive16
– assistance window20
– automatic climate
control104
– changing date and time84
– changing language84
– changing settings84
– changing units of measure
and display format84
– confirming selection or
entry19
– controller16
– controls16
– displays, menus17
– menus17
– rear seat screen21
– selecting menu item19
– setting brightness85
– showing help text21
– start menu18
– status lines20
– symbols19
Ignition key30
Ignition lock57
Illuminated vanity mirror51
Imitation leather, refer to
Caring for your vehicle
brochure
"Indep. ventil.", automatic
climate control109
Indicator/warning lamps13
– airbags96
– alarm system37
– DSC88
– DTC88
– Flat Tire Monitor91
– fog lamps101
– safety belt warning48
– Tire Pressure Monitor93
Individually programmable
buttons11,52
Individual settings, refer to
Key Memory31