2008 BMW 760LI SEDAN buttons
[x] Cancel search: buttonsPage 11 of 254
At a glance
This overview of buttons, switches and displays
is intended to orient you in your vehicle's
operating environment. It will also assist you
in becoming acquainted with the control
concepts and options available for
operating the various systems.
At a glance
Page 13 of 254
At a glance
11Reference
Controls
Driving tips
Communications
Navigation
Entertainment
Mobility
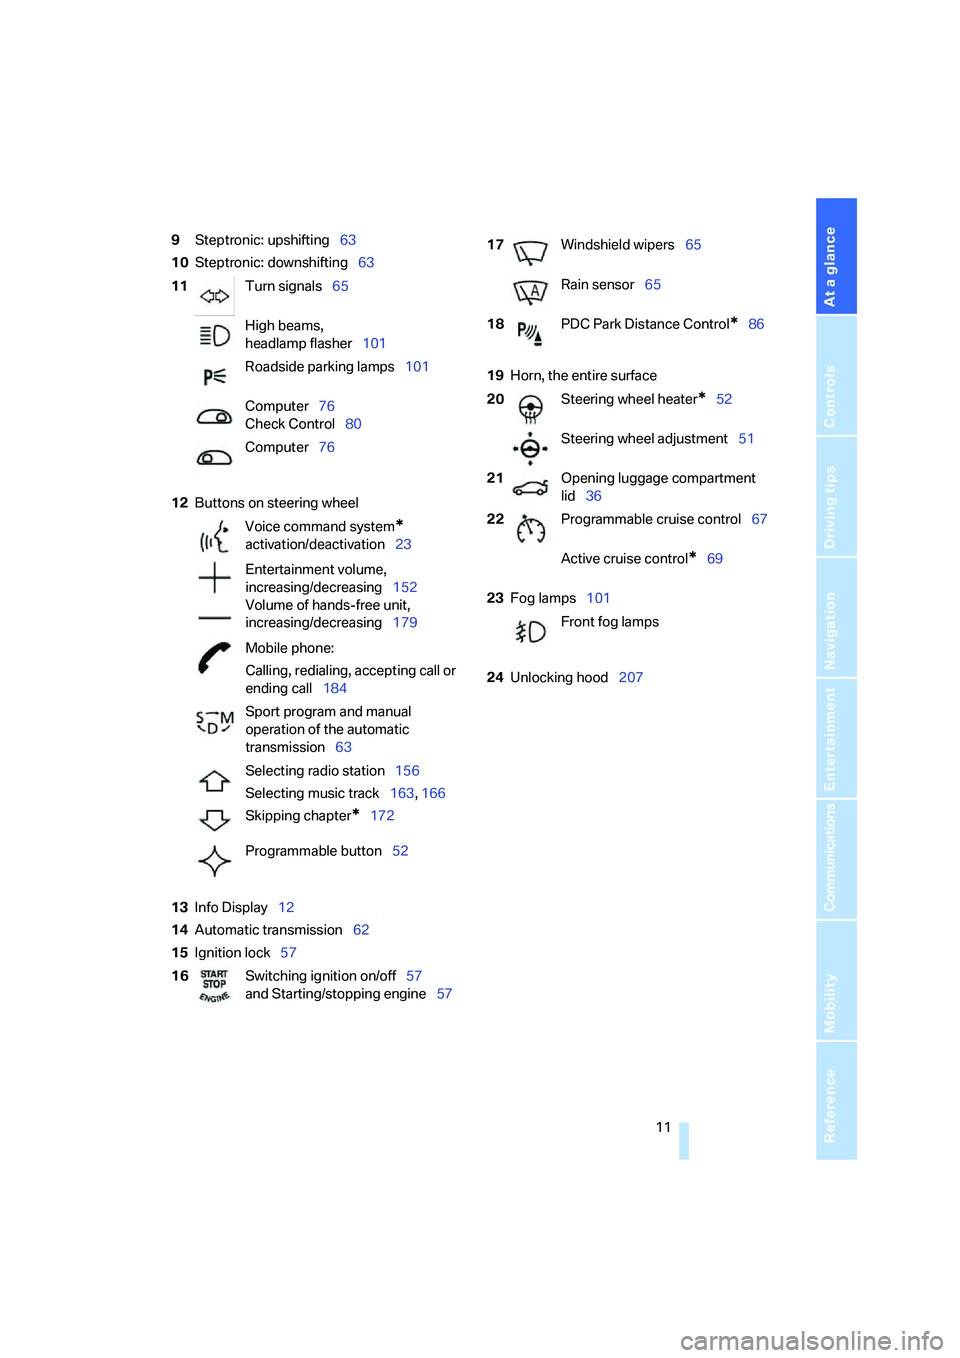
9Steptronic: upshifting63
10Steptronic: downshifting63
12Buttons on steering wheel
13Info Display12
14Automatic transmission62
15Ignition lock5719Horn, the entire surface
23Fog lamps101
24Unlocking hood207 11Turn signals65
High beams,
headlamp flasher101
Roadside parking lamps101
Computer76
Check Control80
Computer76
Voice command system
*
activation/deactivation23
Entertainment volume,
increasing/decreasing152
Volume of hands-free unit,
increasing/decreasing179
Mobile phone:
Calling, redialing, accepting call or
ending call184
Sport program and manual
operation of the automatic
transmission63
Selecting radio station156
Selecting music track163, 166
Skipping chapter
*172
Programmable button52
16Switching ignition on/off57
and Starting/stopping engine57
17Windshield wipers65
Rain sensor65
18PDC Park Distance Control
*86
20Steering wheel heater
*52
Steering wheel adjustment51
21Opening luggage compartment
lid36
22Programmable cruise control67
Active cruise control
*69
Front fog lamps
Page 17 of 254
At a glance
15Reference
Controls
Driving tips
Communications
Navigation
Entertainment
Mobility
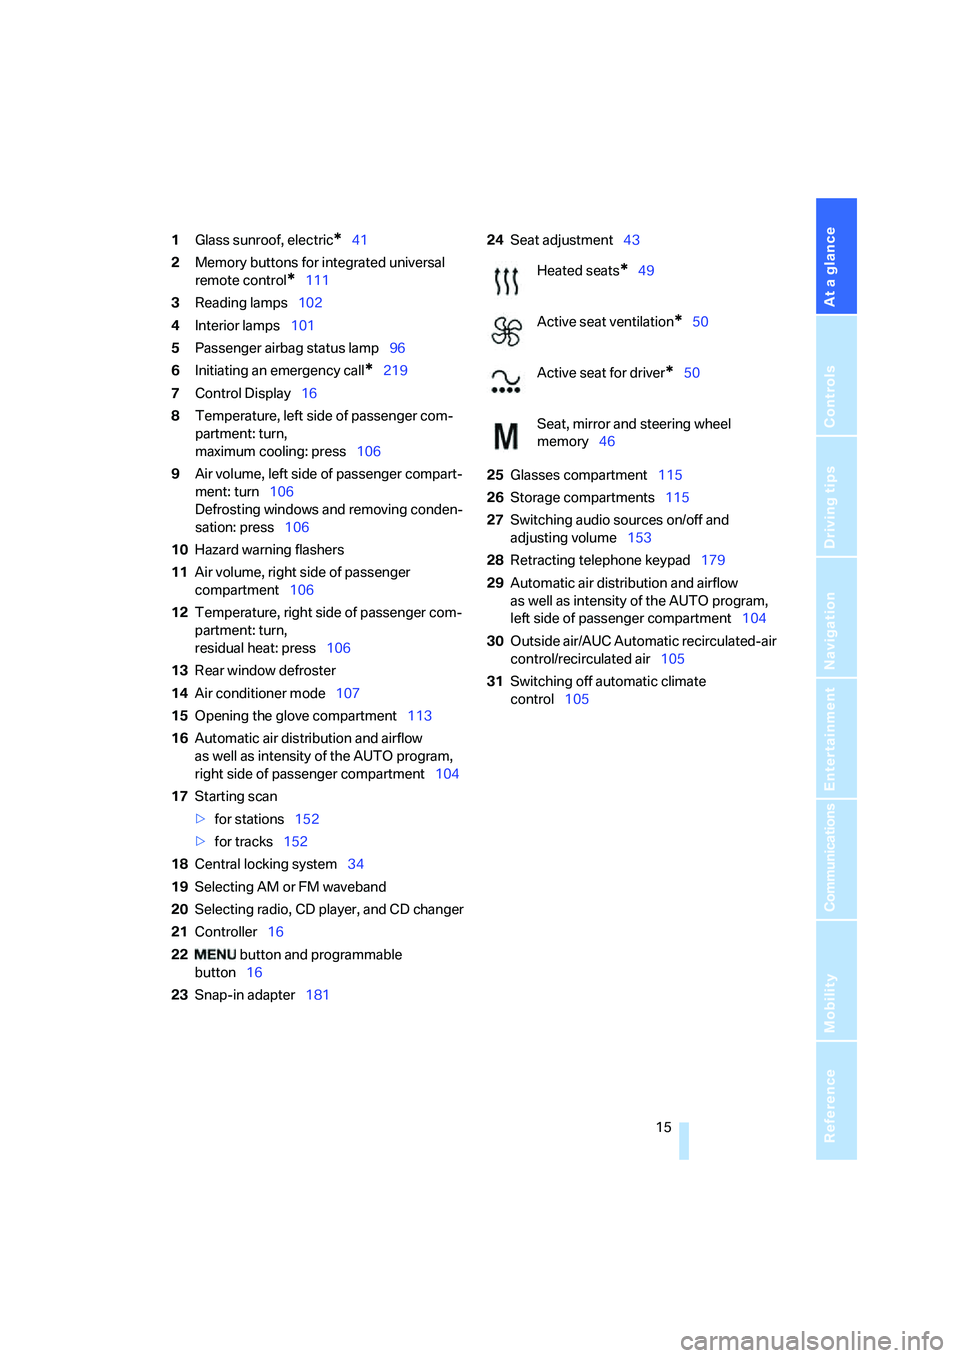
1Glass sunroof, electric*41
2Memory buttons for integrated universal
remote control
*111
3Reading lamps102
4Interior lamps101
5Passenger airbag status lamp96
6Initiating an emergency call
*219
7Control Display16
8Temperature, left side of passenger com-
partment: turn,
maximum cooling: press106
9Air volume, left side of passenger compart-
ment: turn106
Defrosting windows and removing conden-
sation: press106
10Hazard warning flashers
11Air volume, right side of passenger
compartment106
12Temperature, right side of passenger com-
partment: turn,
residual heat: press106
13Rear window defroster
14Air conditioner mode107
15Opening the glove compartment113
16Automatic air distribution and airflow
as well as intensity of the AUTO program,
right side of passenger compartment104
17Starting scan
>for stations152
>for tracks152
18Central locking system34
19Selecting AM or FM waveband
20Selecting radio, CD player, and CD changer
21Controller16
22 button and programmable
button16
23Snap-in adapter18124Seat adjustment43
25Glasses compartment115
26Storage compartments115
27Switching audio sources on/off and
adjusting volume153
28Retracting telephone keypad179
29Automatic air distribution and airflow
as well as intensity of the AUTO program,
left side of passenger compartment104
30Outside air/AUC Automatic recirculated-air
control/recirculated air105
31Switching off automatic climate
control105
Heated seats*49
Active seat ventilation
*50
Active seat for driver
*50
Seat, mirror and steering wheel
memory46
Page 20 of 254
iDrive
18 DVDs can only be played on the rear
seat screen, refer to Rear seat
screen
* on page21.<
7Settings
>Parking brake58
>PDC Park Distance Control86
>EDC Electronic Damping Control89
>Programmable buttons52
>FTM Flat Tire Monitor
*90
>TPM Tire Pressure Monitor
*91
>Time and date84
>Language84
>Units of measure and display format84
>Brightness85
>Rear seat screen
*21
>Pairing mobile phone with vehicle182
8Climate
>Intensity of AUTO program104
>Air volume106
>Heated seats
*49
>Parked car ventilation109
>Extra, e.g. rear air conditioner108
Basic operation
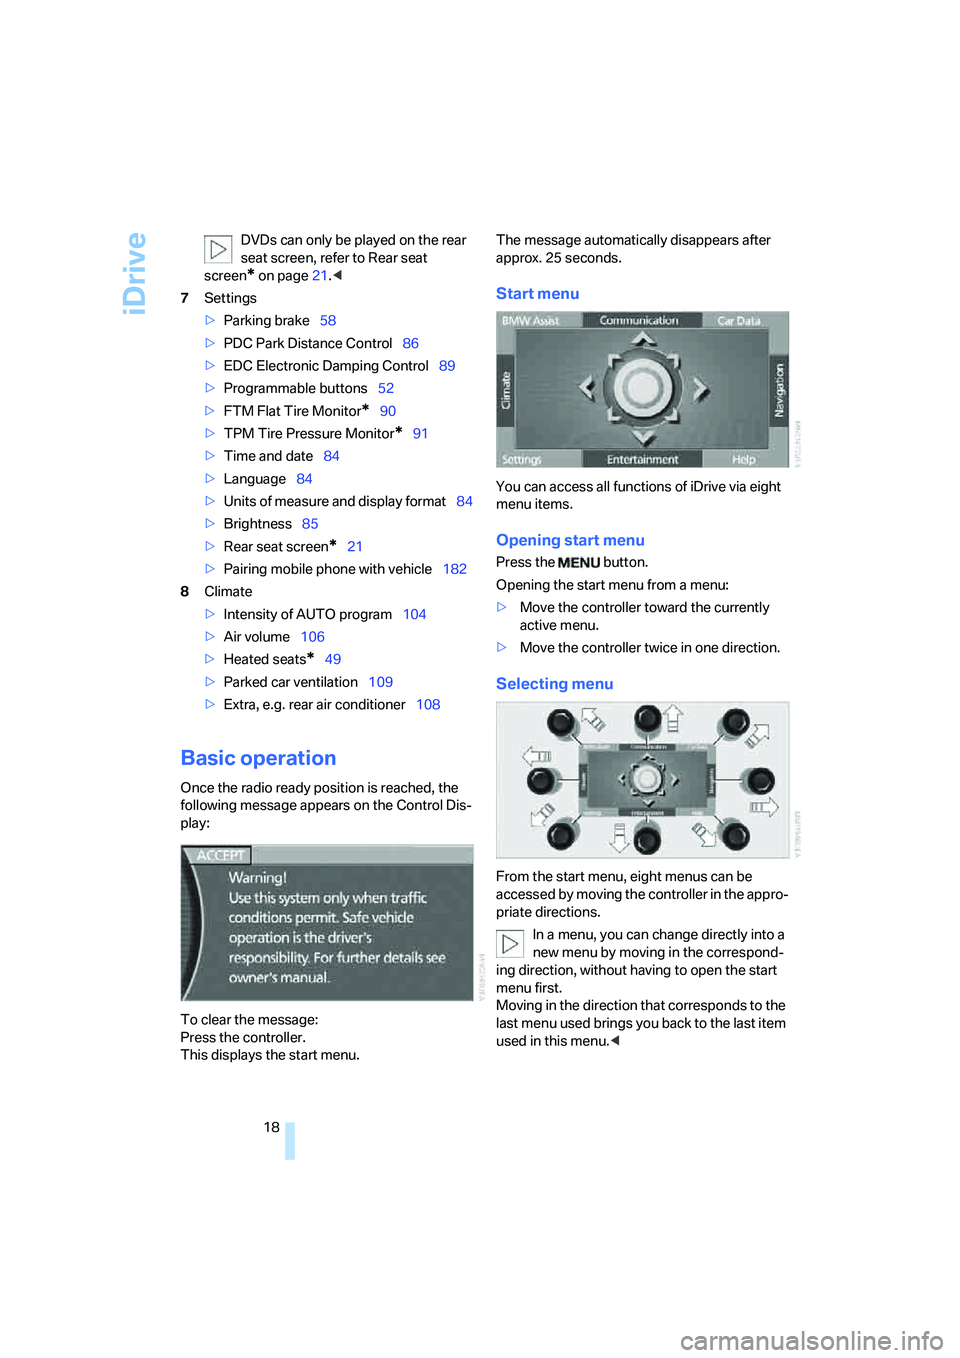
Once the radio ready position is reached, the
following message appears on the Control Dis-
play:
To clear the message:
Press the controller.
This displays the start menu.The message automatically disappears after
approx. 25 seconds.
Start menu
You can access all functions of iDrive via eight
menu items.
Opening start menu
Press the button.
Opening the start menu from a menu:
>Move the controller toward the currently
active menu.
>Move the controller twice in one direction.
Selecting menu
From the start menu, eight menus can be
accessed by moving the controller in the appro-
priate directions.
In a menu, you can change directly into a
new menu by moving in the correspond-
ing direction, without having to open the start
menu first.
Moving in the direction that corresponds to the
last menu used brings you back to the last item
used in this menu.<
Page 24 of 254
iDrive
22
Controller/buttons
The controller and buttons are located on the
center armrest.
Rear lock
The available functions are operated with the
respective controller.
You can use iDrive to restrict operation in the
rear or to switch off the rear seat screen.
iDrive, for principle details, refer to page16.
1.Press the button to open the start
menu.
2.Move the controller toward "Settings".
3.Select "Rear" and press the controller.
4.Select "Unlock" and press the controller
repeatedly until the desired enabling of the
rear iDrive is set.
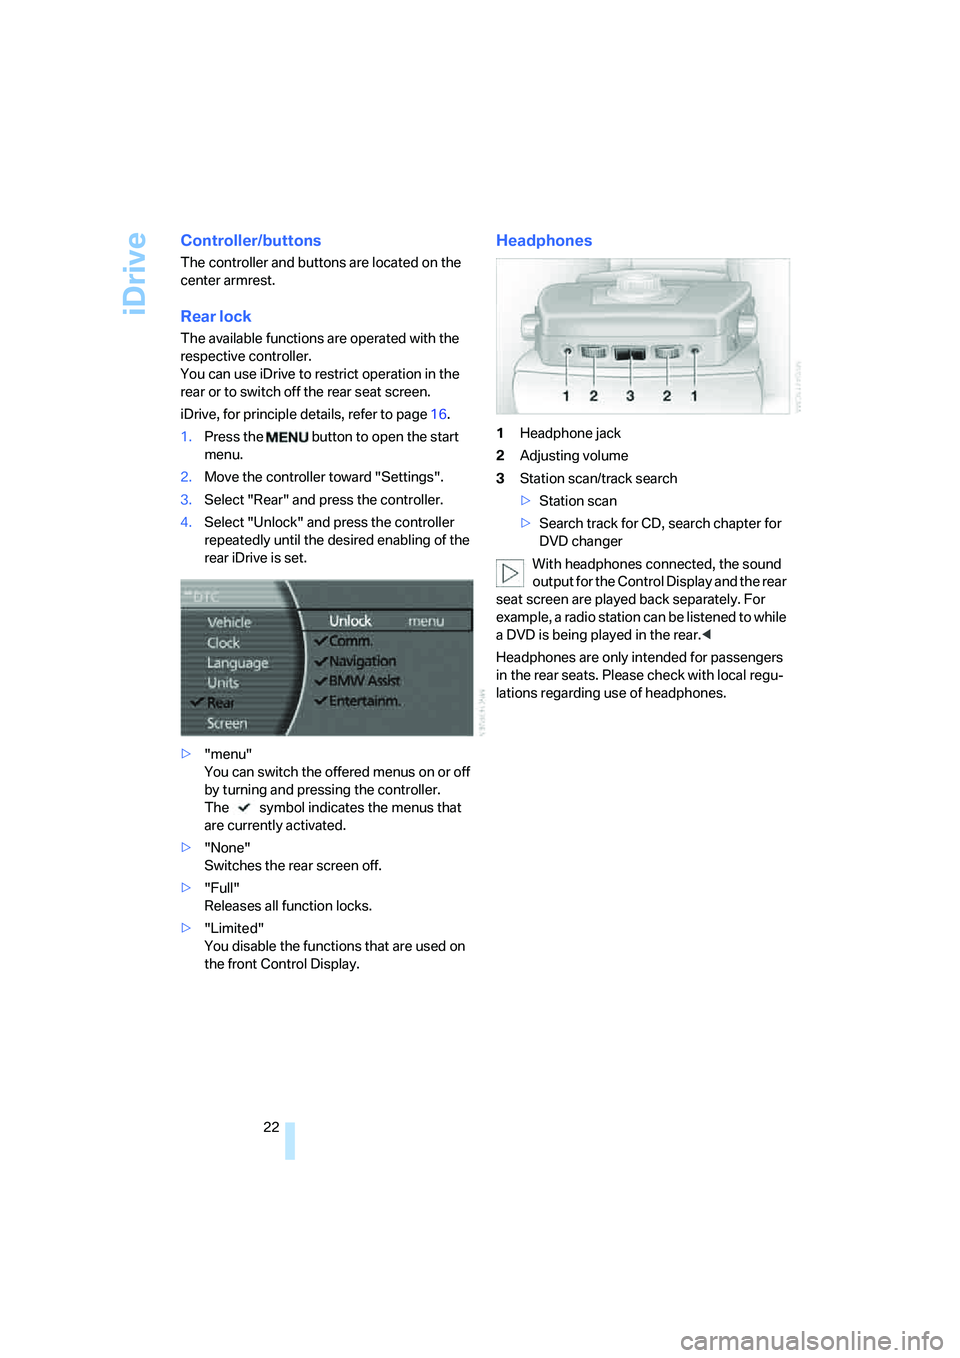
>"menu"
You can switch the offered menus on or off
by turning and pressing the controller.
The symbol indicates the menus that
are currently activated.
>"None"
Switches the rear screen off.
>"Full"
Releases all function locks.
>"Limited"
You disable the functions that are used on
the front Control Display.
Headphones
1Headphone jack
2Adjusting volume
3Station scan/track search
>Station scan
>Search track for CD, search chapter for
DVD changer
With headphones connected, the sound
output for the Control Display and the rear
seat screen are played back separately. For
example, a radio station can be listened to while
a DVD is being played in the rear.<
Headphones are only intended for passengers
in the rear seats. Please check with local regu-
lations regarding use of headphones.
Page 36 of 254
Opening and closing
34
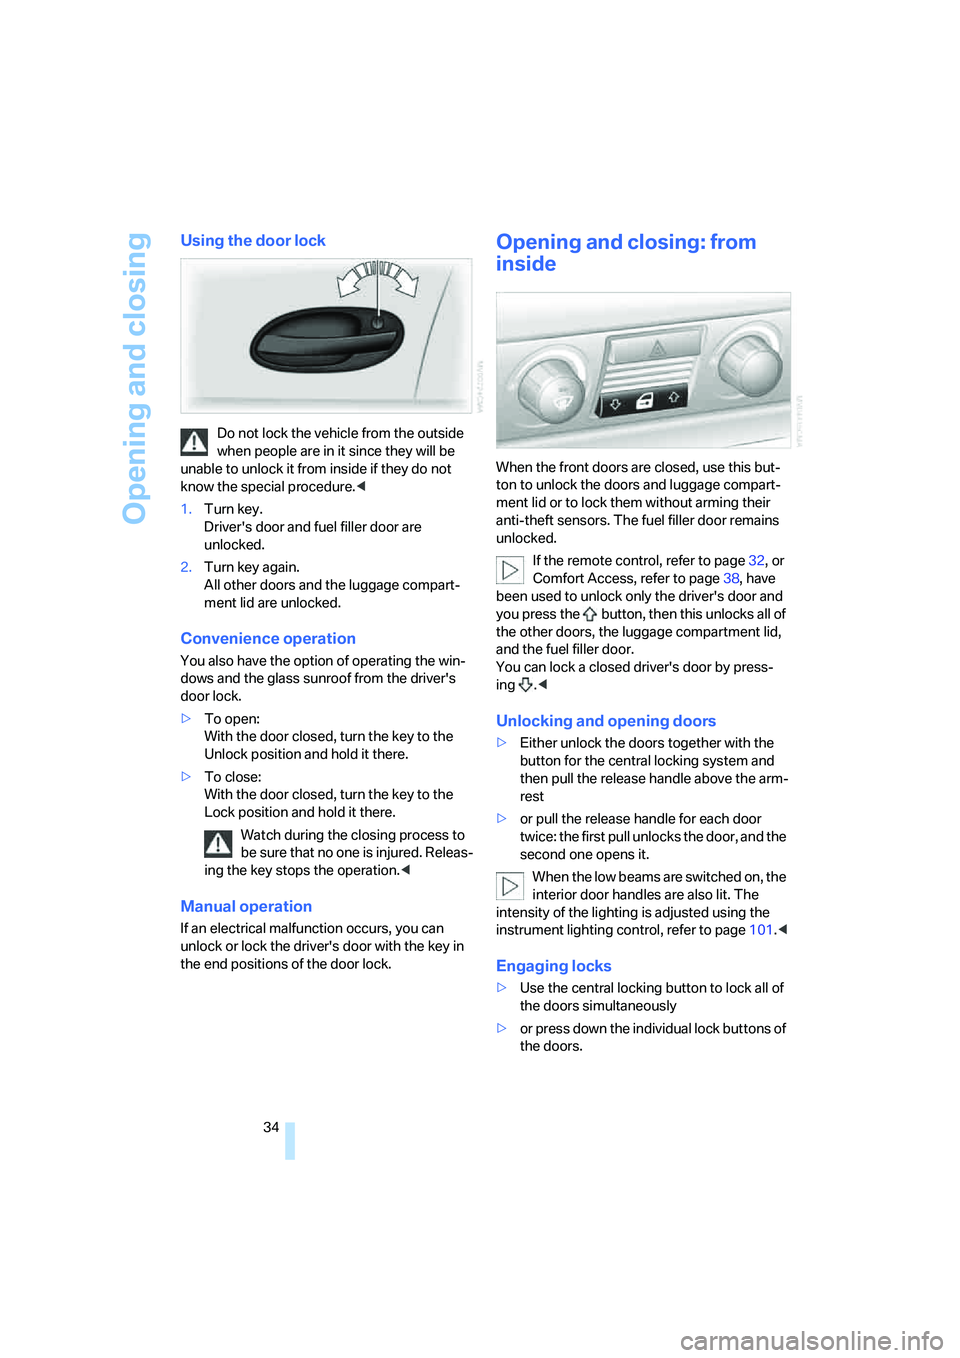
Using the door lock
Do not lock the vehicle from the outside
when people are in it since they will be
unable to unlock it from inside if they do not
know the special procedure.<
1.Turn key.
Driver's door and fuel filler door are
unlocked.
2.Turn key again.
All other doors and the luggage compart-
ment lid are unlocked.
Convenience operation
You also have the option of operating the win-
dows and the glass sunroof from the driver's
door lock.
>To open:
With the door closed, turn the key to the
Unlock position and hold it there.
>To close:
With the door closed, turn the key to the
Lock position and hold it there.
Watch during the closing process to
be sure that no one is injured. Releas-
ing the key stops the operation.<
Manual operation
If an electrical malfunction occurs, you can
unlock or lock the driver's door with the key in
the end positions of the door lock.
Opening and closing: from
inside
When the front doors are closed, use this but-
ton to unlock the doors and luggage compart-
ment lid or to lock them without arming their
anti-theft sensors. The fuel filler door remains
unlocked.
If the remote control, refer to page32, or
Comfort Access, refer to page38, have
been used to unlock only the driver's door and
you press the button, then this unlocks all of
the other doors, the luggage compartment lid,
and the fuel filler door.
You can lock a closed driver's door by press-
ing .<
Unlocking and opening doors
>Either unlock the doors together with the
button for the central locking system and
then pull the release handle above the arm-
rest
>or pull the release handle for each door
twice: the first pull unlocks the door, and the
second one opens it.
When the low beams are switched on, the
interior door handles are also lit. The
intensity of the lighting is adjusted using the
instrument lighting control, refer to page101.<
Engaging locks
>Use the central locking button to lock all of
the doors simultaneously
>or press down the individual lock buttons of
the doors.
Page 40 of 254
Opening and closing
38
Tilt alarm sensor
The tilt of the vehicle is monitored. The alarm
system reacts, e.g. in case of an attempted
wheel theft or towing.
Interior motion sensor
In order for the interior motion sensor to func-
tion properly, the windows and glass sunroof
must be completely closed.
Avoiding unintentional alarms
The tilt alarm sensor and interior motion sensor
may be switched off at the same time. This pre-
vents unintentional alarms, e.g. in the following
situations:
>In duplex garages
>During transport on car-carrying trains,
boats/ships or on a trailer
>When animals are to remain in the vehicle
Switching off tilt alarm sensor and
interior motion sensor
Press the button on the remote control
again as soon as the vehicle is locked.
The indicator lamp lights up briefly and then
flashes continuously. The tilt alarm sensor and
the interior motion sensor are switched off until
the next time the vehicle is unlocked and subse-
quently locked again.
Comfort Access*
With Comfort Access, you can have access to
your vehicle without having to hold the remote
control in your hand. It is sufficient to carry the
remote control on your person, e.g. in a jacket
pocket. The vehicle automatically detects the
associated remote control inside the vehicle or
in its immediate vicinity.
Comfort Access supports the following func-
tions:
>Locking/unlocking the vehicle
>Unlocking the luggage compartment lid
separately
>Starting the engine
Functional requirements
>The vehicle can only be locked if the remote
control is outside the vehicle.
>The next unlocking and locking cycle is not
possible until after approx. 2 seconds.
>The engine can only be started if the remote
control is inside the vehicle.
Comparison to conventional remote
control
You can control the functions mentioned previ-
ously with the Comfort Access or by pressing
the buttons on the remote control. Therefore
please first familiarize yourself with the instruc-
tions for opening and closing, starting on
page32.
The specific features involved in the use of
Comfort Access are described below.
If a short delay occurs when opening or
closing the windows and the glass sun-
roof, then this indicates that the system is
checking whether a remote control is located in
the vehicle. Please repeat opening or closing if
necessary.<
Unlocking
Pull a door handle. This corresponds to press-
ing the button.
Only the door of the door handle you have
pulled is unlocked.
You unlock the other doors from the inside,
using the central locking system button, refer to
page34.<
Locking
Push a door handle. This corresponds to press-
ing the button.
Before locking, make sure that the igni-
tion and all current-consuming devices
are switched off in order to minimized the drain
on the battery.
If a remote control is detected in the interior, the
vehicle is unlocked again or not locked in the
first place.<
Page 41 of 254
Controls
39Reference
At a glance
Driving tips
Communications
Navigation
Entertainment
Mobility
Unlocking the luggage compartment
lid separately
Press the button on the outside of the luggage
compartment lid, refer to page35. This corre-
sponds to pressing the button.
If a remote control accidentally left in the
luggage compartment is detected in the
locked vehicle, then the luggage compartment
lid opens again.<
Radio ready state
By briefly pressing the Start/Stop button, you
switch on the radio ready state, refer to
page57.
When doing so, do not depress the brake
pedal; otherwise, the engine will start.<
Starting the engine
You can start the engine or switch on the igni-
tion, as long as a remote control is in the pas-
senger compartment. The remote does not
have to be inserted into the ignition lock, refer to
page57.
Before driving into a car wash
1.Insert remote control into ignition lock.
2.Shift transmission into position N.
3.Switch engine off.
4.Leave the remote control in the ignition
lock.
The vehicle can roll.
Malfunction
Local radio waves can disrupt the function of
Comfort Access. Should the remote control fail
to operate due to interference of this kind, you
can respond by using the buttons on the remote
control or by using a key to unlock or lock your
vehicle at one of the doors. To start the engine
after this, insert the remote control into the igni-
tion lock.
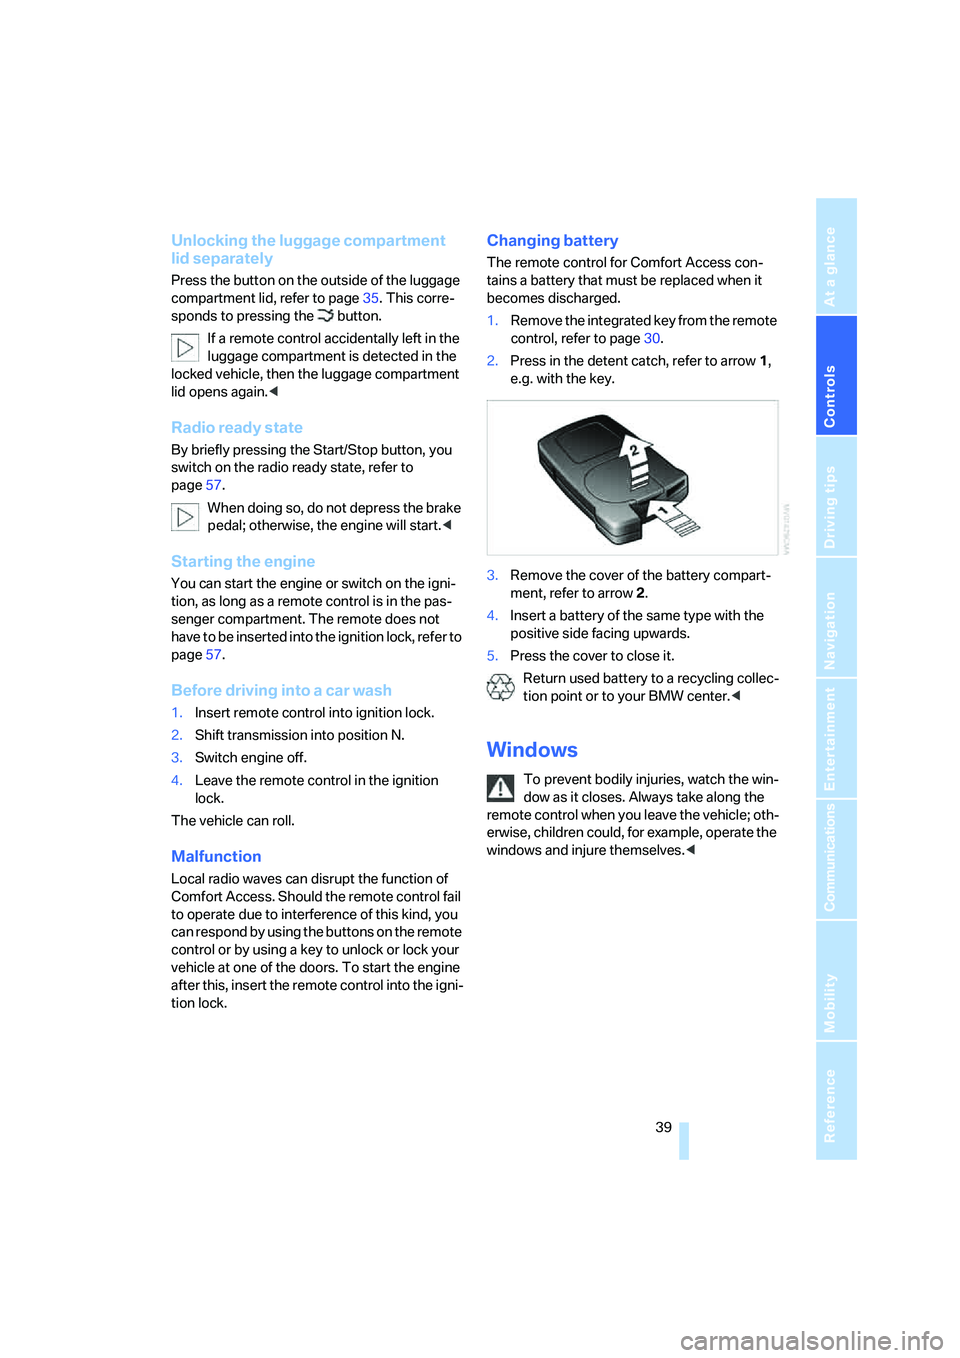
Changing battery
The remote control for Comfort Access con-
tains a battery that must be replaced when it
becomes discharged.
1.Remove the integrated key from the remote
control, refer to page30.
2.Press in the detent catch, refer to arrow1,
e.g. with the key.
3.Remove the cover of the battery compart-
ment, refer to arrow2.
4.Insert a battery of the same type with the
positive side facing upwards.
5.Press the cover to close it.
Return used battery to a recycling collec-
tion point or to your BMW center.<
Windows
To prevent bodily injuries, watch the win-
dow as it closes. Always take along the
remote control when you leave the vehicle; oth-
erwise, children could, for example, operate the
windows and injure themselves.<