2008 BMW 760I radio controls
[x] Cancel search: radio controlsPage 41 of 254

Controls
39Reference
At a glance
Driving tips
Communications
Navigation
Entertainment
Mobility
Unlocking the luggage compartment
lid separately
Press the button on the outside of the luggage
compartment lid, refer to page35. This corre-
sponds to pressing the button.
If a remote control accidentally left in the
luggage compartment is detected in the
locked vehicle, then the luggage compartment
lid opens again.<
Radio ready state
By briefly pressing the Start/Stop button, you
switch on the radio ready state, refer to
page57.
When doing so, do not depress the brake
pedal; otherwise, the engine will start.<
Starting the engine
You can start the engine or switch on the igni-
tion, as long as a remote control is in the pas-
senger compartment. The remote does not
have to be inserted into the ignition lock, refer to
page57.
Before driving into a car wash
1.Insert remote control into ignition lock.
2.Shift transmission into position N.
3.Switch engine off.
4.Leave the remote control in the ignition
lock.
The vehicle can roll.
Malfunction
Local radio waves can disrupt the function of
Comfort Access. Should the remote control fail
to operate due to interference of this kind, you
can respond by using the buttons on the remote
control or by using a key to unlock or lock your
vehicle at one of the doors. To start the engine
after this, insert the remote control into the igni-
tion lock.
Changing battery
The remote control for Comfort Access con-
tains a battery that must be replaced when it
becomes discharged.
1.Remove the integrated key from the remote
control, refer to page30.
2.Press in the detent catch, refer to arrow1,
e.g. with the key.
3.Remove the cover of the battery compart-
ment, refer to arrow2.
4.Insert a battery of the same type with the
positive side facing upwards.
5.Press the cover to close it.
Return used battery to a recycling collec-
tion point or to your BMW center.<
Windows
To prevent bodily injuries, watch the win-
dow as it closes. Always take along the
remote control when you leave the vehicle; oth-
erwise, children could, for example, operate the
windows and injure themselves.<
Page 43 of 254
Controls
41Reference
At a glance
Driving tips
Communications
Navigation
Entertainment
Mobility
Press the safety switch when children
ride in the rear; otherwise, unsupervised
closing of the windows could lead to injuries.<
In order to deactivate the function again,
you must insert the remote control into
the ignition lock or, with Comfort Access, you
must switch into radio ready state.<
Glass sunroof, electric*
To prevent bodily injuries, watch the
glass sunroof as it closes.
Always take along the remote control when you
leave the vehicle; otherwise, children could, for
example, operate the roof and injure them-
selves.<
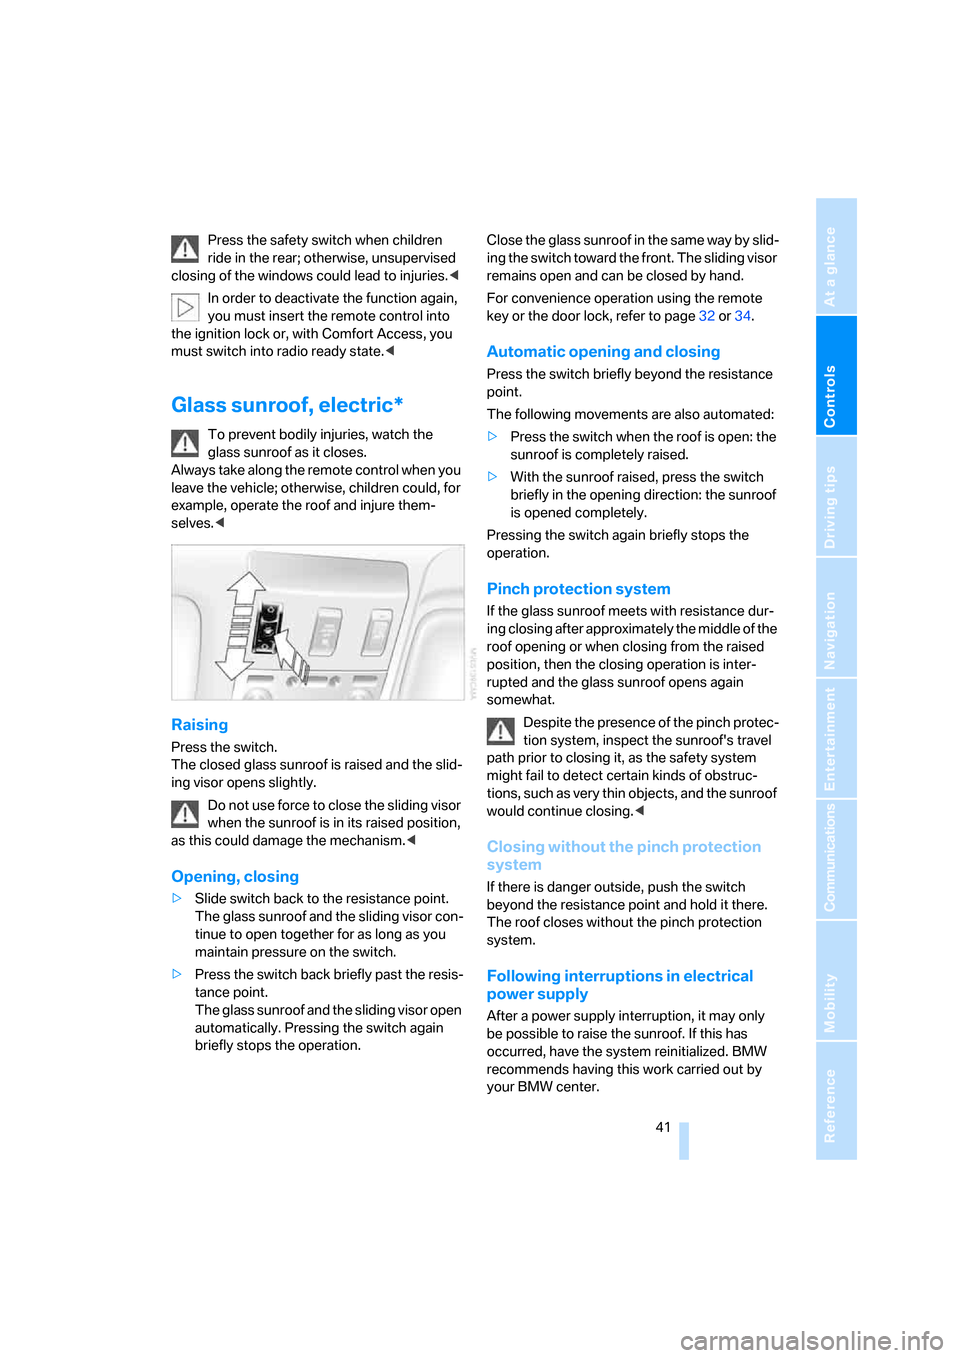
Raising
Press the switch.
The closed glass sunroof is raised and the slid-
ing visor opens slightly.
Do not use force to close the sliding visor
when the sunroof is in its raised position,
as this could damage the mechanism.<
Opening, closing
>Slide switch back to the resistance point.
The glass sunroof and the sliding visor con-
tinue to open together for as long as you
maintain pressure on the switch.
>Press the switch back briefly past the resis-
tance point.
The glass sunroof and the sliding visor open
automatically. Pressing the switch again
briefly stops the operation.Close the glass sunroof in the same way by slid-
ing the switch toward the front. The sliding visor
remains open and can be closed by hand.
For convenience operation using the remote
key or the door lock, refer to page32 or34.
Automatic opening and closing
Press the switch briefly beyond the resistance
point.
The following movements are also automated:
>Press the switch when the roof is open: the
sunroof is completely raised.
>With the sunroof raised, press the switch
briefly in the opening direction: the sunroof
is opened completely.
Pressing the switch again briefly stops the
operation.
Pinch protection system
If the glass sunroof meets with resistance dur-
ing closing after approximately the middle of the
roof opening or when closing from the raised
position, then the closing operation is inter-
rupted and the glass sunroof opens again
somewhat.
Despite the presence of the pinch protec-
tion system, inspect the sunroof's travel
path prior to closing it, as the safety system
might fail to detect certain kinds of obstruc-
tions, such as very thin objects, and the sunroof
would continue closing.<
Closing without the pinch protection
system
If there is danger outside, push the switch
beyond the resistance point and hold it there.
The roof closes without the pinch protection
system.
Following interruptions in electrical
power supply
After a power supply interruption, it may only
be possible to raise the sunroof. If this has
occurred, have the system reinitialized. BMW
recommends having this work carried out by
your BMW center.
Page 59 of 254

Controls
57Reference
At a glance
Driving tips
Communications
Navigation
Entertainment
Mobility
Driving
Ignition lock
Insert the remote control all the way into the
ignition lock. Radio ready state is switched on.
Individual electrical devices are ready for use.
Start/Stop button
Briefly pressing the Start/Stop button several
times switches the radio ready state or the igni-
tion on and off.
Briefly pressing the Start/Stop button
with the brake pedal depressed starts the
engine.<
Radio ready state
Individual electrical devices are ready for use.
The time and outside temperature appear on
the Info Display.
Ignition switched on
All vehicle systems are ready for operation.
When the engine is not running, please
switch off the ignition and nonessential current-consuming devices in order to mini-
mize the drain on the battery.<
Ignition off
All of the indicator lamps on the Info Display go
out. Only the selector lever indicator of the
automatic transmission is still briefly displayed.
Starting engine
Do not run the engine in closed rooms;
otherwise, the inhalation of toxic exhaust
gases can cause unconsciousness and death.
The exhaust gases contain carbon monoxide,
an odorless and colorless, but highly toxic gas.
Never leave an unattended vehicle with the
engine running, as such a vehicle represents a
potential safety hazard.
To prevent the vehicle from rolling, always
move the selector lever into position P and
engage the parking brake before leaving the
vehicle with the engine running.<
Avoid frequent starts in rapid succession
or repeated starting attempts in which the
engine does not start. Otherwise, the fuel is
either left unspent or is insufficiently burned
and there is a risk of overheating and damaging
the catalytic converter.<
1.Depress brake pedal.
2.Briefly press the Start/Stop button.
When starting the engine, do not press the
accelerator pedal.
Page 77 of 254

Controls
75Reference
At a glance
Driving tips
Communications
Navigation
Entertainment
Mobility
Everything under control
Odometer, outside temperature display, clock
1Outside temperature display, clock
2Odometer
3Trip odometer
4Press button:
>with ignition switched on to reset trip
odometer
>with ignition switched off to briefly dis-
play odometer, outside temperature,
and time
Outside temperature display, clock,
date
The outside temperature and the time displays
are active with the ignition lock in radio ready
state or higher.
You can change the units of measure, 7/6,
in the "Settings" menu, refer to page84.
Setting the clock, refer to page84.
The date is displayed in the assistance win-
dow
*, refer to page21.
Setting date, refer to page84.
Outside temperature warning
If the display drops to +377/+36, a signal
sounds and a message appears on the Info Dis-
play. There is an increased danger of ice.
Even at temperatures above +377/
+36, ice can form. Therefore, drive care-
fully, e.g. on bridges and shaded roadways; oth-
erwise, there is an increased accident risk.<
Odometer and trip odometer
The display area is also used for the computer
and the Check Control.
Regardless of the current display, you can
briefly display the odometer for a short time by
briefly pressing button4.
Pressing the button again resets the trip odom-
eter to zero.
Check Control, refer to page80.
Computer, refer to page76.
Tachometer
The orange advance warning field, arrow, is dis-
played as a function of the engine temperature.
The segments disappear in sequence as the
engine temperature increases.
Avoid allowing the engine speed to rise as far as
the orange advance warning field whenever
possible.
Page 95 of 254
Controls
93Reference
At a glance
Driving tips
Communications
Navigation
Entertainment
Mobility
ing driving. The tires are displayed in green on
the Control Display.
If a flat tire is detected during the reset-
ting and adoption of the tire inflation pres-
sures, all tires are shown in yellow on the Con-
trol Display. The message "Status: Tire low!" is
displayed.<
Low tire pressure message
The warning lamp lights up yellow. A
message appears on the Control Dis-
play. In addition, a signal sounds. A flat
tire or a major air loss has occurred.
1.Reduce speed and stop the vehicle care-
fully. Avoid sudden braking and steering
maneuvers.
2.Check whether your vehicle is equipped
with standard tires or run-flat tires.
You will recognize run-flat tires by a
circular symbol containing the letters
RSC on the side of the tire, refer to
page205.<
Standard tires
1.If all four wheels are shown in yellow, iden-
tify the damaged tire on the vehicle.
2.Replace the damaged wheel or wheels,
refer to Changing wheels on page215.
The spare wheel is equipped with the neces-
sary TPM electronics and when mounted, will
also be monitored once the system has been
reset.
Have the tire replaced by a BMW center or a
workshop that is familiar with handling TPM and
works according to BMW repair procedures
with correspondingly trained personnel.
Run-flat tires*
1.Cautiously reduce speed to below 50 mph/
80 km/h. Avoid hard braking and steering
maneuvers and do not exceed 50 mph/
80 km/h.
If the vehicle is not equipped with run-
flat tires, refer to page205, do not
continue to drive. Continued driving after a
flat tire can result in serious accidents.<2.In the event of complete tire pressure loss,
0 psi/0 kPa, you can estimate the possible
distance for continued driving on the basis
of the following guide values:
>With a light load:
1 to 2 persons without luggage:
approx. 155 miles/250 km
>With a medium load:
2 persons, luggage compartment full, or
4 persons without luggage:
approx. 95 miles/150 km
>With a full load:
4 or more persons, luggage compart-
ment full:
approx. 30 miles/50 km
Drive reservedly and do not exceed a
speed of 50 mph/80 km/h. In the event of
pressure loss, vehicle handling changes. This
includes reduced tracking stability in braking,
extended braking distance and altered natural
steering characteristics.
If unusual vibrations occur while the vehicle is
being driven, this can indicate final failure of the
damaged tire. Reduce speed and stop as soon
as possible; otherwise, pieces of the tire could
come loose and cause an accident. Do not con-
tinue driving, contact your BMW center.<
Malfunction
The yellow warning light flashes and
then lights up continuously. The tires
are shown in gray on the Control Dis-
play and a message is displayed. No flat tire can
be detected. Have system checked.
A message like this is displayed in the following
situations:
>When a malfunction is occurring.
Have the system checked.
>When a wheel without TPM electronics is
mounted.
>When TPM is experiencing temporary inter-
ference from other systems or devices that
use the same radio frequency.
Page 109 of 254
Controls
107Reference
At a glance
Driving tips
Communications
Navigation
Entertainment
Mobility
The interior temperature, air volume, and air
distribution can be set starting from the radio
ready state.
Switching cooling function on and off
manually
When activated, the air conditioner
mode cools and dehumidifies the
incoming air, reheating it as
required, depending on the temperature set-
ting. Depending on the weather, the windshield
may fog over briefly when the engine is started.
The cooling function is switched on automati-
cally with the AUTO program. The passenger
compartment can only be cooled with the
engine running.
Rear window defroster
The rear window defroster
switches off automatically after a
while. Depending on your equip-
ment package, the upper wires are used as an
antenna and are not part of the rear window
defroster.
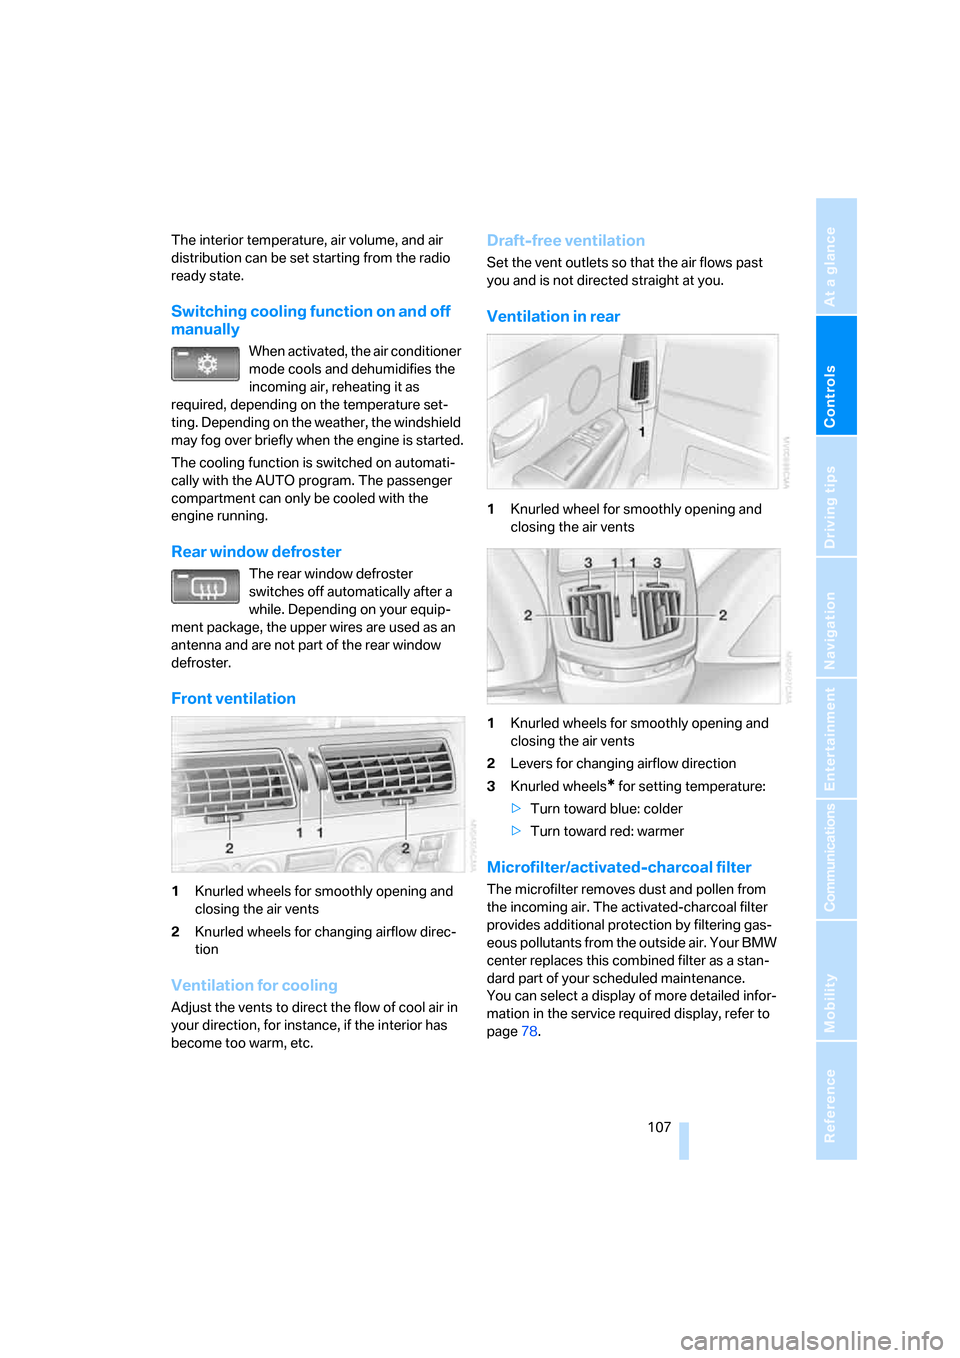
Front ventilation
1Knurled wheels for smoothly opening and
closing the air vents
2Knurled wheels for changing airflow direc-
tion
Ventilation for cooling
Adjust the vents to direct the flow of cool air in
your direction, for instance, if the interior has
become too warm, etc.
Draft-free ventilation
Set the vent outlets so that the air flows past
you and is not directed straight at you.
Ventilation in rear
1Knurled wheel for smoothly opening and
closing the air vents
1Knurled wheels for smoothly opening and
closing the air vents
2Levers for changing airflow direction
3Knurled wheels
* for setting temperature:
>Turn toward blue: colder
>Turn toward red: warmer
Microfilter/activated-charcoal filter
The microfilter removes dust and pollen from
the incoming air. The activated-charcoal filter
provides additional protection by filtering gas-
eous pollutants from the outside air. Your BMW
center replaces this combined filter as a stan-
dard part of your scheduled maintenance.
You can select a display of more detailed infor-
mation in the service required display, refer to
page78.
Page 113 of 254
Controls
111Reference
At a glance
Driving tips
Communications
Navigation
Entertainment
Mobility
Practical interior accessories
Integrated universal remote
control*
The concept
The integrated universal remote control can
replace as many as three hand-held transmit-
ters for various radio-controlled accessories,
such as garage doors, entrance gates, or light-
ing systems. The integrated universal remote
control registers and stores signals from the
original hand-held transmitters.
The signal of an original hand-held transmitter
can be programmed into one of the three mem-
ory buttons1. After this, the programmed
memory button1 will operate the system in
question. The LED2 flashes to confirm trans-
mission of the signal.
Should you sell your vehicle one day, be sure to
delete the stored programs beforehand for your
security, refer to page112.
To prevent possible damage or injury,
during programming or before each use
of the programmed device by the integrated
universal remote control, always inspect the
immediate area to make certain that no people,
animals or objects are within the swiveling and
movement range of the device. Also, comply
with the safety precautions of the original hand-
held transmitter.<
Checking compatibility
If you see this symbol on the packaging
or in the manual supplied with the orig-
inal hand-held transmitter, then it is
safe to assume that it is compatible with the
integrated universal remote control.
If you have additional questions, please
contact your BMW center or call:
1-800-355-3515.
Information is also provided on the Internet at:
www.bmwusa.com or
www.homelink.com. HomeLink is a registered trademark of
Johnson Controls, Inc.<
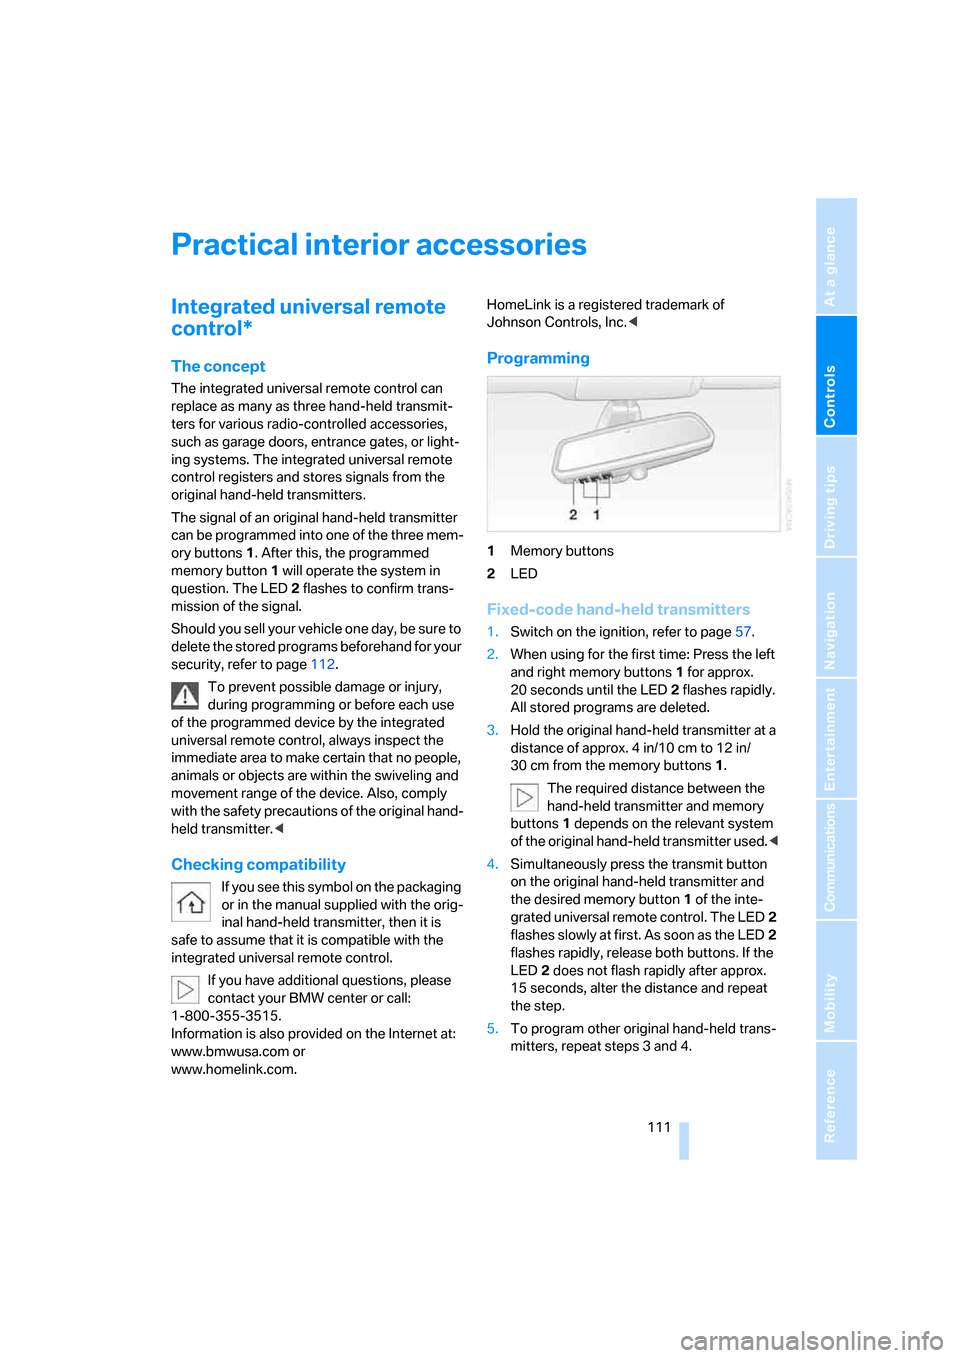
Programming
1Memory buttons
2LED
Fixed-code hand-held transmitters
1.Switch on the ignition, refer to page57.
2.When using for the first time: Press the left
and right memory buttons1 for approx.
20 seconds until the LED2 flashes rapidly.
All stored programs are deleted.
3.Hold the original hand-held transmitter at a
distance of approx. 4 in/10 cm to 12 in/
30 cm from the memory buttons1.
The required distance between the
hand-held transmitter and memory
buttons1 depends on the relevant system
of the original hand-held transmitter used.<
4.Simultaneously press the transmit button
on the original hand-held transmitter and
the desired memory button1 of the inte-
grated universal remote control. The LED2
flashes slowly at first. As soon as the LED2
flashes rapidly, release both buttons. If the
LED2 does not flash rapidly after approx.
15 seconds, alter the distance and repeat
the step.
5.To program other original hand-held trans-
mitters, repeat steps 3 and 4.
Page 115 of 254
Controls
113Reference
At a glance
Driving tips
Communications
Navigation
Entertainment
Mobility
4Switching to the other side
Briefly press the corresponding button with the
ignition in radio ready state or higher.
The side window blind can not be
extended unless the side window is
closed. If the side window is open, the blind will
rise slightly prior to immediately retracting to its
original position.<
To avoid injuries, make sure that the clos-
ing region of the roller blind is clear.
Press the safety switch on the driver's door,
refer to page40. The LED must light up. This
precaution prevents children from operating
the sun blinds using the rear switches, etc.
When leaving the vehicle parked, remove the
remote control from the ignition lock and close
the doors; this precaution prevents children
from operating the roller sun blinds and injuring
themselves.<
Automatically extending and retracting
sun blinds
You can run the sun blinds up and down
together when you press and hold the button3
longer.
Glove compartment
Releasing
Press button. The glove compartment opens
automatically and the light comes on.
Closing
Fold the cover up.
To prevent injury in the event of an acci-
dent while the vehicle is being driven,
close the glove compartment immediately after
use.<
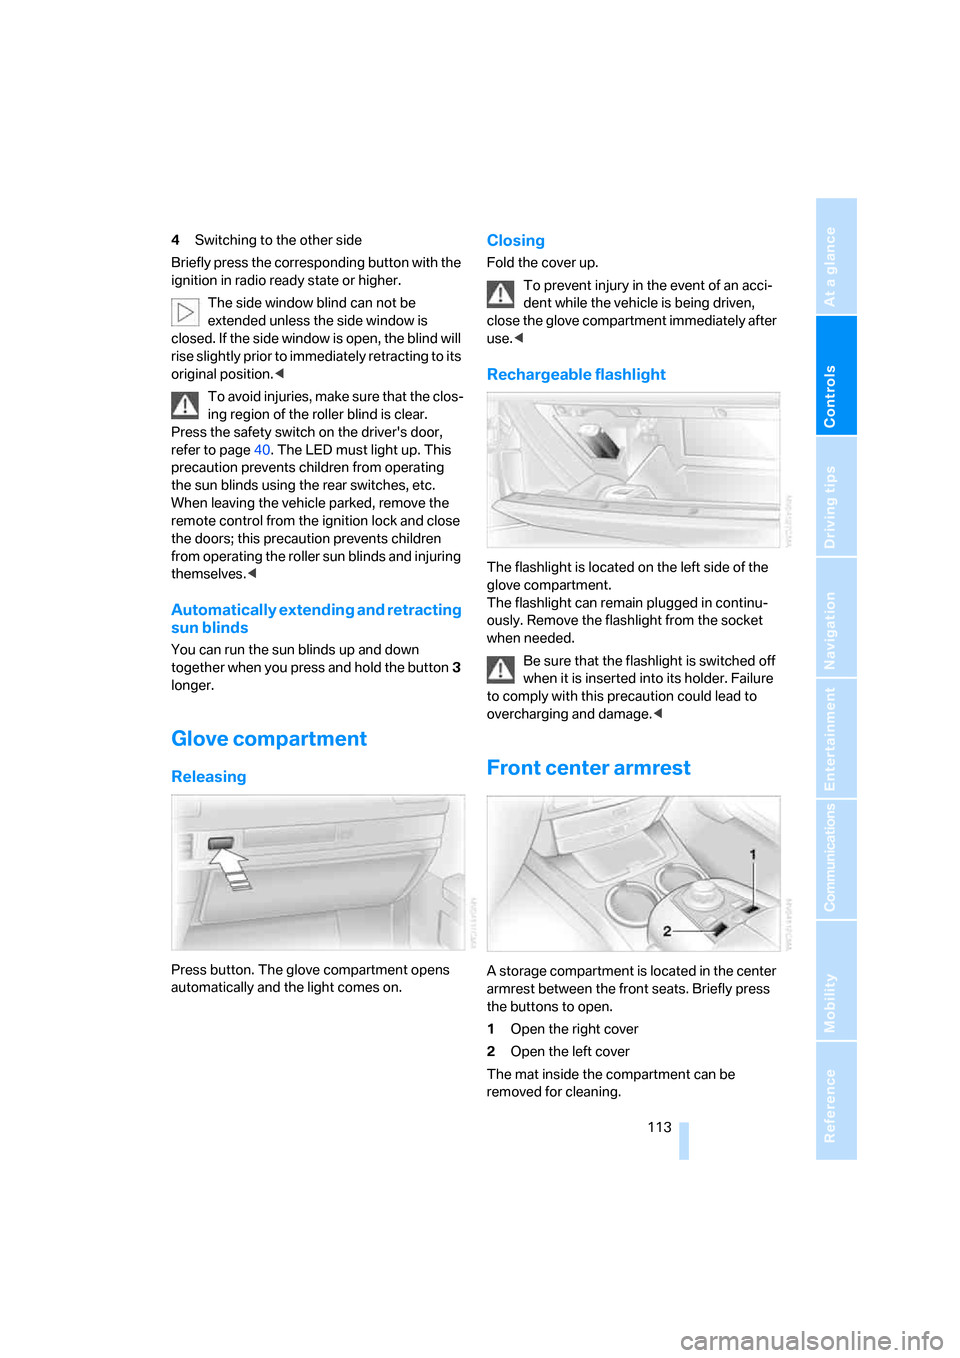
Rechargeable flashlight
The flashlight is located on the left side of the
glove compartment.
The flashlight can remain plugged in continu-
ously. Remove the flashlight from the socket
when needed.
Be sure that the flashlight is switched off
when it is inserted into its holder. Failure
to comply with this precaution could lead to
overcharging and damage.<
Front center armrest
A storage compartment is located in the center
armrest between the front seats. Briefly press
the buttons to open.
1Open the right cover
2Open the left cover
The mat inside the compartment can be
removed for cleaning.