2008 BMW 750LI warning
[x] Cancel search: warningPage 91 of 254

Controls
89Reference
At a glance
Driving tips
Communications
Navigation
Entertainment
Mobility
Deactivating DTC
Select "DTC" and press the controller.
The LED on the Control Display and the DTC
indicator lamp on the Info Display go out.
Dynamic Drive
The concept
Dynamic Drive minimizes body roll and opti-
mizes vehicle stability during cornering and
evasive maneuvers.
Active stabilizers at the front and rear axles form
the basis for Dynamic Drive. Suspension com-
pliance adapts to suit driving conditions, vary-
ing from performance-oriented during corner-
ing to smooth and comfort-oriented when the
vehicle is traveling in a straight line. During vehi-
cle operation, the system continuously runs
through closed-loop control cycles lasting only
fractions of a second.
The system assumes operational status each
time you start the engine.
Malfunction
The warning lamp lights up yellow and
a message appears on the Info Display.
A malfunction has occurred in the
Dynamic Drive system. Have the system
checked as soon as possible.
If a malfunction occurs, please remember
to adapt your speed accordingly, espe-
cially in curves.
The suspension will be noticeably softer and
the vehicle will display a greater tendency to tilt
during cornering and in crosswinds.<
If a Check Control message indicates an oil loss,
stop as soon as possible at a suitable location
and switch off the engine. Do not continue driv-
ing, contact your BMW center.
Self-leveling suspension*
Malfunction
The warning lamp for self-leveling sus-
pension lights up yellow and a message
appears on the Info Display.
A malfunction has occurred in the level control
system.
Stop driving and check the vehicle:
>The vehicle is considerably lower at the rear
than at the front, possibly also on one side,
at the rear left compared to the rear right.
>The ground clearance is reduced or the
driving comfort is noticeably reduced.
>The position of the vehicle is normal, but a
malfunction is indicated.
Drive to the nearest BMW center or a workshop
that works in accordance with BMW guidelines
and uses appropriately trained personnel. Drive
with appropriate caution in the meantime.
EDC Electronic Damping
Control*
If the influencing variables such as road surface
quality or operating conditions such as steer-
ing, braking etc. change, the damping automat-
ically adjusts to the new conditions.
iDrive, for principle details, refer to page16.
1.Press the button to open the start
menu.
2.Move the controller toward "Settings".
3.Select "Vehicle" and press the controller.
4.Select "EDC" and press the controller.
Page 93 of 254

Controls
91Reference
At a glance
Driving tips
Communications
Navigation
Entertainment
Mobility
6.Start driving.
It takes at least 10 minutes before the Flat
Tire Monitor is once again able to detect
and report a flat tire.
The initialization is completed during driving.
To exit the menu:
Select the arrow and press the controller.
Indication of a flat tire
The warning lamp lights up red and a
message appears on the Info Display. In
addition, a signal sounds. A flat tire or a
major air loss has occurred.
1.Reduce speed and stop the vehicle care-
fully. Avoid sudden braking and steering
maneuvers.
2.Identify the damaged tire.
If identification is not possible, con-
tact your BMW center.<
3.Replace the damaged tire, refer to Chang-
ing wheels on page215.
Run-flat tires*
1.Cautiously reduce the vehicle speed to
below 50 mph/80 km/h. Avoid hard braking
and steering maneuvers and do not exceed
50 mph/80 km/h.
If the vehicle is not equipped with run-
flat tires, refer to page205, do not
continue to drive. Continued driving after a
flat tire can result in serious accidents.<
2.Check the air pressure in all four tires at the
next opportunity.
If the tire inflation pressure in all four
tires is correct, the Flat Tire Monitor
may not have been initialized. The system
must then be initialized.<
3.In the event of a total loss of inflation pres-
sure, 0 psi/kPa, or obvious tire damage, you
can estimate the possible distance for con-
tinued driving on the basis of the following
guide values:
>With low load:
1 to 2 persons without luggage:
approx. 155 miles/250 km.>With medium load:
2 persons, luggage compartment full, or
4 persons without luggage:
approx. 95 miles/150 km.
>With full load:
4 or more persons, luggage compart-
ment full:
approx. 30 miles/50 km.
Drive reservedly and do not exceed a
speed of 50 mph/80 km/h. In the event of
pressure loss, vehicle handling changes. This
includes reduced tracking stability in braking,
extended braking distances, and altered natural
steering characteristics.
If unusual vibrations or loud noises occur while
the vehicle is being driven, this can indicate final
failure of the damaged tire. Reduce speed and
stop at a suitable location as soon as possible;
otherwise, pieces of the tire could come off and
cause an accident. Do not continue driving,
contact your BMW center.<
Malfunction
The warning lamp lights up yellow and
a message appears on the Info Display.
The Flat Tire Monitor has failed. Have
the system checked as soon as possible.
TPM Tire Pressure Monitor*
The concept
TPM checks the tire inflation pressure in the
four mounted tires. The system indicates if the
tire inflation pressure has dropped considerably
in one or several tires.
Functional requirement
In order to assure the reliable reporting of a flat
tire, the system must have been reset with the
correct tire inflation pressure.
Always use wheels with TPM electronics; oth-
erwise, the system cannot be assured of func-
tioning properly.
Reset the system again after each correc-
tion of the tire inflation pressure and after
every tire or wheel change.<
Page 95 of 254

Controls
93Reference
At a glance
Driving tips
Communications
Navigation
Entertainment
Mobility
ing driving. The tires are displayed in green on
the Control Display.
If a flat tire is detected during the reset-
ting and adoption of the tire inflation pres-
sures, all tires are shown in yellow on the Con-
trol Display. The message "Status: Tire low!" is
displayed.<
Low tire pressure message
The warning lamp lights up yellow. A
message appears on the Control Dis-
play. In addition, a signal sounds. A flat
tire or a major air loss has occurred.
1.Reduce speed and stop the vehicle care-
fully. Avoid sudden braking and steering
maneuvers.
2.Check whether your vehicle is equipped
with standard tires or run-flat tires.
You will recognize run-flat tires by a
circular symbol containing the letters
RSC on the side of the tire, refer to
page205.<
Standard tires
1.If all four wheels are shown in yellow, iden-
tify the damaged tire on the vehicle.
2.Replace the damaged wheel or wheels,
refer to Changing wheels on page215.
The spare wheel is equipped with the neces-
sary TPM electronics and when mounted, will
also be monitored once the system has been
reset.
Have the tire replaced by a BMW center or a
workshop that is familiar with handling TPM and
works according to BMW repair procedures
with correspondingly trained personnel.
Run-flat tires*
1.Cautiously reduce speed to below 50 mph/
80 km/h. Avoid hard braking and steering
maneuvers and do not exceed 50 mph/
80 km/h.
If the vehicle is not equipped with run-
flat tires, refer to page205, do not
continue to drive. Continued driving after a
flat tire can result in serious accidents.<2.In the event of complete tire pressure loss,
0 psi/0 kPa, you can estimate the possible
distance for continued driving on the basis
of the following guide values:
>With a light load:
1 to 2 persons without luggage:
approx. 155 miles/250 km
>With a medium load:
2 persons, luggage compartment full, or
4 persons without luggage:
approx. 95 miles/150 km
>With a full load:
4 or more persons, luggage compart-
ment full:
approx. 30 miles/50 km
Drive reservedly and do not exceed a
speed of 50 mph/80 km/h. In the event of
pressure loss, vehicle handling changes. This
includes reduced tracking stability in braking,
extended braking distance and altered natural
steering characteristics.
If unusual vibrations occur while the vehicle is
being driven, this can indicate final failure of the
damaged tire. Reduce speed and stop as soon
as possible; otherwise, pieces of the tire could
come loose and cause an accident. Do not con-
tinue driving, contact your BMW center.<
Malfunction
The yellow warning light flashes and
then lights up continuously. The tires
are shown in gray on the Control Dis-
play and a message is displayed. No flat tire can
be detected. Have system checked.
A message like this is displayed in the following
situations:
>When a malfunction is occurring.
Have the system checked.
>When a wheel without TPM electronics is
mounted.
>When TPM is experiencing temporary inter-
ference from other systems or devices that
use the same radio frequency.
Page 97 of 254

Controls
95Reference
At a glance
Driving tips
Communications
Navigation
Entertainment
Mobility
Airbags
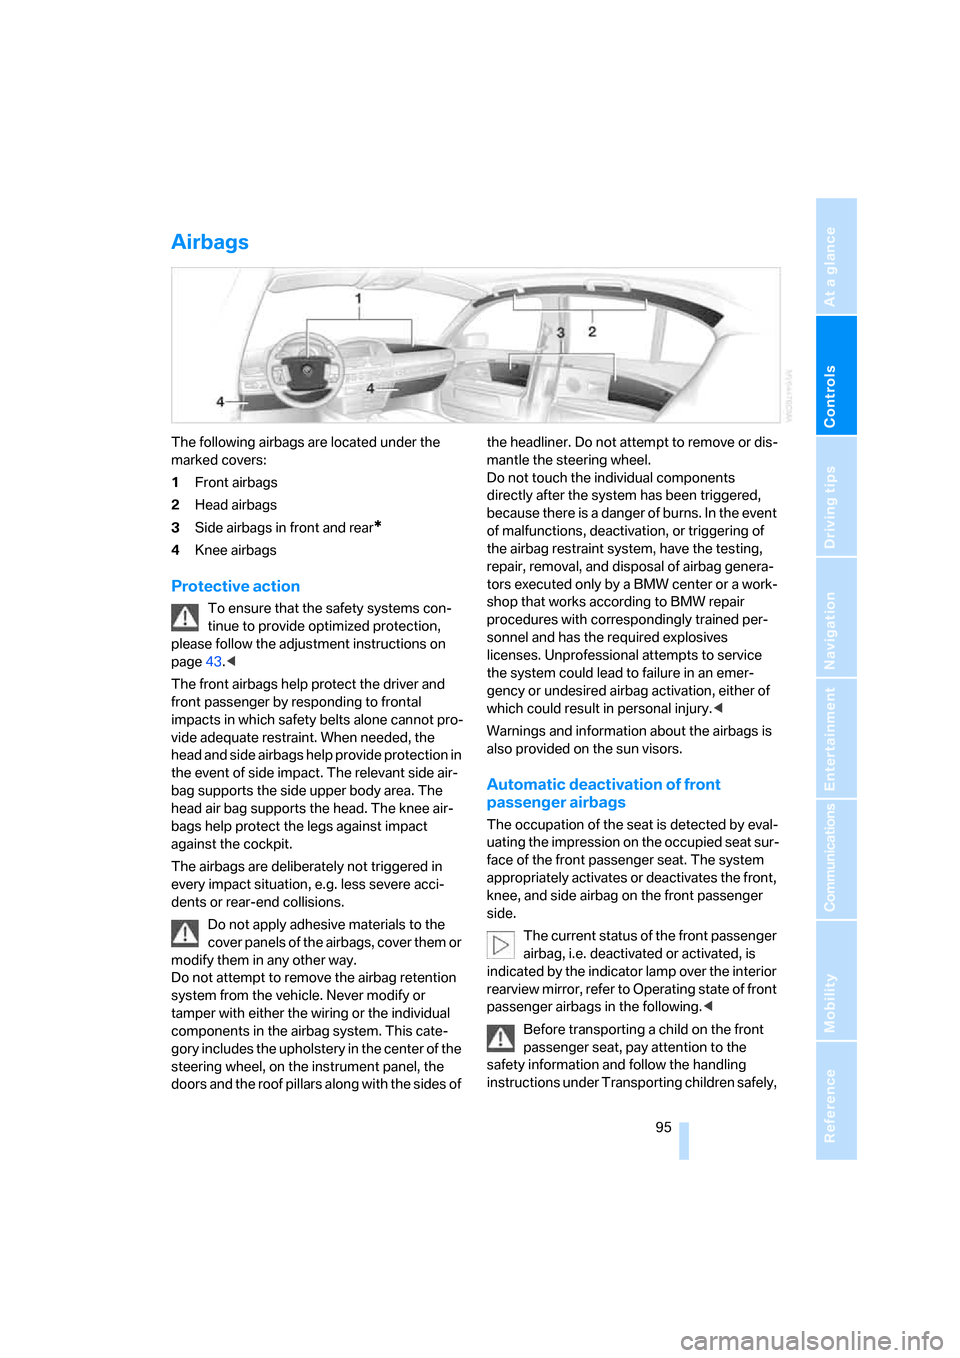
The following airbags are located under the
marked covers:
1Front airbags
2Head airbags
3Side airbags in front and rear
*
4Knee airbags
Protective action
To ensure that the safety systems con-
tinue to provide optimized protection,
please follow the adjustment instructions on
page43.<
The front airbags help protect the driver and
front passenger by responding to frontal
impacts in which safety belts alone cannot pro-
vide adequate restraint. When needed, the
head and side airbags help provide protection in
the event of side impact. The relevant side air-
bag supports the side upper body area. The
head air bag supports the head. The knee air-
bags help protect the legs against impact
against the cockpit.
The airbags are deliberately not triggered in
every impact situation, e.g. less severe acci-
dents or rear-end collisions.
Do not apply adhesive materials to the
cover panels of the airbags, cover them or
modify them in any other way.
Do not attempt to remove the airbag retention
system from the vehicle. Never modify or
tamper with either the wiring or the individual
components in the airbag system. This cate-
gory includes the upholstery in the center of the
steering wheel, on the instrument panel, the
doors and the roof pillars along with the sides of the headliner. Do not attempt to remove or dis-
mantle the steering wheel.
Do not touch the individual components
directly after the system has been triggered,
because there is a danger of burns. In the event
of malfunctions, deactivation, or triggering of
the airbag restraint system, have the testing,
repair, removal, and disposal of airbag genera-
tors executed only by a BMW center or a work-
shop that works according to BMW repair
procedures with correspondingly trained per-
sonnel and has the required explosives
licenses. Unprofessional attempts to service
the system could lead to failure in an emer-
gency or undesired airbag activation, either of
which could result in personal injury.<
Warnings and information about the airbags is
also provided on the sun visors.
Automatic deactivation of front
passenger airbags
The occupation of the seat is detected by eval-
uating the impression on the occupied seat sur-
face of the front passenger seat. The system
appropriately activates or deactivates the front,
knee, and side airbag on the front passenger
side.
The current status of the front passenger
airbag, i.e. deactivated or activated, is
indicated by the indicator lamp over the interior
rearview mirror, refer to Operating state of front
passenger airbags in the following.<
Before transporting a child on the front
passenger seat, pay attention to the
safety information and follow the handling
instructions under Transporting children safely,
Page 98 of 254

Technology for comfort, convenience and safety
96 refer to page54.
In certain sitting positions, teenagers and adults
can deactivate the front, knee and side airbag
on the front passenger side; when this occurs,
the indicator lamp for the front passenger air-
bags lights up. In these cases, change the sit-
ting position so that the front passenger airbags
are activated and the indicator lamp goes out.
If the desired status cannot be produced by
changing the sitting position, have the person
ride in the back. Do not place slip covers, seat
cushions, beaded mats, or other objects on the
passenger seat that are not specifically recom-
mended by BMW. Do not lay objects under the
seat which could press against the seat from
below. Otherwise, a correct evaluation of the
occupied seat surface cannot be assured.<
Operating state of front passenger
airbags
The indicator lamp for the front passenger air-
bags indicates the operational status of the
front, knee and side airbag on the front passen-
ger side depending on whether the seat is
occupied. The indicator lamp shows whether
the front passenger airbags are activated or
deactivated.
>The indicator lamp lights up when a child
properly seated in a child restraint system
intended for the purpose is detected on the
seat.
Front, knee and side airbag on the front
passenger side are deactivated.
Most child seats are detected by the
system. It is particularly advisable to
use child seats approved by NHTSA at the
time that the vehicle was produced. After
installing a child's seat, make sure that the indicator light for the front passenger air-
bags is illuminated. This indicates that the
system has detected the child's seat and
has deactivated the front passenger air-
bags.<
>The indicator lamp does not light up when,
for example, a correctly seated person of
sufficient height is detected on the seat.
Front, knee and side airbag on the front
passenger side are activated.
>The indicator lamp does not light up when
the seat is empty.
The front, knee, and side airbags on the
front passenger side are not activated in
this case either.
Operational readiness of the airbag
system
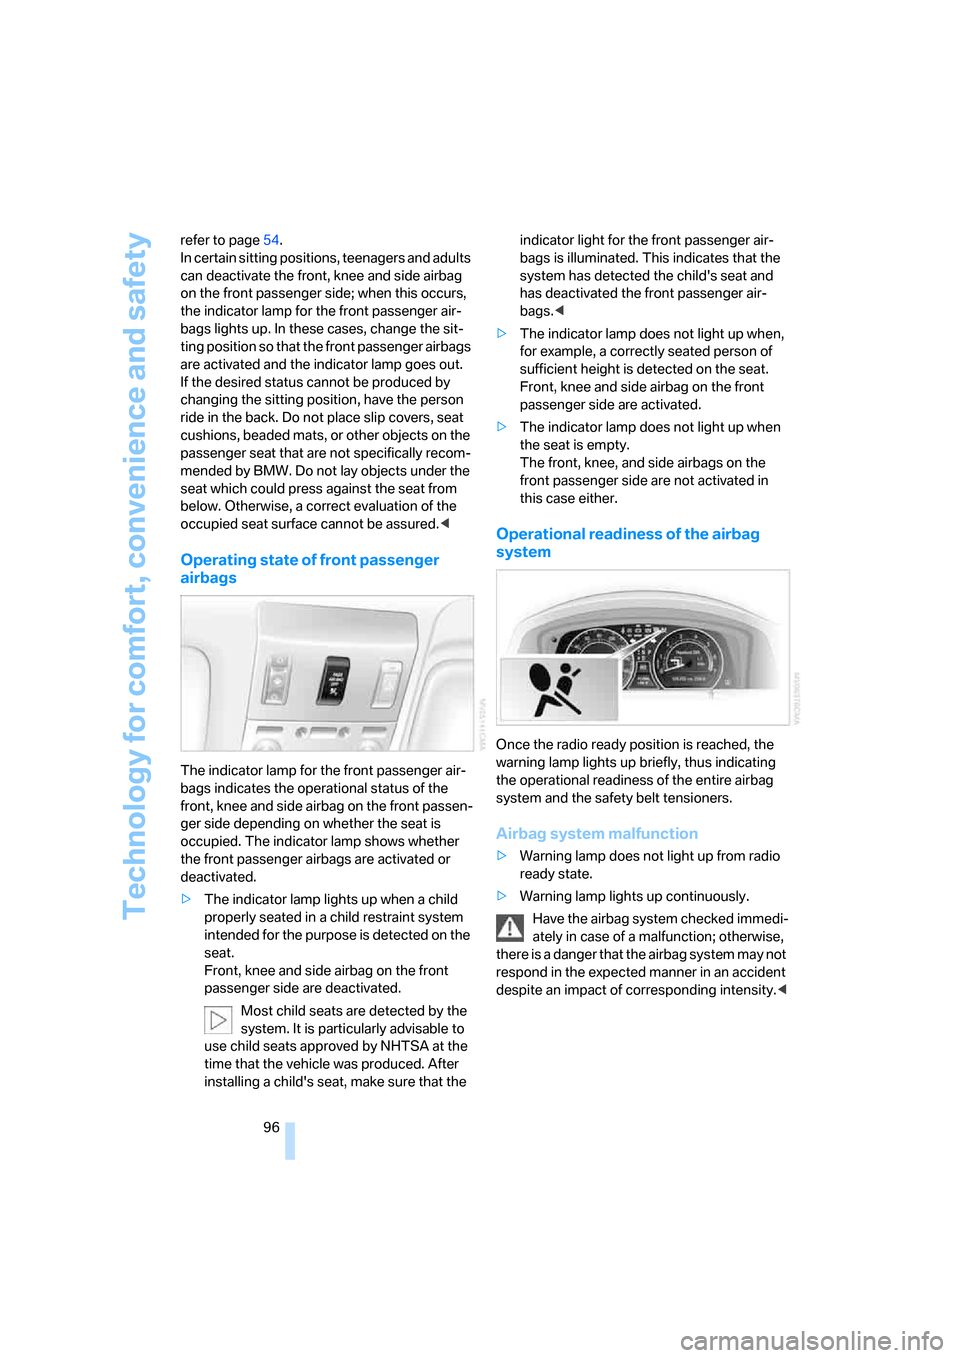
Once the radio ready position is reached, the
warning lamp lights up briefly, thus indicating
the operational readiness of the entire airbag
system and the safety belt tensioners.
Airbag system malfunction
>Warning lamp does not light up from radio
ready state.
>Warning lamp lights up continuously.
Have the airbag system checked immedi-
ately in case of a malfunction; otherwise,
there is a danger that the airbag system may not
respond in the expected manner in an accident
despite an impact of corresponding intensity.<
Page 161 of 254

Navigation
Entertainment
Driving tips
159Reference
At a glance
Controls
Communications
Mobility
7.Turn the controller until you reach the
desired memory position.
8.Press the controller.
The stations are stored for the remote control
currently in use.
Using the voice command system:
Changing memory position
1.Select the desired station and press the
controller.
2.Turn the controller until you reach the
desired memory position.
3.Press the controller.
The station is now stored.
RDS Radio Data System*
RDS also broadcasts information on the VHF/
FM waveband. RDS stations have the following
properties for this purpose:
>In broadcasting companies that broadcast
over several frequencies, the system auto-
matically switches to the frequency with the
best reception quality.
>If the reception conditions are good, the
station names are shown on the Control
Display. With weaker reception or when
there is interference, it can take a while for
the station names to appear.
Switching RDS on/off
1.Select "FM" and press the controller.
2.Choose the selection criterion and press
the controller.
3.Select "MANUAL" and press the controller.
4.Select "RDS" and press the controller.
RDS is available in the FM waveband.<
Weather reports*
Weather Radio is a service of the National Oce-
anic and Atmospheric Administration (NOAA)
of the US Department of Trade. Weather
reports are repeated every 4 to 6 minutes and
are routinely updated at intervals of 1 to
3 hours, more often when necessary. Most sta-
tions operate 24 hours a day. In case of a storm,
the National Weather Service interrupts the
routine weather news and transmits special
warning messages instead. Should you have
questions regarding NOAA Weather Radio, 1.{Radio}.
2.{Station 1...12}.
Page 211 of 254

Mobility
209Reference
At a glance
Controls
Driving tips
Communications
Navigation
Entertainment
Possible displays
>"Update of engine oil level in process".
>"Engine oil level O.K.".
>"Oil level at minimum! Add 1 quart engine
oil": add a maximum of 1 quart/1 liter of
engine oil at the earliest opportunity, refer
to Adding engine oil.
>"Oil level under min.! Add 1 quart engine
oil": add a maximum of 1 quart/1 liter of
engine oil at the earliest opportunity, refer
to Adding engine oil.
>"Engine oil level too high".
Have vehicle checked immediately;
otherwise, overfilled oil can lead to
engine damage.<
>"No measurement possible at this time".
Adding engine oil
Do not add oil until a Check Control message
appears.
Add oil within the next 125 miles/200 km;
otherwise, the engine could be dam-
aged.<
Keep oil, grease, etc. out of reach of chil-
dren and heed warnings on the contain-
ers to avoid health risks.<
Oil changing
Only have an oil change carried out by a BMW
center or a repair shop that works in accordance
with BMW guidelines and uses appropriately
trained personnel.
Approved engine oils
The quality of the engine oil selected has critical
significance for the operation and service life of
an engine. BMW continuously approves spe-
cific engine oils after confirming their suitability
for use in its vehicles with extensive testing.
Use only approved BMW High Performance
Synthetic Oil.
If BMW High Performance Synthetic Oil is
unavailable, you can add small quantities of
other synthetic oils between oil changes. Use
only oils of the specification API SH or higher.
Your BMW center will be happy to answer
detailed questions on BMW High Perfor-
mance Synthetic Oil or approved synthetic
oils.<
You can also call BMW of North America at
1-800-831-1117 or visit the website at
www.bmwusa.com to obtain this information.
Never use oil additives as they can dam-
age your engine under some circum-
stances.<
Viscosity grades
The viscosity is a measure of the thickness of
the oil and is specified in SAE grades.
The choice of the right SAE grade is based on
the climatic conditions in the region in which
you normally drive your BMW.
Approved oils belong to the SAE grades
5W-40 and 5W-30.<
These oils can be used for driving at all outside
temperatures.
Page 214 of 254

Maintenance
212
Socket for OBD Onboard
Diagnostics
Components which are decisive for the
exhaust-gas composition can be checked via
the OBD socket with a device.
This socket is located to the left on the driver's
side, on the underside of the instrument panel
under a cover.
Emissions values
The warning lamp lights up. The emis-
sions values are deteriorating. Have the
vehicle checked as soon as possible.
Display of the previously described
malfunction on Canadian models.
Under certain circumstances, the warning lamp
will flash. This is a sign of excessive misfiring of
the engine. In this case you should reduce
speed and drive to the nearest BMW center as
soon as possible. Serious engine misfiring,
even for only a short period of time, can seri-
ously damage emission control components,
especially the catalytic converter.
If the fuel filler cap is not properly tight-
ened, the OBD system can detect the
vapor leak and the indicator lamp will light up. If
the cap is then tightened, the display should go
out within a few days.<
Event Data Recorders
Your vehicle may be equipped with one or sev-
eral measuring and diagnosis modules, or with a
device for recording or transmitting certain
vehicle data or information. If you have also
signed a contract of participation for BMW
Assist, certain vehicle data can be transmitted
or recorded to enable corresponding services.
Care
You can find useful information on caring for
your BMW in the Caring for your vehicle bro-
chure.