2008 BMW 650I COUPE light
[x] Cancel search: lightPage 179 of 264

Navigation
Entertainment
Driving tips
177Reference
At a glance
Controls
Communications
Mobility
Notes
BMW CD/DVD players and changers are
officially designated Class 1 laser prod-
ucts. Do not operate if the cover is damaged,
otherwise severe eye damage can result.
Do not use self-recorded CDs with adhesive
labels as these can come loose during playback
due to heat build-up and cause irreparable
damage to the system.
Only use round CDs/DVDs with a standard
diameter of 4.7 in/12 cm and do not play CDs/
DVDs with an adapter, e.g. Single-CDs, other-
wise the CDs or the adapter can jam and may no
longer be ejected.
Do not use a combined CD/DVD, e.g. DVD
Plus;
otherwise, the CD/DVD can jam and will no
longer eject.<
General malfunctions
BMW CD/DVD changers and players have been
optimized for performance in vehicles. In some
instances they may be more sensitive to faulty
CDs/DVDs than stationary devices would be.
If a CD/DVD cannot be played, first check
whether it has been inserted correctly.
Humidity
High levels of humidity can lead to condensa-
tion on the CD/DVD or the laser's scan lens and
temporarily prevent playback.
Malfunctions with individual CDs/DVDs
If malfunctions occur only with particular CDs/
DVDs, this can be due to one of the following
causes.
Home-recorded CDs/DVDs
Possible reasons for malfunctions with self-
recorded CDs/DVDs are, e.g., inconsistent
data-creation or recording processes, or poor
quality or advanced age of the CD/DVD blank.
Label CDs/DVDs only on the top, using a marker
designed for this purpose.
Damaged CDs/DVDs
Avoid fingerprints dust, scratches, and mois-
ture.
Keep CDs/DVDs in a sleeve.
Do not subject CDs/DVDs to temperatures over
1227/506, high levels of humidity or direct
sunlight.
CDs/DVDs with copy protection
Manufacturers often provide CDs/DVDs with
copy protection. This can mean that some CDs/
DVDs cannot be played or can only be played to
a limited extent.
Care
If necessary, clean the reflective scanning side
of the CDs/DVDs with a commercially available
cleaning cloth by wiping in straight lines from
the center outward.
Page 217 of 264
Mobility
215Reference
At a glance
Controls
Driving tips
Communications
Navigation
Entertainment
Recommended tire brands
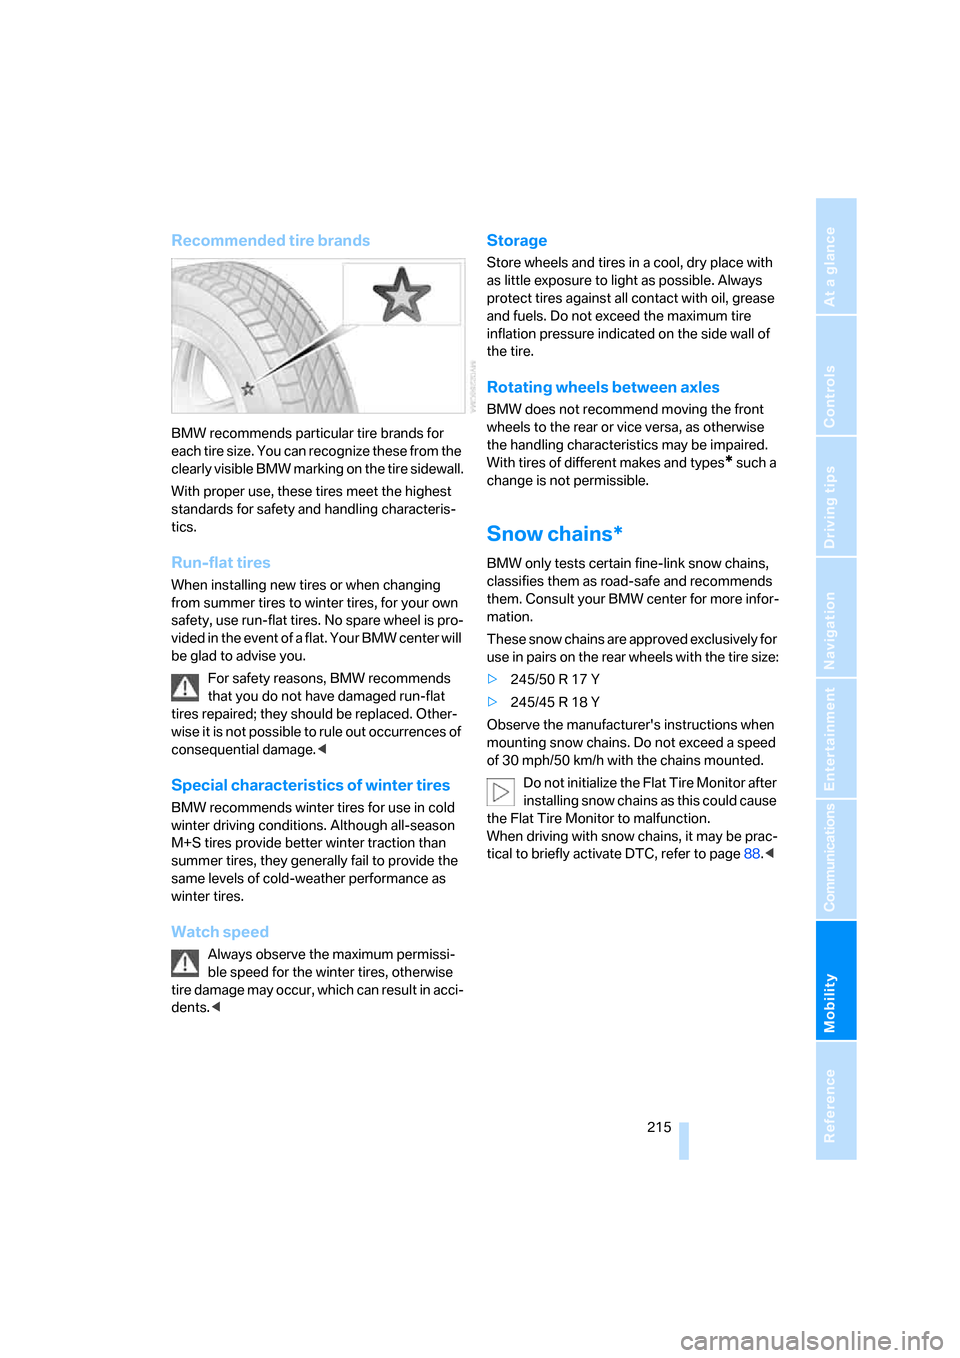
BMW recommends particular tire brands for
each tire size. You can recognize these from the
clearly visible BMW marking on the tire sidewall.
With proper use, these tires meet the highest
standards for safety and handling characteris-
tics.
Run-flat tires
When installing new tires or when changing
from summer tires to winter tires, for your own
safety, use run-flat tires. No spare wheel is pro-
vided in the event of a flat. Your BMW center will
be glad to advise you.
For safety reasons, BMW recommends
that you do not have damaged run-flat
tires repaired; they should be replaced. Other-
wise it is not possible to rule out occurrences of
consequential damage.<
Special characteristics of winter tires
BMW recommends winter tires for use in cold
winter driving conditions. Although all-season
M+S tires provide better winter traction than
summer tires, they generally fail to provide the
same levels of cold-weather performance as
winter tires.
Watch speed
Always observe the maximum permissi-
ble speed for the winter tires, otherwise
tire damage may occur, which can result in acci-
dents.<
Storage
Store wheels and tires in a cool, dry place with
as little exposure to light as possible. Always
protect tires against all contact with oil, grease
and fuels. Do not exceed the maximum tire
inflation pressure indicated on the side wall of
the tire.
Rotating wheels between axles
BMW does not recommend moving the front
wheels to the rear or vice versa, as otherwise
the handling characteristics may be impaired.
With tires of different makes and types
* such a
change is not permissible.
Snow chains*
BMW only tests certain fine-link snow chains,
classifies them as road-safe and recommends
them. Consult your BMW center for more infor-
mation.
These snow chains are approved exclusively for
use in pairs on the rear wheels with the tire size:
>245/50 R 17 Y
>245/45 R 18 Y
Observe the manufacturer's instructions when
mounting snow chains. Do not exceed a speed
of 30 mph/50 km/h with the chains mounted.
Do not initialize the Flat Tire Monitor after
installing snow chains as this could cause
the Flat Tire Monitor to malfunction.
When driving with snow chains, it may be prac-
tical to briefly activate DTC, refer to page88.<
Page 224 of 264

Maintenance
222
Socket for OBD Onboard
Diagnostics interface
Components which are decisive for the
exhaust-gas composition can be checked via
the OBD socket with a device.
This socket is located under a cover on the left
side of the driver's footwell, directly under the
instrument panel.
Exhaust-gas values
The warning lamp lights up. The
exhaust-gas values are deteriorating.
Have the vehicle checked as soon as
possible.
Display of the previously described
malfunction on Canadian models.
The lamp flashes under certain conditions. This
is a sign of excessive misfiring of the engine. In
this case, you should reduce speed and drive to
the nearest BMW center as soon as possible.
Heavy engine misfiring causes serious damage
to the emission-relevant components, espe-
cially the catalytic converter, within a short time.
If the fuel filler cap is not properly tight-
ened, the OBD system can detect the
escape of fuel vapor. This causes a display to
light up. If the cap is then tightened, the display
should go out within a few days.<
Event data recorders
Your vehicle may be equipped with one or sev-
eral measuring and diagnosis modules, or with a
device for recording or transmitting certain
vehicle data or information. If you have also sub-
scribed to BMW Assist, then certain vehicle
data can be transmitted or recorded to enable
corresponding services.
Care
Important information on care and maintenance
of your BMW is contained in the Caring for your
vehicle brochure.
Page 225 of 264

Mobility
223Reference
At a glance
Controls
Driving tips
Communications
Navigation
Entertainment
Replacing components
Onboard tool kit
The onboard tool kit is located in the luggage
compartment under the floor mat.
Replacing wiper blades
1.Fold the wiper arm out and grasp it firmly.
2.Press the locking tabs together while slid-
ing the wiper blade toward the front to dis-
engage it.
3.Insert the new wiper blade and slide it in
until it audibly clicks into place.
Lamps and bulbs
Lamps and bulbs make an essential contribu-
tion to driving safety. You must be duly diligent
in replacing them. If you are not familiar with the
specified procedures, have the corresponding
work carried out at your BMW center.
Never touch the glass on new bulbs with
your bare fingers, as even minute
amounts of contamination will burn into the
bulb's surface and reduce its service life. Use a
clean cloth, napkin, etc., or hold the bulb by its
metal socket.<
A selection of replacement bulbs is available at
your BMW center.
Whenever you perform any work on the
electrical system, turn off the electrical
devices involved to prevent short circuits from
occurring. To avoid possible injury or equip-
ment damage when replacing bulbs, follow any
instructions provided by the bulb manufac-
turer.<
When performing maintenance on the head-
lamps, follow the instructions in the separate
Caring for your vehicle brochure.
For bulbs for which changing is not
described, and for checking and adjusting
headlamp aim, please contact your BMW cen-
ter.<
Light-emitting diodes LEDs
Light-emitting diodes installed behind translu-
cent lenses serve as the light source for many of
the controls and displays in your vehicle. These
light-emitting diodes, which operate using a
concept similar to that applied in conventional
lasers, are officially designated as Class 1 light-
emitting diodes.
Do not remove the covers, and never
stare into the unfiltered light for several
hours, as irritation of the retina could result.<
Page 226 of 264
Replacing components
224
Xenon lamps
The service life of these lamps is very long and
the probability of a failure is very low, provided
that they are not switched on and off an unusual
number of times. If one of these bulbs should
nevertheless fail, it is possible to continue driv-
ing with great caution using the fog lamps, pro-
vided traffic laws in your area do not prohibit
this.
Have work on the xenon lighting system
performed only by your BMW center or a
workshop that works according to BMW repair
procedures with correspondingly trained per-
sonnel. Due to the high voltage involved, there
is a danger to life and limb when work is carried
out improperly.<
Parking lamps, roadside parking
lamps, daytime running lamps
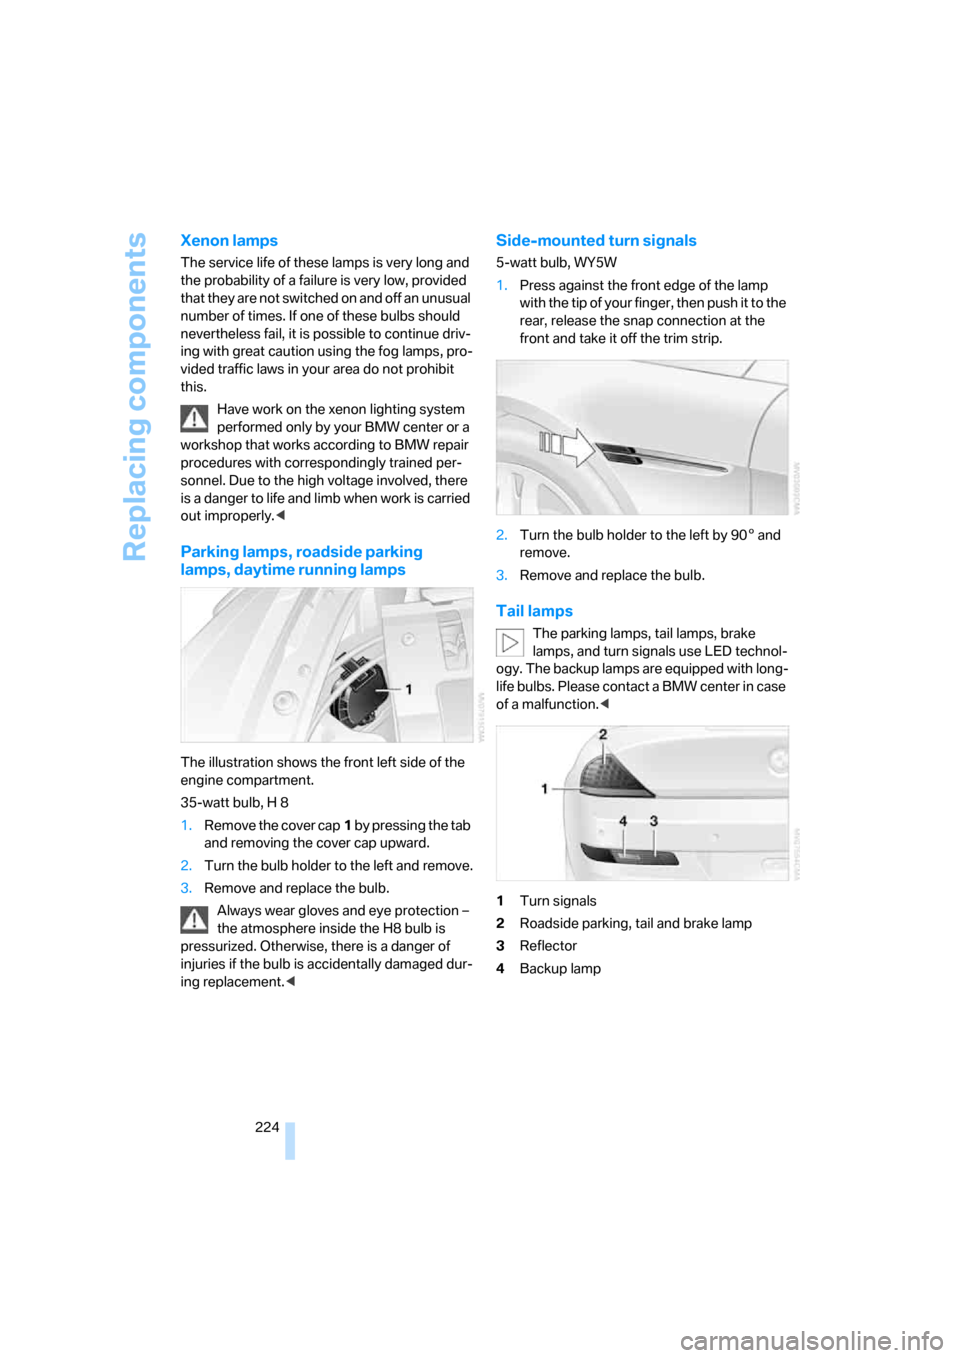
The illustration shows the front left side of the
engine compartment.
35-watt bulb, H 8
1.Remove the cover cap1 by pressing the tab
and removing the cover cap upward.
2.Turn the bulb holder to the left and remove.
3.Remove and replace the bulb.
Always wear gloves and eye protection –
the atmosphere inside the H8 bulb is
pressurized. Otherwise, there is a danger of
injuries if the bulb is accidentally damaged dur-
ing replacement.<
Side-mounted turn signals
5-watt bulb, WY5W
1.Press against the front edge of the lamp
with the tip of your finger, then push it to the
rear, release the snap connection at the
front and take it off the trim strip.
2.Turn the bulb holder to the left by 905 and
remove.
3.Remove and replace the bulb.
Tail lamps
The parking lamps, tail lamps, brake
lamps, and turn signals use LED technol-
ogy. The backup lamps are equipped with long-
life bulbs. Please contact a BMW center in case
of a malfunction.<
1Turn signals
2Roadside parking, tail and brake lamp
3Reflector
4Backup lamp
Page 229 of 264
Mobility
227Reference
At a glance
Controls
Driving tips
Communications
Navigation
Entertainment
Giving and receiving assistance
Emergency request
Conditions for an emergency request:
>Full preparation package mobile phone.
With this equipment, an emergency request
is still possible when no mobile phone is
paired in the vehicle.
>BMW Assist is activated.
Activating BMW Assist, refer to page204.
>Radio readiness is activated.
>The BMW Assist system is logged on to a
mobile phone network.
>The emergency request system is opera-
ble.
Once your service contract for BMW Assist
expires, the BMW Assist system can be deacti-
vated by a BMW center without you having to
visit a workshop. Following deactivation of the
BMW Assist system, no emergency requests
can be made. The BMW Assist system can be
reactivated after concluding a new agreement
at a BMW center.
Initiating an emergency request
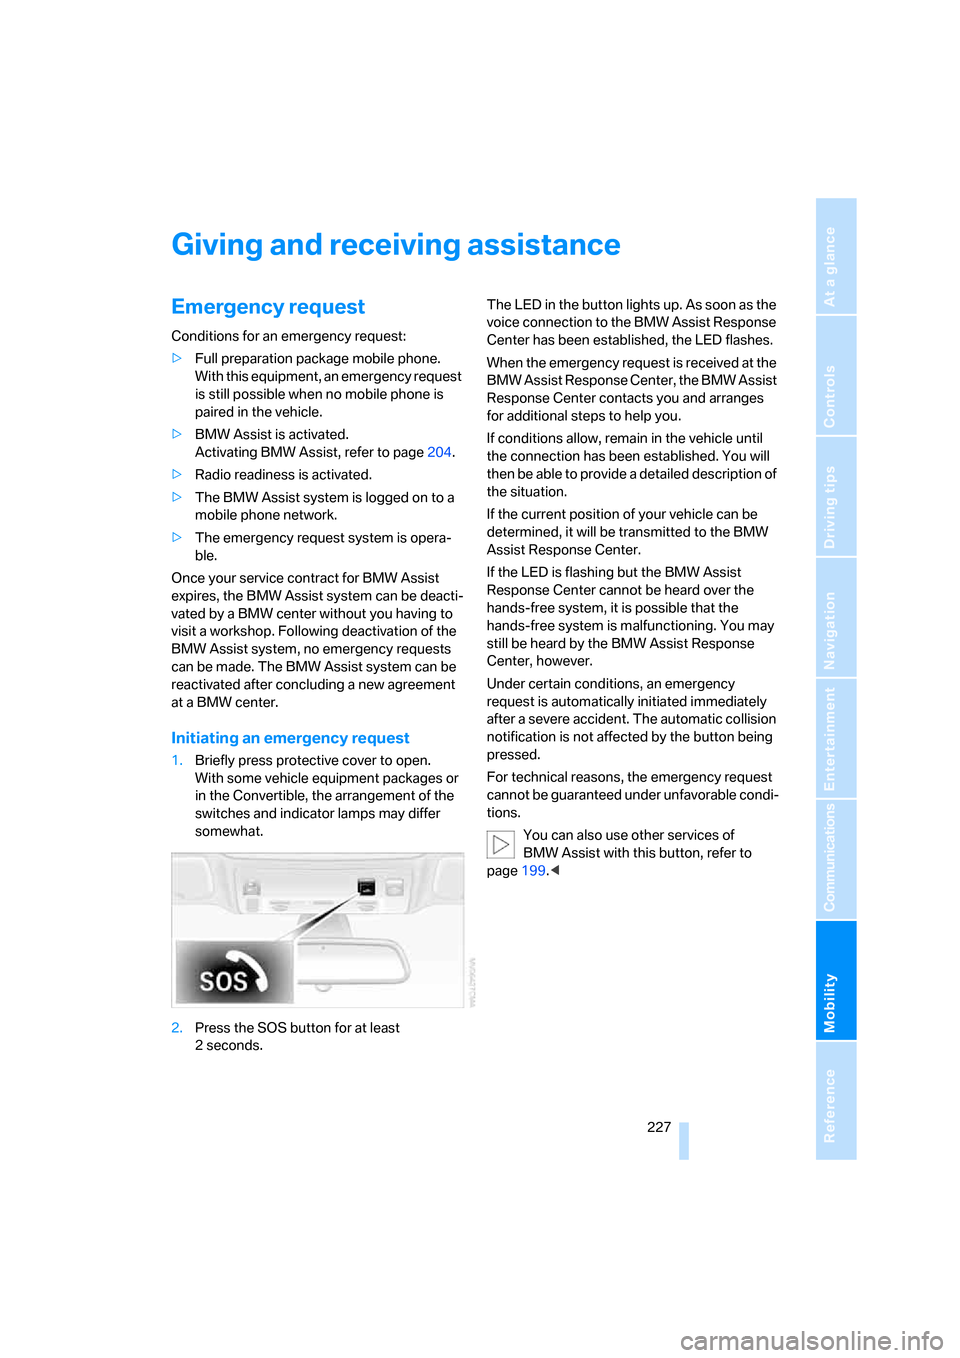
1.Briefly press protective cover to open.
With some vehicle equipment packages or
in the Convertible, the arrangement of the
switches and indicator lamps may differ
somewhat.
2.Press the SOS button for at least
2seconds.The LED in the button lights up. As soon as the
voice connection to the BMW Assist Response
Center has been established, the LED flashes.
When the emergency request is received at the
BMW Assist Response Center, the BMW Assist
Response Center contacts you and arranges
for additional steps to help you.
If conditions allow, remain in the vehicle until
the connection has been established. You will
then be able to provide a detailed description of
the situation.
If the current position of your vehicle can be
determined, it will be transmitted to the BMW
Assist Response Center.
If the LED is flashing but the BMW Assist
Response Center cannot be heard over the
hands-free system, it is possible that the
hands-free system is malfunctioning. You may
still be heard by the BMW Assist Response
Center, however.
Under certain conditions, an emergency
request is automatically initiated immediately
after a severe accident. The automatic collision
notification is not affected by the button being
pressed.
For technical reasons, the emergency request
cannot be guaranteed under unfavorable condi-
tions.
You can also use other services of
BMW Assist with this button, refer to
page199.<
Page 231 of 264
Mobility
229Reference
At a glance
Controls
Driving tips
Communications
Navigation
Entertainment
There must not be any contact between
the bodies of the two vehicles; otherwise,
there is a danger of short circuiting.<
Connecting jumper cables
To avoid personal injury from sparks, fol-
low this sequence when connecting
jumper cables.<
In your BMW, the so-called jump-starting termi-
nal for jump starting in the engine compartment
serves as a positive terminal for the battery, also
refer to engine compartment overview on
page217. The cover cap is marked with a +.
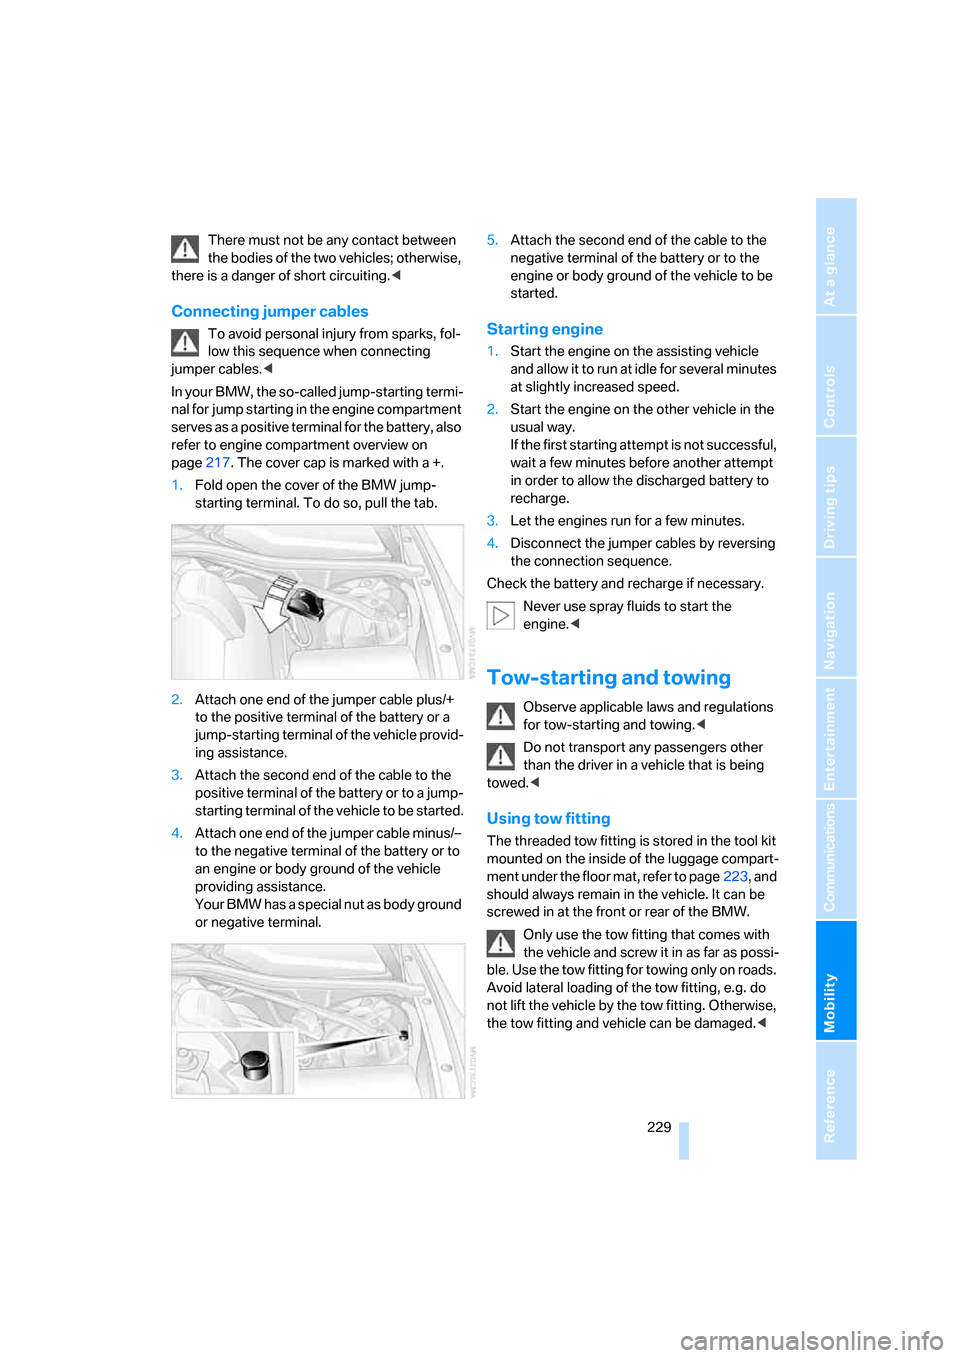
1.Fold open the cover of the BMW jump-
starting terminal. To do so, pull the tab.
2.Attach one end of the jumper cable plus/+
to the positive terminal of the battery or a
jump-starting terminal of the vehicle provid-
ing assistance.
3.Attach the second end of the cable to the
positive terminal of the battery or to a jump-
starting terminal of the vehicle to be started.
4.Attach one end of the jumper cable minus/–
to the negative terminal of the battery or to
an engine or body ground of the vehicle
providing assistance.
Your BMW has a special nut as body ground
or negative terminal.5.Attach the second end of the cable to the
negative terminal of the battery or to the
engine or body ground of the vehicle to be
started.Starting engine
1.Start the engine on the assisting vehicle
and allow it to run at idle for several minutes
at slightly increased speed.
2.Start the engine on the other vehicle in the
usual way.
If the first starting attempt is not successful,
wait a few minutes before another attempt
in order to allow the discharged battery to
recharge.
3.Let the engines run for a few minutes.
4.Disconnect the jumper cables by reversing
the connection sequence.
Check the battery and recharge if necessary.
Never use spray fluids to start the
engine.<
Tow-starting and towing
Observe applicable laws and regulations
for tow-starting and towing.<
Do not transport any passengers other
than the driver in a vehicle that is being
towed.<
Using tow fitting
The threaded tow fitting is stored in the tool kit
mounted on the inside of the luggage compart-
ment under the floor mat, refer to page223, and
should always remain in the vehicle. It can be
screwed in at the front or rear of the BMW.
Only use the tow fitting that comes with
the vehicle and screw it in as far as possi-
ble. Use the tow fitting for towing only on roads.
Avoid lateral loading of the tow fitting, e.g. do
not lift the vehicle by the tow fitting. Otherwise,
the tow fitting and vehicle can be damaged.<
Page 232 of 264
Giving and receiving assistance
230
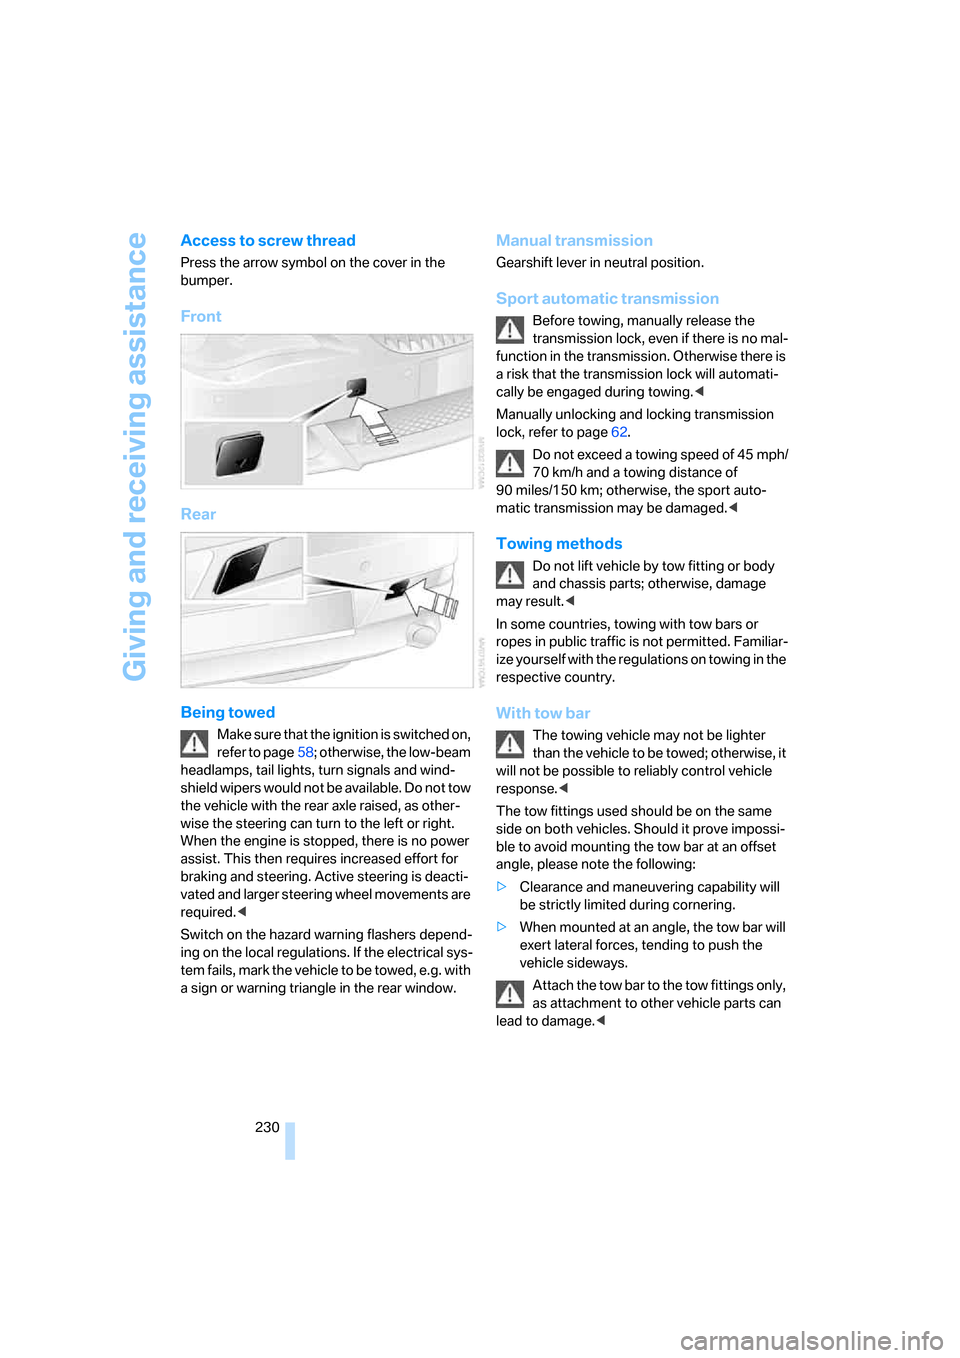
Access to screw thread
Press the arrow symbol on the cover in the
bumper.
Front
Rear
Being towed
Make sure that the ignition is switched on,
refer to page58; otherwise, the low-beam
headlamps, tail lights, turn signals and wind-
shield wipers would not be available. Do not tow
the vehicle with the rear axle raised, as other-
wise the steering can turn to the left or right.
When the engine is stopped, there is no power
assist. This then requires increased effort for
braking and steering. Active steering is deacti-
vated and larger steering wheel movements are
required.<
Switch on the hazard warning flashers depend-
ing on the local regulations. If the electrical sys-
tem fails, mark the vehicle to be towed, e.g. with
a sign or warning triangle in the rear window.
Manual transmission
Gearshift lever in neutral position.
Sport automatic transmission
Before towing, manually release the
transmission lock, even if there is no mal-
function in the transmission. Otherwise there is
a risk that the transmission lock will automati-
cally be engaged during towing.<
Manually unlocking and locking transmission
lock, refer to page62.
Do not exceed a towing speed of 45 mph/
70 km/h and a towing distance of
90 miles/150 km; otherwise, the sport auto-
matic transmission may be damaged.<
Towing methods
Do not lift vehicle by tow fitting or body
and chassis parts; otherwise, damage
may result.<
In some countries, towing with tow bars or
ropes in public traffic is not permitted. Familiar-
ize yourself with the regulations on towing in the
respective country.
With tow bar
The towing vehicle may not be lighter
than the vehicle to be towed; otherwise, it
will not be possible to reliably control vehicle
response.<
The tow fittings used should be on the same
side on both vehicles. Should it prove impossi-
ble to avoid mounting the tow bar at an offset
angle, please note the following:
>Clearance and maneuvering capability will
be strictly limited during cornering.
>When mounted at an angle, the tow bar will
exert lateral forces, tending to push the
vehicle sideways.
Attach the tow bar to the tow fittings only,
as attachment to other vehicle parts can
lead to damage.<