2008 BMW 650I COUPE warning
[x] Cancel search: warningPage 99 of 264
Controls
97Reference
At a glance
Driving tips
Communications
Navigation
Entertainment
Mobility
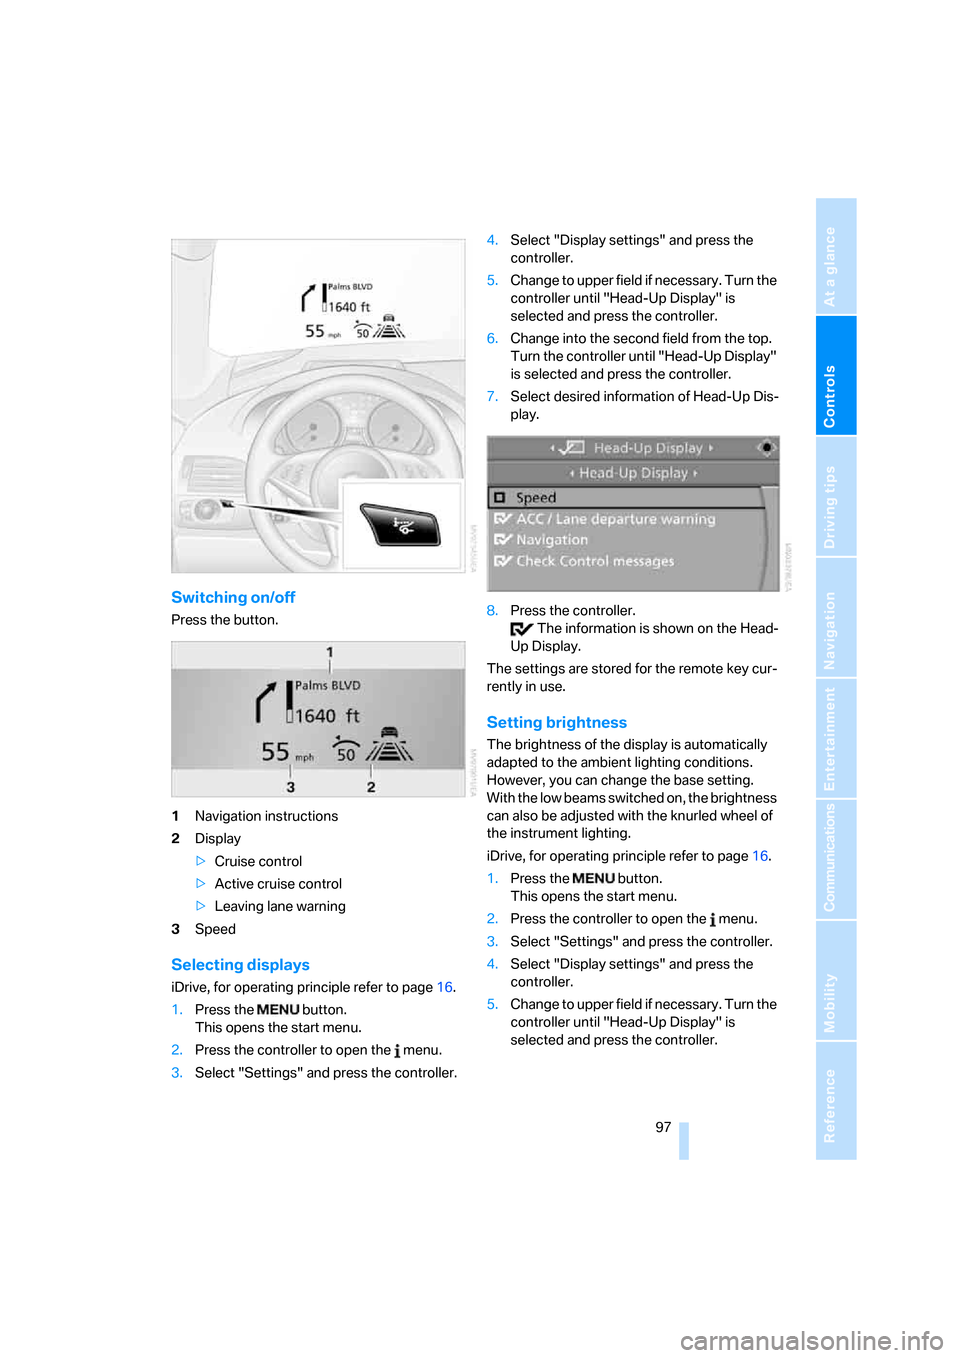
Switching on/off
Press the button.
1Navigation instructions
2Display
>Cruise control
>Active cruise control
>Leaving lane warning
3Speed
Selecting displays
iDrive, for operating principle refer to page16.
1.Press the button.
This opens the start menu.
2.Press the controller to open the menu.
3.Select "Settings" and press the controller.4.Select "Display settings" and press the
controller.
5.Change to upper field if necessary. Turn the
controller until "Head-Up Display" is
selected and press the controller.
6.Change into the second field from the top.
Turn the controller until "Head-Up Display"
is selected and press the controller.
7.Select desired information of Head-Up Dis-
play.
8.Press the controller.
The information is shown on the Head-
Up Display.
The settings are stored for the remote key cur-
rently in use.
Setting brightness
The brightness of the display is automatically
adapted to the ambient lighting conditions.
However, you can change the base setting.
With the low beams switched on, the brightness
can also be adjusted with the knurled wheel of
the instrument lighting.
iDrive, for operating principle refer to page16.
1.Press the button.
This opens the start menu.
2.Press the controller to open the menu.
3.Select "Settings" and press the controller.
4.Select "Display settings" and press the
controller.
5.Change to upper field if necessary. Turn the
controller until "Head-Up Display" is
selected and press the controller.
Page 103 of 264
Controls
101Reference
At a glance
Driving tips
Communications
Navigation
Entertainment
Mobility
age to the lens, do not use sharp or abrasive
instruments to clean ice, snow, or dirt off the
lens.
When the windshield is cleaned with the head-
lamps on, the camera lens area is automatically
sprayed as well. Refer to page64.
Leaving lane warning*
The concept
This system warns you from a speed of approx.
40 mph/70 km/h when the vehicle is leaving the
lane you are currently in on roads with lane limit
lines. You feel this due to a slight vibration of the
steering wheel.
The system does not warn you if you signal
before leaving the lane.
It is best to use the system on well-developed
roads and freeways.
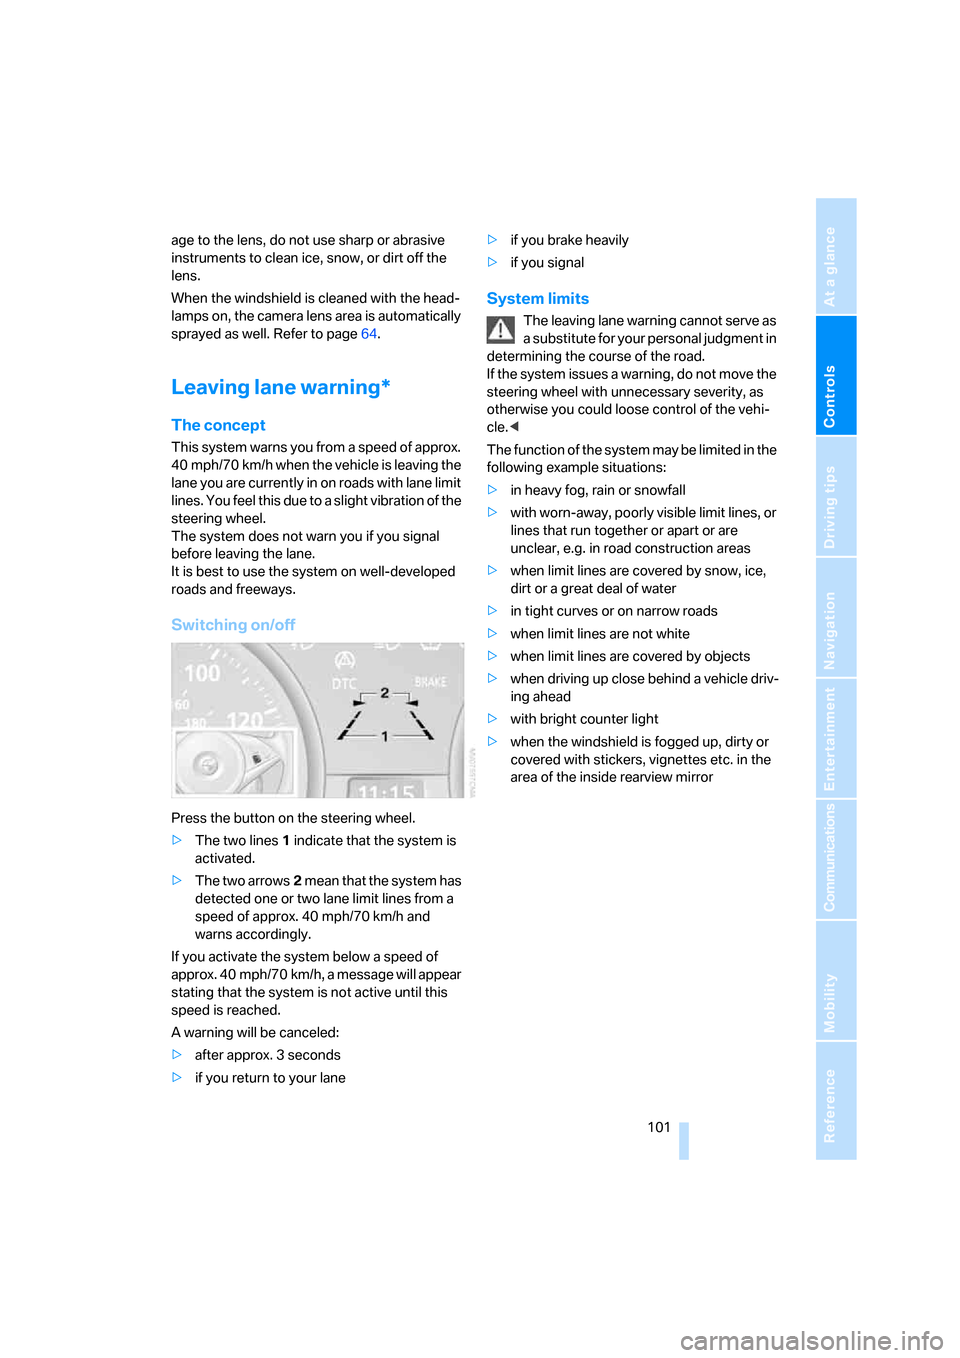
Switching on/off
Press the button on the steering wheel.
>The two lines1 indicate that the system is
activated.
>The two arrows2 mean that the system has
detected one or two lane limit lines from a
speed of approx. 40 mph/70 km/h and
warns accordingly.
If you activate the system below a speed of
approx. 40 mph/70 km/h, a message will appear
stating that the system is not active until this
speed is reached.
A warning will be canceled:
>after approx. 3 seconds
>if you return to your lane>if you brake heavily
>if you signal
System limits
The leaving lane warning cannot serve as
a substitute for your personal judgment in
determining the course of the road.
If the system issues a warning, do not move the
steering wheel with unnecessary severity, as
otherwise you could loose control of the vehi-
cle.<
The function of the system may be limited in the
following example situations:
>in heavy fog, rain or snowfall
>with worn-away, poorly visible limit lines, or
lines that run together or apart or are
unclear, e.g. in road construction areas
>when limit lines are covered by snow, ice,
dirt or a great deal of water
>in tight curves or on narrow roads
>when limit lines are not white
>when limit lines are covered by objects
>when driving up close behind a vehicle driv-
ing ahead
>with bright counter light
>when the windshield is fogged up, dirty or
covered with stickers, vignettes etc. in the
area of the inside rearview mirror
Page 168 of 264

Radio
166 2.Select "Favorites" and press the controller.
The most frequently used stations are
shown at the beginning.
Weather news flashes*
Weather Radio is a service of the National Oce-
anic and Atmospheric Administration (NOAA)
of the US Department of Trade. Weather news
flashes are repeated every 4 to 6 minutes and
are routinely updated at intervals of 1 to 3 hours,
and more often when necessary. Most stations
operate 24 hours a day. In case of a storm, the
National Weather Service interrupts the routine
weather news and transmits special warning
messages instead. If you have a question about
NOAA Weather Radio, please contact the near-
est office of the National Weather Service.
Details are also provided on the Internet at
www.nws.noaa.gov.
Calling up weather news flashes
1.Select "WB" and press the controller.
2.Select a station.
The station for weather news flashes may be
unavailable in some regions.
High Definition Radio*
Many stations transmit both analog and digital
signals. You can receive these stations digitally
and with improved sound quality.
A digital radio network must be available in
order to receive digital stations.
Activating/deactivating digital radio
reception
1.Press the button.
This opens the start menu.
2.Press the controller to open the menu.
3.Turn the controller until "Settings" is
selected and press the controller.
4.Select "Audio" and press the controller.
5.Change to upper field. Turn the controller
until "HD radio" is selected and press the
controller.
6.Select "Off" and press the controller.
The reception of digital stations is activated.
This symbol is displayed when a station is
being received digitally.
With some stations the digital signals are not
transmitted simultaneously with the analog sig-
nals. If you are in an area in which the selected
station is not continuously received digitally,
Page 221 of 264
Mobility
219Reference
At a glance
Controls
Driving tips
Communications
Navigation
Entertainment
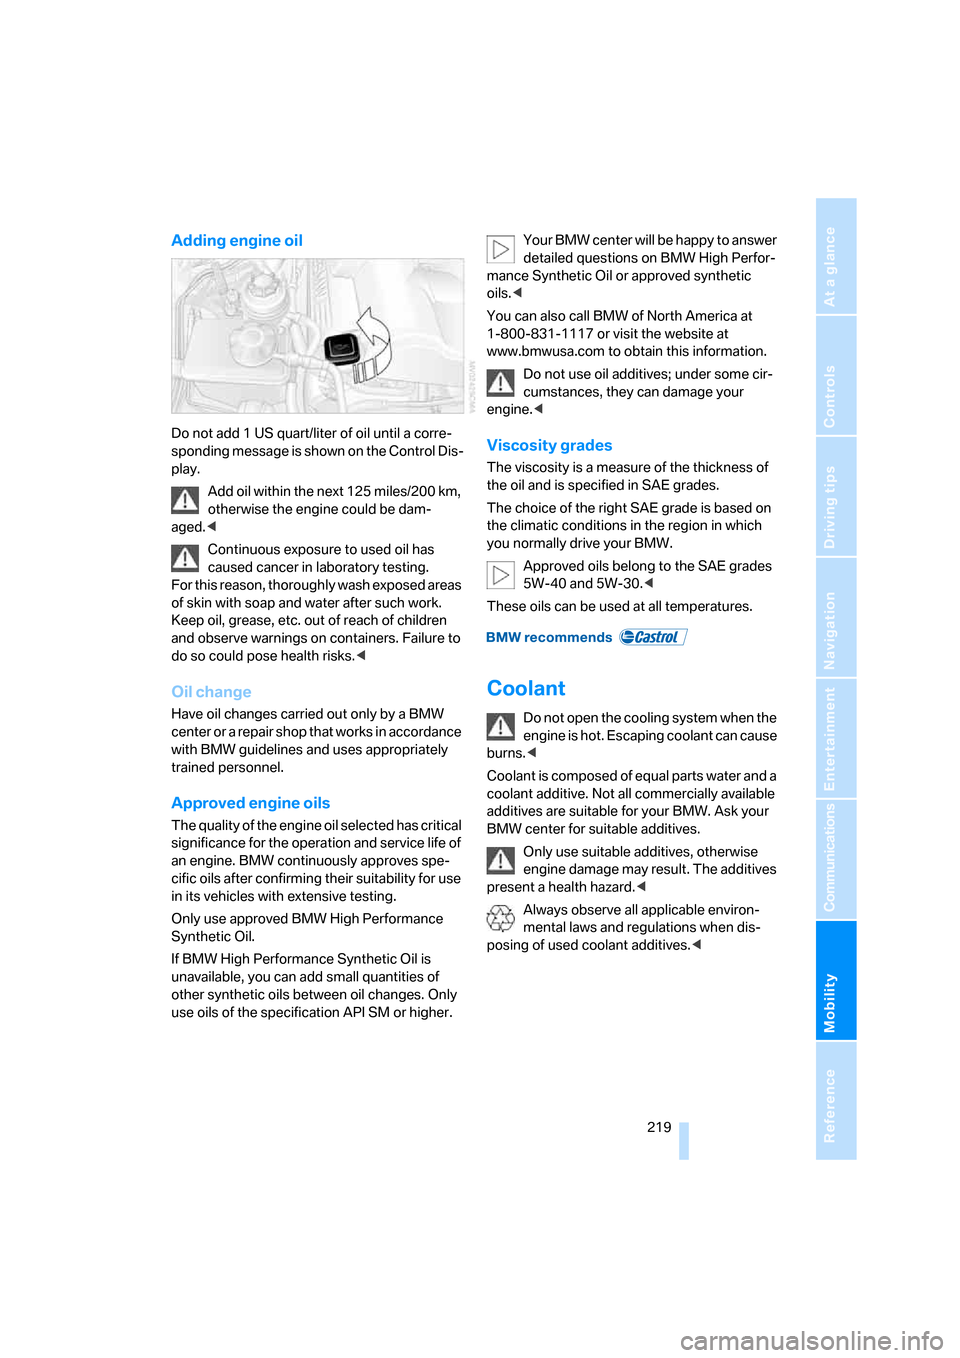
Adding engine oil
Do not add 1 US quart/liter of oil until a corre-
sponding message is shown on the Control Dis-
play.
Add oil within the next 125 miles/200 km,
otherwise the engine could be dam-
aged.<
Continuous exposure to used oil has
caused cancer in laboratory testing.
For this reason, thoroughly wash exposed areas
of skin with soap and water after such work.
Keep oil, grease, etc. out of reach of children
and observe warnings on containers. Failure to
do so could pose health risks.<
Oil change
Have oil changes carried out only by a BMW
center or a repair shop that works in accordance
with BMW guidelines and uses appropriately
trained personnel.
Approved engine oils
The quality of the engine oil selected has critical
significance for the operation and service life of
an engine. BMW continuously approves spe-
cific oils after confirming their suitability for use
in its vehicles with extensive testing.
Only use approved BMW High Performance
Synthetic Oil.
If BMW High Performance Synthetic Oil is
unavailable, you can add small quantities of
other synthetic oils between oil changes. Only
use oils of the specification API SM or higher.Your BMW center will be happy to answer
detailed questions on BMW High Perfor-
mance Synthetic Oil or approved synthetic
oils.<
You can also call BMW of North America at
1-800-831-1117 or visit the website at
www.bmwusa.com to obtain this information.
Do not use oil additives; under some cir-
cumstances, they can damage your
engine.<
Viscosity grades
The viscosity is a measure of the thickness of
the oil and is specified in SAE grades.
The choice of the right SAE grade is based on
the climatic conditions in the region in which
you normally drive your BMW.
Approved oils belong to the SAE grades
5W-40 and 5W-30.<
These oils can be used at all temperatures.
Coolant
Do not open the cooling system when the
engine is hot. Escaping coolant can cause
burns.<
Coolant is composed of equal parts water and a
coolant additive. Not all commercially available
additives are suitable for your BMW. Ask your
BMW center for suitable additives.
Only use suitable additives, otherwise
engine damage may result. The additives
present a health hazard.<
Always observe all applicable environ-
mental laws and regulations when dis-
posing of used coolant additives.<
Page 224 of 264

Maintenance
222
Socket for OBD Onboard
Diagnostics interface
Components which are decisive for the
exhaust-gas composition can be checked via
the OBD socket with a device.
This socket is located under a cover on the left
side of the driver's footwell, directly under the
instrument panel.
Exhaust-gas values
The warning lamp lights up. The
exhaust-gas values are deteriorating.
Have the vehicle checked as soon as
possible.
Display of the previously described
malfunction on Canadian models.
The lamp flashes under certain conditions. This
is a sign of excessive misfiring of the engine. In
this case, you should reduce speed and drive to
the nearest BMW center as soon as possible.
Heavy engine misfiring causes serious damage
to the emission-relevant components, espe-
cially the catalytic converter, within a short time.
If the fuel filler cap is not properly tight-
ened, the OBD system can detect the
escape of fuel vapor. This causes a display to
light up. If the cap is then tightened, the display
should go out within a few days.<
Event data recorders
Your vehicle may be equipped with one or sev-
eral measuring and diagnosis modules, or with a
device for recording or transmitting certain
vehicle data or information. If you have also sub-
scribed to BMW Assist, then certain vehicle
data can be transmitted or recorded to enable
corresponding services.
Care
Important information on care and maintenance
of your BMW is contained in the Caring for your
vehicle brochure.
Page 230 of 264

Giving and receiving assistance
228
Warning triangle*
The warning triangle is located on the left-hand
side in the luggage compartment.
First-aid kit*
The first-aid kit is located in the filler element of
the rear seat backrest.
1.Press the button downward and pull the
filler element forward.
2.Take out first-aid kit.
To refit the filler element, insert the two
bottom tabs into the strip and press the
filler element back into place. Make sure that
you do not damage the rear seat upholstery.
the expiration dates of each of the items regu-
larly and replace any whose expiration dates
have passed.
Roadside Assistance*
BMW Roadside Assistance offers you assis-
tance in the event of a breakdown around the
clock, including on weekends and public holi-
days.
The phone numbers of the Roadside Assis-
tance in your home country can be found in the
BMW Contact directory.
With BMW Assist you can contact the Roadside
Assistance of the BMW Group for assistance in
the event of a breakdown directly via iDrive,
refer to page200.
Jump starting
When your battery is discharged, you can use
two jumper cables to start your BMW with
power from the battery in a second vehicle. You
can also use the same method to help start
another vehicle. Use only jumper cables with
fully-insulated clamp handles.
To avoid the risk of potentially fatal injury,
always avoid all contact with electrical
components while the engine is running. Care-
fully adhere to the following sequence, both to
prevent damage to one or both vehicles, and to
guard against possible personal injuries.<
Preparing
1.Check whether the battery of the other
vehicle has a voltage of 12 Volts and
approximately the same capacitance in Ah.
This information can be found on the bat-
tery.
2.Switch off the engine of the vehicle provid-
ing assistance.
3.Switch off any electrical systems and com-
ponents in both vehicles.
Page 232 of 264
Giving and receiving assistance
230
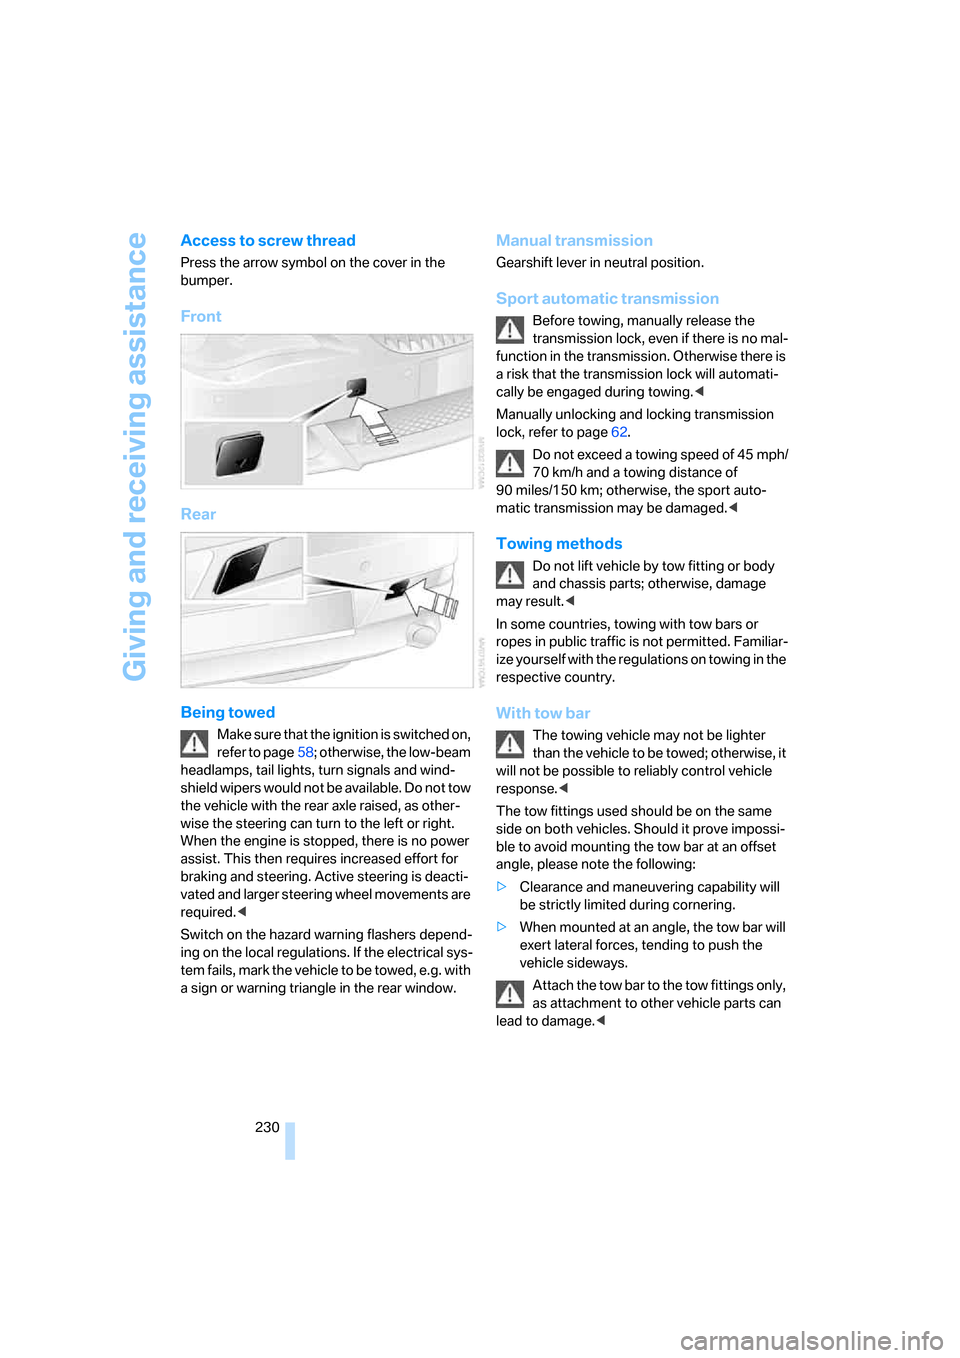
Access to screw thread
Press the arrow symbol on the cover in the
bumper.
Front
Rear
Being towed
Make sure that the ignition is switched on,
refer to page58; otherwise, the low-beam
headlamps, tail lights, turn signals and wind-
shield wipers would not be available. Do not tow
the vehicle with the rear axle raised, as other-
wise the steering can turn to the left or right.
When the engine is stopped, there is no power
assist. This then requires increased effort for
braking and steering. Active steering is deacti-
vated and larger steering wheel movements are
required.<
Switch on the hazard warning flashers depend-
ing on the local regulations. If the electrical sys-
tem fails, mark the vehicle to be towed, e.g. with
a sign or warning triangle in the rear window.
Manual transmission
Gearshift lever in neutral position.
Sport automatic transmission
Before towing, manually release the
transmission lock, even if there is no mal-
function in the transmission. Otherwise there is
a risk that the transmission lock will automati-
cally be engaged during towing.<
Manually unlocking and locking transmission
lock, refer to page62.
Do not exceed a towing speed of 45 mph/
70 km/h and a towing distance of
90 miles/150 km; otherwise, the sport auto-
matic transmission may be damaged.<
Towing methods
Do not lift vehicle by tow fitting or body
and chassis parts; otherwise, damage
may result.<
In some countries, towing with tow bars or
ropes in public traffic is not permitted. Familiar-
ize yourself with the regulations on towing in the
respective country.
With tow bar
The towing vehicle may not be lighter
than the vehicle to be towed; otherwise, it
will not be possible to reliably control vehicle
response.<
The tow fittings used should be on the same
side on both vehicles. Should it prove impossi-
ble to avoid mounting the tow bar at an offset
angle, please note the following:
>Clearance and maneuvering capability will
be strictly limited during cornering.
>When mounted at an angle, the tow bar will
exert lateral forces, tending to push the
vehicle sideways.
Attach the tow bar to the tow fittings only,
as attachment to other vehicle parts can
lead to damage.<
Page 233 of 264
Mobility
231Reference
At a glance
Controls
Driving tips
Communications
Navigation
Entertainment
With tow rope
When starting off in the towing vehicle, make
sure that the tow rope is taut.
To avoid jerking and the associated
stresses on vehicle components when
towing, always use nylon ropes or nylon straps.
Attach tow ropes to the tow fittings only, as
attachment to other vehicle parts can lead to
damage.<
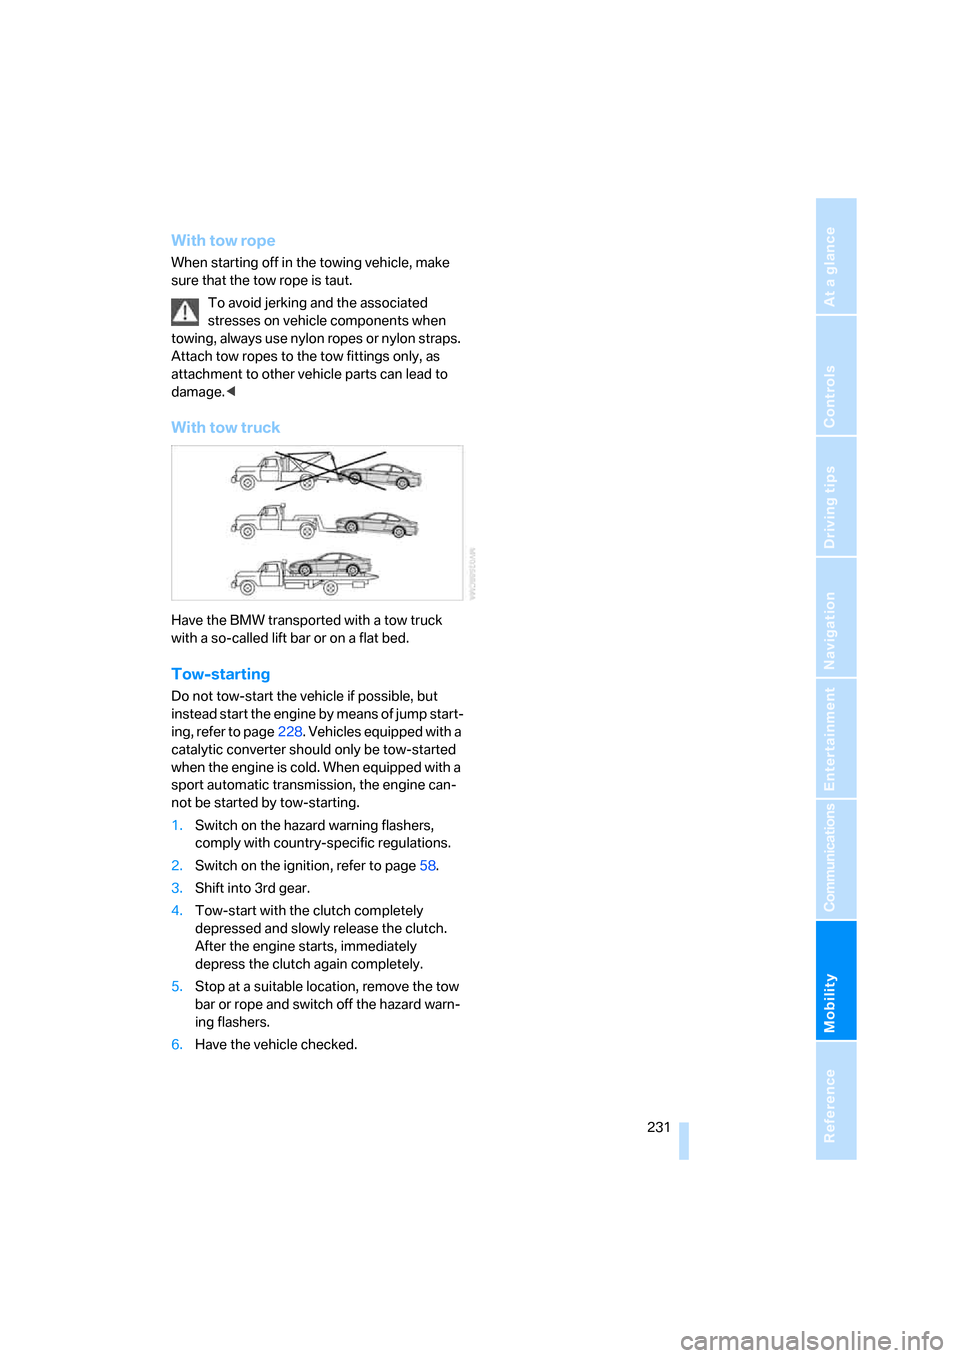
With tow truck
Have the BMW transported with a tow truck
with a so-called lift bar or on a flat bed.
Tow-starting
Do not tow-start the vehicle if possible, but
instead start the engine by means of jump start-
ing, refer to page228. Vehicles equipped with a
catalytic converter should only be tow-started
when the engine is cold. When equipped with a
sport automatic transmission, the engine can-
not be started by tow-starting.
1.Switch on the hazard warning flashers,
comply with country-specific regulations.
2.Switch on the ignition, refer to page58.
3.Shift into 3rd gear.
4.Tow-start with the clutch completely
depressed and slowly release the clutch.
After the engine starts, immediately
depress the clutch again completely.
5.Stop at a suitable location, remove the tow
bar or rope and switch off the hazard warn-
ing flashers.
6.Have the vehicle checked.