2008 BMW 650I COUPE service
[x] Cancel search: servicePage 79 of 264

Controls
77Reference
At a glance
Driving tips
Communications
Navigation
Entertainment
Mobility
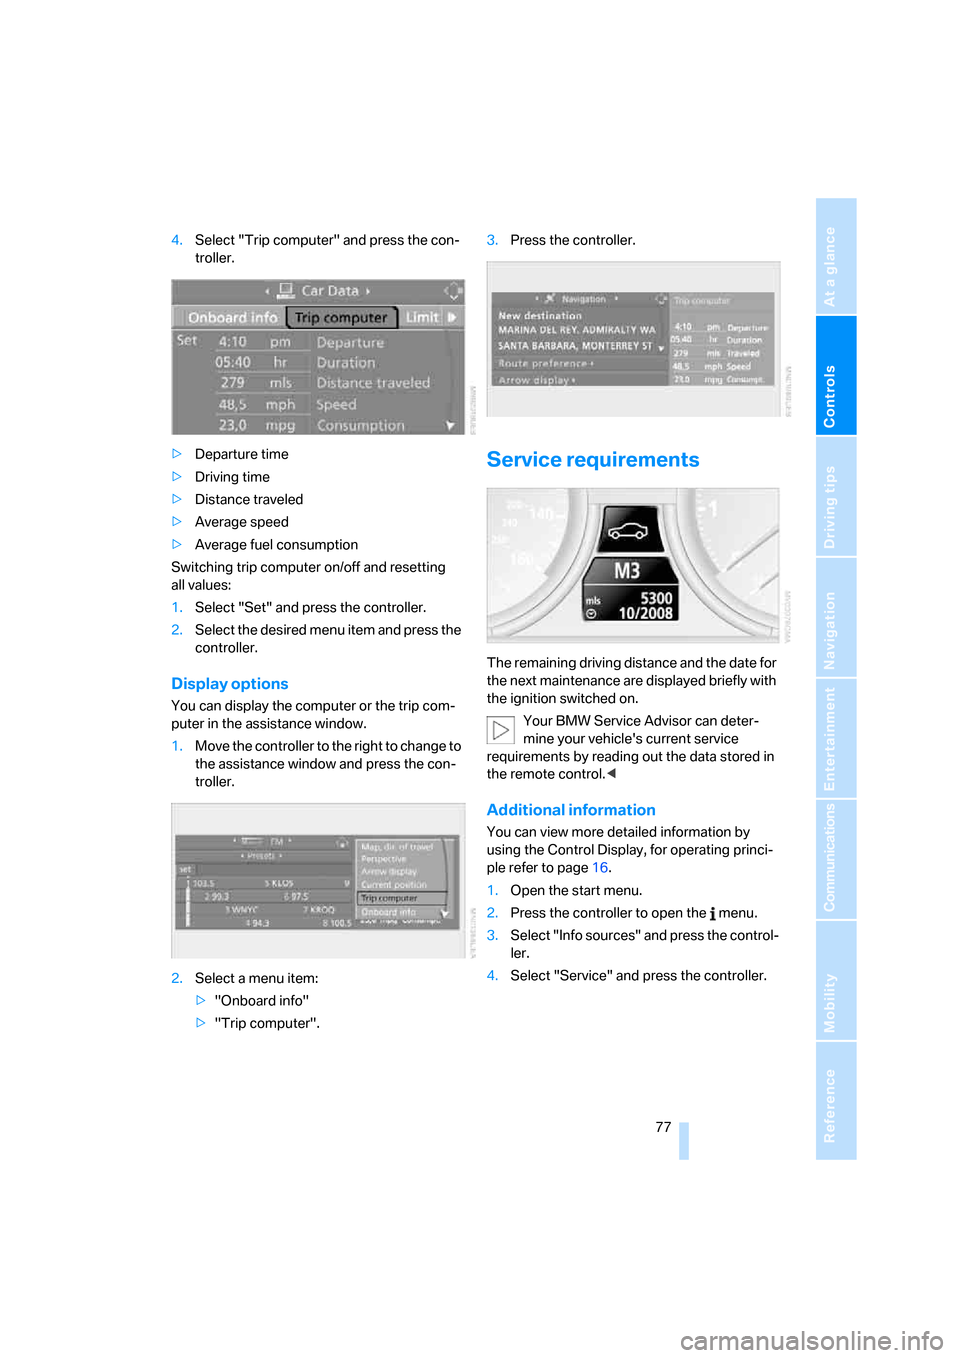
4.Select "Trip computer" and press the con-
troller.
>Departure time
>Driving time
>Distance traveled
>Average speed
>Average fuel consumption
Switching trip computer on/off and resetting
all values:
1.Select "Set" and press the controller.
2.Select the desired menu item and press the
controller.
Display options
You can display the computer or the trip com-
puter in the assistance window.
1.Move the controller to the right to change to
the assistance window and press the con-
troller.
2.Select a menu item:
>"Onboard info"
>"Trip computer".3.Press the controller.
Service requirements
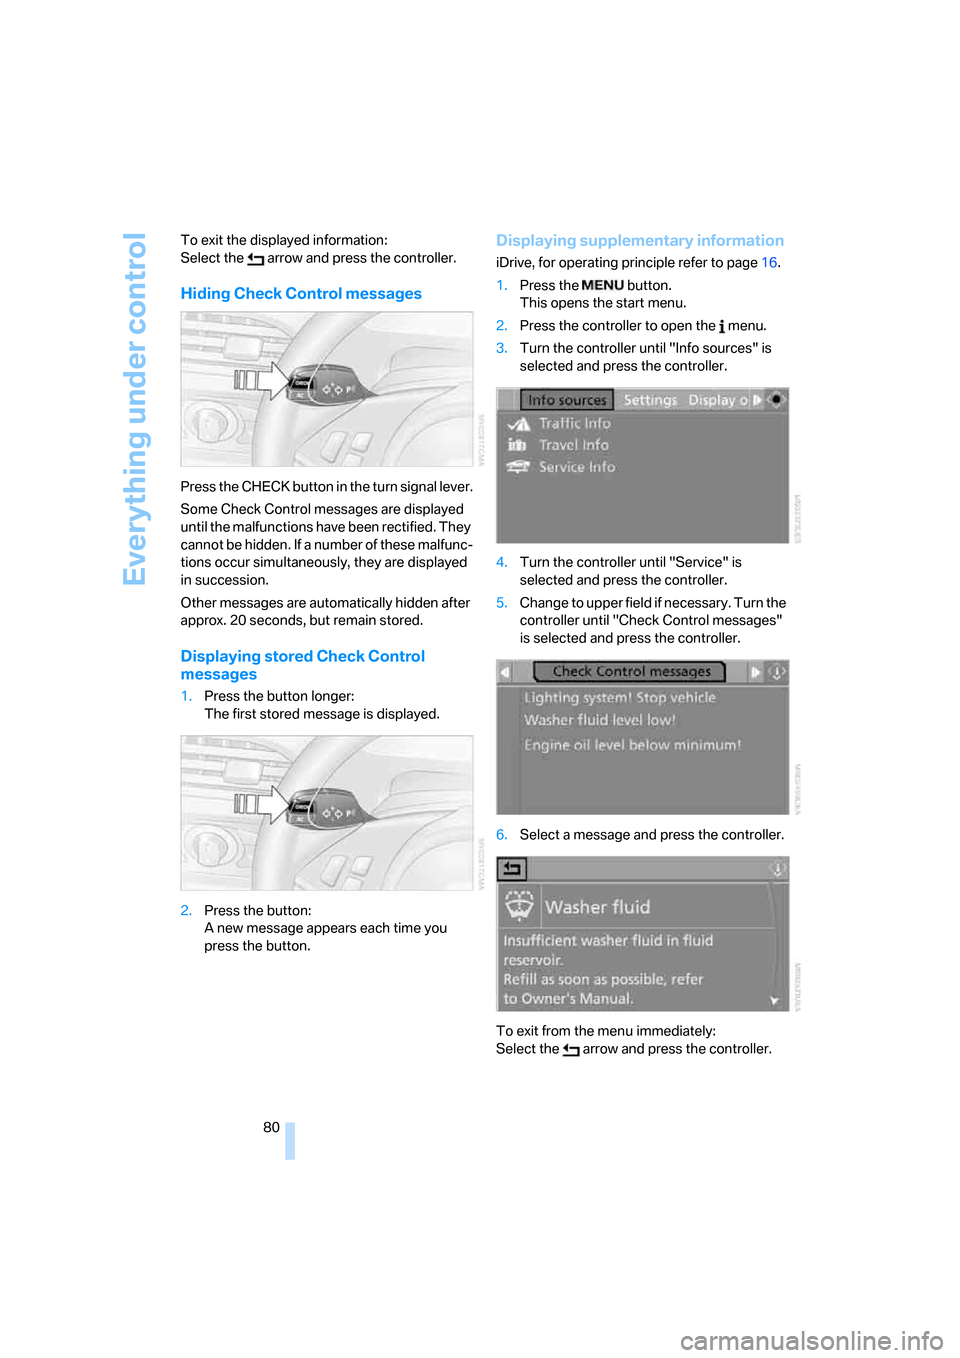
The remaining driving distance and the date for
the next maintenance are displayed briefly with
the ignition switched on.
Your BMW Service Advisor can deter-
mine your vehicle's current service
requirements by reading out the data stored in
the remote control.<
Additional information
You can view more detailed information by
using the Control Display, for operating princi-
ple refer to page16.
1.Open the start menu.
2.Press the controller to open the menu.
3.Select "Info sources" and press the control-
ler.
4.Select "Service" and press the controller.
Page 80 of 264

Everything under control
78 5.Change to upper field if necessary. Turn the
controller until "Service requirements" is
selected and press the controller.
6.Select "Status" and press the controller.
The display shows a list of selected service and
maintenance procedures, as well as legally
mandated official inspections.
You can request more detailed information on
every entry.
Select the entry and press the controller.
To exit from the menu:
Select the arrow and press the controller.
Symbols
No service is currently required.
The deadline for service or an official
inspection is approaching. Please
arrange a service appointment.
The service deadline has already passed.
Entering deadlines for legally required
inspections*
Make sure the date on the Control Display is set
correctly, refer to page83; otherwise, the effec-
tiveness of CBS Condition Based Service is not
ensured.
1.Open the start menu.
2.Press the controller to open the menu.
3.Select "Info sources" and press the control-
ler.
4.Select "Service" and press the controller.
5.Change to upper field if necessary. Turn the
controller until "Service requirements" is
selected and press the controller.
6.Select "Status" and press the controller.
7.Select "State inspection" and press the
controller.
8.Select "Set service date" and press the
controller. The month is selected.
Page 82 of 264

Everything under control
80 To exit the displayed information:
Select the arrow and press the controller.
Hiding Check Control messages
Press the CHECK button in the turn signal lever.
Some Check Control messages are displayed
until the malfunctions have been rectified. They
cannot be hidden. If a number of these malfunc-
tions occur simultaneously, they are displayed
in succession.
Other messages are automatically hidden after
approx. 20 seconds, but remain stored.
Displaying stored Check Control
messages
1.Press the button longer:
The first stored message is displayed.
2.Press the button:
A new message appears each time you
press the button.
Displaying supplementary information
iDrive, for operating principle refer to page16.
1.Press the button.
This opens the start menu.
2.Press the controller to open the menu.
3.Turn the controller until "Info sources" is
selected and press the controller.
4.Turn the controller until "Service" is
selected and press the controller.
5.Change to upper field if necessary. Turn the
controller until "Check Control messages"
is selected and press the controller.
6.Select a message and press the controller.
To exit from the menu immediately:
Select the arrow and press the controller.
Page 96 of 264

Technology for comfort, convenience and safety
94
Airbags
The following airbags are located under the
marked covers:
1Front airbags
2Coupe: Head airbags
3Side airbags
4Knee airbag
5Knee airbag
Protective action
To ensure that the safety systems con-
tinue to provide optimized protection,
please follow the adjustment instructions on
page47.<
The front airbags help protect the driver and
front passenger by responding to frontal
impacts in which safety belts alone cannot pro-
vide adequate restraint. When needed, the
head and side airbags help provide protection in
the event of a side impact. The relevant side air-
bag supports the side upper body area. The
head airbag supports the head. The knee airbag
protects the legs from colliding with the cockpit.
The airbags are deliberately not triggered in
every impact situation, e. g. less severe acci-
dents or rear-end collisions.
Do not apply adhesive materials to the
cover panels of the airbags, cover them or
modify them in any other way. Do not attempt to
remove the airbag restraint system from the
vehicle. Do not modify or tamper with either the
wiring or the individual components in the air-
bag system. This category includes the uphol-
stery in the center of the steering wheel, on the
instrument panel, the side trim panels on the
doors and on the Coupe, the roof pillars along with the sides of the headliner. Do not attempt
to remove or dismantle the steering wheel.
Do not touch the individual components
directly after the system has been triggered,
because there is a danger of burns.
In the event of malfunctions, deactivation, or
triggering of the airbag restraint system, have
the testing, repair, removal, and disposal of air-
bag generators carried out only by a BMW cen-
ter or a workshop that works according to BMW
repair procedures with appropriately trained
personnel and has the required explosives
licenses. Otherwise unprofessional attempts to
service the system could lead to failure in an
emergency or undesired airbag triggering,
either of which could result in personal injury.<
Warnings and information on the airbags is also
provided on the sun visors.
Automatic deactivation of front
passenger airbags
The occupation of the seat is detected by eval-
uating the impression on the occupied seat sur-
face of the front passenger seat. The system
correspondingly activates or deactivates the
front, knee and side airbags on the front pas-
senger side.
The current status of the front passenger
airbags, i.e. deactivated or activated, is
indicated by the indicator lamp over the interior
rearview mirror, refer to Operating state of front
passenger airbags below.<
Before transporting a child in the front
passenger seat, read the safety informa-
tion and follow the instructions under Trans-
porting children safely, refer to page56.
Page 98 of 264

Technology for comfort, convenience and safety
96
Convertible: rollover
protection system
The rollover protection system is automatically
activated in the event of an accident or a critical
driving situation, extreme inclination on the lon-
gitudinal axis, or loss of ground contact. The
rollover bars located behind the rear head
restraints are deployed within fractions of a sec-
ond.
As a supplement to the rollover bar integrated
into the windshield frame, the rollover protec-
tion system ensures that all vehicle occupants
have the necessary headroom.
Always keep the path of movement of the
rollover protection system clear.
In less severe accidents, you are protected by
the fastened safety belt and, depending on the
severity of the accident, the belt tensioner and
the multistage airbag restraint system.<
Lowering
If the rollover protection system experienced no
impact after automatic activation, then it can be
lowered again. No tools are necessary for this
purpose.
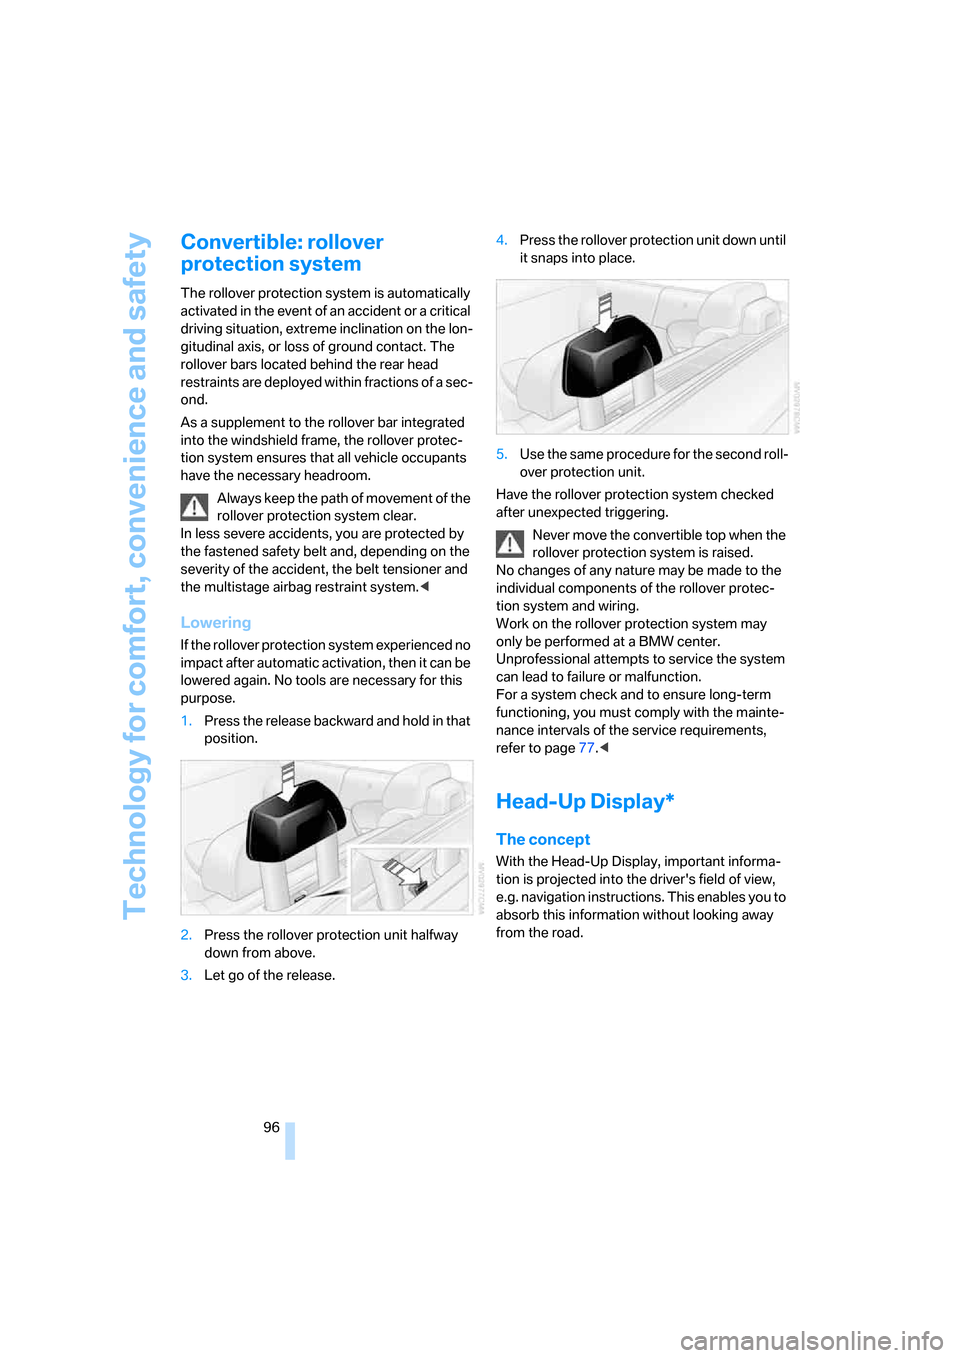
1.Press the release backward and hold in that
position.
2.Press the rollover protection unit halfway
down from above.
3.Let go of the release.4.Press the rollover protection unit down until
it snaps into place.
5.Use the same procedure for the second roll-
over protection unit.
Have the rollover protection system checked
after unexpected triggering.
Never move the convertible top when the
rollover protection system is raised.
No changes of any nature may be made to the
individual components of the rollover protec-
tion system and wiring.
Work on the rollover protection system may
only be performed at a BMW center.
Unprofessional attempts to service the system
can lead to failure or malfunction.
For a system check and to ensure long-term
functioning, you must comply with the mainte-
nance intervals of the service requirements,
refer to page77.<
Head-Up Display*
The concept
With the Head-Up Display, important informa-
tion is projected into the driver's field of view,
e.g. navigation instructions. This enables you to
absorb this information without looking away
from the road.
Page 126 of 264

Things to remember when driving
124
Things to remember when driving
Breaking-in
Moving parts need time to adjust to one
another. To ensure that your vehicle continues
to provide optimized economy of operation
throughout an extended service life, we request
that you devote careful attention to the follow-
ing section.
Engine and differential
Always obey all official speed limits.
Up to 1,200 miles/2,000 km
Drive at changing engine and driving speeds,
however do not exceed 4,500 rpm or 100 mph/
160 km/h.
Avoid full-throttle operation and use of the
transmission's kick-down mode during these
initial miles.
From 1,200 miles/2,000 km
The engine and vehicle speed can gradually be
increased.
Tires
Due to technical factors associated with their
manufacture, tires do not achieve their full trac-
tion potential until after an initial break-in
period. Therefore, drive reservedly during the
first 200 miles/300 km.
Brake system
Brakes require an initial break-in period of
approx. 300 miles/500 km to achieve optimized
contact and wear patterns between brake pads
and rotors. Drive in a reserved manner during
this break-in period.
Clutch
The function of the clutch is only at its opti-
mized level after a distance driven of approx.
300 miles/500 km. During this break-in period,
engage the clutch gently.
Following part replacement
Observe the break-in instructions again if com-
ponents mentioned above must be replaced
after subsequent driving operation.
Saving fuel
The fuel consumption of your vehicle depends
on various factors. Through a few simple steps,
your driving style, and regular maintenance, you
can have a positive influence on your fuel con-
sumption and environmental impact.
Removing unnecessary cargo
Additional weight increases fuel consumption.
Removing add-on parts after use
Remove unneeded auxiliary mirrors, roof or rear
luggage racks after use. Add-on parts attached
to the vehicle impede the aerodynamics and
increase the fuel consumption.
Closing windows and the glass sunroof
An open glass sunroof or open windows like-
wise increase the drag coefficient and therefore
the fuel consumption.
Checking tire inflation pressures
regularly
Check and correct the tire inflation pressure as
needed at least twice a month and before long
trips.
An insufficient tire inflation pressure increases
the rolling resistance and thus increases the
fuel consumption and tire wear.
Driving off immediately
Do not allow the engine to warm up by leaving it
running while the vehicle remains stationary.
Instead, begin to drive at a moderate engine
speed. This is the fastest way for the cold
engine to reach its operating temperature.
Page 127 of 264

Driving tips
125Reference
At a glance
Controls
Communications
Navigation
Entertainment
Mobility
Thinking ahead when driving
Avoid unnecessary acceleration and braking.
To do so, maintain the appropriate distance
from the vehicle in front of you. An anticipatory
and smooth driving style reduces fuel con-
sumption.
Avoiding high engine speeds
Use 1st gear only for starting off. Accelerate
rapidly in 2nd gear and above. Avoid high
engine speeds in doing so and shift into the
next gear early.
When you have reached the desired speed,
shift into the highest possible gear and drive
with the lowest possible engine speed while
maintaining a constant a vehicle speed.
In general: driving at a low engine speed
reduces fuel consumption and minimizes wear.
Taking advantage of coasting
When approaching a red light, let off the gas
and allow the vehicle to coast to a stop in the
highest possible gear.
On steep roadways, let off the gas and allow the
vehicle to roll in the appropriate gear.
The flow of fuel is interrupted when coasting.
Switching off engine during longer
stops
Switch off the engine at longer stops such as
traffic signals, railroad crossings, or in traffic
jams. Even having the engine switched off for
approx. 4 seconds results in fuel savings.
Switching off functions currently not
required
Functions such as air conditioning, seat heat-
ing, or rear window defrosting consume a lot of
energy and require additional fuel. Their influ-
ence is particularly pronounced in city traffic
and stop & go operation. For this reason, it is a
good idea to switch these functions off when
they are not really needed.
Having maintenance done
Have the vehicle serviced regularly in order to
achieve the optimum economy and service life
of your vehicle. BMW recommends having the
maintenance performed by a BMW center. Also
please pay attention to the BMW maintenance
system, refer to page221.
General driving notes
Closing luggage compartment lid
Only drive with the luggage compartment
lid completely closed, otherwise exhaust
can penetrate into the passenger compart-
ment.<
If it is absolutely necessary to drive with the lug-
gage compartment lid open:
1.Coupe: close both windows and the glass
sunroof.
Convertible: with closed top, close all win-
dows.
2.Increase the air volume of the automatic cli-
mate control to a high level, refer to
page110.
Hot exhaust system
As in all vehicles, extremely high temper-
atures are generated in the exhaust sys-
tem. Do not remove the heat shields installed
adjacent to it, and never apply undercoating to
them. When driving, standing at idle and while
parking, take care to avoid possible contact
between the hot exhaust system and any highly
flammable materials such as hay, leaves, grass,
etc. Such contact could lead to a fire, and with it
the risk of serious property damage as well as
personal injury. Do not touch hot exhaust tail
pipes. Otherwise there is a risk of burns.<
Hydroplaning
When driving on wet or slushy roads,
reduce road speed. If you do not, a wedge
of water can form between tires and road sur-
face. This phenomenon is referred to as hydro-
planing, and is characterized by a partial or
complete loss of contact between the tires and
Page 168 of 264

Radio
166 2.Select "Favorites" and press the controller.
The most frequently used stations are
shown at the beginning.
Weather news flashes*
Weather Radio is a service of the National Oce-
anic and Atmospheric Administration (NOAA)
of the US Department of Trade. Weather news
flashes are repeated every 4 to 6 minutes and
are routinely updated at intervals of 1 to 3 hours,
and more often when necessary. Most stations
operate 24 hours a day. In case of a storm, the
National Weather Service interrupts the routine
weather news and transmits special warning
messages instead. If you have a question about
NOAA Weather Radio, please contact the near-
est office of the National Weather Service.
Details are also provided on the Internet at
www.nws.noaa.gov.
Calling up weather news flashes
1.Select "WB" and press the controller.
2.Select a station.
The station for weather news flashes may be
unavailable in some regions.
High Definition Radio*
Many stations transmit both analog and digital
signals. You can receive these stations digitally
and with improved sound quality.
A digital radio network must be available in
order to receive digital stations.
Activating/deactivating digital radio
reception
1.Press the button.
This opens the start menu.
2.Press the controller to open the menu.
3.Turn the controller until "Settings" is
selected and press the controller.
4.Select "Audio" and press the controller.
5.Change to upper field. Turn the controller
until "HD radio" is selected and press the
controller.
6.Select "Off" and press the controller.
The reception of digital stations is activated.
This symbol is displayed when a station is
being received digitally.
With some stations the digital signals are not
transmitted simultaneously with the analog sig-
nals. If you are in an area in which the selected
station is not continuously received digitally,