2008 BMW 550I TOURING height
[x] Cancel search: heightPage 38 of 292
Opening and closing
36 The tailgate is locked again as soon as it is
closed.
Closing
Make sure that the closing path of the tail-
gate is clear, otherwise injuries may
result.<
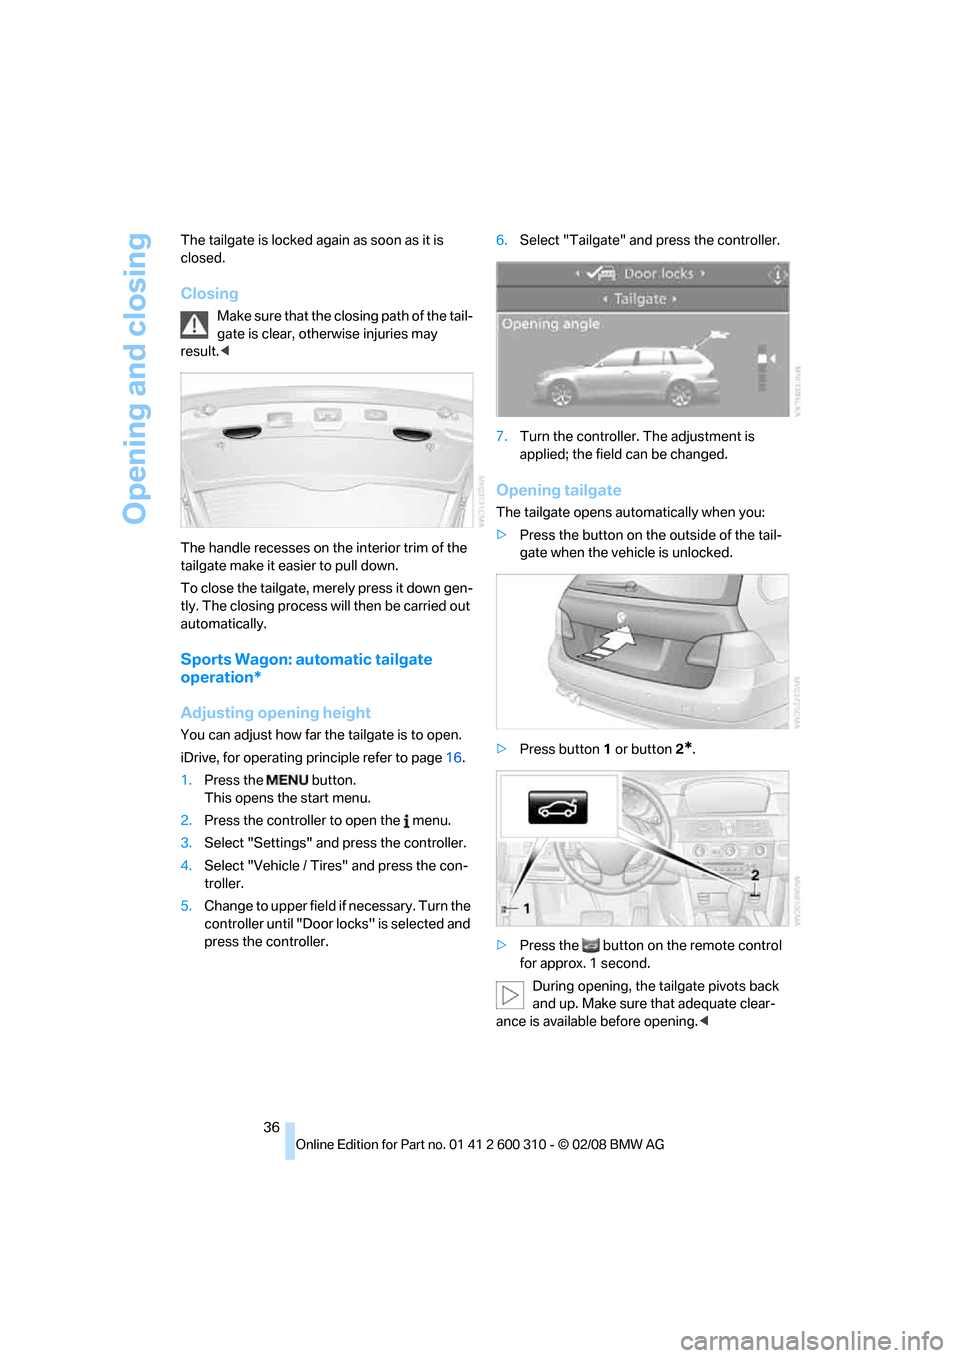
The handle recesses on the interior trim of the
tailgate make it easier to pull down.
To close the tailgate, merely press it down gen-
tly. The closing process will then be carried out
automatically.
Sports Wagon: automatic tailgate
operation*
Adjusting opening height
You can adjust how far the tailgate is to open.
iDrive, for operating principle refer to page16.
1.Press the button.
This opens the start menu.
2.Press the controller to open the menu.
3.Select "Settings" and press the controller.
4.Select "Vehicle / Tires" and press the con-
troller.
5.Change to upper field if necessary. Turn the
controller until "Door locks" is selected and
press the controller.6.Select "Tailgate" and press the controller.
7.Turn the controller. The adjustment is
applied; the field can be changed.
Opening tailgate
The tailgate opens automatically when you:
>Press the button on the outside of the tail-
gate when the vehicle is unlocked.
>Press button1 or button2
*.
>Press the button on the remote control
for approx. 1 second.
During opening, the tailgate pivots back
and up. Make sure that adequate clear-
ance is available before opening.<
Page 48 of 292
Adjusting
46
Seats
Note before adjusting
Never attempt to adjust your seat while
the vehicle is moving. The seat could
respond with unexpected movement, and the
ensuing loss of vehicle control could lead to an
accident.
Also on the passenger side, do not incline the
backrest too far to the rear while the vehicle is
being driven, otherwise there is a danger in the
event of an accident of sliding under the safety
belt, eliminating the protection normally pro-
vided by the belt.<
Please follow the instructions on damage to
safety belts provided on page51 and the infor-
mation on the active front head restraints
on
page49.
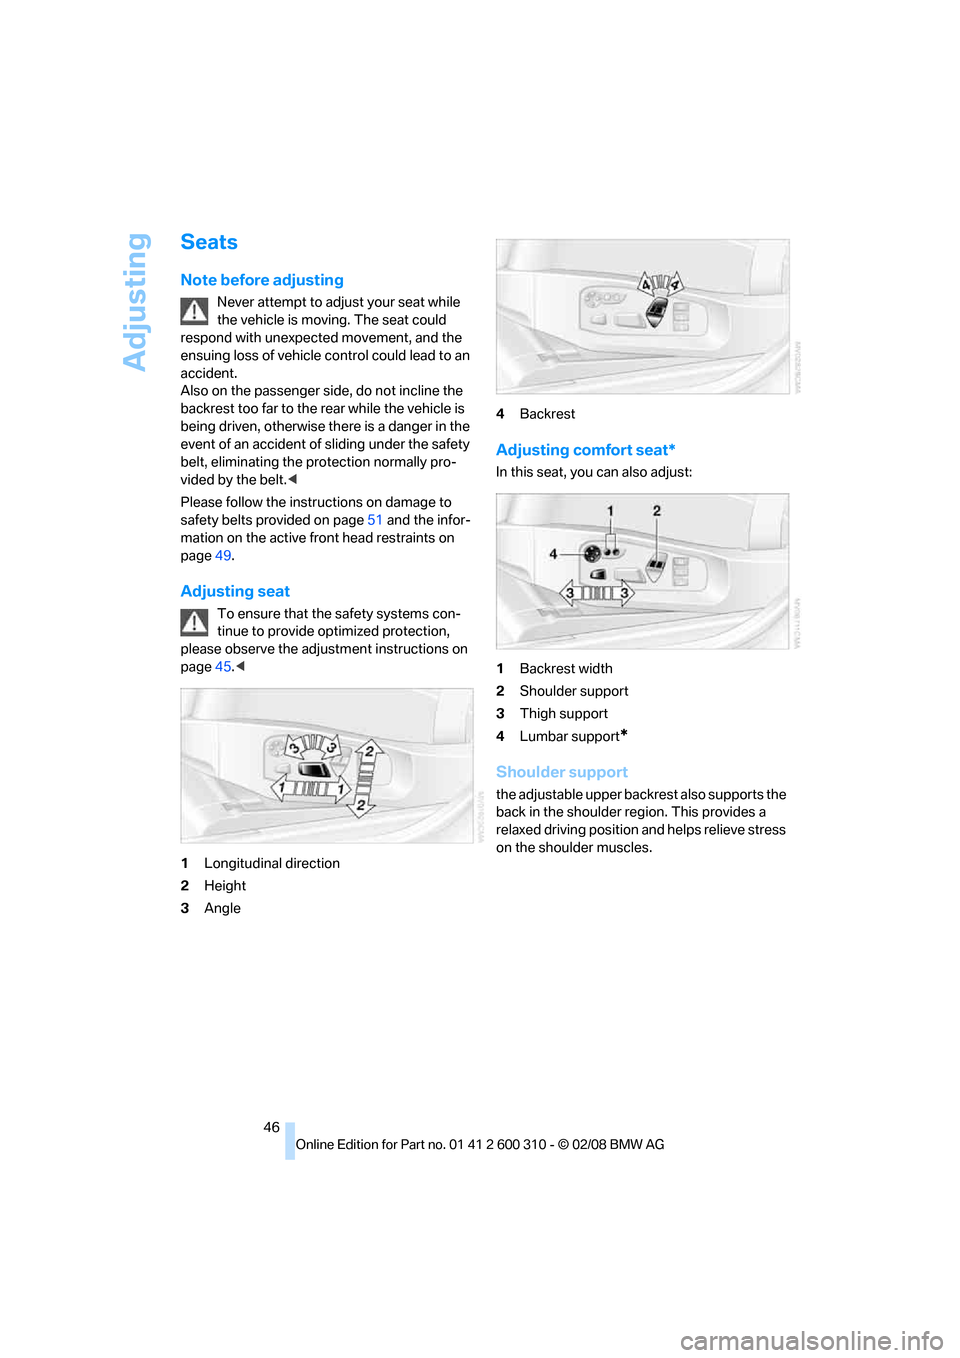
Adjusting seat
To ensure that the safety systems con-
tinue to provide optimized protection,
please observe the adjustment instructions on
page45.<
1Longitudinal direction
2Height
3Angle4Backrest
Adjusting comfort seat*
In this seat, you can also adjust:
1Backrest width
2Shoulder support
3Thigh support
4Lumbar support
*
Shoulder support
the adjustable upper backrest also supports the
back in the shoulder region. This provides a
relaxed driving position and helps relieve stress
on the shoulder muscles.
Page 51 of 292

Controls
49Reference
At a glance
Driving tips
Communications
Navigation
Entertainment
Mobility
To cancel the request:
Select "Deactivated" and press the controller.
Head restraints
A correctly adjusted head restraint reduces the
risk of spinal injury in the event of an accident.
Adjust the head restraint so that its center
is approximately at ear level. Otherwise
there is increased danger of injury in the event
of an accident. Only remove the head restraints
if no one will be sitting on the seat in question.
Reinstall the head restraints before transport-
ing passengers, as otherwise the head restraint
cannot provide its protective function.<
Active front head restraints
In the event of a rear-end collision of sufficient
severity, the active head restraint reduces the
distance to the head.
Do not use seat covers or head restraint
covers that could impede the proper
functioning of the active head restraint. Other-
wise, there is no assurance that the active head
restraint will perform its protective function and
it is not possible to take advantage of its injury-
reducing potential in the event of a rear-end
collision.
Have the active head restraints reset after they
are triggered in a rear-end collision. Only have
this work carried out by a BMW center or a
workshop that works according to BMW repair
procedures with correspondingly trained per-
sonnel. Otherwise, this safety equipment will
not function properly.<
Please contact a BMW center if you wish
to have the front head restraints removed
and installed.<
Front seats: height adjustment
Front seats: adjusting distance to the
back of the head
>Forward: pull up.
>Back: push the button and slide the head-
rest cushion toward the rear.
Do not place any objects behind the
headrest cushion. Otherwise, you can
impair the proper function of the head
restraint.<
Comfort seat*
You can adjust the distance to the back of the
head with the shoulder support, refer to
page46.
Page 52 of 292
Adjusting
50
Adjusting side extensions
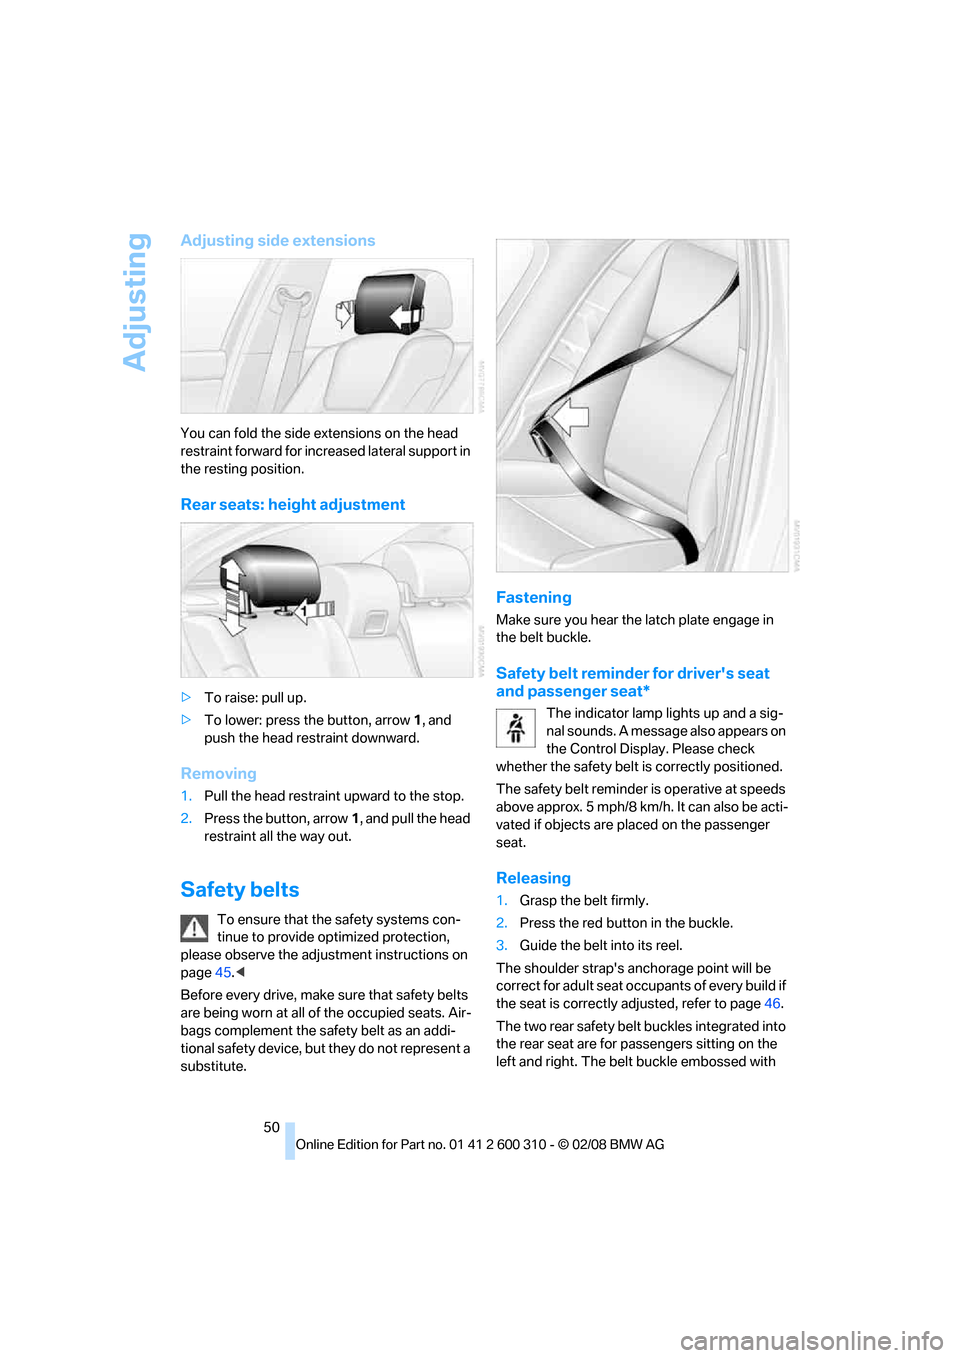
You can fold the side extensions on the head
restraint forward for increased lateral support in
the resting position.
Rear seats: height adjustment
>To raise: pull up.
>To lower: press the button, arrow1, and
push the head restraint downward.
Removing
1.Pull the head restraint upward to the stop.
2.Press the button, arrow1, and pull the head
restraint all the way out.
Safety belts
To ensure that the safety systems con-
tinue to provide optimized protection,
please observe the adjustment instructions on
page45.<
Before every drive, make sure that safety belts
are being worn at all of the occupied seats. Air-
bags complement the safety belt as an addi-
tional safety device, but they do not represent a
substitute.
Fastening
Make sure you hear the latch plate engage in
the belt buckle.
Safety belt reminder for driver's seat
and passenger seat*
The indicator lamp lights up and a sig-
nal sounds. A message also appears on
the Control Display. Please check
whether the safety belt is correctly positioned.
The safety belt reminder is operative at speeds
above approx. 5 mph/8 km/h. It can also be acti-
vated if objects are placed on the passenger
seat.
Releasing
1.Grasp the belt firmly.
2.Press the red button in the buckle.
3.Guide the belt into its reel.
The shoulder strap's anchorage point will be
correct for adult seat occupants of every build if
the seat is correctly adjusted, refer to page46.
The two rear safety belt buckles integrated into
the rear seat are for passengers sitting on the
left and right. The belt buckle embossed with
Page 58 of 292
Transporting children safely
56
Transporting children safely
The right place for children
Do not leave children unattended in the
vehicle, otherwise they could endanger
themselves and other persons, e.g. by opening
the doors.<
Children always in the rear
Accident research shows that the safest place
for children is on the rear seat.
Children younger than 13 years of age or
with a height under 5 ft/150 cm may only
be transported in the rear in child restraint sys-
tems which correspond to the age, weight and
height of the child. Otherwise there is an
increased danger of injury in an accident.<
Children 13 years of age or older must wear a
safety belt as soon as a suitable child restraint
system can no longer be used due to their age,
size and weight.
Exception for front passenger seat
Should it ever be necessary to use a child
restraint system on the front passenger
seat, the front and side airbags on the passen-
ger side must first be deactivated. Otherwise,
there is an increased risk of injury for the child if
the airbags are triggered, even with a child
restraint system.<
For more information on automatic deactivation
of the front passenger airbags, refer to
page100.
Installing child restraint
systems
Observe the child restraint system manu-
facturer's instructions for selection,
installation and use of the child restraint sys-
tems. Otherwise the degree of protection may
be reduced.<
Backrest width* on front passenger
seat
Open the backrest width setting of the
front passenger seat all the way. After
mounting the child's seat, deactivate the active
backrest width adjustment and do not call up
any memory position. Otherwise this limits the
stability of the child's seat on the front passen-
ger seat.<
1.After unlocking the vehicle, sit on the front
passenger seat and close the door to call up
the memory position.
2.Completely open the backrest width adjust-
ment, refer to page46.
3.Deactivate active backrest width adjust-
ment, refer to page47.
4.Install child's seat.
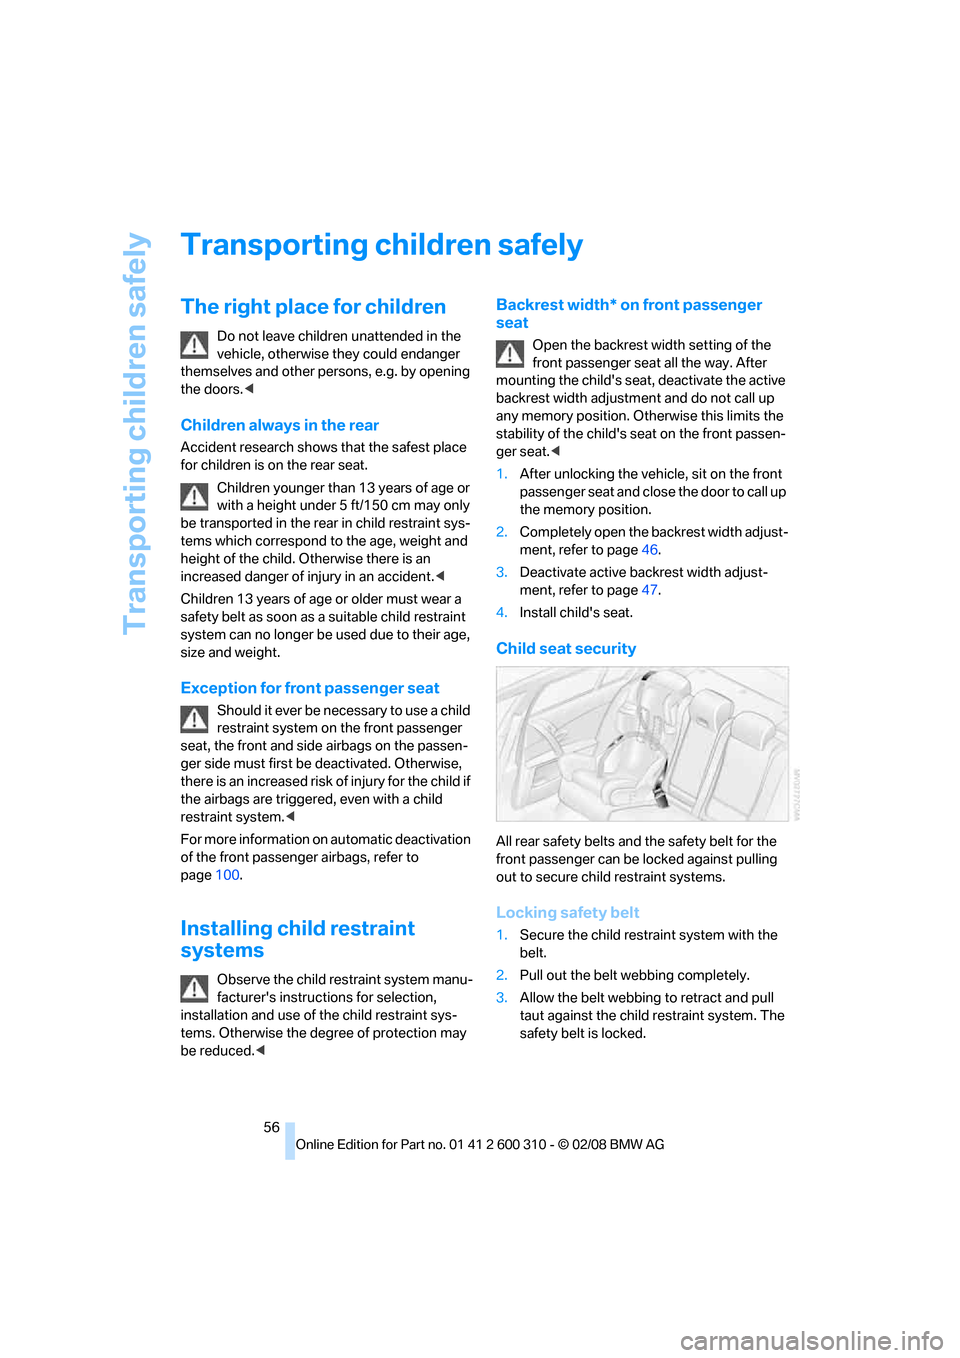
Child seat security
All rear safety belts and the safety belt for the
front passenger can be locked against pulling
out to secure child restraint systems.
Locking safety belt
1.Secure the child restraint system with the
belt.
2.Pull out the belt webbing completely.
3.Allow the belt webbing to retract and pull
taut against the child restraint system. The
safety belt is locked.
Page 78 of 292
Driving
76 situations as the system will neither automati-
cally brake, nor provide a warning to you. Also,
be aware that every decrease in the distance
setting allows your vehicle to come closer to a
vehicle in front of you and requires a heightened
amount of alertness.<
The system cannot allow the vehicle to drive off
automatically in situations that make driving off
considerably more difficult, e.g. on steep uphill
grades, with a heavy trailer or before raised
areas in the road.
Near radio astronomy stations, the system
radar is deactivated at speeds under 20 mph/
30 km/h due to legal regulations.
Be certain to interrupt the system when
you pull into an exit lane for a highway
offramp.<
Also, vehicles traveling in a staggered manner
on a highway may cause a delay in the system's
reaction to a vehicle in front of you or may cause
the system to react to a vehicle that is actually in
the lane next to yours. Always be ready to take
action or apply the brakes if necessary.
In addition, the system is interrupted
whenever the driver applies the vehicle
brakes, shifts the transmission from drive/D to
neutral/N, or deactivates DSC. After any inter-
ruption, the system will no longer automatically
activate the vehicle brakes, which means the
driver must intervene and resume manual brak-
ing. You should then reactivate the system only
when you are fully aware of the prior speed and
distance settings.<
Active cruise control may brake when you
reduce the stored desired speed; however, the
driver must constantly monitor traffic and inter-
vene if necessary.
When you switch off the engine or ignition,
active cruise control is fully switched off, too,
and any settings you have selected are can-
celed.
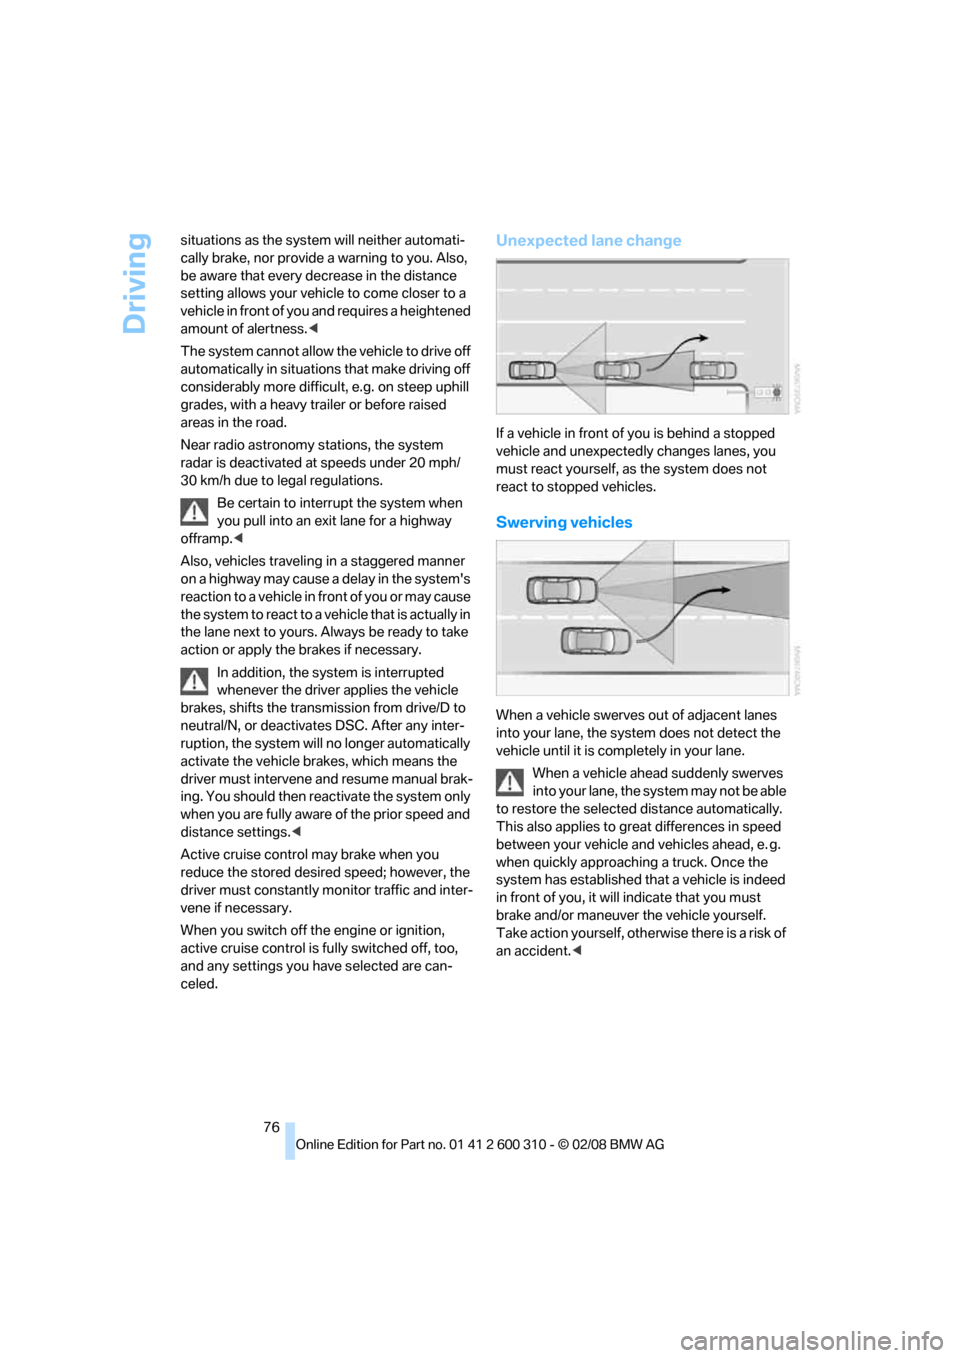
Unexpected lane change
If a vehicle in front of you is behind a stopped
vehicle and unexpectedly changes lanes, you
must react yourself, as the system does not
react to stopped vehicles.
Swerving vehicles
When a vehicle swerves out of adjacent lanes
into your lane, the system does not detect the
vehicle until it is completely in your lane.
When a vehicle ahead suddenly swerves
into your lane, the system may not be able
to restore the selected distance automatically.
This also applies to great differences in speed
between your vehicle and vehicles ahead, e. g.
when quickly approaching a truck. Once the
system has established that a vehicle is indeed
in front of you, it will indicate that you must
brake and/or maneuver the vehicle yourself.
Take action yourself, otherwise there is a risk of
an accident.<
Page 102 of 292
Technology for comfort, convenience and safety
100 wheel. Do not touch the individual components
immediately after the system has been trig-
gered, because there is a danger of burns.
In the event of malfunctions, deactivation, or
triggering of the airbag restraint system, have
the testing, repair, removal, and disposal of air-
bag generators executed only by a BMW center
or a workshop that works according to BMW
repair procedures with correspondingly trained
personnel and has the required explosives
licenses. Otherwise unprofessional attempts to
service the system could lead to failure in an
emergency or undesired airbag triggering,
either of which could result in personal injury.<
Warnings and information on the airbags is also
provided on the sun visors.
Automatic deactivation of front
passenger airbags
The occupation of the seat is detected by eval-
uating the impression on the occupied seat sur-
face of the front passenger seat. The front and
side airbags on the front passenger side are
activated or deactivated accordingly by the sys-
tem.
The current status of the front passenger
airbag, i.e. deactivated or activated, is
indicated by the indicator lamp over the interior
rearview mirror, refer to Operating state of front
passenger airbags in the following.<
Before transporting a child on the front
passenger seat, observe the safety infor-
mation and handling instructions under Trans-
porting children safely refer to page56.
The front and side airbags on the front passen-
ger side can be deactivated for teenagers and
adults in certain sitting positions; then the indi-
cator lamp for the front passenger airbags lights
up. In these cases, change the sitting position
so that the front passenger airbags are acti-
vated and the indicator lamp goes out. If the
desired status cannot be produced by changing
the sitting position, transport the correspond-
ing person on the rear seat. Do not fit seat cov-
ers, seat cushion padding, ball mats or other
items onto the front passenger seat unless they
are specifically recommended by BMW. Do not
lay objects under the seat which could press against the seat from below. Otherwise a cor-
rect evaluation of the occupied seat surface
cannot be ensured.<
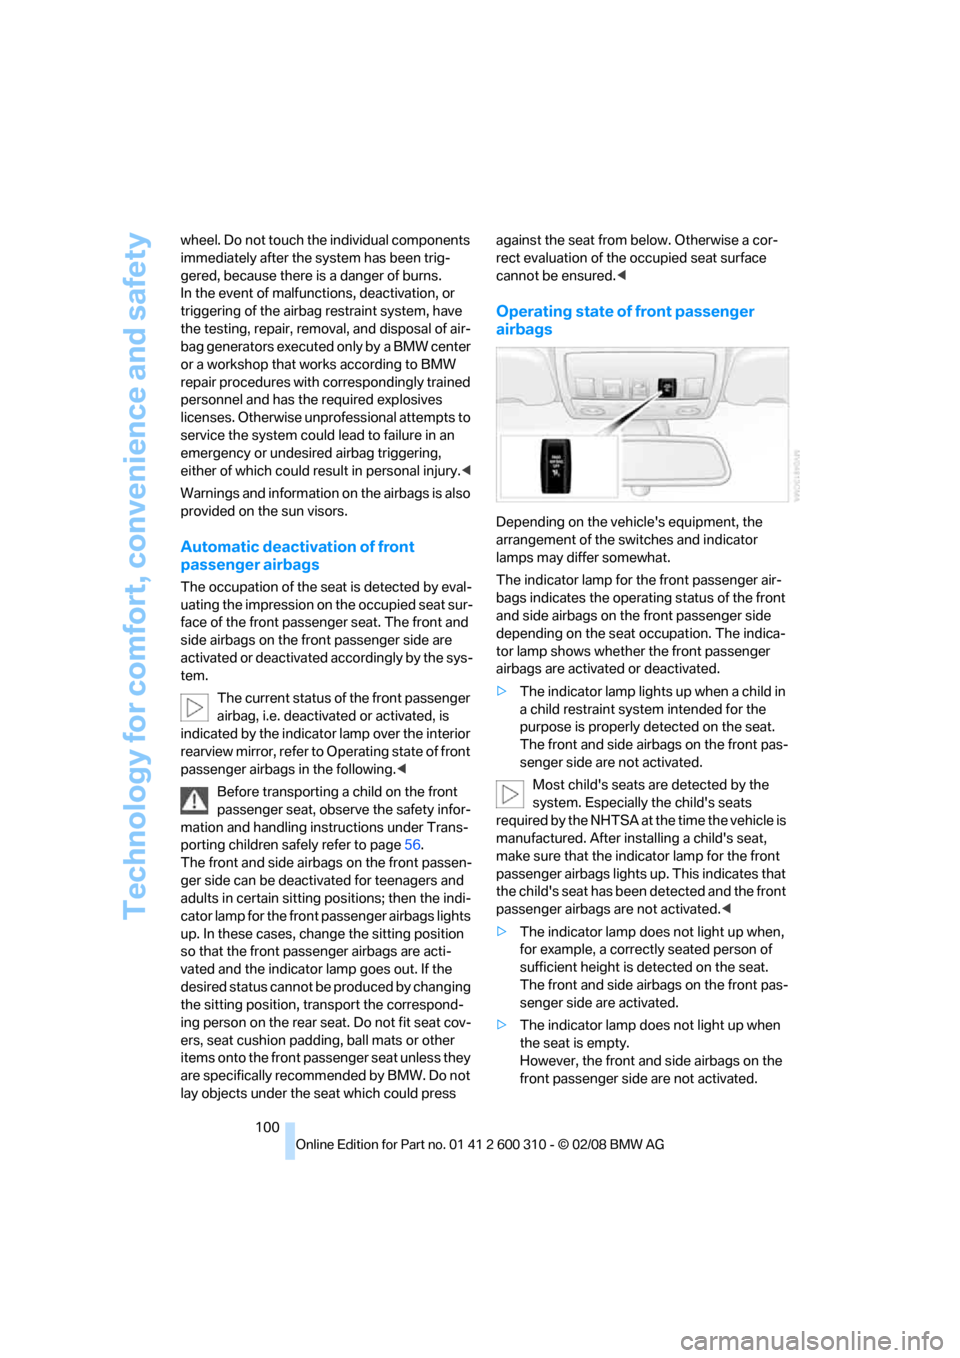
Operating state of front passenger
airbags
Depending on the vehicle's equipment, the
arrangement of the switches and indicator
lamps may differ somewhat.
The indicator lamp for the front passenger air-
bags indicates the operating status of the front
and side airbags on the front passenger side
depending on the seat occupation. The indica-
tor lamp shows whether the front passenger
airbags are activated or deactivated.
>The indicator lamp lights up when a child in
a child restraint system intended for the
purpose is properly detected on the seat.
The front and side airbags on the front pas-
senger side are not activated.
Most child's seats are detected by the
system. Especially the child's seats
required by the NHTSA at the time the vehicle is
manufactured. After installing a child's seat,
make sure that the indicator lamp for the front
passenger airbags lights up. This indicates that
the child's seat has been detected and the front
passenger airbags are not activated.<
>The indicator lamp does not light up when,
for example, a correctly seated person of
sufficient height is detected on the seat.
The front and side airbags on the front pas-
senger side are activated.
>The indicator lamp does not light up when
the seat is empty.
However, the front and side airbags on the
front passenger side are not activated.
Page 139 of 292
Driving tips
137Reference
At a glance
Controls
Communications
Navigation
Entertainment
Mobility
You can find valuable information on this topic
under Care, starting on page239.
528xi, 535xi
Avoid car washes with guide rail heights
over 4 in/10 cm; otherwise, there is dan-
ger of damaging chassis parts.<
Rear window wiper*
The rear window wiper can be damaged in car
washes. Take appropriate protective measures;
ask the car wash operator if necessary.
Automatic and sport automatic
transmission
Follow the instructions on page62 so that the
vehicle can roll.
Cargo loading
To avoid loading the tires beyond their
approved carrying capacity, never over-
load the vehicle. Overloading can lead to over-
heating and increases the rate at which damage
develops inside the tires. The ultimate result
can assume the form of a sudden blow-out.<
Make sure that no fluids leak in the cargo
bay; otherwise the vehicle could be dam-
aged.<
Determining loading limit
1.Locate the following statement on your
vehicle's placard
*:
The combined weight of occupants
and cargo should never exceed
XXX lbs. or YYY kg, as otherwise the vehicle may be damaged and unstable driving con-
ditions may result.<
2.Determine the combined weight of the
driver and passengers that will be riding in
your vehicle.
3.Subtract the combined weight of the driver
and passengers from XXX lbs. or YYY kg.
4.The resulting figure equals the available
amount of cargo and luggage load capacity.
For example, if the XXX amount equals
1,400 lbs. and there will be five 150-lb. pas-
sengers in your vehicle, the amount of avail-
able cargo and luggage load capacity is
650 lbs.:
1,400 lbs. minus 750 lbs. = 650 lbs.
5.Determine the combined weight of luggage
and cargo being loaded on the vehicle. That
weight may not safely exceed the available
cargo and luggage load capacity calculated
in step 4.
6.If your vehicle will be towing a trailer, part of
the load from your trailer will be transferred
to your vehicle. Consult the manual for
transporting a trailer to determine how this
may reduce the available cargo and luggage
load capacity of your vehicle.
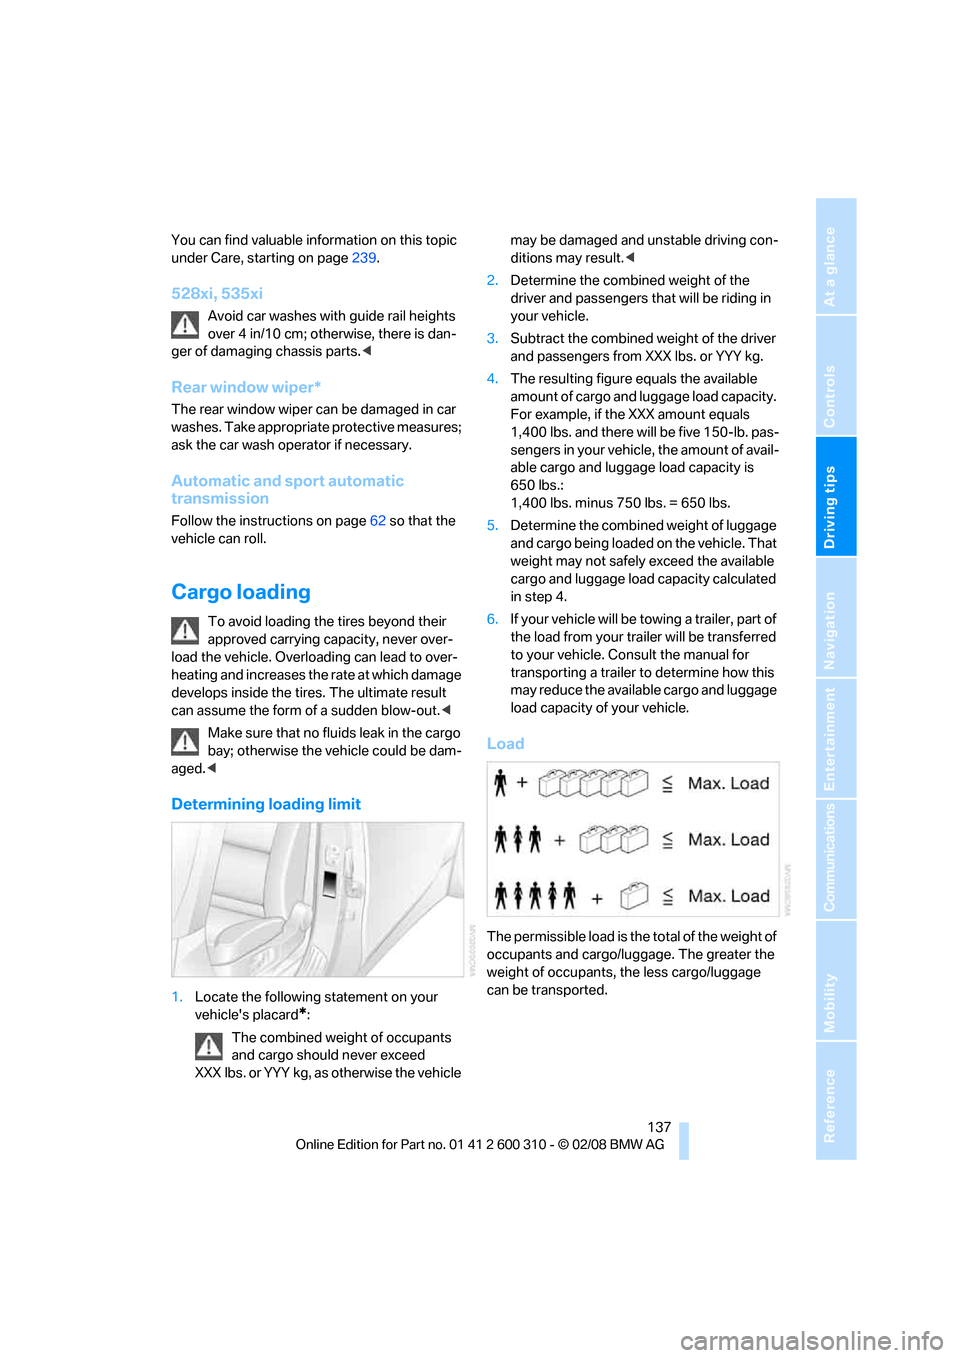
Load
The permissible load is the total of the weight of
occupants and cargo/luggage. The greater the
weight of occupants, the less cargo/luggage
can be transported.