2008 BMW 535I AUX
[x] Cancel search: AUXPage 5 of 288

Reference
At a glance
Controls
Driving tips
Communications
Navigation
Entertainment
Mobility
Contents
The fastest way to find specific topics is to use
the index, refer to page264.
Using this Owner's Manual
4Notes
7Reporting safety defects
At a glance
10Cockpit
16iDrive
23Voice command system
Controls
28Opening and closing
45Adjusting
56Transporting children safely
61Driving
78Everything under control
90Technology for comfort, convenience
and safety
108Lamps
114Climate
121Practical interior accessories
Driving tips
134Things to remember when driving
Navigation
142Starting navigation system
144Destination entry
156Destination guidance
165What to do if …
Entertainment
168On/off and tone
172Radio
179Satellite radio
182CD player and CD changer
188AUX-In connection
189USB/audio interface
Communications
194Telephoning
209BMW Assist
Mobility
218Refueling
220Wheels and tires
230Under the hood
235Maintenance
237Replacing components
247Giving and receiving assistance
Reference
254Technical data
259Short commands of voice command
system
264Everything from A to Z
Page 19 of 288

At a glance
17Reference
Controls
Driving tips
Communications
Navigation
Entertainment
Mobility
Menu overview
Communication
>Telephone*
>BMW Assist* or TeleService*
Navigation or onboard information
>Navigation system*
>Onboard information, e.g. for displaying
the average fuel consumption
Entertainment
>Radio
>CD player and CD changer
*
>AUX-In connection
>USB/audio interface
*
Climate
>Vent settings
>Automatic programs
>Seat heater distribution
*
>Parked car operation*
menu
>Switching off Control Display
>Tone and display settings
>Settings for your vehicle, e.g. for the central
locking system
>Display of maintenance intervals and dead-
lines for legally mandated inspections
>Settings for telephone
Operating principle
From radio readiness, refer to page61, the fol-
lowing message is shown on the Control Dis-
play:
To hide the message:
Press the controller.
This displays the start menu.
The message is automatically hidden after
approx. 10 seconds.
Start menu
You can call up all the functions of iDrive using
five menu items.
Opening start menu
Press the button.
To open the start menu from the menu:
Press the button twice.
Page 23 of 288
At a glance
21Reference
Controls
Driving tips
Communications
Navigation
Entertainment
Mobility
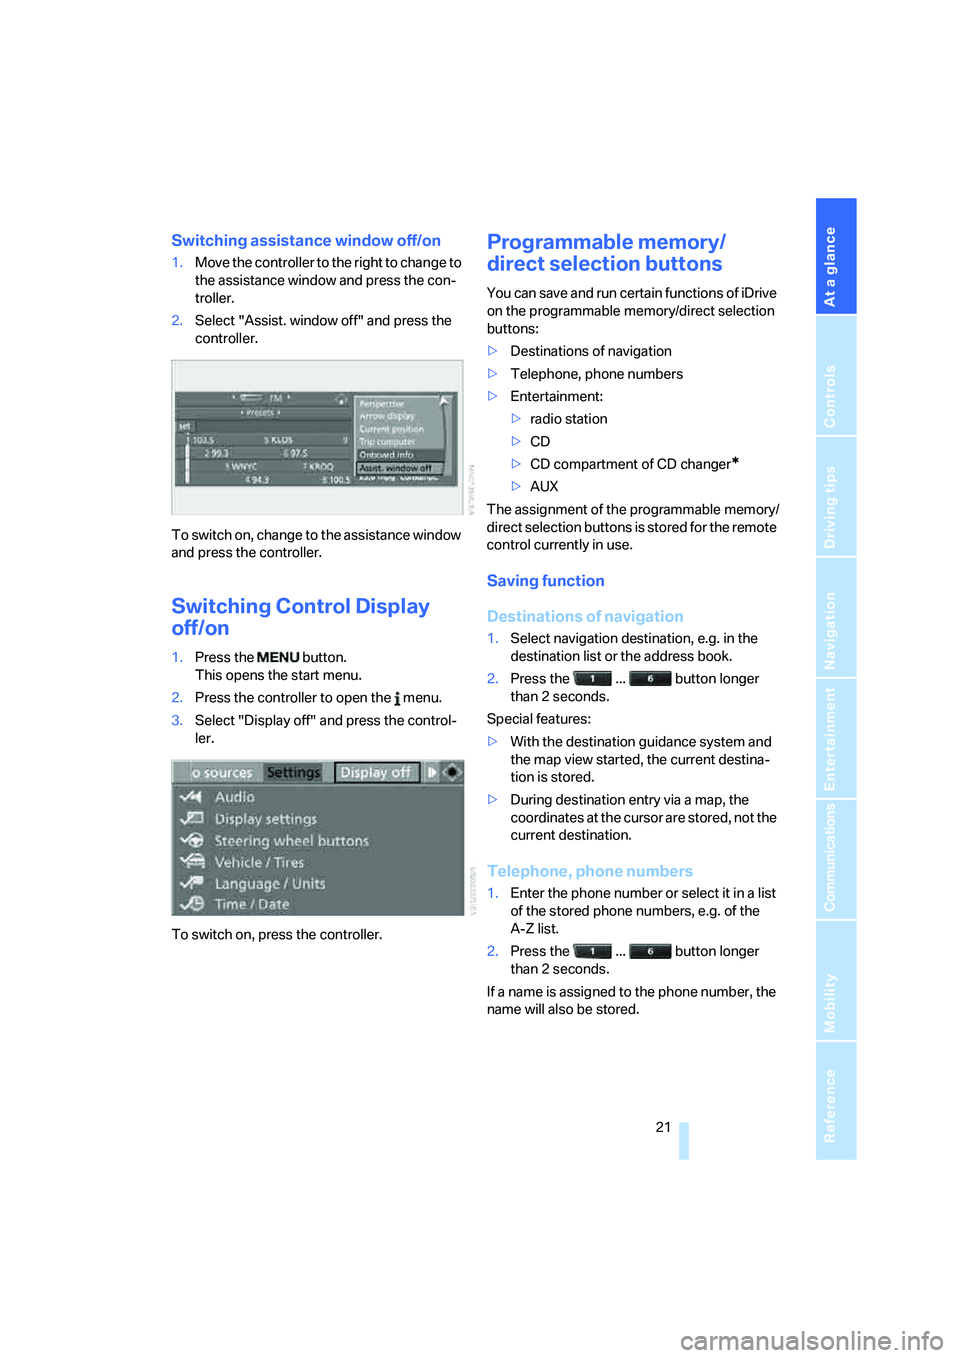
Switching assistance window off/on
1.Move the controller to the right to change to
the assistance window and press the con-
troller.
2.Select "Assist. window off" and press the
controller.
To switch on, change to the assistance window
and press the controller.
Switching Control Display
off/on
1.Press the button.
This opens the start menu.
2.Press the controller to open the menu.
3.Select "Display off" and press the control-
ler.
To switch on, press the controller.
Programmable memory/
direct selection buttons
You can save and run certain functions of iDrive
on the programmable memory/direct selection
buttons:
>Destinations of navigation
>Telephone, phone numbers
>Entertainment:
>radio station
>CD
>CD compartment of CD changer
*
>AUX
The assignment of the programmable memory/
direct selection buttons is stored for the remote
control currently in use.
Saving function
Destinations of navigation
1.Select navigation destination, e.g. in the
destination list or the address book.
2.Press the ... button longer
than 2 seconds.
Special features:
>With the destination guidance system and
the map view started, the current destina-
tion is stored.
>During destination entry via a map, the
coordinates at the cursor are stored, not the
current destination.
Telephone, phone numbers
1.Enter the phone number or select it in a list
of the stored phone numbers, e.g. of the
A-Z list.
2.Press the ... button longer
than 2 seconds.
If a name is assigned to the phone number, the
name will also be stored.
Page 126 of 288
Practical interior accessories
124
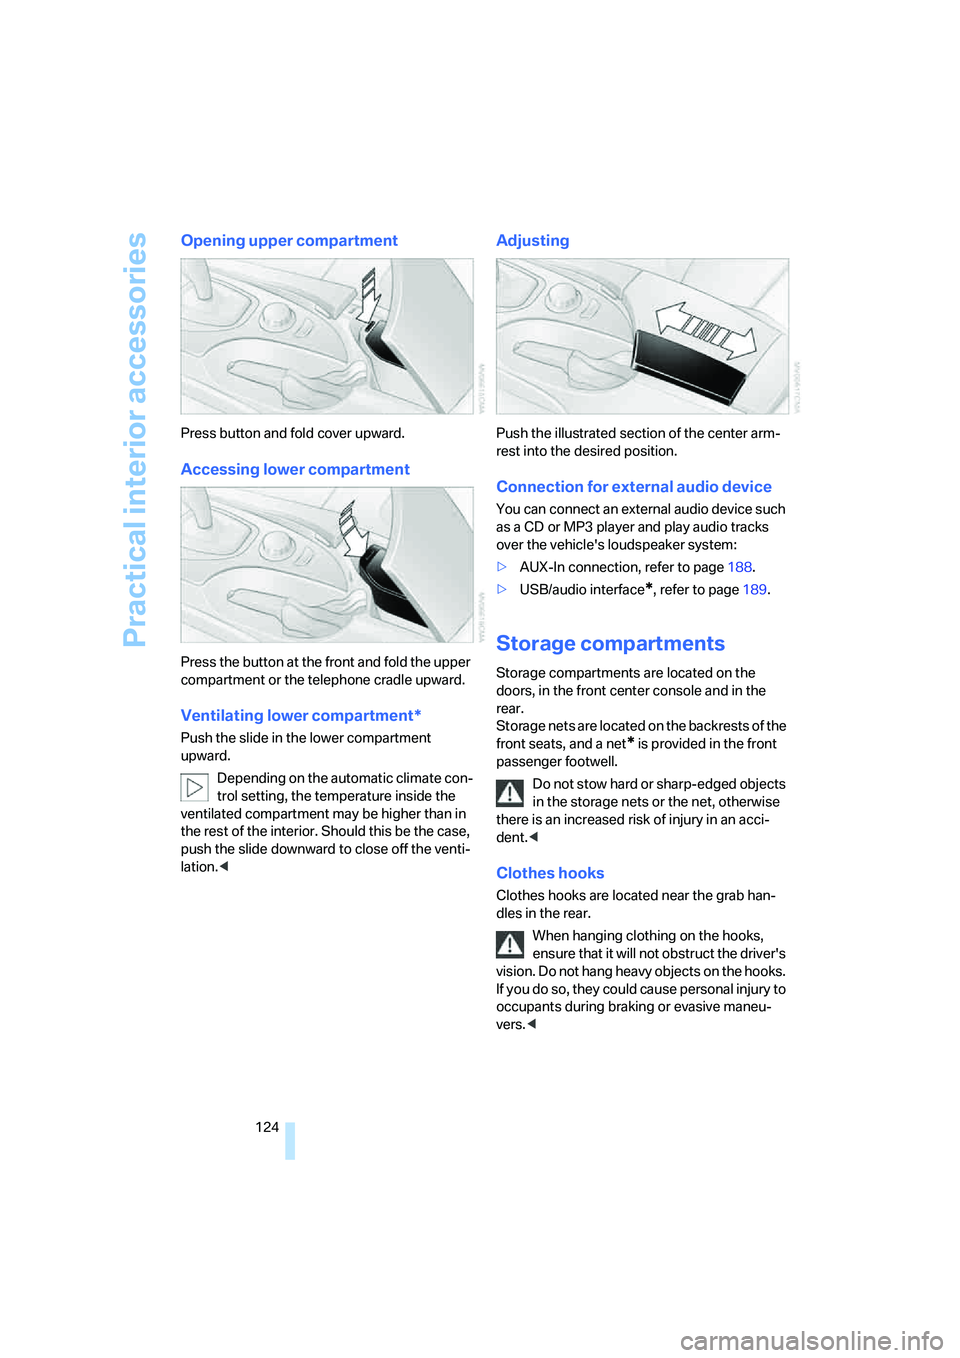
Opening upper compartment
Press button and fold cover upward.
Accessing lower compartment
Press the button at the front and fold the upper
compartment or the telephone cradle upward.
Ventilating lower compartment*
Push the slide in the lower compartment
upward.
Depending on the automatic climate con-
trol setting, the temperature inside the
ventilated compartment may be higher than in
the rest of the interior. Should this be the case,
push the slide downward to close off the venti-
lation.<
Adjusting
Push the illustrated section of the center arm-
rest into the desired position.
Connection for external audio device
You can connect an external audio device such
as a CD or MP3 player and play audio tracks
over the vehicle's loudspeaker system:
>AUX-In connection, refer to page188.
>USB/audio interface
*, refer to page189.
Storage compartments
Storage compartments are located on the
doors, in the front center console and in the
rear.
Storage nets are located on the backrests of the
front seats, and a net
* is provided in the front
passenger footwell.
Do not stow hard or sharp-edged objects
in the storage nets or the net, otherwise
there is an increased risk of injury in an acci-
dent.<
Clothes hooks
Clothes hooks are located near the grab han-
dles in the rear.
When hanging clothing on the hooks,
ensure that it will not obstruct the driver's
vision. Do not hang heavy objects on the hooks.
If you do so, they could cause personal injury to
occupants during braking or evasive maneu-
vers.<
Page 136 of 288
Things to remember when driving
134
Things to remember when driving
Break-in period
Moving parts need breaking-in time to adjust to
each other. To ensure that your vehicle contin-
ues to provide optimized economy of operation
throughout an extended service life, we request
that you devote careful attention to the follow-
ing section.
Engine and differential
Always obey all official speed limits.
Up to 1,200 miles/2,000 km
Drive at changing engine and driving speeds,
however do not exceed 4,500 rpm or 100 mph/
160 km/h.
Avoid full-throttle operation and use of the
transmission's kick-down mode during these
initial miles.
From 1,200 miles/2,000 km
The engine and vehicle speed can gradually be
increased.
Tires
Due to technical factors associated with their
manufacture, tires do not achieve their full trac-
tion potential until after an initial break-in
period. Therefore, drive reservedly during the
first 200 miles/300 km.
Brake system
Brakes require an initial break-in period of
approx. 300 miles/500 km to achieve optimized
contact and wear patterns between brake pads
and rotors. Drive in a reserved manner during
this break-in period.
Clutch
The function of the clutch is only at its opti-
mized level after a distance driven of approx.
300 miles/500 km. During this break-in period,
engage the clutch gently.
Following part replacement
Observe the break-in instructions again if com-
ponents mentioned above must be replaced
after subsequent driving operation.
Saving fuel
The fuel consumption of your vehicle depends
on various factors. Through a few simple steps,
your driving style, and regular maintenance, you
can have a positive influence on your fuel con-
sumption and environmental impact.
Removing unnecessary cargo
Additional weight increases fuel consumption.
Removing add-on parts after use
Remove unneeded auxiliary mirrors, roof or rear
luggage racks after use. Add-on parts attached
to the vehicle impede the aerodynamics and
increase the fuel consumption.
Closing windows and glass sunroof
An open glass sunroof or open windows like-
wise increase the drag coefficient and therefore
the fuel consumption.
Checking tire inflation pressures
regularly
Check and correct the tire inflation pressure as
needed at least twice a month and before long
trips.
An insufficient tire inflation pressure increases
the rolling resistance and thus increases the
fuel consumption and tire wear.
Driving off immediately
Do not allow the engine to warm up by leaving it
running while the vehicle remains stationary.
Instead, begin to drive at a moderate engine
speed. This is the fastest way for the cold
engine to reach its operating temperature.
Page 171 of 288
Navigation
Entertainment
Driving tips
169Reference
At a glance
Controls
Communications
Mobility
You have the following choices:
>"FM" and "AM": radio reception
>"WB": Weather Band station
>"SAT": satellite radio
>"CD": CD player or CD changer
>"AUX": AUX-In connection
>USB/audio interface
*
>"Set": depending on the audio source,
other adjustments can be made, e.g. with
the radio: update station with strongest
reception, store station, tone control, sam-
ple stations.
From another menu, you can change
directly to the screen last displayed,
refer to Comfort opening of menu items,
page18.<
From radio readiness, the selected audio
source is stored for the remote control currently
in use.
Switching on/off
To switch the Entertainment sound output on
and off:
Press knob1 next to the CD player.
This symbol on the Control Display indi-
cates that sound output is switched off.
For a single drive, the sound output is available
for approx. 20 minutes with the ignition
switched off.
Switch on the sound output again for this pur-
pose.
Adjusting volume
Turn knob1 next to the CD player until the
desired volume is set.
You can also adjust the volume with buttons on
the steering wheel, refer to page11.
From radio readiness, the setting is stored for
the remote control currently in use.
Tone control
You can alter various tone settings, e. g. treble
and bass, or the speed-dependent volume
increase.
The tone settings are set for all audio sources at
once.
From radio readiness, the settings are stored
for the remote control currently in use.
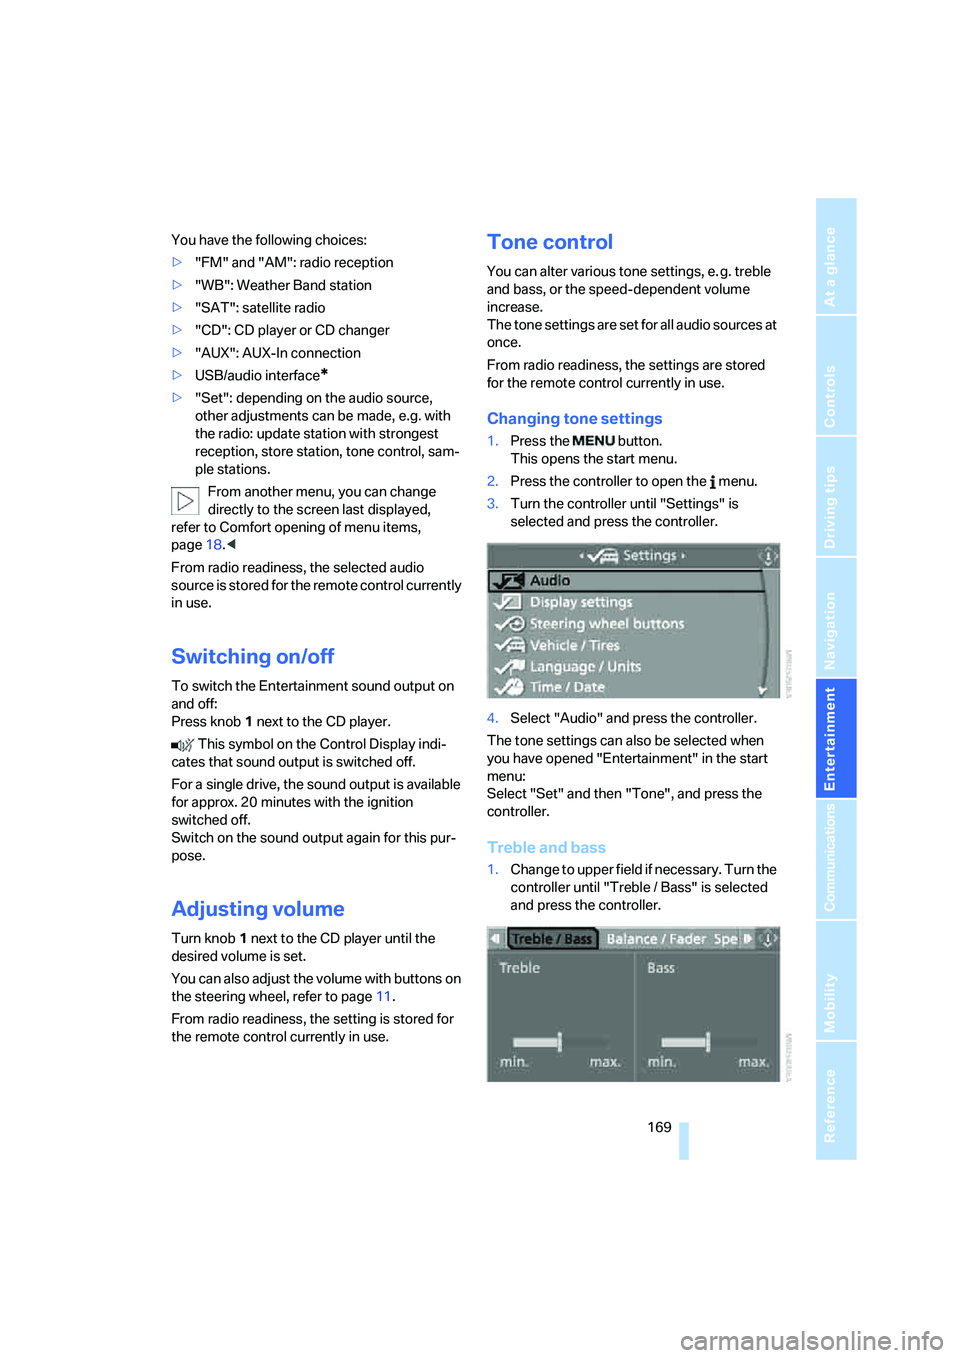
Changing tone settings
1.Press the button.
This opens the start menu.
2.Press the controller to open the menu.
3.Turn the controller until "Settings" is
selected and press the controller.
4.Select "Audio" and press the controller.
The tone settings can also be selected when
you have opened "Entertainment" in the start
menu:
Select "Set" and then "Tone", and press the
controller.
Treble and bass
1.Change to upper field if necessary. Turn the
controller until "Treble / Bass" is selected
and press the controller.
Page 190 of 288
AUX-In connection
188
AUX-In connection
You can connect an external audio device, e.g.
an MP3 player, and play the sound via the vehi-
cle loudspeakers. The sound can be adjusted
via iDrive.
Connecting
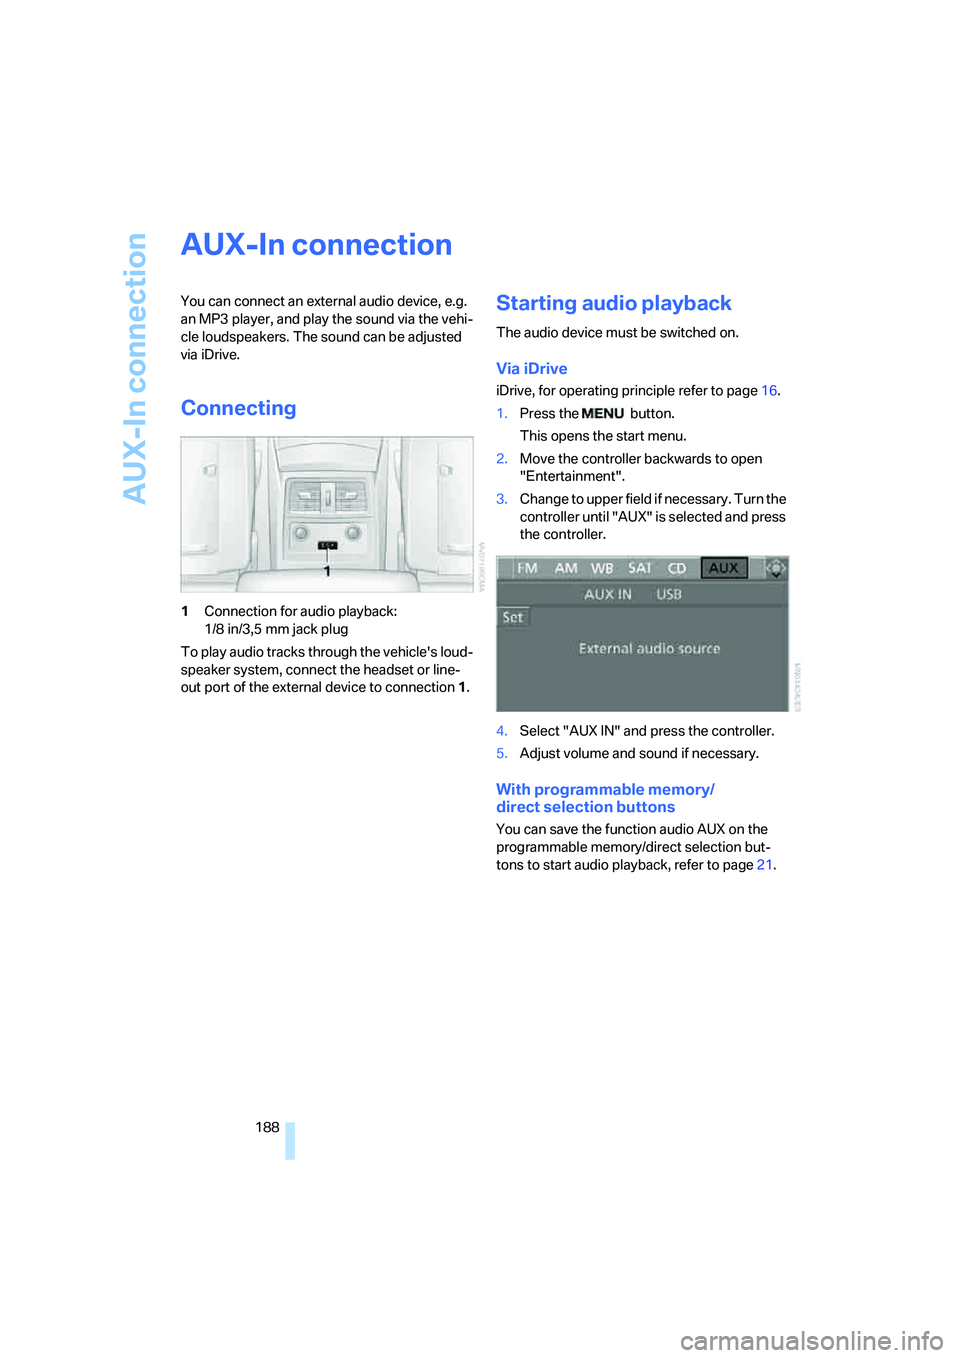
1Connection for audio playback:
1/8 in/3,5 mm jack plug
To play audio tracks through the vehicle's loud-
speaker system, connect the headset or line-
out port of the external device to connection 1.
Starting audio playback
The audio device must be switched on.
Via iDrive
iDrive, for operating principle refer to page16.
1.Press the button.
This opens the start menu.
2.Move the controller backwards to open
"Entertainment".
3.Change to upper field if necessary. Turn the
controller until "AUX" is selected and press
the controller.
4.Select "AUX IN" and press the controller.
5.Adjust volume and sound if necessary.
With programmable memory/
direct selection buttons
You can save the function audio AUX on the
programmable memory/direct selection but-
tons to start audio playback, refer to page21.
Page 191 of 288
Navigation
Entertainment
Driving tips
189Reference
At a glance
Controls
Communications
Mobility
USB/audio interface
You can connect audio devices to the USB/
audio interface, e.g. an iPod or a USB device
(MP3 player, USB memory stick). You can then
operate these via iDrive.
The system can play back common audio files,
e.g. MP3, WMA, WAV (PCM) and ACC, as well
as playback lists in the M3U format.
Due to the large number of audio devices avail-
able on the market, operation via the vehicle
cannot be ensured for every audio device.
Ask your BMW center which audio devices are
suitable.
Connecting
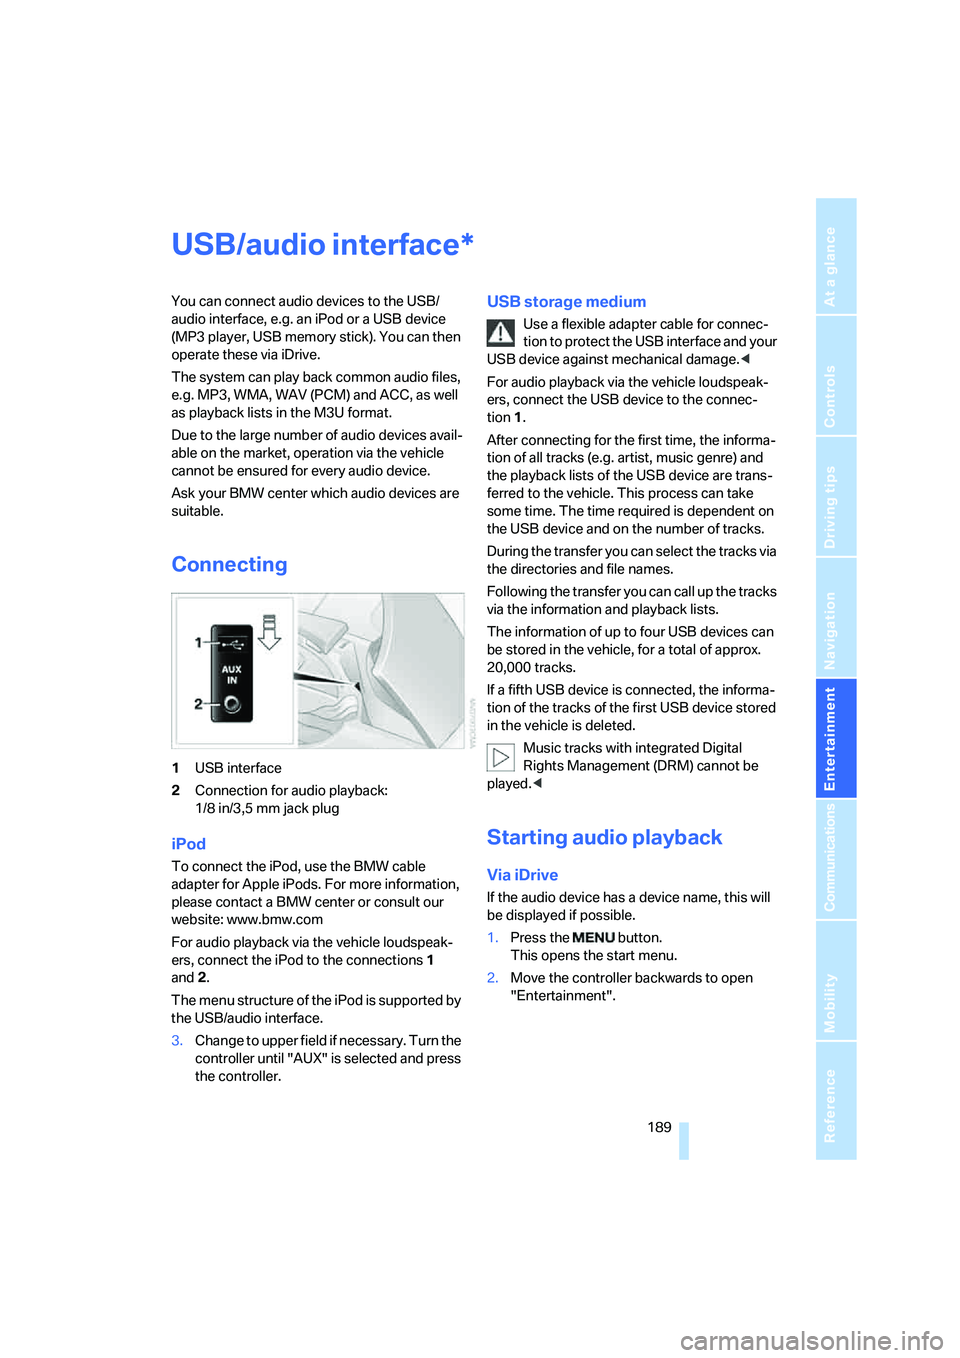
1USB interface
2Connection for audio playback:
1/8 in/3,5 mm jack plug
iPod
To connect the iPod, use the BMW cable
adapter for Apple iPods. For more information,
please contact a BMW center or consult our
website: www.bmw.com
For audio playback via the vehicle loudspeak-
ers, connect the iPod to the connections1
and2.
The menu structure of the iPod is supported by
the USB/audio interface.
USB storage medium
Use a flexible adapter cable for connec-
tion to protect the USB interface and your
USB device against mechanical damage.<
For audio playback via the vehicle loudspeak-
ers, connect the USB device to the connec-
tion 1.
After connecting for the first time, the informa-
tion of all tracks (e.g. artist, music genre) and
the playback lists of the USB device are trans-
ferred to the vehicle. This process can take
some time. The time required is dependent on
the USB device and on the number of tracks.
During the transfer you can select the tracks via
the directories and file names.
Following the transfer you can call up the tracks
via the information and playback lists.
The information of up to four USB devices can
be stored in the vehicle, for a total of approx.
20,000 tracks.
If a fifth USB device is connected, the informa-
tion of the tracks of the first USB device stored
in the vehicle is deleted.
Music tracks with integrated Digital
Rights Management (DRM) cannot be
played.<
Starting audio playback
Via iDrive
If the audio device has a device name, this will
be displayed if possible.
1.Press the button.
This opens the start menu.
2.Move the controller backwards to open
"Entertainment".
3.Change to upper field if necessary. Turn the
controller until "AUX" is selected and press
the controller.
*