2008 BMW 530XI TOURING sat nav
[x] Cancel search: sat navPage 5 of 292

Reference
At a glance
Controls
Driving tips
Communications
Navigation
Entertainment
Mobility
Contents
The fastest way to find specific topics is to use
the index, refer to page270.
Using this Owner's Manual
4Notes
7Reporting safety defects
At a glance
10Cockpit
16iDrive
23Voice command system
Controls
28Opening and closing
45Adjusting
56Transporting children safely
61Driving
78Everything under control
89Technology for comfort, convenience
and safety
107Lamps
113Climate
120Practical interior accessories
Driving tips
134Things to remember when driving
Navigation
142Starting navigation system
144Destination entry
156Destination guidance
165What to do if …
Entertainment
168On/off and tone
172Radio
178Satellite radio
181CD player and CD changer
187AUX-In connection
188USB audio interface
Communications
194Telephoning
209BMW Assist
Mobility
220Refueling
222Wheels and tires
232Under the hood
237Maintenance
239Care
243Replacing components
253Giving and receiving assistance
Reference
260Technical data
265Short commands of voice command
system
270Everything from A to Z
Page 17 of 292

At a glance
15Reference
Controls
Driving tips
Communications
Navigation
Entertainment
Mobility
1Microphone for hands-free mode
for telephone
*
and for voice command system*23
2Reading lamps112
3SOS: initiating
an emergency request253
4Interior lamps111
5Glass sunroof
*, electric41
Panorama glass sunroof42
6Passenger airbag status lamp100
7Control Display16
Displays for menu navigation
8Hazard warning flashers
9Central locking system32
10Automatic climate control113
11Changing
>radio station172
>track168
12Ejecting
>navigation DVD
*142
>audio CD181
13Programmable memory buttons21
14Drive for navigation DVDs
*14215Drive for audio CDs181
16Switching Entertainment sound output
on/off and adjusting volume168
18Controller16
Turn, press or move horizontally in four
directions
19Opening start menu on Control Display17 Temperature setting,
left/right114
Automatic air distribution and
volume114
Cooling function116
AUC Automatic recirculated-air
control116
Recirculated-air mode116
Maximum cooling116
Air volume115
Defrosting windows and removing
condensation115
Rear window defroster115
17
Heated seats*51
Active seat ventilation
*52
Adjusting active backrest
width
*47
Active seat
*52
PDC Park Distance Control
*89
DTC Dynamic Traction Control91
Opening luggage compartment lid/
tailgate
*33,35
Page 115 of 292

Controls
113Reference
At a glance
Driving tips
Communications
Navigation
Entertainment
Mobility
Climate
Automatic climate control
1Air directed toward the windshield and side
windows
2Air for the upper body region, refer to Front
ventilation on page117
3Air to footwell
4Temperature, left side of passenger com-
partment
5Manual air distribution, driver's side
6Defrosting windows and removing conden-
sation
7Manual air volume, switching off automatic
climate control, residual heat utilization8AUTO program
9Switching cooling function on and off man-
ually
10Temperature, right side of passenger com-
partment
11Manual air distribution, front passenger side
12Maximum cooling
13AUC Automatic recirculated-air control/
recirculated-air mode
14LED for residual heat utilization and parked-
car ventilation system
15Rear window defroster
Page 117 of 292

Controls
115Reference
At a glance
Driving tips
Communications
Navigation
Entertainment
Mobility
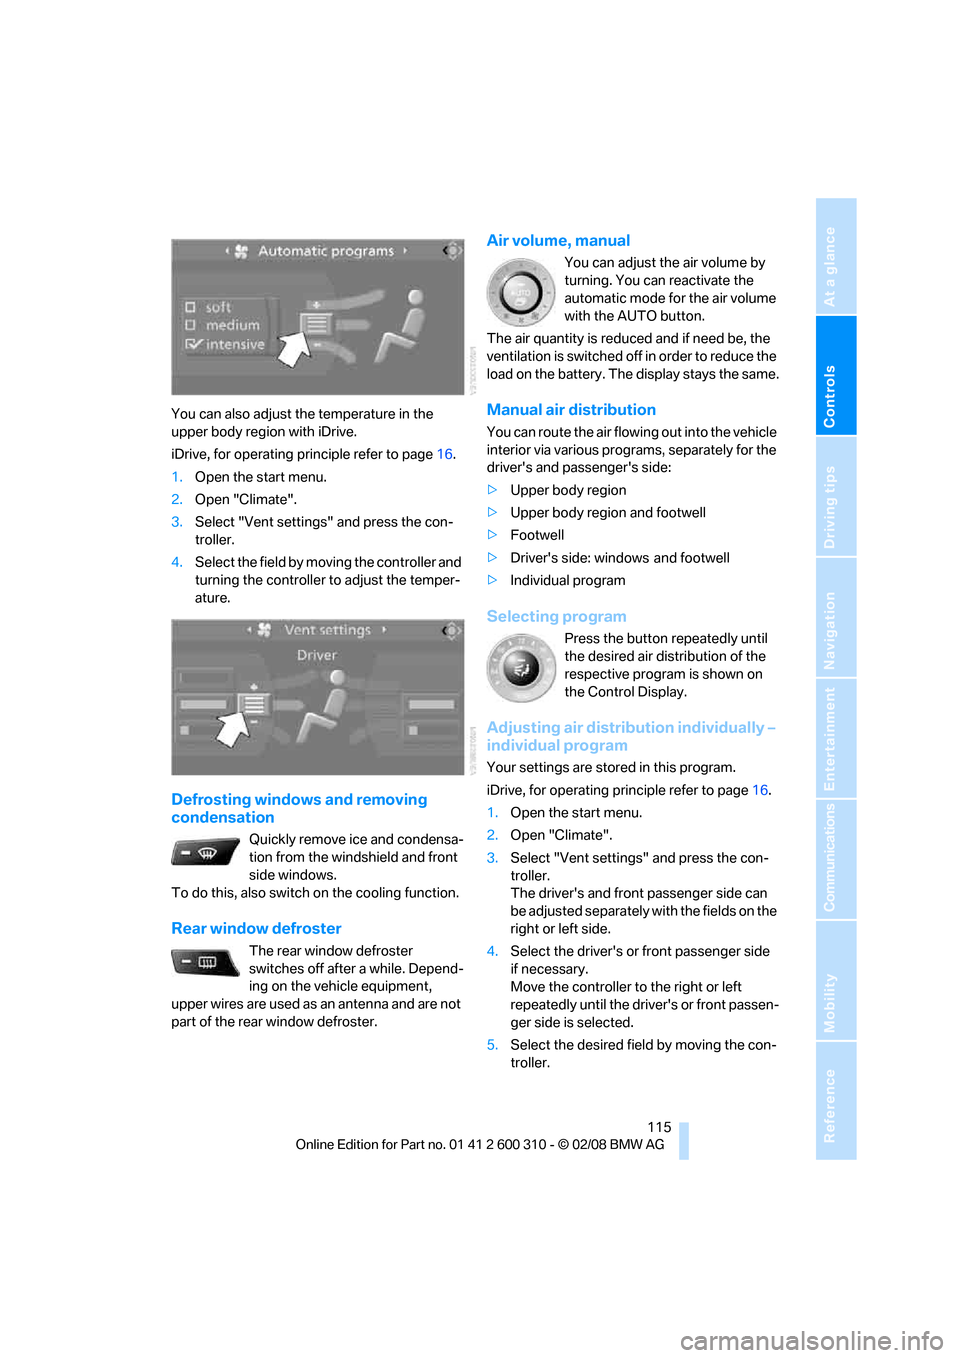
You can also adjust the temperature in the
upper body region with iDrive.
iDrive, for operating principle refer to page16.
1.Open the start menu.
2.Open "Climate".
3.Select "Vent settings" and press the con-
troller.
4.Select the field by moving the controller and
turning the controller to adjust the temper-
ature.
Defrosting windows and removing
condensation
Quickly remove ice and condensa-
tion from the windshield and front
side windows.
To do this, also switch on the cooling function.
Rear window defroster
The rear window defroster
switches off after a while. Depend-
ing on the vehicle equipment,
upper wires are used as an antenna and are not
part of the rear window defroster.
Air volume, manual
You can adjust the air volume by
turning. You can reactivate the
automatic mode for the air volume
with the AUTO button.
The air quantity is reduced and if need be, the
ventilation is switched off in order to reduce the
load on the battery. The display stays the same.
Manual air distribution
You can route the air flowing out into the vehicle
interior via various programs, separately for the
driver's and passenger's side:
>Upper body region
>Upper body region and footwell
>Footwell
>Driver's side: windows and footwell
>Individual program
Selecting program
Press the button repeatedly until
the desired air distribution of the
respective program is shown on
the Control Display.
Adjusting air distribution individually –
individual program
Your settings are stored in this program.
iDrive, for operating principle refer to page16.
1.Open the start menu.
2.Open "Climate".
3.Select "Vent settings" and press the con-
troller.
The driver's and front passenger side can
be adjusted separately with the fields on the
right or left side.
4.Select the driver's or front passenger side
if necessary.
Move the controller to the right or left
repeatedly until the driver's or front passen-
ger side is selected.
5.Select the desired field by moving the con-
troller.
Page 144 of 292

Starting navigation system
142
Starting navigation system
Your navigation system can use satellites to
ascertain the precise position of your vehicle
and guide you reliably to any destination you
enter.
Navigation DVD
The navigation system requires a special navi-
gation DVD. The latest version is available at
your BMW center.
Inserting navigation DVD
1.Insert the navigation DVD with the labeled
side up. The navigation DVD is retracted.
2.Allow several seconds for the system to
scan the data from the DVD.
Removing navigation DVD
1.Press button 1.
The DVD emerges slightly from the drive.
2.Remove the DVD.
If the DVD is not ejected from the drive, it is pos-
sible that it is blocked. In this case a message is
also shown on the Control Display.
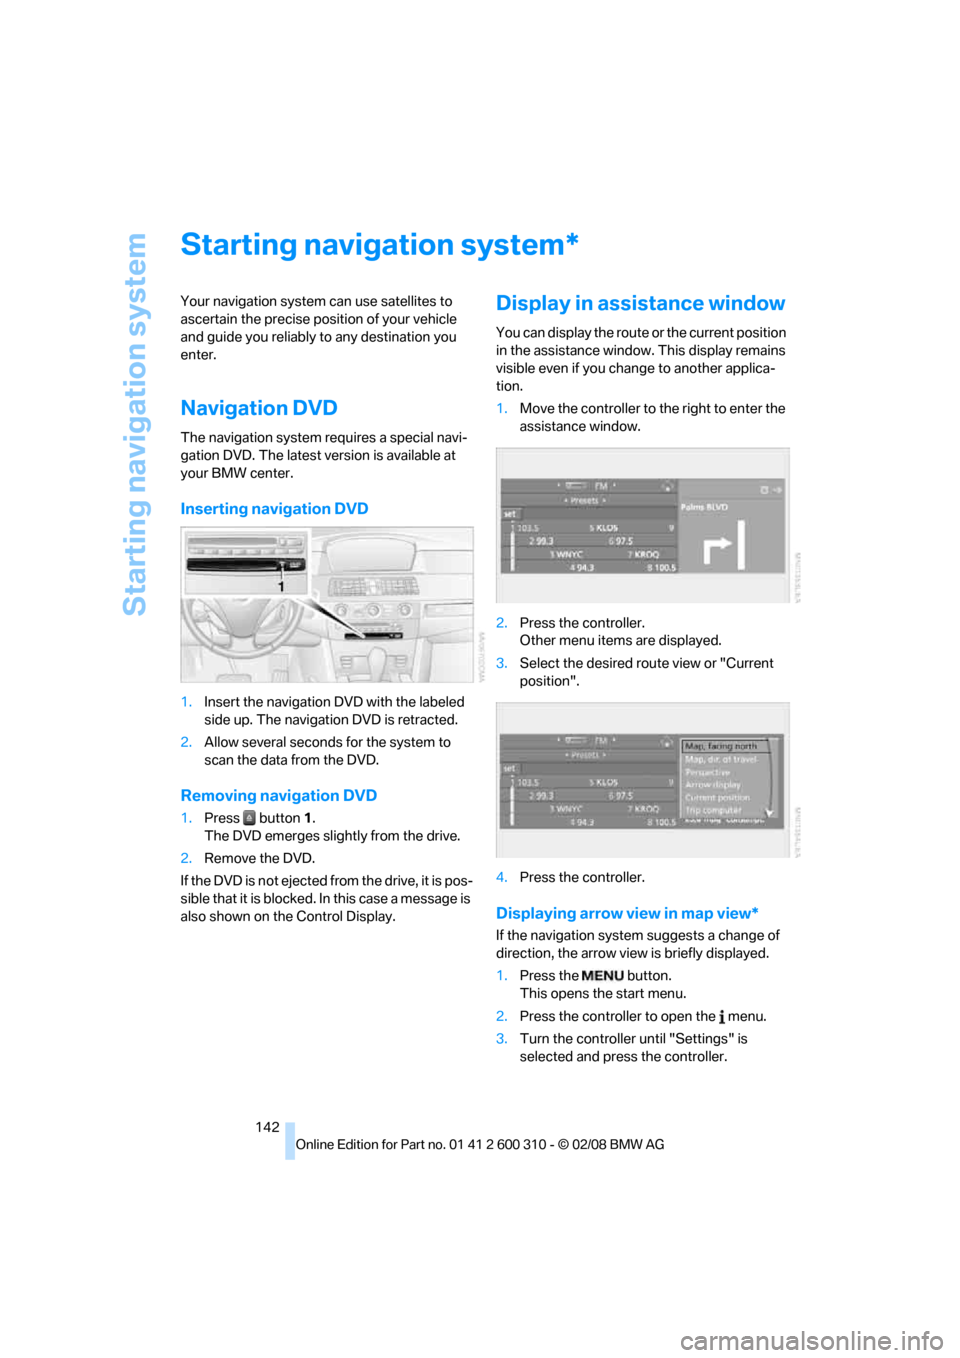
Display in assistance window
You can display the route or the current position
in the assistance window. This display remains
visible even if you change to another applica-
tion.
1.Move the controller to the right to enter the
assistance window.
2.Press the controller.
Other menu items are displayed.
3.Select the desired route view or "Current
position".
4.Press the controller.
Displaying arrow view in map view*
If the navigation system suggests a change of
direction, the arrow view is briefly displayed.
1.Press the button.
This opens the start menu.
2.Press the controller to open the menu.
3.Turn the controller until "Settings" is
selected and press the controller.
*
Page 170 of 292

On/off and tone
168
On/off and tone
The following audio sources have shared con-
trols and setting options:
>Professional
* radio or
Business radio
>CD player
>CD changer
*
Controls
The audio sources can be operated using:
>Buttons in the area of the CD player
>iDrive
>Buttons on steering wheel, refer to page11
>Programmable memory buttons, refer to
page21
Buttons in area of CD player
The layout of the buttons can vary depending
on your vehicle's equipment.
One drive:
Two drives:1Entertainment sound output on/off, volume
>Press: switch on/off.
When the system is switched on, the
most recently selected radio station or
CD track is played.
>Turn: adjust volume.
2Drive for audio CDs
3 Eject CD
4 Station scan/track search
>Change radio station.
>Select track for CD player and
CD changer.
5Drive for navigation DVDs
Operation via iDrive
iDrive, for operating principle refer to page16.
1.Press the button.
This opens the start menu.
2.Move the controller backwards to open
"Entertainment".
You have the following choices:
>"FM" and "AM": radio reception
>"WB": Weather Band station
>"SAT": satellite radio
>"CD": CD player or CD changer
*
>"AUX": AUX-In connection
>USB audio interface
*
>"Set": depending on the audio source,
other adjustments can be made, e.g. with
the radio: update station with strongest
Page 181 of 292

Navigation
Entertainment
Driving tips
179Reference
At a glance
Controls
Communications
Mobility
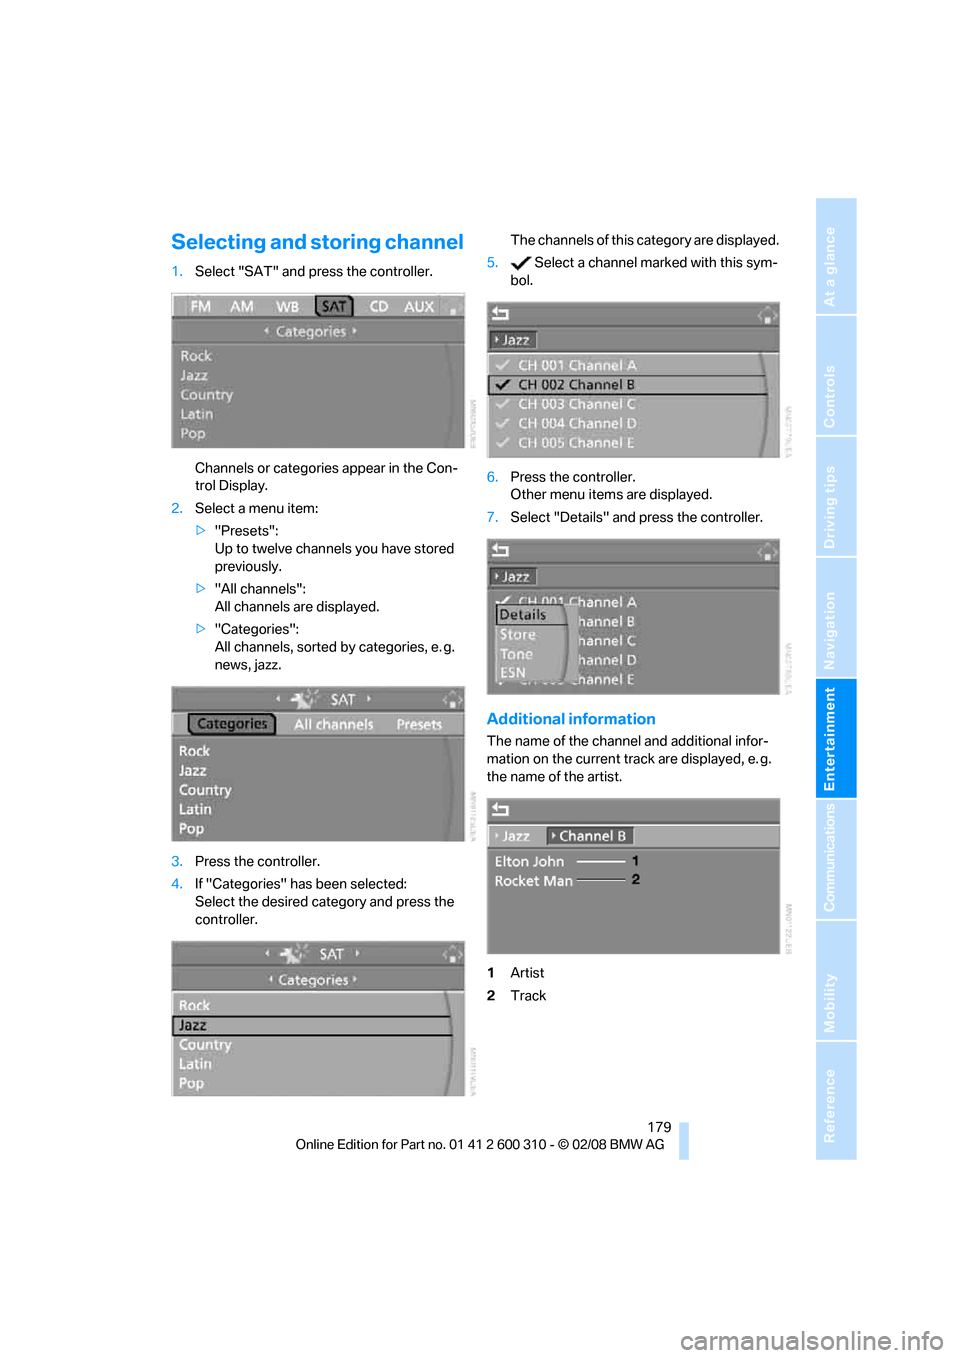
Selecting and storing channel
1.Select "SAT" and press the controller.
Channels or categories appear in the Con-
trol Display.
2.Select a menu item:
>"Presets":
Up to twelve channels you have stored
previously.
>"All channels":
All channels are displayed.
>"Categories":
All channels, sorted by categories, e. g.
news, jazz.
3.Press the controller.
4.If "Categories" has been selected:
Select the desired category and press the
controller.The channels of this category are displayed.
5. Select a channel marked with this sym-
bol.
6.Press the controller.
Other menu items are displayed.
7.Select "Details" and press the controller.
Additional information
The name of the channel and additional infor-
mation on the current track are displayed, e. g.
the name of the artist.
1Artist
2Track
Page 207 of 292

205
Entertainment
Reference
At a glance
Controls
Driving tips Communications
Navigation
Mobility
Changing between mobile
phone and hands-free system
From mobile phone to hands-free
system*
You can continue calls begun outside the Blue-
tooth range of the vehicle via the hands-free
system when the motor is running or the igni-
tion is switched on. Depending on your mobile
phone, the system automatically changes over
to the hands-free mode.
For mobile phones that do not automatically
change over to the hands-free mode:
>Depending on the mobile phone model
used, the conversation can be continued via
the hands-free system if necessary. Act
according to what is shown on the mobile
phone display, refer to the operating
instructions of your mobile phone.
>Press the button above the storage
compartment. Changing over may take sev-
eral seconds.
From hands-free system to mobile
phone
When you telephone via the hands-free system,
you can also continue the call via the mobile
phone if necessary, depending on the mobile
phone model. Act according to what is shown
on the mobile phone display, refer to the oper-
ating instructions of your mobile phone.
As an alternative, you can deactivate the Blue-
tooth link.
Depending on your mobile phone model, poor
reception of the wireless communications net-
work can result in the system changing from the
hands-free system to the mobile phone.
Operation by voice*
The concept
You can operate your mobile phone without
having to remove your hands from the steering
wheel. When making your entries, you will be
supported by announcements or questions in
many cases.
The same prerequisites as for operation via
iDrive apply, refer to page200.
Voice commands
Activating system
1.Briefly press the button on the steering
wheel.
An acoustic signal indicates that you can
say commands.
2.Say the command.
Ending/canceling operation by voice
Press the button on the steering wheel
or
In dialogs where text is spoken, not a command,
e.g. a name, canceling is only possible using the
button on the steering wheel.
Having possible commands read aloud
The system understands default commands
that must be spoken word for word.
You can have the possible commands spoken
by the system at any point:
Using alternative commands
There are often a number of commands to run a
function, e.g.:
The system recognizes digits from zero to nine.
You can say each digit individually or group
them into a sequence to accelerate the input.
{Cancel}.
{Help}.
{Dial name} or {Name}.