2008 BMW 528XI SEDAN warning light
[x] Cancel search: warning lightPage 103 of 288

Controls
101Reference
At a glance
Driving tips
Communications
Navigation
Entertainment
Mobility
wheel. Do not touch the individual components
immediately after the system has been trig-
gered, because there is a danger of burns.
In the event of malfunctions, deactivation, or
triggering of the airbag restraint system, have
the testing, repair, removal, and disposal of air-
bag generators executed only by a BMW center
or a workshop that works according to BMW
repair procedures with correspondingly trained
personnel and has the required explosives
licenses. Otherwise unprofessional attempts to
service the system could lead to failure in an
emergency or undesired airbag triggering,
either of which could result in personal injury.<
Warnings and information on the airbags is also
provided on the sun visors.
Automatic deactivation of front
passenger airbags
The occupation of the seat is detected by eval-
uating the impression on the occupied seat sur-
face of the front passenger seat. The front and
side airbags on the front passenger side are
activated or deactivated accordingly by the sys-
tem.
The current status of the front passenger
airbag, i.e. deactivated or activated, is
indicated by the indicator lamp over the interior
rearview mirror, refer to Operating state of front
passenger airbags in the following.<
Before transporting a child on the front
passenger seat, observe the safety infor-
mation and handling instructions under Trans-
porting children safely refer to page56.
The front and side airbags on the front passen-
ger side can be deactivated for teenagers and
adults in certain sitting positions; then the indi-
cator lamp for the front passenger airbags lights
up. In these cases, change the sitting position
so that the front passenger airbags are acti-
vated and the indicator lamp goes out. If the
desired status cannot be produced by changing
the sitting position, transport the correspond-
ing person on the rear seat. Do not fit seat cov-
ers, seat cushion padding, ball mats or other
items onto the front passenger seat unless they
are specifically recommended by BMW. Do not
lay objects under the seat which could press against the seat from below. Otherwise a cor-
rect evaluation of the occupied seat surface
cannot be ensured.<
Operating state of front passenger
airbags
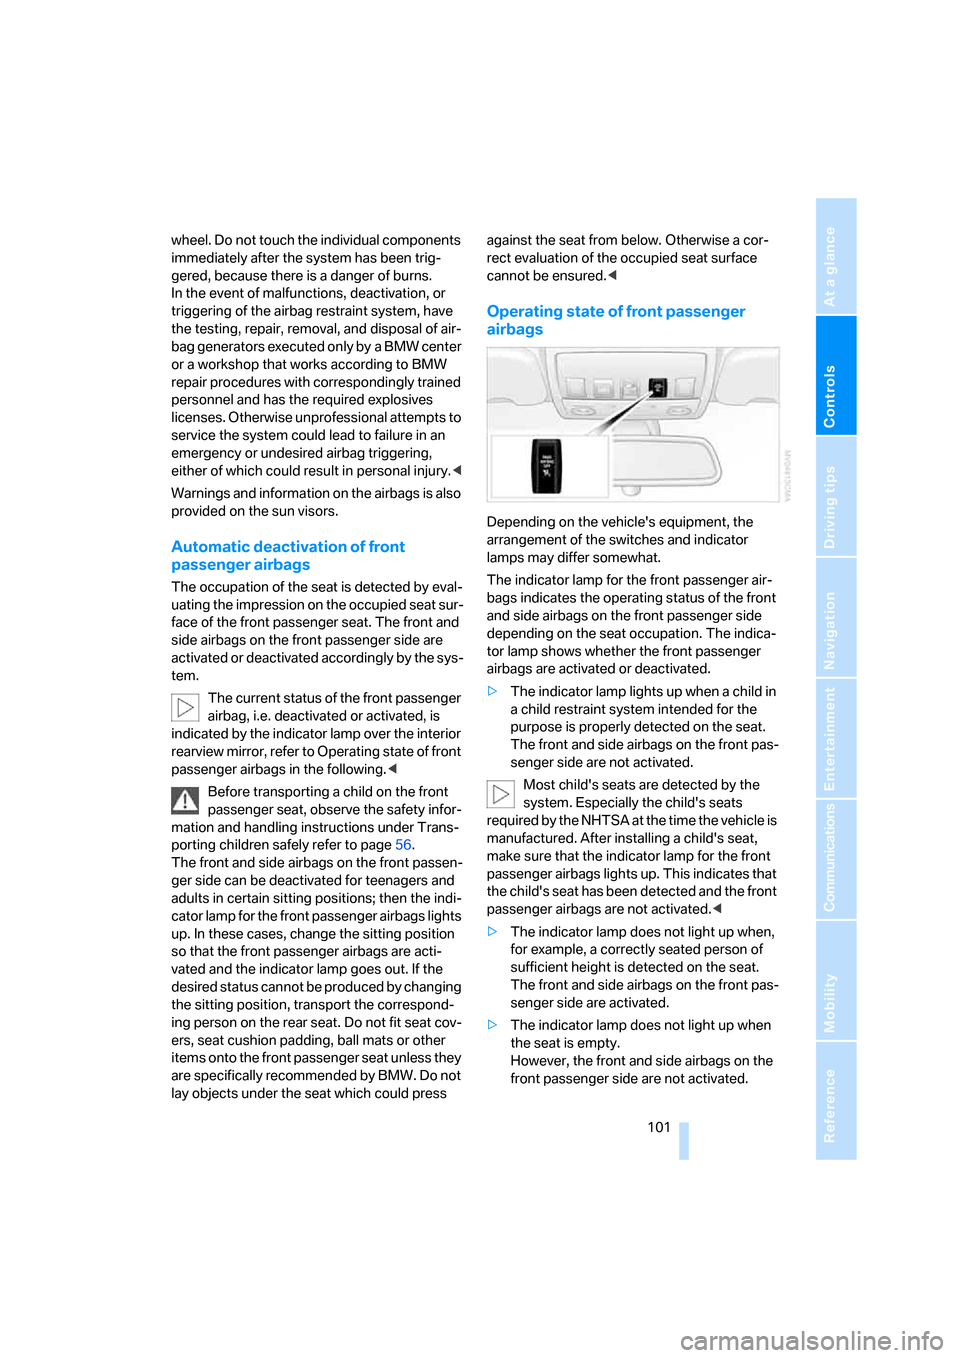
Depending on the vehicle's equipment, the
arrangement of the switches and indicator
lamps may differ somewhat.
The indicator lamp for the front passenger air-
bags indicates the operating status of the front
and side airbags on the front passenger side
depending on the seat occupation. The indica-
tor lamp shows whether the front passenger
airbags are activated or deactivated.
>The indicator lamp lights up when a child in
a child restraint system intended for the
purpose is properly detected on the seat.
The front and side airbags on the front pas-
senger side are not activated.
Most child's seats are detected by the
system. Especially the child's seats
required by the NHTSA at the time the vehicle is
manufactured. After installing a child's seat,
make sure that the indicator lamp for the front
passenger airbags lights up. This indicates that
the child's seat has been detected and the front
passenger airbags are not activated.<
>The indicator lamp does not light up when,
for example, a correctly seated person of
sufficient height is detected on the seat.
The front and side airbags on the front pas-
senger side are activated.
>The indicator lamp does not light up when
the seat is empty.
However, the front and side airbags on the
front passenger side are not activated.
Page 104 of 288

Technology for comfort, convenience and safety
102
Operational readiness of airbag system
From radio readiness, refer to page61, the
warning lamp lights up briefly, indicating the
operational readiness of the entire airbag sys-
tem and the safety belt tensioners.
Airbag system malfunction
>Warning lamp does not light up from radio
readiness.
>Warning lamp lights up continuously.
Have the airbag system checked immedi-
ately in case of a malfunction, otherwise
there is a danger that the airbag system may not
respond in the expected manner in an accident
despite an impact of corresponding intensity.<
Head-Up Display*
The concept
With the Head-Up Display important informa-
tion is projected into the driver's field of view,
e.g. navigation instructions. This enables you to
take in this information without looking away
from the road.
Switching on/off
Press the button.
1Navigation instructions
2Display
>Cruise control
>Active cruise control
>Leaving lane warning
3Speed
Selecting displays
iDrive, for operating principle refer to page16.
1.Press the button.
This opens the start menu.
2.Press the controller to open the menu.
3.Select "Settings" and press the controller.
Page 108 of 288

Technology for comfort, convenience and safety
106 3.Select the menu item and press the control-
ler:
>"Night Vision off":
Deactivate BMW Night Vision.
>"Zoom":
At higher speeds, the image is zoomed
in.
>"Curve mode":
Depending on the steering angle and
other parameters, the image sections
follows the course of the road to some
degree.
>"Full screen":
The image is shown on the entire Con-
trol Display.
>"Contrast":
The contrast of the screen can be
adjusted.
>"Brightness":
The brightness of the screen can be
adjusted.
"Curve mode" can only be activated with
the "Zoom" function switched on. With
"Full screen" activated, "Curve mode" and
"Zoom" cannot be selected.<
The settings are stored for the remote control
currently in use.
To exit the menu:
The image will automatically disappear after
approx. 5 seconds.
Cleaning camera
The function of the camera may be affected by
heavy rain and fog, dirt, snow or ice on the lens.
When this occurs, the displayed image on the
Control Display may become gray.To minimize icing, the camera lens is automati-
cally heated. However, it may be necessary to
clean the camera lens manually under severe
weather conditions. When doing so, cautiously
remove any debris, ice or snow. To avoid dam-
age to the lens, do not use sharp or abrasive
instruments to clean ice, snow, or dirt off the
lens.
When the windshield is cleaned with the head-
lamps on, the camera lens area is automatically
sprayed as well. Refer to page68.
Leaving lane warning*
The concept
This system warns you from a speed of approx.
40 mph/70 km/h when the vehicle is leaving the
lane you are currently in on roads with lane limit
lines. You feel this due to a slight vibration of the
steering wheel.
The system does not warn you if you signal
before leaving the lane.
It is best to use the system on well-developed
roads and freeways.
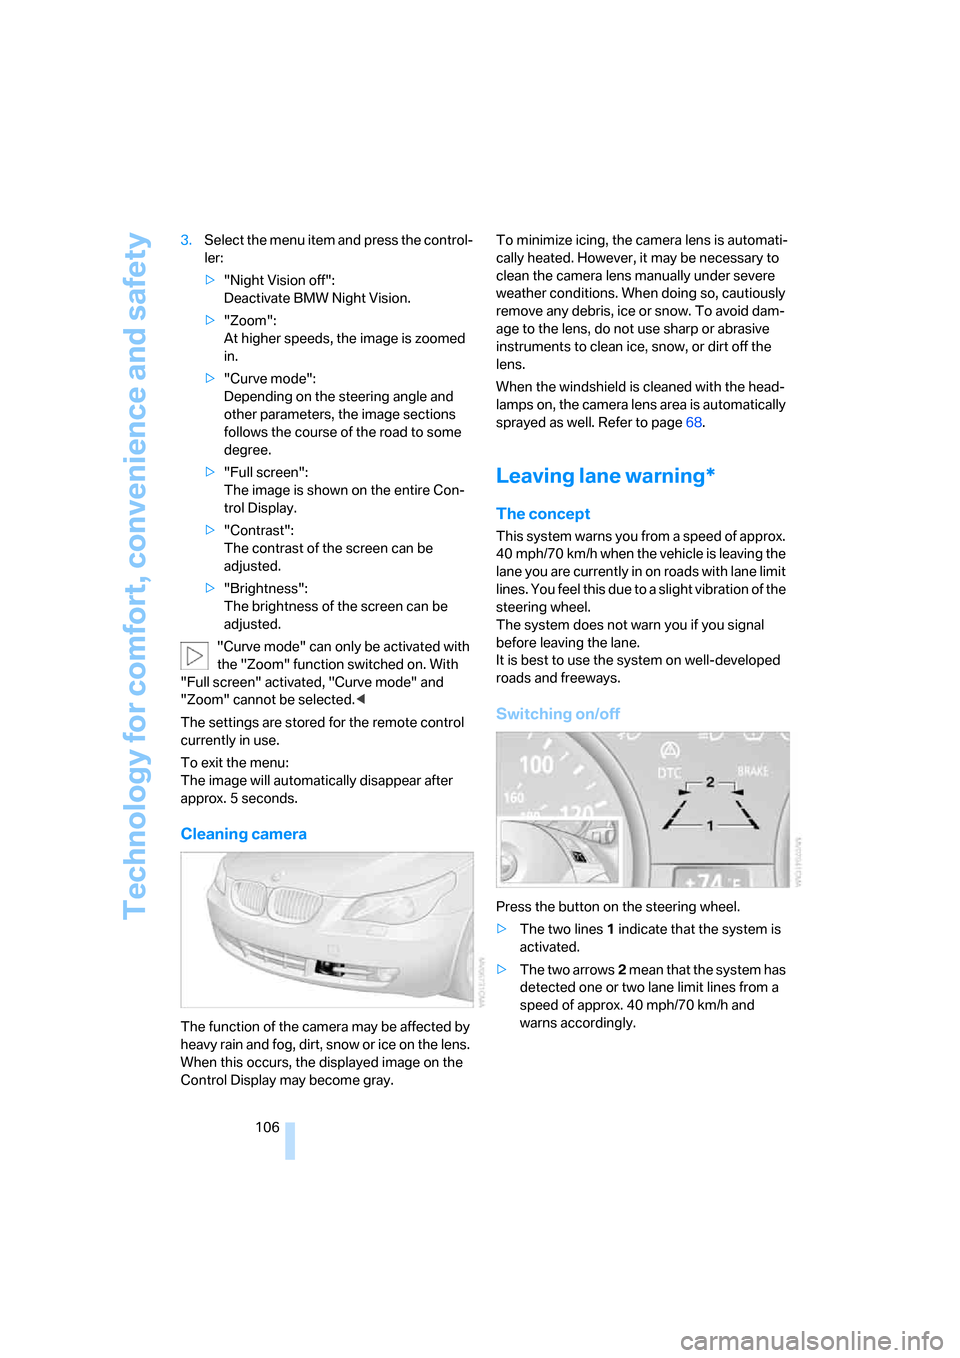
Switching on/off
Press the button on the steering wheel.
>The two lines1 indicate that the system is
activated.
>The two arrows2 mean that the system has
detected one or two lane limit lines from a
speed of approx. 40 mph/70 km/h and
warns accordingly.
Page 109 of 288

Controls
107Reference
At a glance
Driving tips
Communications
Navigation
Entertainment
Mobility
If you activate the system below a speed of
approx. 40 mph/70 km/h, a message will appear
stating that the system is not active until this
speed is reached.
A warning will be canceled:
>after approx. 3 seconds
>if you return to your lane
>if you brake heavily
>if you signal
System limits
The leaving lane warning cannot serve as
a substitute for your personal judgment in
determining the course of the road.
If the system issues a warning, do not move the
steering wheel with unnecessary severity, as
otherwise you could loose control of the vehi-
cle.<
The function of the system may be limited in the
following example situations:
>in heavy fog, rain or snowfall
>with worn-away, poorly visible limit lines, or
lines that run together or apart or are
unclear, e.g. in road construction areas
>when limit lines are covered by snow, ice,
dirt or a great deal of water
>in tight curves or on narrow roads
>when limit lines are not white
>when limit lines are covered by objects
>when driving up close behind a vehicle driv-
ing ahead
>with bright counter light
>when the windshield is fogged up, dirty or
covered with stickers, vignettes etc. in the
area of the inside rearview mirror
Page 238 of 288

Maintenance
236
Socket for OBD Onboard
Diagnostics interface
Components which are decisive for the
exhaust-gas composition can be checked via
the OBD socket with a device.
This socket is located to the left on the driver's
side, on the underside of the instrument panel
under a cover.
Exhaust-gas values
The warning lamp lights up. The
exhaust-gas values worsen. Have the
vehicle checked as soon as possible.
Display of the previously described
malfunction in Canadian models.
The lamp flashes under certain conditions. This
is a sign of excessive misfiring of the engine. In
this case you should reduce speed and drive to
the nearest BMW center as soon as possible.
Heavy engine misfiring causes serious damage
to the emission-relevant components, espe-
cially the catalytic converter, within a short time.
If the fuel filler cap is not properly tight-
ened, the OBD system will assume that
fuel vapor escapes. Then a display lights up. If
the cap is then tightened, the display will go out
within a few days.<
Event Data Recorders
Your vehicle may be equipped with one or sev-
eral measuring and diagnosis modules, or with
a device for recording or transmitting certain
vehicle data or information. If you have also sub-
scribed to BMW Assist, certain vehicle data can
be transmitted or recorded to enable corre-
sponding services.
Care
Important information on the care and mainte-
nance of your BMW is contained in the Caring
for your vehicle brochure.
Page 249 of 288

Mobility
247Reference
At a glance
Controls
Driving tips
Communications
Navigation
Entertainment
Giving and receiving assistance
Emergency request
Conditions for an emergency request:
>Full preparation package mobile phone.
With this equipment, an emergency request
is still possible when no mobile phone is
paired in the vehicle.
>BMW Assist is activated.
Activating BMW Assist, refer to page214.
>Radio readiness is activated.
>The BMW Assist system is logged on to a
mobile phone network.
>The emergency request system is opera-
ble.
Once your BMW Assist subscription expires,
the BMW Assist system can be deactivated by
a BMW center without you having to visit a
workshop. Once the BMW Assist system has
been deactivated, emergency requests are not
possible. The BMW Assist system can be reac-
tivated by a BMW center after signing a new
contract.
Initiating an emergency request
1.Briefly press protective cover to open.
Depending on the vehicle's equipment, the
arrangement of the switches and indicator
lamps may differ somewhat.
2.Press the SOS button for at least
2seconds.The LED in the button lights up. As soon as the
voice connection to the BMW Assist Response
Center has been established, the LED flashes.
Even if you are unable to answer, the BMW
Assist Response Center can take further steps
to help you under certain conditions.
If conditions allow, remain in the vehicle until
the connection has been established. You will
then be able to provide a detailed description of
the situation.
If the current position of your vehicle can be
determined, it will be transmitted to the BMW
Assist Response Center.
If the LED is flashing but the BMW Assist
Response Center cannot be heard over the
hands-free system, it is possible that the
hands-free system is malfunctioning. You may
still be heard by the BMW Assist Response
Center, however.
Under certain conditions, an emergency
request is automatically initiated immediately
after a severe accident. The automatic collision
notification is not affected by the button being
pressed.
For technical reasons, the emergency request
cannot be guaranteed under unfavorable condi-
tions.
You can also use other services of
BMW Assist with this button, refer to
page209.<
Warning triangle*
The warning triangle is located in the luggage
compartment lid/tailgate.
Page 252 of 288

Giving and receiving assistance
250 Sedan:
It is located in the toolkit in the luggage com-
partment lid, refer to page237.
Sports Wagon:
It is located in the toolkit behind the left side
panel in the cargo bay, refer to page237.
Use only the tow fitting provided with the
vehicle and screw it all the way in. Use the
tow fitting for towing only on roads. Avoid lateral
loading of the tow fitting, e.g. do not lift the vehi-
cle by the tow fitting. Otherwise damage to the
tow fitting and the vehicle can occur.<
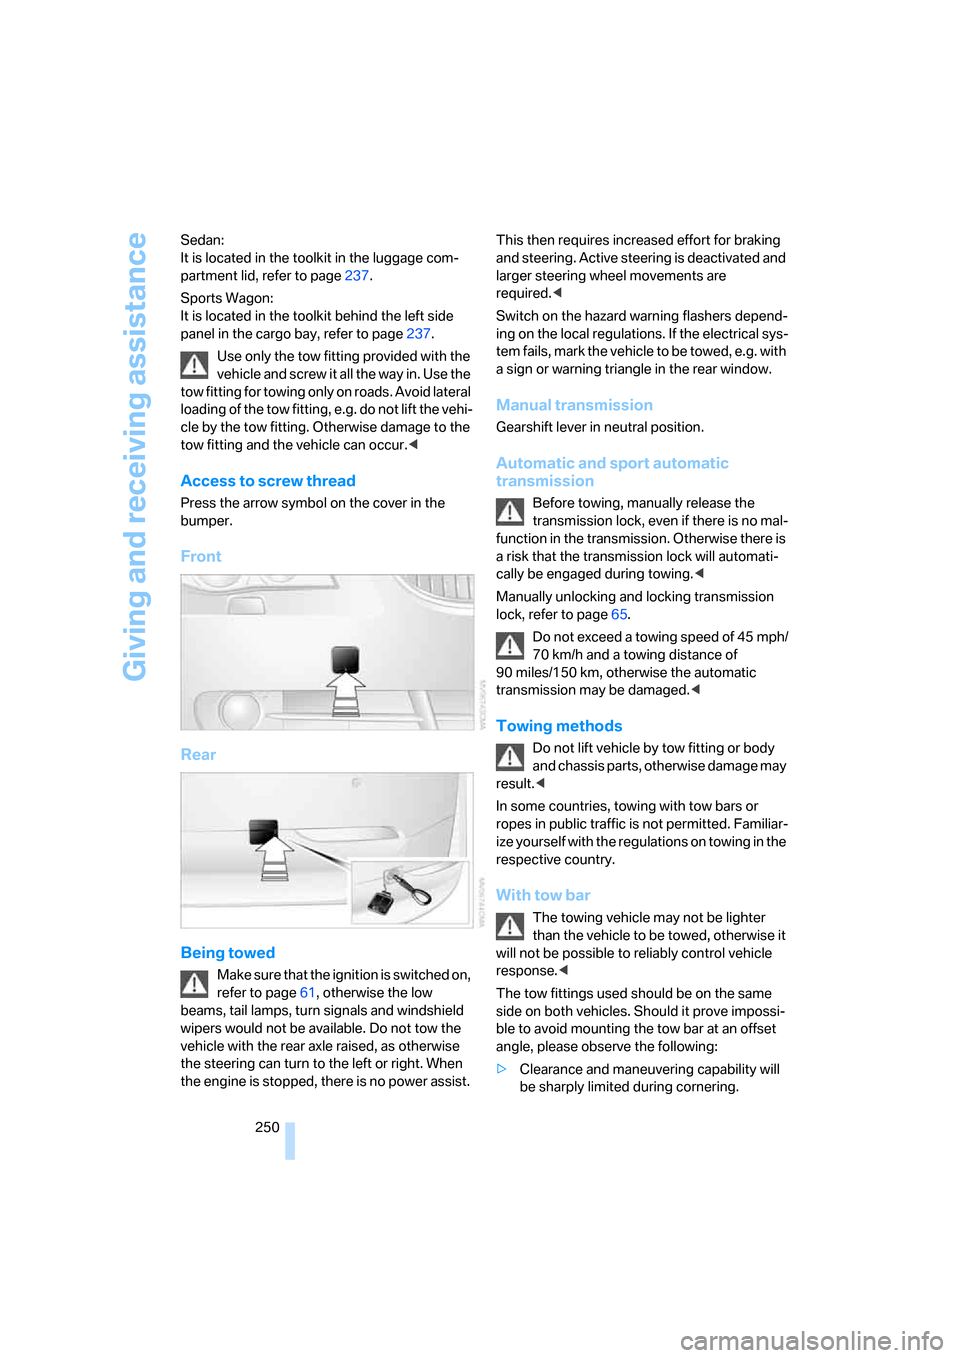
Access to screw thread
Press the arrow symbol on the cover in the
bumper.
Front
Rear
Being towed
Make sure that the ignition is switched on,
refer to page61, otherwise the low
beams, tail lamps, turn signals and windshield
wipers would not be available. Do not tow the
vehicle with the rear axle raised, as otherwise
the steering can turn to the left or right. When
the engine is stopped, there is no power assist. This then requires increased effort for braking
and steering. Active steering is deactivated and
larger steering wheel movements are
required.<
Switch on the hazard warning flashers depend-
ing on the local regulations. If the electrical sys-
tem fails, mark the vehicle to be towed, e.g. with
a sign or warning triangle in the rear window.
Manual transmission
Gearshift lever in neutral position.
Automatic and sport automatic
transmission
Before towing, manually release the
transmission lock, even if there is no mal-
function in the transmission. Otherwise there is
a risk that the transmission lock will automati-
cally be engaged during towing.<
Manually unlocking and locking transmission
lock, refer to page65.
Do not exceed a towing speed of 45 mph/
70 km/h and a towing distance of
90 miles/150 km, otherwise the automatic
transmission may be damaged.<
Towing methods
Do not lift vehicle by tow fitting or body
and chassis parts, otherwise damage may
result.<
In some countries, towing with tow bars or
ropes in public traffic is not permitted. Familiar-
ize yourself with the regulations on towing in the
respective country.
With tow bar
The towing vehicle may not be lighter
than the vehicle to be towed, otherwise it
will not be possible to reliably control vehicle
response.<
The tow fittings used should be on the same
side on both vehicles. Should it prove impossi-
ble to avoid mounting the tow bar at an offset
angle, please observe the following:
>Clearance and maneuvering capability will
be sharply limited during cornering.
Page 266 of 288

Everything from A to Z
264
Everything from A to Z
Index
"..." Identifies Control Display
texts used to select
individual functions, and
indicates where to find them
in the text.
A
ABS Antilock Brake
System91
– indicator lamp94
ACC, refer to Active cruise
control70
Accepted calls202
Accessories6
Accident, refer to Emergency
request247
Acoustic signal, refer to Check
Control83
Activated-charcoal filter for
automatic climate
control118
"Activation time" for parked-
car ventilation119
Active cruise control70
– indicator lamp74
– radar sensors74
– selecting distance72
– warning lamps74
Active front head restraints49
Active seat52
Active seat ventilation52
Active steering99
– warning lamp100
Adapter for spare key28
Adaptive brake assistant92
Adaptive brake lamps, refer to
Brake force display100
Adaptive Head Light110
"Add digits" for mobile
phone202Additives
– coolant233
– engine oil, refer to Approved
engine oils233
"Address book" for navigation
system151
Address for navigation
– deleting153
– entering144,147
– selecting152
– storing151
– storing current position152
"Add to address book"151
"Add to destination
list"147,148
Adjusting active backrest
width47
Adjusting interior
temperature115
Adjusting the tone during
audio operation, refer to
Tone control169
Adjusting thigh support46
"After door opened"48
"After unlocking"48
Airbags100
– indicator/warning lamp102
– indicator lamp for front
passenger airbags101
– sitting safely45
Air distribution
– automatic115
– manual116
Airing, refer to Ventilation118
Air recirculation
– AUC Automatic
recirculated-air control117
– recirculated-air mode117
"Air recirculation on / off"55
Air supply, automatic climate
control114
Air volume116AKI, refer to Fuel quality219
Alarm system37
– avoiding unintentional
alarms38
– interior motion sensor38
– switching off alarm37
– switching off tilt alarm
sensor and interior motion
sensor38
– tilt alarm sensor38
"All channels"180
"All doors"30
All-season tires, refer to
Winter tires228
"All stations", calling up with
radio172,176
All-wheel drive, refer to
xDrive93
Alterations, technical, refer to
For your own safety5
Altering stretch of road160
"AM", reception
range169,172
Antenna, refer to Caring for
your vehicle brochure
Antenna for mobile phone194
Antifreeze
– coolant233
– washer fluid69
Antilock Brake System
ABS91
Anti-theft alarm system, refer
to Alarm system37
Anti-theft system, refer to
Central locking system29
Approved axle loads, refer to
Weights257
Approved engine oils233
Approved gross vehicle
weight, refer to Weights257
Armrest, refer to Center
armrest, rear127