2008 BMW 528I buttons
[x] Cancel search: buttonsPage 42 of 288

Opening and closing
40
Malfunction
The comfort access function may malfunction
due to local radio waves. Then open or close the
vehicle with the buttons on the remote control
or with a key. To start the engine following this,
insert the remote control in the ignition lock.
When unlocking or locking/comfort closing do
not simultaneously grasp the door handle and
touch the surfaces, arrow2 or 3. Otherwise, you
may limit the function.
Replacing battery
If the battery of the remote control is dead, a
message will appear in the Control Display.
1.Remove integrated key from remote con-
trol, refer to page28.
2.Remove cover.
3.Lay in new battery with positive side facing
upward.
4.Press cover closed.
Return used battery to a recycling collec-
tion point or to your BMW center.<
Windows
To prevent injuries, exercise care when
closing the windows and keep them in
your field of vision until they are shut.
Always take along the remote control when you
leave the vehicle, otherwise children could, for
example, operate the windows and injure them-
selves.<
Opening, closing
>Press switch to resistance point:
The window continues to open as long as
you keep the switch pressed.
>Press switch beyond resistance point:
The window opens automatically. Pressing
the switch again stops the opening move-
ment.
You can close the windows in the same manner
by pulling the switch.
Separate switches for the rear windows are
located in the rear.
For information on using the convenient opera-
tion at the door lock or with the remote control,
refer to page30 or32.
For information on comfort closing with comfort
access, refer to page39.
After switching off ignition
You can still operate the windows with the
remote control removed or the ignition
switched off for approx. 1 minute, as long as
neither of the front doors has been opened.
Page 50 of 288

Adjusting
48 The adjustment of the lumbar support is not
stored in the memory.
Storing
1.Switch on radio readiness or ignition, refer
to page61.
2.Set the desired seat, exterior mirror and
steering wheel positions.
3.Press the button:
The LED in the button lights up.
4.Press the desired memory button1 or2:
The LED goes out.
Requesting
Do not request a position from the mem-
ory while the vehicle is moving. There is a
risk of accident from unexpected movement of
the seat or steering wheel.<
Comfort mode
1.Open the driver's door after unlocking or
switch on radio readiness.
2.Briefly press the desired memory button1
or2.
The system cancels the adjustment procedure
when you briefly press one of the seat adjust-
ment switches or one of the memory buttons.
Safety feature
1.Close the driver's door and switch the igni-
tion on or off.
2.Press the desired memory button1 or2
and maintain pressure until the adjustment
process has been completed.
If the button was pressed inadvertently:
press the button again; the LED goes out.
Requesting with remote control
The last positions of the driver's seat, the exte-
rior rearview mirrors, and steering wheel are
stored for the remote control currently in use.
You can choose when the position is requested:
>Request when unlocking vehicle
>Request when opening driver's doorWhen using this feature, always make
sure that the footwell behind the driver's
seat is empty and unobstructed. Failure to do
so could cause injury to persons or damage to
objects behind the seat as a result of a rearward
movement of the seat.<
The system cancels the adjustment procedure
when you briefly press one of the seat adjust-
ment switches or one of the memory buttons.
iDrive, for operating principle refer to page16.
1.Open the start menu.
2.Press the controller to open the menu.
3.Select "Settings" and press the controller.
4.Select "Vehicle / Tires" and press the con-
troller.
5.Change to upper field if necessary. Turn the
controller until "Door locks" is selected and
press the controller.
6.Select "Central locking" and press the con-
troller.
7.Select "Last seat pos." and press the con-
troller.
8.Select "After unlocking" or "After door
opened".
9.Press the controller.
Page 53 of 288

Controls
51Reference
At a glance
Driving tips
Communications
Navigation
Entertainment
Mobility
the word CENTER is intended exclusively for
use by passengers riding in the center position.
Damage to safety belts
When subjected to strain due to an acci-
dent or in the event of damage, replace
the safety belts, the belt tensioners, and any
child restraint systems and have the belt anchor
points checked. Only have this work carried out
at a BMW center or at a workshop that works
according to BMW repair procedures with cor-
respondingly trained personnel. Otherwise cor-
rect operation of this safety equipment is not
guaranteed.<
Seat heating*
Front
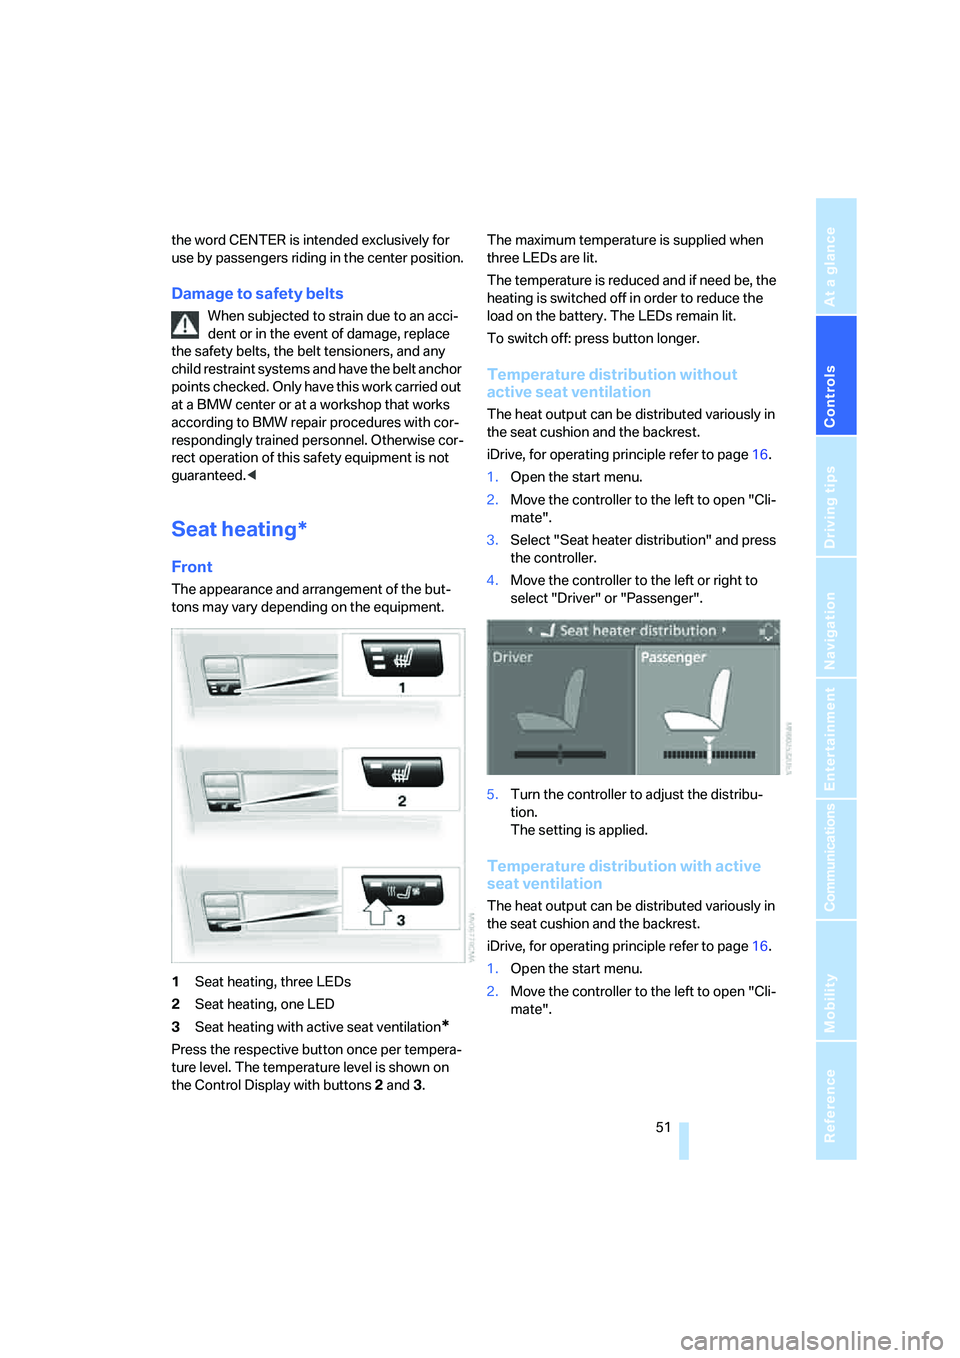
The appearance and arrangement of the but-
tons may vary depending on the equipment.
1Seat heating, three LEDs
2Seat heating, one LED
3Seat heating with active seat ventilation
*
Press the respective button once per tempera-
ture level. The temperature level is shown on
the Control Display with buttons2 and3. The maximum temperature is supplied when
three LEDs are lit.
The temperature is reduced and if need be, the
heating is switched off in order to reduce the
load on the battery. The LEDs remain lit.
To switch off: press button longer.
Temperature distribution without
active seat ventilation
The heat output can be distributed variously in
the seat cushion and the backrest.
iDrive, for operating principle refer to page16.
1.Open the start menu.
2.Move the controller to the left to open "Cli-
mate".
3.Select "Seat heater distribution" and press
the controller.
4.Move the controller to the left or right to
select "Driver" or "Passenger".
5.Turn the controller to adjust the distribu-
tion.
The setting is applied.
Temperature distribution with active
seat ventilation
The heat output can be distributed variously in
the seat cushion and the backrest.
iDrive, for operating principle refer to page16.
1.Open the start menu.
2.Move the controller to the left to open "Cli-
mate".
Page 56 of 288

Adjusting
54
Interior and exterior mirrors,
automatic dimming feature*
This feature is controlled by two photocells in
the interior rearview mirror. One is integrated
into the glass of the mirror, while the other is
located at an offset position on the rear of the
mirror housing.
For trouble-free operation, keep the photocells
clean and do not cover the area between the
interior rearview mirror and the windshield. Do
not attach stickers of any kind to the windshield
in front of the mirror, either.
Steering wheel
Adjusting
Do not adjust the steering wheel while the
vehicle is moving. There is a risk of acci-
dent as the result of unexpected movement.<
The steering wheel can be adjusted in four
directions.
Storing steering wheel positions, refer to Seat,
mirror and steering wheel memory on page47.
Easy entry/exit*
To facilitate entry and exit, the steering wheel
temporarily moves into the uppermost position.
Steering wheel heating*
Press the button.
When the steering wheel heater is operating,
the LED in the button lights up.
Programmable buttons* on steering
wheel
You can program the buttons individually.
The setting is stored for the remote control cur-
rently in use.
iDrive, for operating principle refer to page16.
1.Press the button.
This opens the start menu.
2.Press the controller to open the menu.
Page 57 of 288

Controls
55Reference
At a glance
Driving tips
Communications
Navigation
Entertainment
Mobility
3.Select "Settings" and press the controller.
4.Select "Steering wheel buttons" and press
the controller.
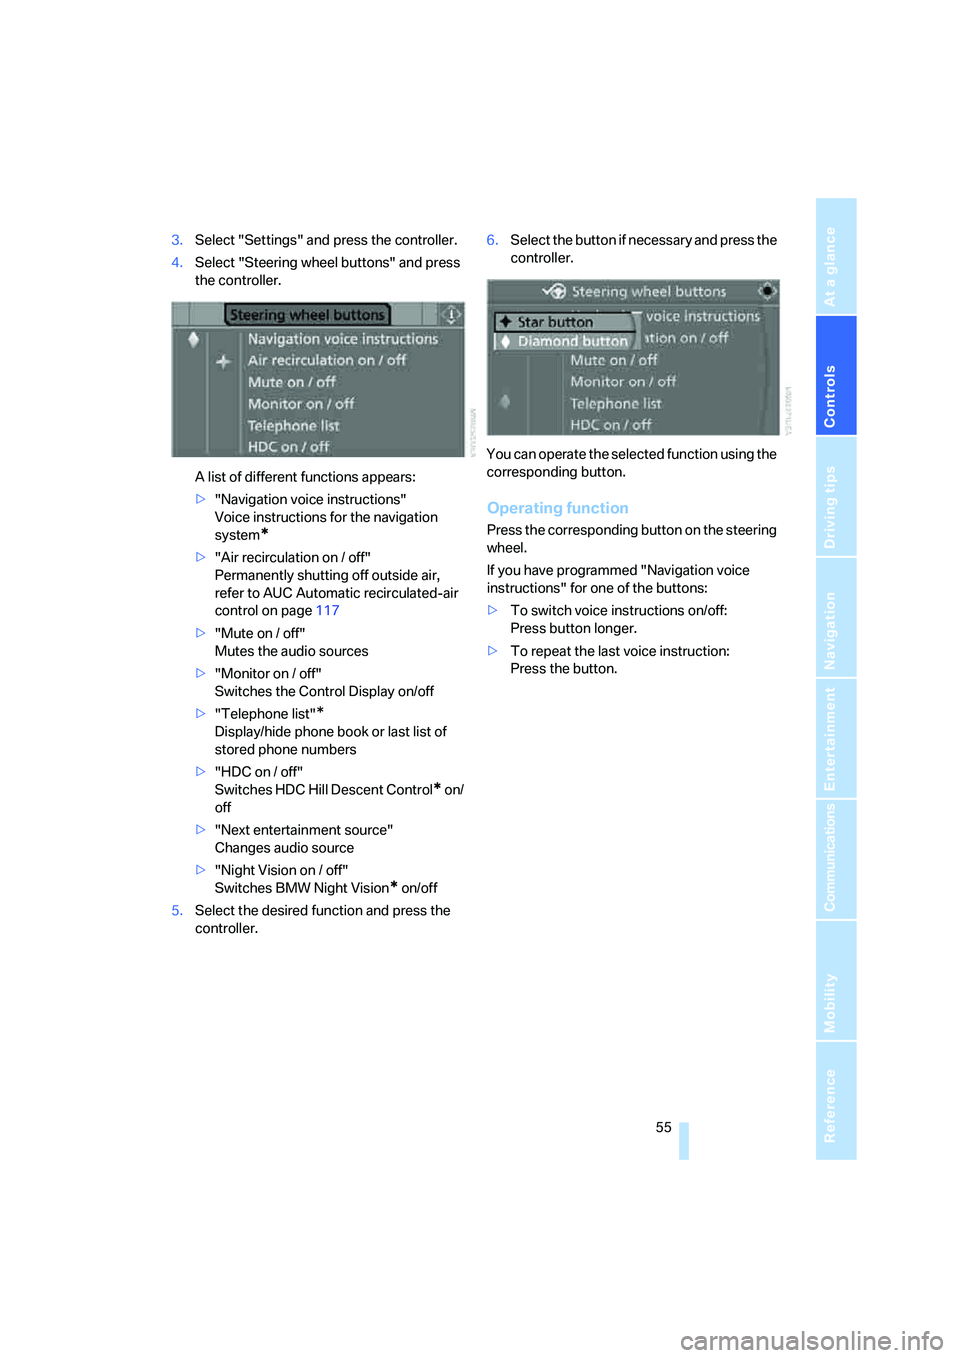
A list of different functions appears:
>"Navigation voice instructions"
Voice instructions for the navigation
system
*
>"Air recirculation on / off"
Permanently shutting off outside air,
refer to AUC Automatic recirculated-air
control on page117
>"Mute on / off"
Mutes the audio sources
>"Monitor on / off"
Switches the Control Display on/off
>"Telephone list"
*
Display/hide phone book or last list of
stored phone numbers
>"HDC on / off"
Switches HDC Hill Descent Control
* on/
off
>"Next entertainment source"
Changes audio source
>"Night Vision on / off"
Switches BMW Night Vision
* on/off
5.Select the desired function and press the
controller.6.Select the button if necessary and press the
controller.
You can operate the selected function using the
corresponding button.
Operating function
Press the corresponding button on the steering
wheel.
If you have programmed "Navigation voice
instructions" for one of the buttons:
>To switch voice instructions on/off:
Press button longer.
>To repeat the last voice instruction:
Press the button.
Page 95 of 288

Controls
93Reference
At a glance
Driving tips
Communications
Navigation
Entertainment
Mobility
For better control
The indicator lamp flashes:
DTC controls the drive forces and
brake forces.
The indicator lamp lights up:
DTC is activated.
Deactivating DTC
Press the button again; the DTC indicator lamp
in the instrument cluster goes out.
xDrive on 528xi, 535xi
xDrive is the 4-wheel drive system of your
BMW. The combined effects of xDrive and DSC
further optimize the traction and dynamic driv-
ing characteristics. The 4-wheel drive system
xDrive variably distributes the drive torque to
the front and rear axle depending on the driving
situation and prevailing road conditions.
HDC Hill Descent Control on 528xi,
535xi
The concept
HDC is a system for driving downhill in steep
terrain. This system reduces vehicle speed on
steep downhill gradients, thus allowing you to
maintain even better control of your BMW
under these conditions. The vehicle moves at
approximately twice walking speed without
active intervention from the driver.
HDC is available for activation at vehicle speeds
below approx. 22 mph/35 km/h. When driving
down steep hills with a speed below approx.
22 mph/35 km/h, the vehicle reduces speed
automatically down to approximately double
walking speed, approx. 7 mph/12 km/h, and
then maintains this speed at a constant.
You can use the accelerator or brakes to vary
this automatically controlled speed within a
range extending from approx. 3 mph/5 km/h to
15 mph/25 km/h.
You can specify a target speed within the same
range by using the lever of the cruise control
*.
Activating HDC
You can activate HDC:
>with the programmable buttons on the
steering wheel, refer to page54
>using iDrive
iDrive, for operating principle refer to page16.
1.Press the button.
This opens the start menu.
2.Press the controller to open the menu.
3.Select "Settings" and press the controller.
4.Select "Vehicle / Tires" and press the con-
troller.
5.Change to upper field if necessary. Turn the
controller until "HDC" is selected and press
the controller.
6.Select "HDC on" and press the controller.
HDC is shown in the instrument cluster.
If the vehicle is automatically braked, a message
is displayed on the Control Display for approx.
20 seconds.
Deactivating HDC
When you use the programmable buttons on
the steering wheel or via iDrive, the HDC display
goes out.
HDC is automatically deactivated in the follow-
ing situations:
>Above approx. 37 mph/60 km/h
>After switching off the ignition
Using HDC
Manual transmission:
Use HDC in low gears and reverse gear.
Page 107 of 288

Controls
105Reference
At a glance
Driving tips
Communications
Navigation
Entertainment
Mobility
>in dense fog, heavy rain or snowfall
>when displaying very hot objects such as
transformers, car exhausts etc.
>when the image briefly freezes during nor-
mal system adjustment.
BMW Night Vision's potential benefits
can be limited by the driving style of the
driver, the size and relative temperature of the
detected objects, dirt or contamination on the
camera lens, adverse weather like snow, rain or
fog, and other factors not mentioned here. It will
always be the driver's responsibility to drive at a
speed and in a manner that recognizes potential
hazards and adjust accordingly.
BMW Night Vision is not a substitute or replace-
ment for the driver's responsibility to adapt to
visibility and traffic conditions. The forward view
illuminated by the headlamps must always be
the basis for making safe driving decisions, oth-
erwise a safety risk will result.<
Activating BMW Night Vision
1.Turn the light switch to position2 or3, refer
to page108.
2.With low beams switched on:
>Press the button. Depending on the
vehicle's equipment, the location of the
button may differ somewhat.
>Press one of the programmable buttons
on the steering wheel, refer to page54.
The image will be displayed on the Control Dis-
play after a few seconds. Depending on the last
mode selected, either the normal or full screen
image will be displayed.Due to the system's need to adjust periodically,
a still image is displayed at certain intervals for
fractions of a second. This is normal and not an
indication of a problem.
To prevent driving without headlamps, at a
speed of more than approx. 3 mph/5 km/h and
when dark, the thermal image on the Control
Display is only shown when the low beams are
on.
Deactivating BMW Night Vision
>Press the button.
>Press the button on the steering wheel.
>Press the button.
>Via iDrive, refer to Selecting settings.
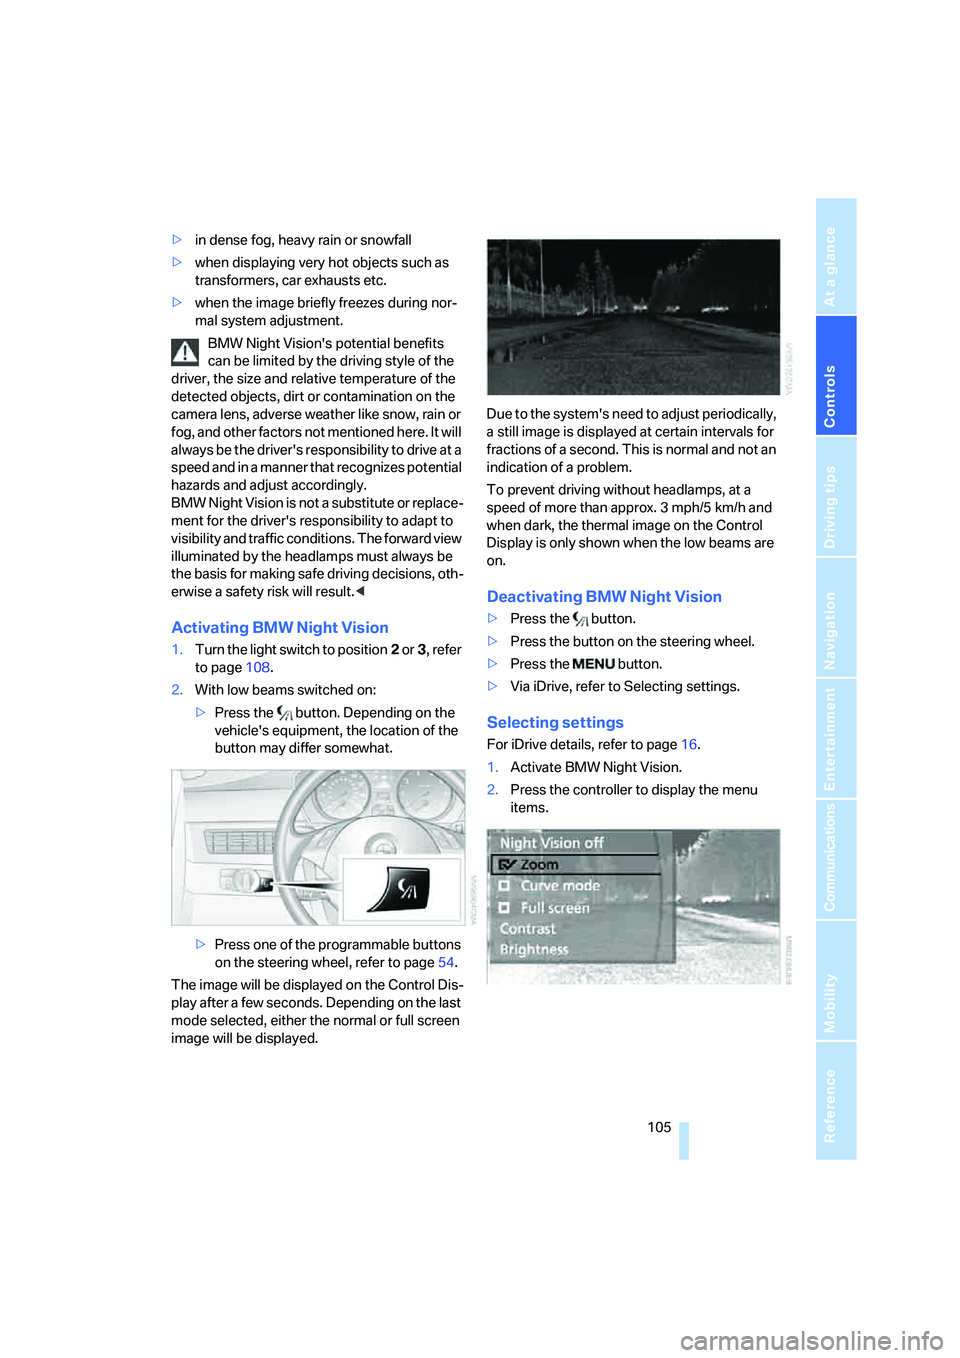
Selecting settings
For iDrive details, refer to page16.
1.Activate BMW Night Vision.
2.Press the controller to display the menu
items.
Page 123 of 288

Controls
121Reference
At a glance
Driving tips
Communications
Navigation
Entertainment
Mobility
Practical interior accessories
Integrated universal remote
control*
The concept
The integrated universal remote control can
replace as many as three hand-held transmit-
ters for various remote-controlled accessories,
such as garage and gate or lighting systems.
The integrated universal remote control regis-
ters and stores signals from the original hand-
held transmitters.
The signal of an original hand-held transmitter
can be programmed on one of the three mem-
ory buttons1. After this, the programmed
memory button1 will operate the system in
question. The LED2 flashes to confirm trans-
mission of the signal.
Should you sell your vehicle one day, be sure to
delete the stored programs beforehand for your
safety, refer to page122.
To prevent possible damage or injury,
before programming or using the inte-
grated universal remote control, always inspect
the immediate area to make certain that no peo-
ple, animals or objects are within the travel
range of the device. Also, comply with the
safety precautions of the original hand-held
transmitter.<
Checking compatibility
If you see this symbol on the packaging
or in the manual supplied with the orig-
inal hand-held transmitter, it is safe to
assume that it is compatible with the integrated
universal remote control.
If you have additional questions, please
contact your BMW center or call:
1-800-355-3515.
Information is also provided on the Internet at:
www.bmwusa.com or
www.homelink.com.
HomeLink is a registered trademark of Johnson
Controls, Inc.<
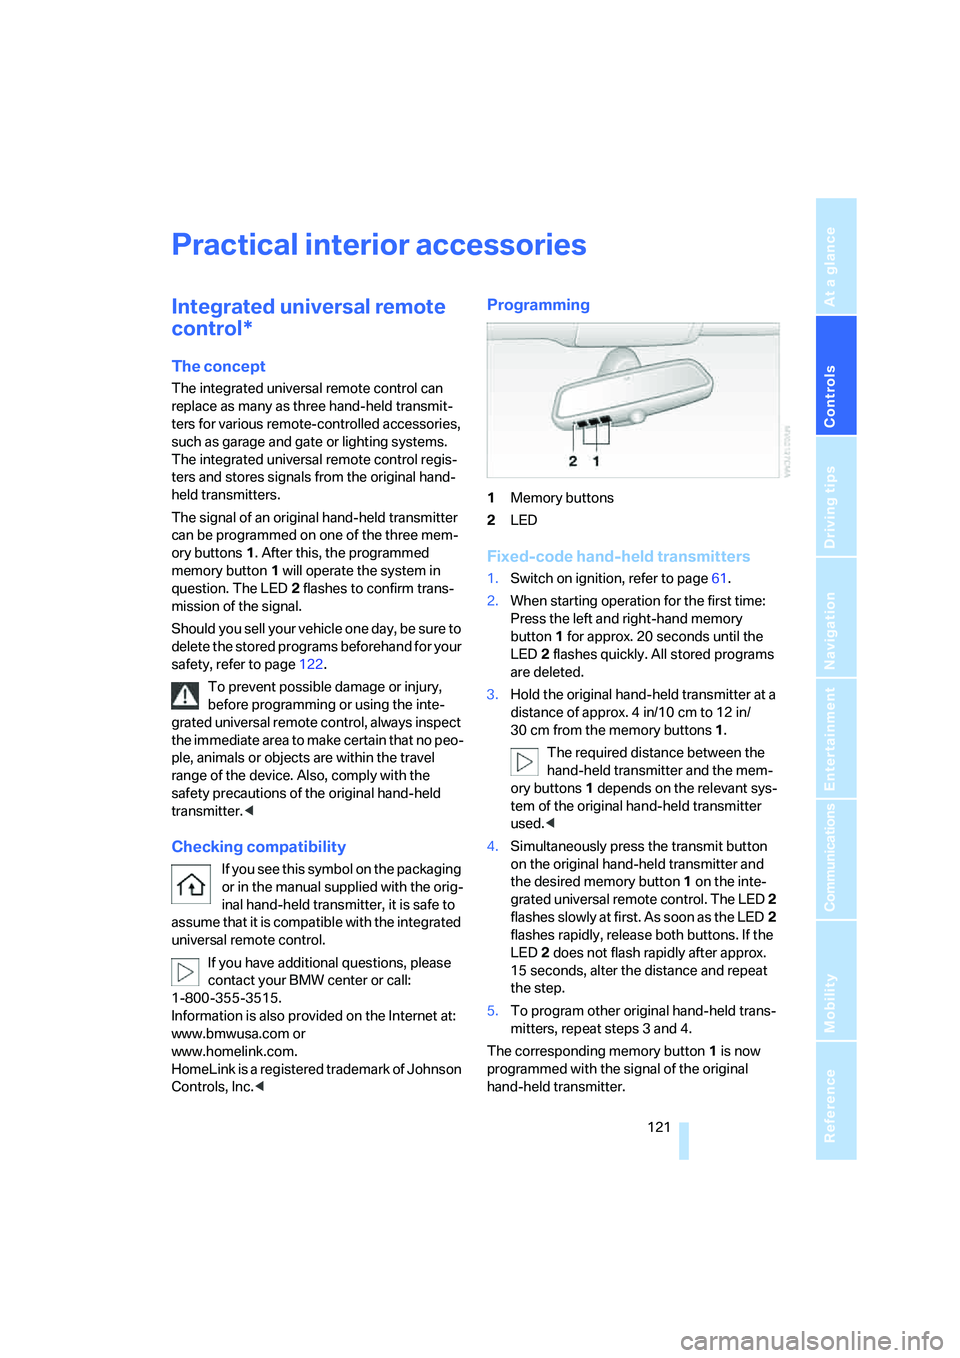
Programming
1Memory buttons
2LED
Fixed-code hand-held transmitters
1.Switch on ignition, refer to page61.
2.When starting operation for the first time:
Press the left and right-hand memory
button1 for approx. 20 seconds until the
LED2 flashes quickly. All stored programs
are deleted.
3.Hold the original hand-held transmitter at a
distance of approx. 4 in/10 cm to 12 in/
30 cm from the memory buttons1.
The required distance between the
hand-held transmitter and the mem-
ory buttons1 depends on the relevant sys-
tem of the original hand-held transmitter
used.<
4.Simultaneously press the transmit button
on the original hand-held transmitter and
the desired memory button 1 on the inte-
grated universal remote control. The LED 2
flashes slowly at first. As soon as the LED2
flashes rapidly, release both buttons. If the
LED2 does not flash rapidly after approx.
15 seconds, alter the distance and repeat
the step.
5.To program other original hand-held trans-
mitters, repeat steps 3 and 4.
The corresponding memory button 1 is now
programmed with the signal of the original
hand-held transmitter.