2008 BMW 328I SEDAN radio
[x] Cancel search: radioPage 158 of 274

On/off and settings
156
On/off and settings
The following audio sources have shared con-
trols and setting options:
>Radio
>CD player
>CD changer
*
Controls
The audio sources can be operated using:
>Buttons near the CD player
>iDrive
>Buttons
on the steering wheel, refer to
page11
>Programmable memory keys, refer to
page21
Buttons on the CD player
1Sound output for entertainment on/off, vol-
ume
>Press: switch on/off.
When you switch on the unit, the last set
radio station or track is played.
>Turn: adjust volume.
2Drive for audio CDs
3 Eject CD.
4 Station scan/track search
>Change radio station.
>Select track for CD player and CD
changer.
5Drive for navigation DVD
Operation via iDrive
iDrive, for operating principle refer to page16.
1.Press the button.
This opens the start menu.
2.Move the controller backwards to call up
"Entertainment".
You have the following choices:
>"FM" and "AM": radio reception
>"SAT": satellite radio
*
>"CD": CD player or changer
>"AUX": AUX-In port, USB-audio interface
>"Set": depending on the audio source,
other adjustments can be made, e.g. with
the radio: update station with strongest
reception, store station, tone control, sam-
ple stations.
From another menu, you can switch
directly to the screen last displayed, refer
to Convenient call-up of menu items on
page18.<
With the ignition at radio readiness or beyond,
the selected audio source is stored for the
remote control currently in use.
Switching on/off
In order to switch the entertainment sound out-
put on and off:
Press button1 on the CD player.
This symbol on the Control Display indi-
cates that sound output is switched off.
Page 159 of 274
Navigation
Entertainment
Driving tips
157Reference
At a glance
Controls
Communications
Mobility
Adjusting volume
Turn knob1 on the CD player until the desired
volume is obtained.
You can also adjust the volume with buttons on
the steering wheel, refer to page11.
With the ignition at radio readiness or beyond,
the setting is stored for the remote control cur-
rently in use.
Tone control
You can alter various tone settings, e.g. treble
and bass or the speed-dependent volume
increase.
The tone settings are applied to all audio
sources.
With the ignition at radio readiness or beyond,
the settings are stored for the remote control
currently in use.
Changing tone settings
1.Press the button.
This opens the start menu.
2.Press the controller to open the menu.
3.Turn the controller until "Settings" is
selected and press the controller.
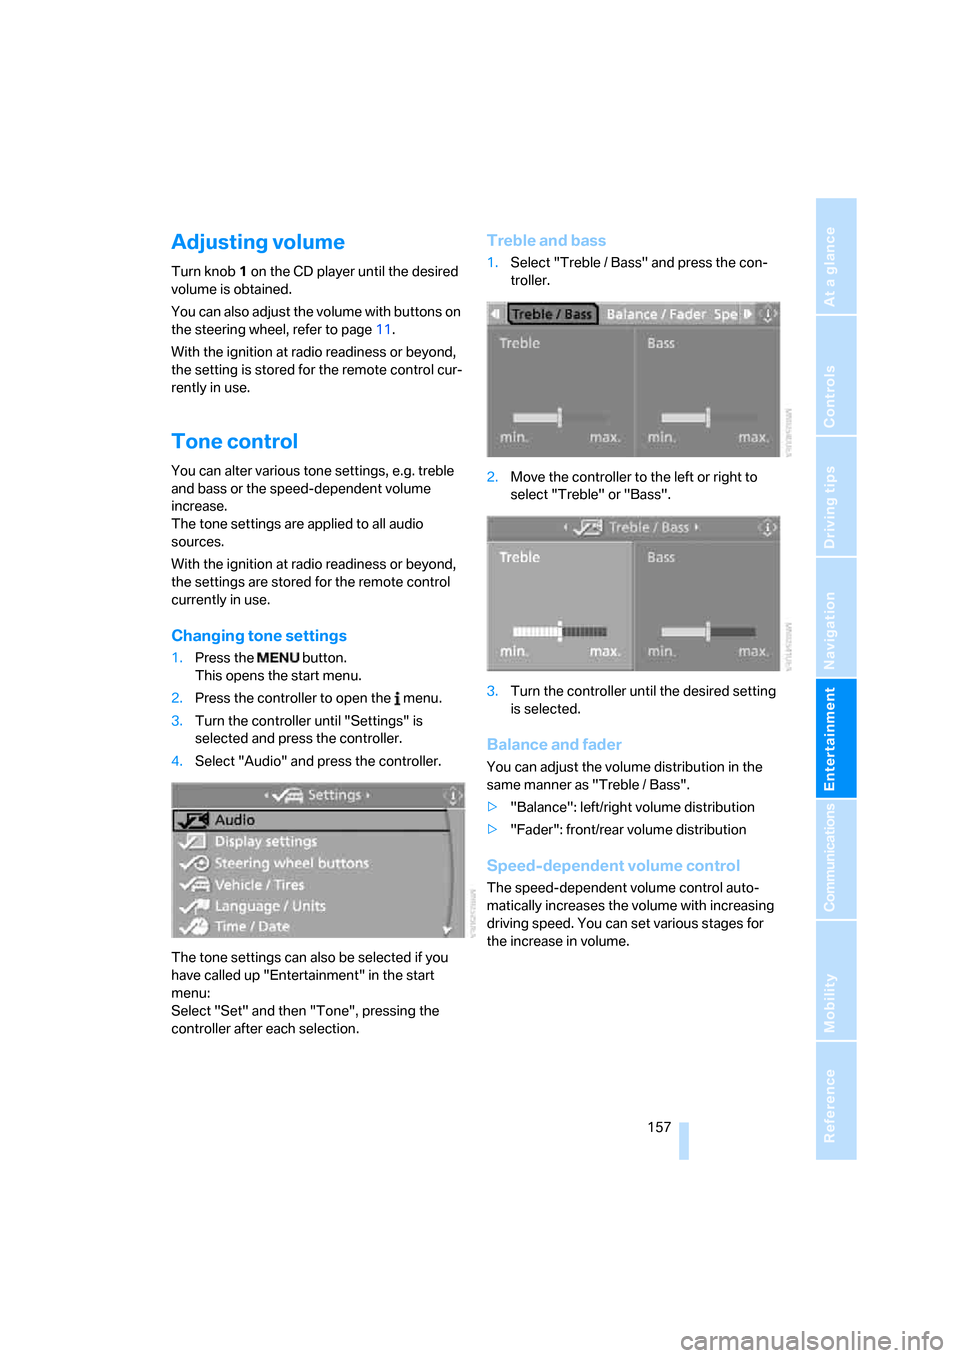
4.Select "Audio" and press the controller.
The tone settings can also be selected if you
have called up "Entertainment" in the start
menu:
Select "Set" and then "Tone", pressing the
controller after each selection.
Treble and bass
1.Select "Treble / Bass" and press the con-
troller.
2.Move the controller to the left or right to
select "Treble" or "Bass".
3.Turn the controller until the desired setting
is selected.
Balance and fader
You can adjust the volume distribution in the
same manner as "Treble / Bass".
>"Balance": left/right volume distribution
>"Fader": front/rear volume distribution
Speed-dependent volume control
The speed-dependent volume control auto-
matically increases the volume with increasing
driving speed. You can set various stages for
the increase in volume.
Page 162 of 274
Radio
160
Radio
Your radio provides reception of the FM and AM
wavebands.
Listening to the radio
Press the button if the sound output is switched
off.
iDrive, for operating principle refer to page16.
1.Press the button.
This opens the start menu.
2.Move the controller backwards to call up
"Entertainment".
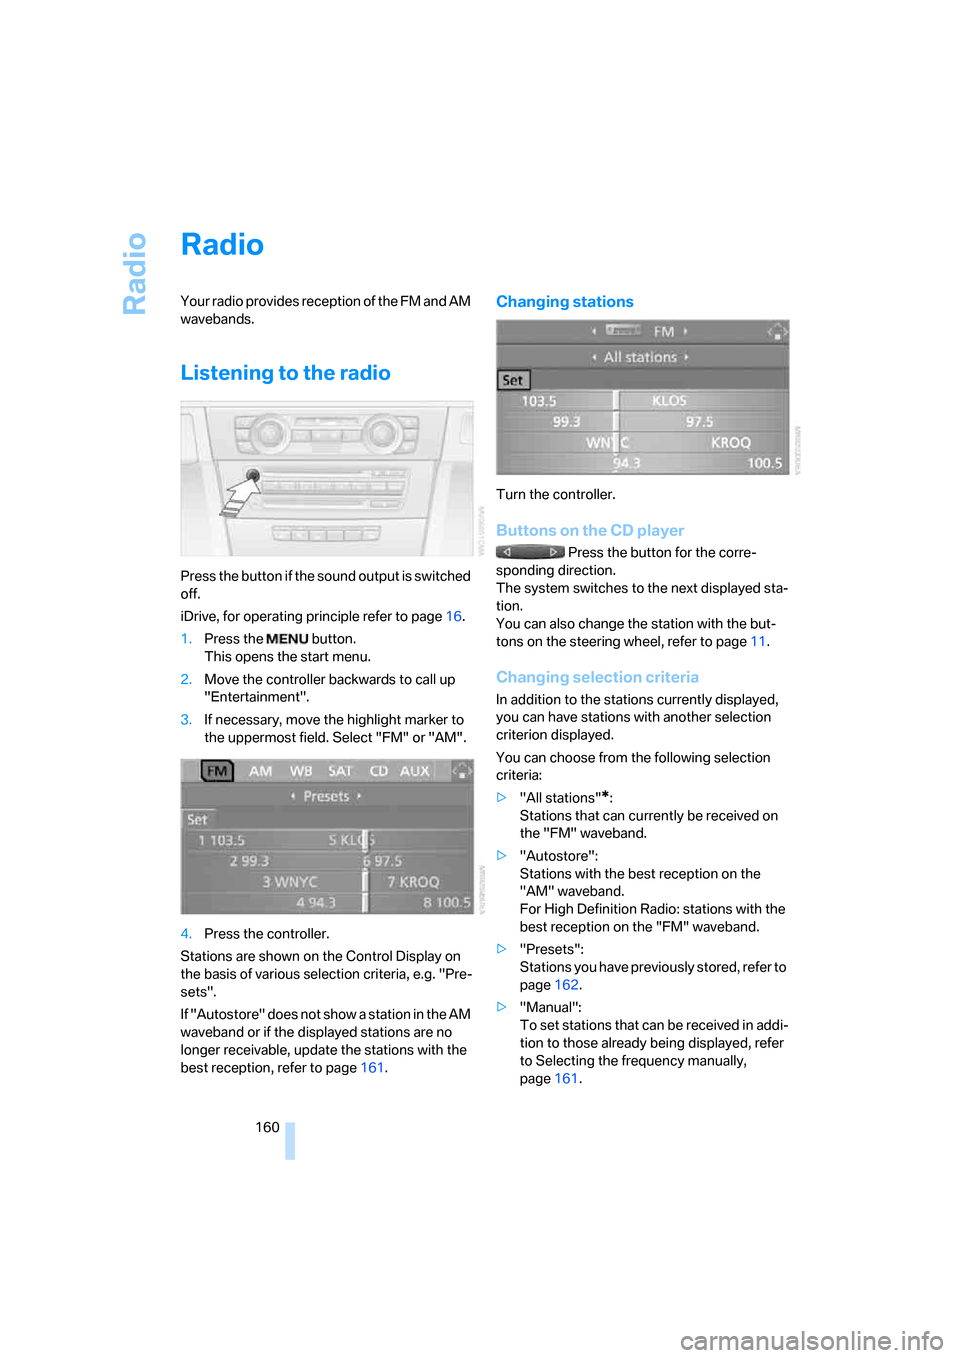
3.If necessary, move the highlight marker to
the uppermost field. Select "FM" or "AM".
4.Press the controller.
Stations are shown on the Control Display on
the basis of various selection criteria, e.g. "Pre-
sets".
If "Autostore" does not show a station in the AM
waveband or if the displayed stations are no
longer receivable, update the stations with the
best reception, refer to page161.
Changing stations
Turn the controller.
Buttons on the CD player
Press the button for the corre-
sponding direction.
The system switches to the next displayed sta-
tion.
You can also change the station with the but-
tons on the steering wheel, refer to page11.
Changing selection criteria
In addition to the stations currently displayed,
you can have stations with another selection
criterion displayed.
You can choose from the following selection
criteria:
>"All stations"
*:
Stations that can currently be received on
the "FM" waveband.
>"Autostore":
Stations with the best reception on the
"AM" waveband.
For High Definition Radio: stations with the
best reception on the "FM" waveband.
>"Presets":
Stations you have previously stored, refer to
page162.
>"Manual":
To set stations that can be received in addi-
tion to those already being displayed, refer
to Selecting the frequency manually,
page161.
Page 164 of 274
Radio
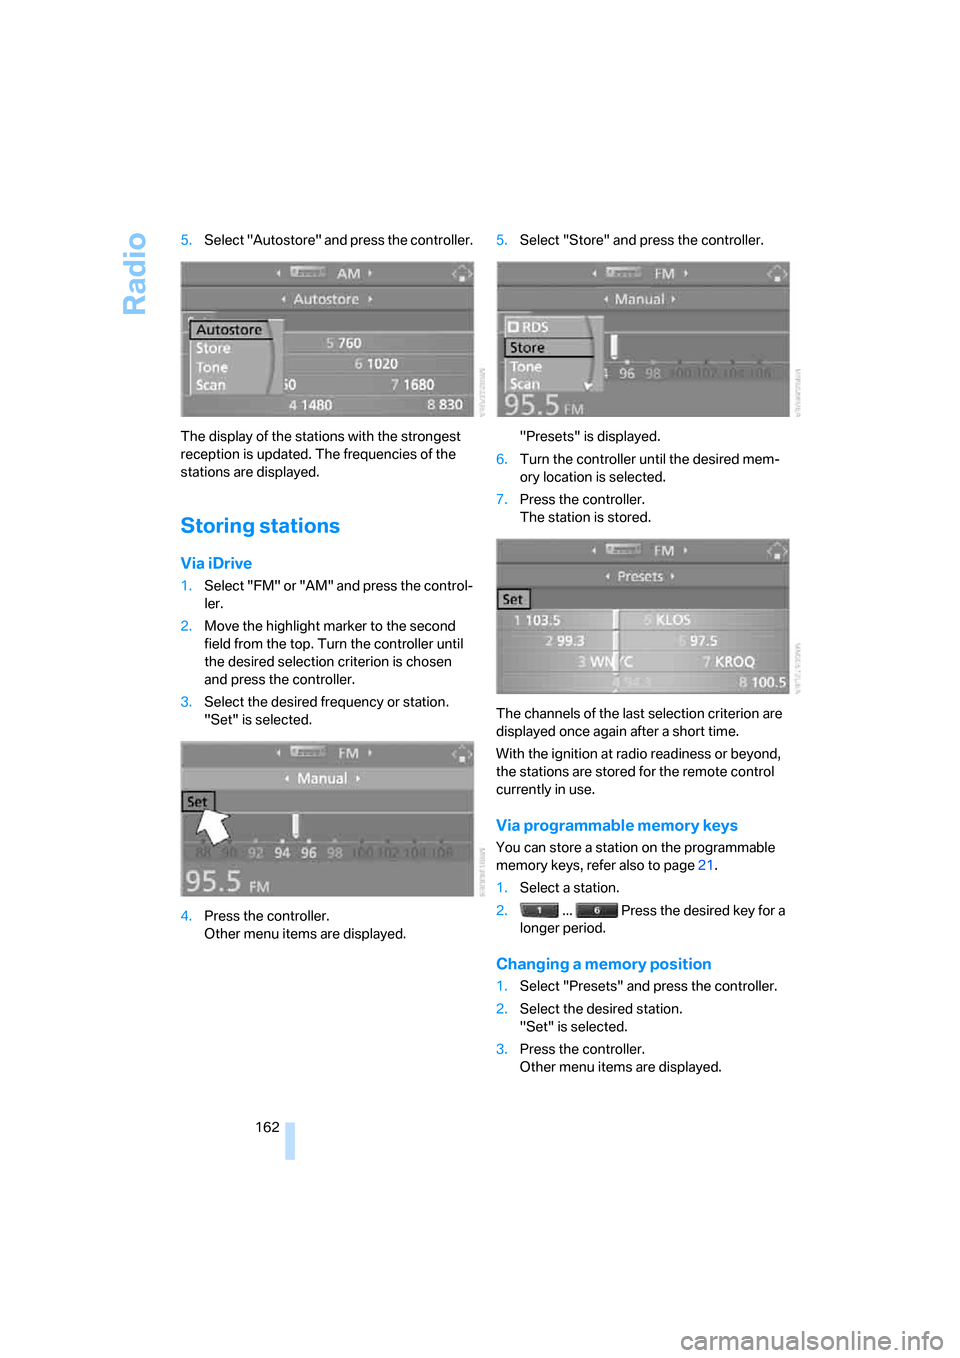
162 5.Select "Autostore" and press the controller.
The display of the stations with the strongest
reception is updated. The frequencies of the
stations are displayed.
Storing stations
Via iDrive
1.Select "FM" or "AM" and press the control-
ler.
2.Move the highlight marker to the second
field from the top. Turn the controller until
the desired selection criterion is chosen
and press the controller.
3.Select the desired frequency or station.
"Set" is selected.
4.Press the controller.
Other menu items are displayed.5.Select "Store" and press the controller.
"Presets" is displayed.
6.Turn the controller until the desired mem-
ory location is selected.
7.Press the controller.
The station is stored.
The channels of the last selection criterion are
displayed once again after a short time.
With the ignition at radio readiness or beyond,
the stations are stored for the remote control
currently in use.
Via programmable memory keys
You can store a station on the programmable
memory keys, refer also to page21.
1.Select a station.
2. ... Press the desired key for a
longer period.
Changing a memory position
1.Select "Presets" and press the controller.
2.Select the desired station.
"Set" is selected.
3.Press the controller.
Other menu items are displayed.
Page 165 of 274
Navigation
Entertainment
Driving tips
163Reference
At a glance
Controls
Communications
Mobility
4.Select "Store" and press the controller.
5.Turn the controller until the desired mem-
ory location is selected.
The number of the memory location
appears beside the name or frequency of
the station.
6.Press the controller.
The station is stored.
RDS Radio Data System
On the FM waveband, additional information is
broadcast via RDS. If the reception conditions
are good, the station names are shown on the
Control Display. Where reception is poor or in
the event of interference, it may take some time
before the station names will appear in the dis-
play.
Switching RDS on/off*
1.Select "FM" and press the controller.
"Set" is selected.
2.Press the controller.
Other menu items are displayed.
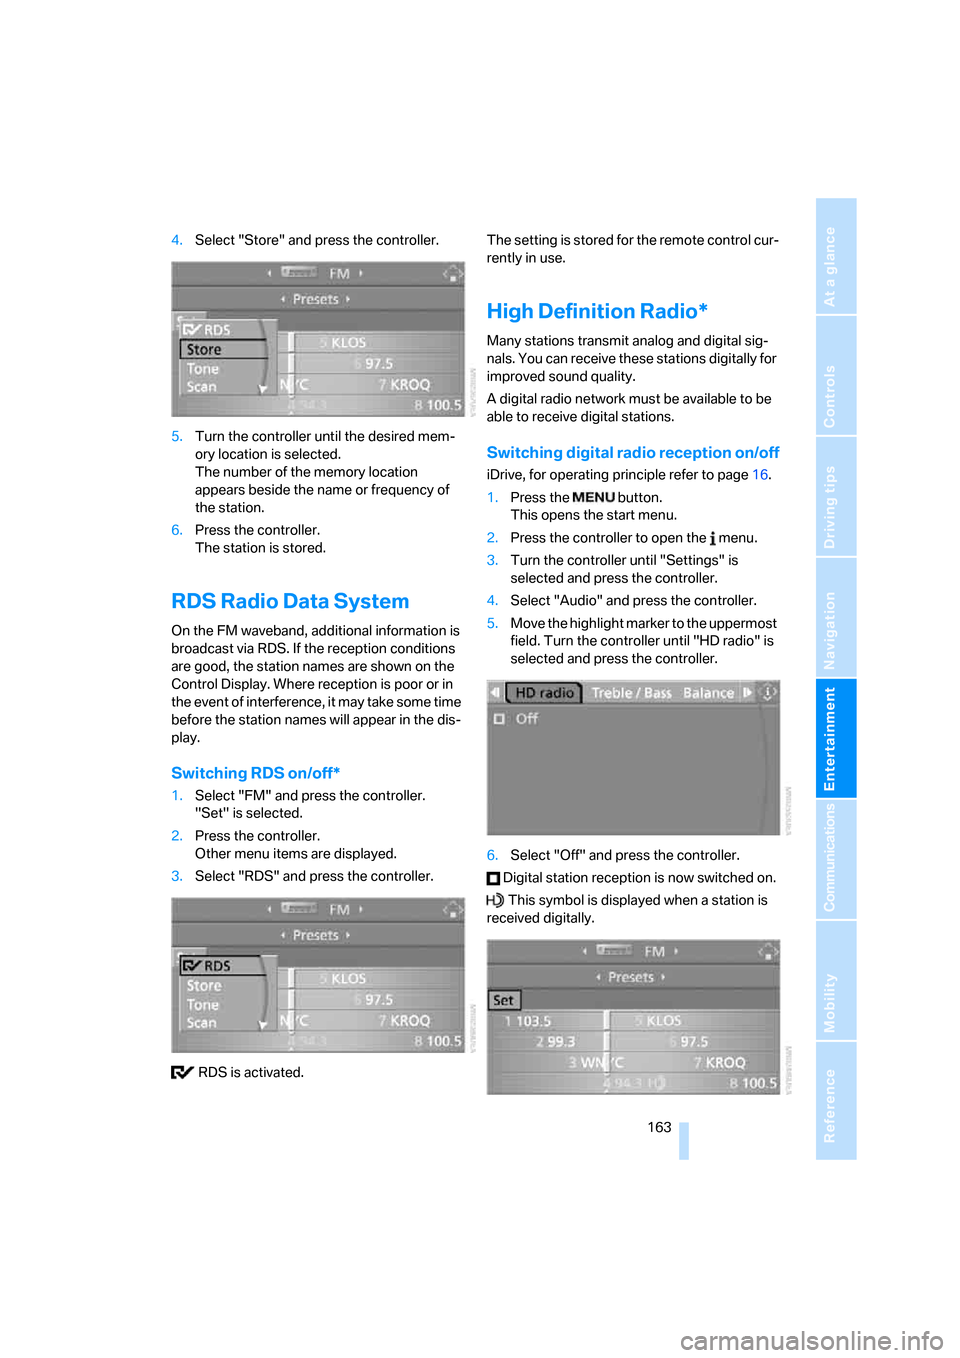
3.Select "RDS" and press the controller.
RDS is activated.The setting is stored for the remote control cur-
rently in use.
High Definition Radio*
Many stations transmit analog and digital sig-
nals. You can receive these stations digitally for
improved sound quality.
A digital radio network must be available to be
able to receive digital stations.
Switching digital radio reception on/off
iDrive, for operating principle refer to page16.
1.Press the button.
This opens the start menu.
2.Press the controller to open the menu.
3.Turn the controller until "Settings" is
selected and press the controller.
4.Select "Audio" and press the controller.
5.Move the highlight marker to the uppermost
field. Turn the controller until "HD radio" is
selected and press the controller.
6.Select "Off" and press the controller.
Digital station reception is now switched on.
This symbol is displayed when a station is
received digitally.
Page 166 of 274
Radio
164 Some stations do not transmit the digital and
analog signals simultaneously. If you are in an
area in which digital reception of the selected
station is not possible continuously, reception
will alternate between analog and digital. This
can cause repetitions or interruptions. In this
case it may be preferable to switch off digital
reception.
Selecting the programs of a digital
station*
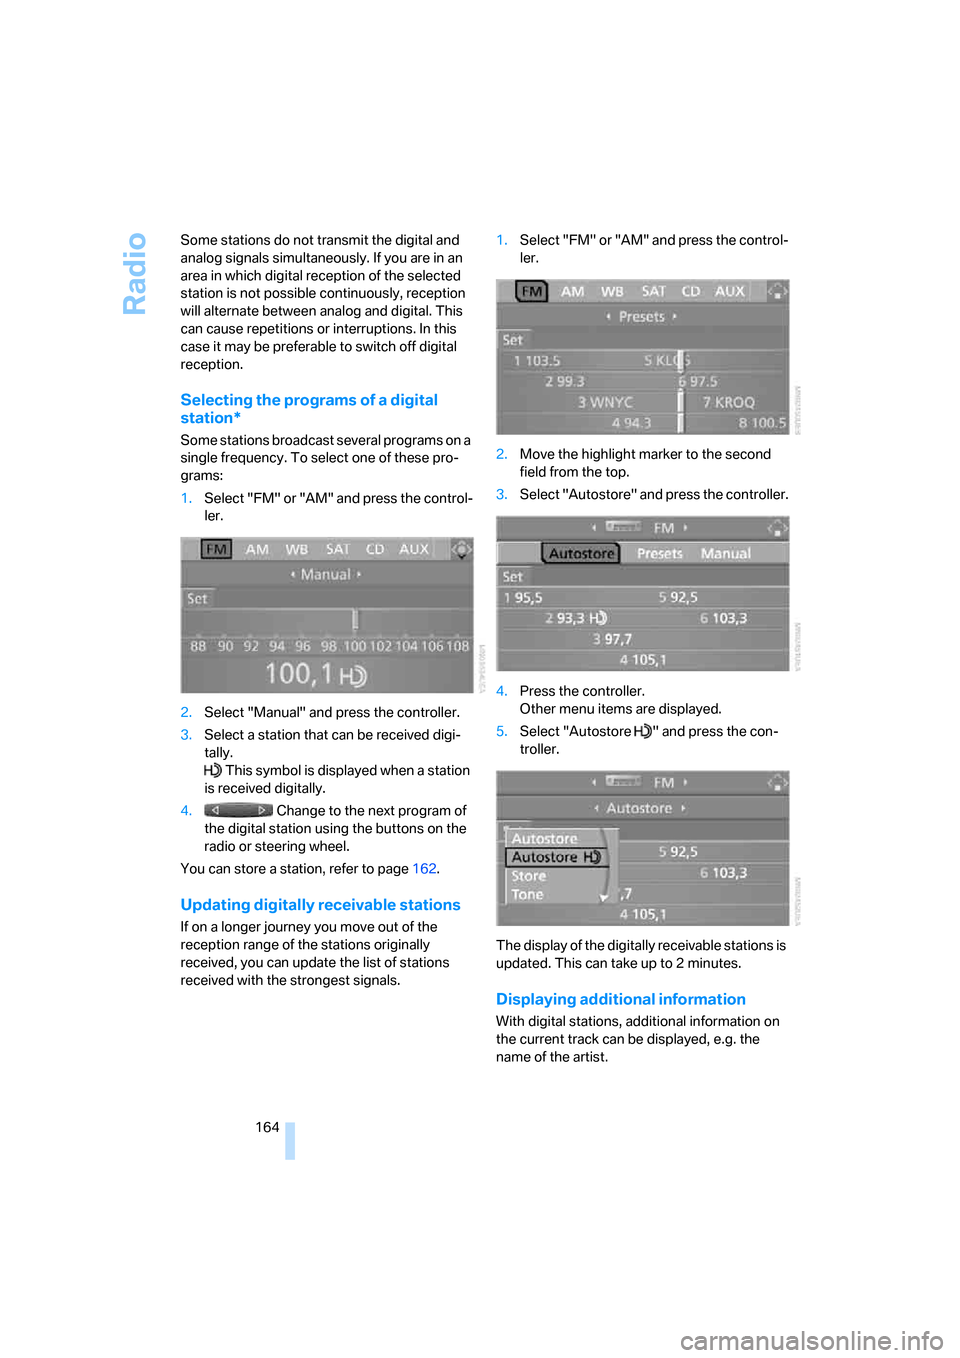
Some stations broadcast several programs on a
single frequency. To select one of these pro-
grams:
1.Select "FM" or "AM" and press the control-
ler.
2.Select "Manual" and press the controller.
3.Select a station that can be received digi-
tally.
This symbol is displayed when a station
is received digitally.
4. Change to the next program of
the digital station using the buttons on the
radio or steering wheel.
You can store a station, refer to page162.
Updating digitally receivable stations
If on a longer journey you move out of the
reception range of the stations originally
received, you can update the list of stations
received with the strongest signals.1.Select "FM" or "AM" and press the control-
ler.
2.Move the highlight marker to the second
field from the top.
3.Select "Autostore" and press the controller.
4.Press the controller.
Other menu items are displayed.
5.Select "Autostore " and press the con-
troller.
The display of the digitally receivable stations is
updated. This can take up to 2 minutes.
Displaying additional information
With digital stations, additional information on
the current track can be displayed, e.g. the
name of the artist.
Page 168 of 274
Satellite radio
166
Satellite radio
You can receive over 100 different channels
with high sound quality.
The channels are offered to you in predefined
packages. To receive the channels of your
choice, you must have the corresponding pack-
ages enabled.
With this new technology, signal losses
can occur from time to time and result in
audio interruptions.<
Enabling or disabling
channels
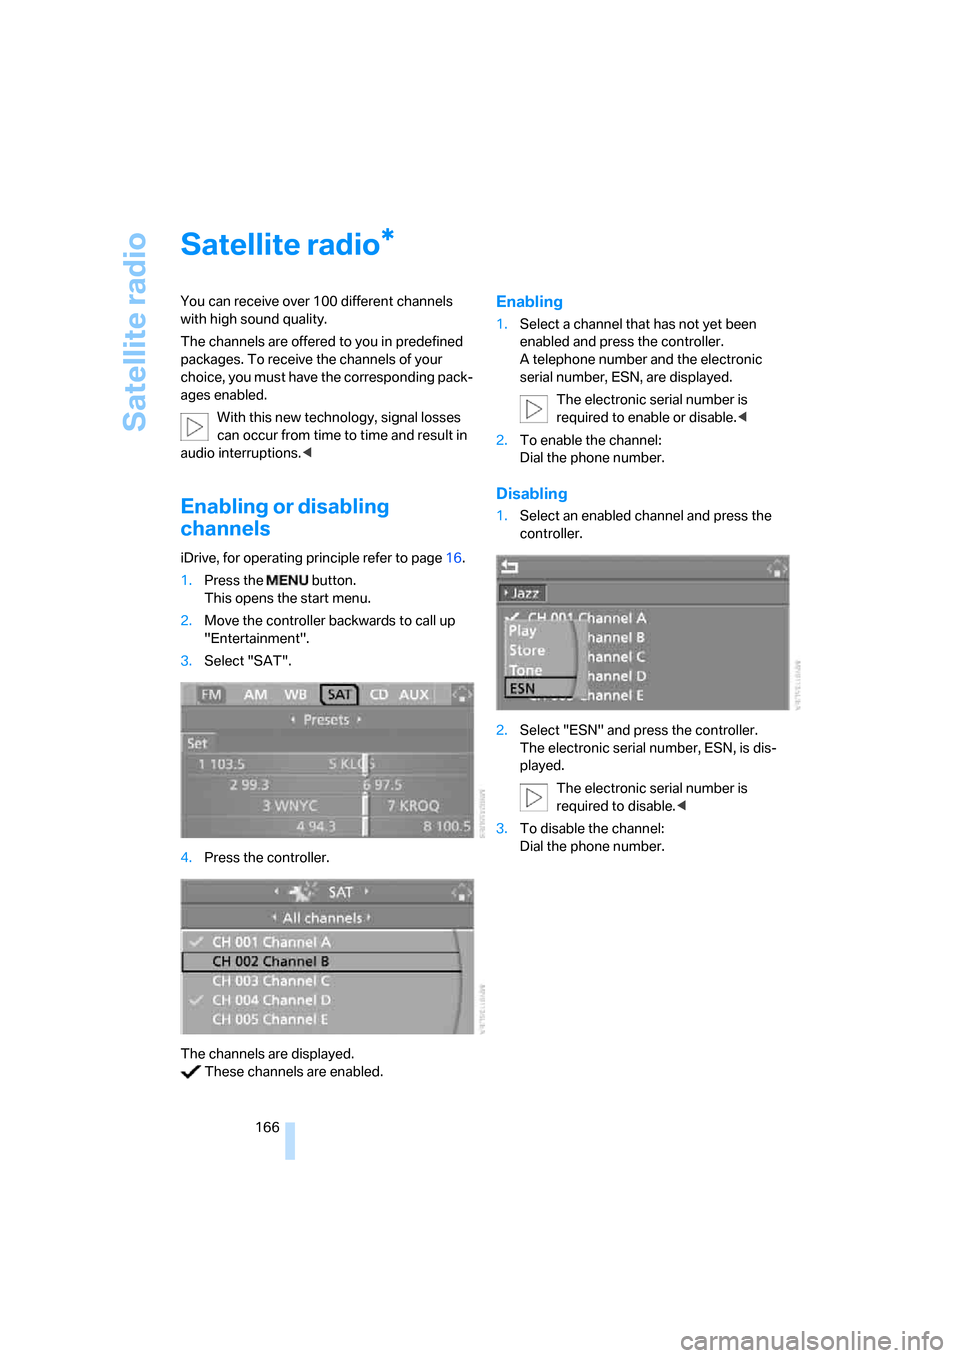
iDrive, for operating principle refer to page16.
1.Press the button.
This opens the start menu.
2.Move the controller backwards to call up
"Entertainment".
3.Select "SAT".
4.Press the controller.
The channels are displayed.
These channels are enabled.
Enabling
1.Select a channel that has not yet been
enabled and press the controller.
A telephone number and the electronic
serial number, ESN, are displayed.
The electronic serial number is
required to enable or disable.<
2.To enable the channel:
Dial the phone number.
Disabling
1.Select an enabled channel and press the
controller.
2.Select "ESN" and press the controller.
The electronic serial number, ESN, is dis-
played.
The electronic serial number is
required to disable.<
3.To disable the channel:
Dial the phone number.
*
Page 170 of 274
Satellite radio
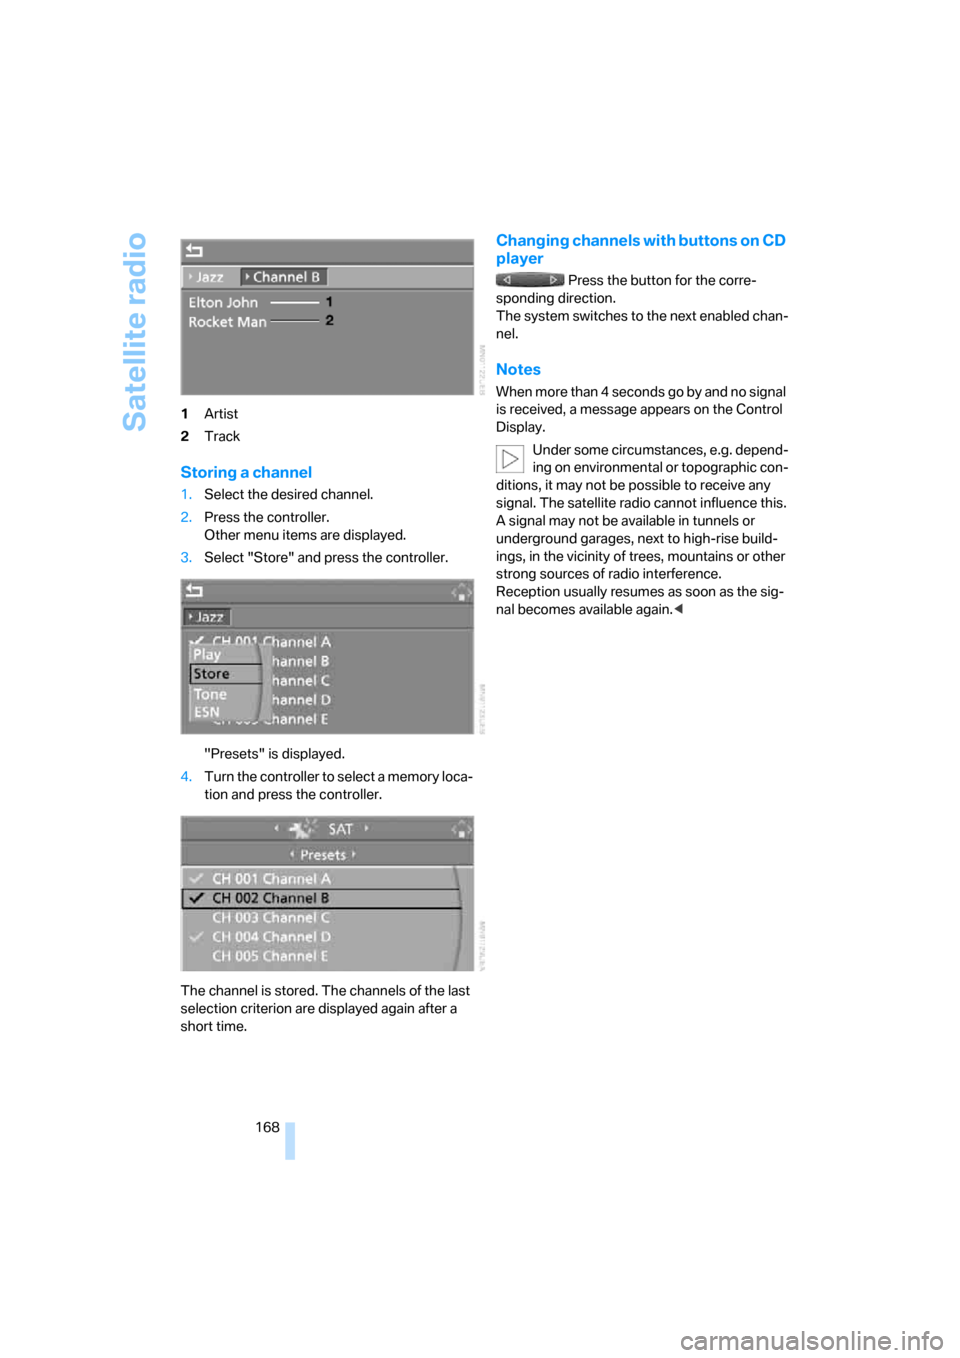
168 1Artist
2Track
Storing a channel
1.Select the desired channel.
2.Press the controller.
Other menu items are displayed.
3.Select "Store" and press the controller.
"Presets" is displayed.
4.Turn the controller to select a memory loca-
tion and press the controller.
The channel is stored. The channels of the last
selection criterion are displayed again after a
short time.
Changing channels with buttons on CD
player
Press the button for the corre-
sponding direction.
The system switches to the next enabled chan-
nel.
Notes
W hen mo re than 4 seconds go by and no s igna l
is received, a message appears on the Control
Display.
Under some circumstances, e.g. depend-
ing on environmental or topographic con-
ditions, it may not be possible to receive any
signal. The satellite radio cannot influence this.
A signal may not be available in tunnels or
underground garages, next to high-rise build-
ings, in the vicinity of trees, mountains or other
strong sources of radio interference.
Reception usually resumes as soon as the sig-
nal becomes available again.<