2008 BMW 328I SEDAN Cargo
[x] Cancel search: CargoPage 126 of 274
Things to remember when driving
124
Sedan
Sports Wagon
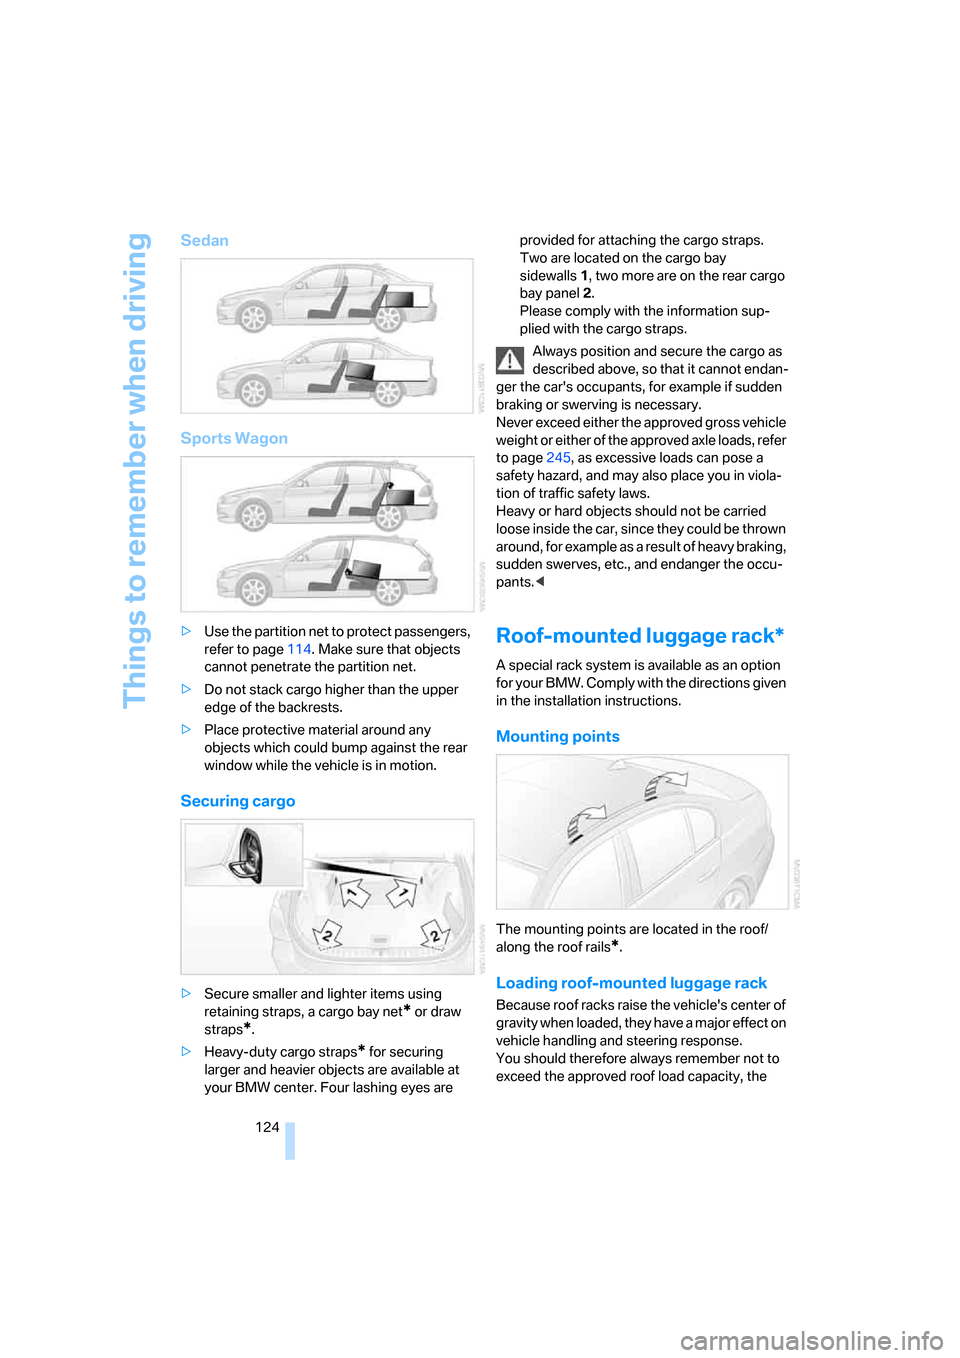
>Use the partition net to protect passengers,
refer to page114. Make sure that objects
cannot penetrate the partition net.
>Do not stack cargo higher than the upper
edge of the backrests.
>Place protective material around any
objects which could bump against the rear
window while the vehicle is in motion.
Securing cargo
>Secure smaller and lighter items using
retaining straps, a cargo bay net
* or draw
straps
*.
>Heavy-duty cargo straps
* for securing
larger and heavier objects are available at
your BMW center. Four lashing eyes are provided for attaching the cargo straps.
Two are located on the cargo bay
sidewalls1, two more are on the rear cargo
bay panel2.
Please comply with the information sup-
plied with the cargo straps.
Always position and secure the cargo as
described above, so that it cannot endan-
ger the car's occupants, for example if sudden
braking or swerving is necessary.
Never exceed either the approved gross vehicle
weight or either of the approved axle loads, refer
to page245, as excessive loads can pose a
safety hazard, and may also place you in viola-
tion of traffic safety laws.
Heavy or hard objects should not be carried
loose inside the car, since they could be thrown
around, for example as a result of heavy braking,
sudden swerves, etc., and endanger the occu-
pants.<
Roof-mounted luggage rack*
A special rack system is available as an option
f o r y o u r B M W . C o m p l y w i t h t h e d i r e c t i o n s g i v e n
in the installation instructions.
Mounting points
The mounting points are located in the roof/
along the roof rails
*.
Loading roof-mounted luggage rack
Because roof racks raise the vehicle's center of
gravity when loaded, they have a major effect on
vehicle handling and steering response.
You should therefore always remember not to
exceed the approved roof load capacity, the
Page 127 of 274
Driving tips
125Reference
At a glance
Controls
Communications
Navigation
Entertainment
Mobility
approved gross vehicle weight or the axle loads
when loading the rack.
You can find the applicable data under Weights
on page245.
The roof load must be distributed uniformly and
should not be too large in area. Heavy items
should always be placed at the bottom. Be sure
that adequate clearance is maintained for rais-
ing the glass roof, and that objects do not
project into the opening path of the luggage
compartment lid/tailgate.
Fasten roof-mounted cargo correctly and
securely to prevent it from shifting or falling off
during the trip.
Drive smoothly. Avoid sudden acceleration and
braking maneuvers. Take corners gently.
Page 175 of 274
Navigation
Entertainment
Driving tips
173Reference
At a glance
Controls
Communications
Mobility
Compressed audio files*
1.Select the current track and press the con-
troller.
2.Select the desired menu item:
>To play all the tracks in the current direc-
tory in random order, select "Random
directory" and press the controller.
>To play all the tracks on the CD in ran-
dom order, select "Random all" and
press the controller.
Stop random function:
1.Press the controller.
2.Select "Random directory" or "Random all"
and press the controller.
Fast forward/reverse
Buttons on the CD player:
Press and hold the button for the
corresponding direction.
The tracks can be heard, but reproduction is
distorted.
CD magazine
Sedan
Sports Wagon
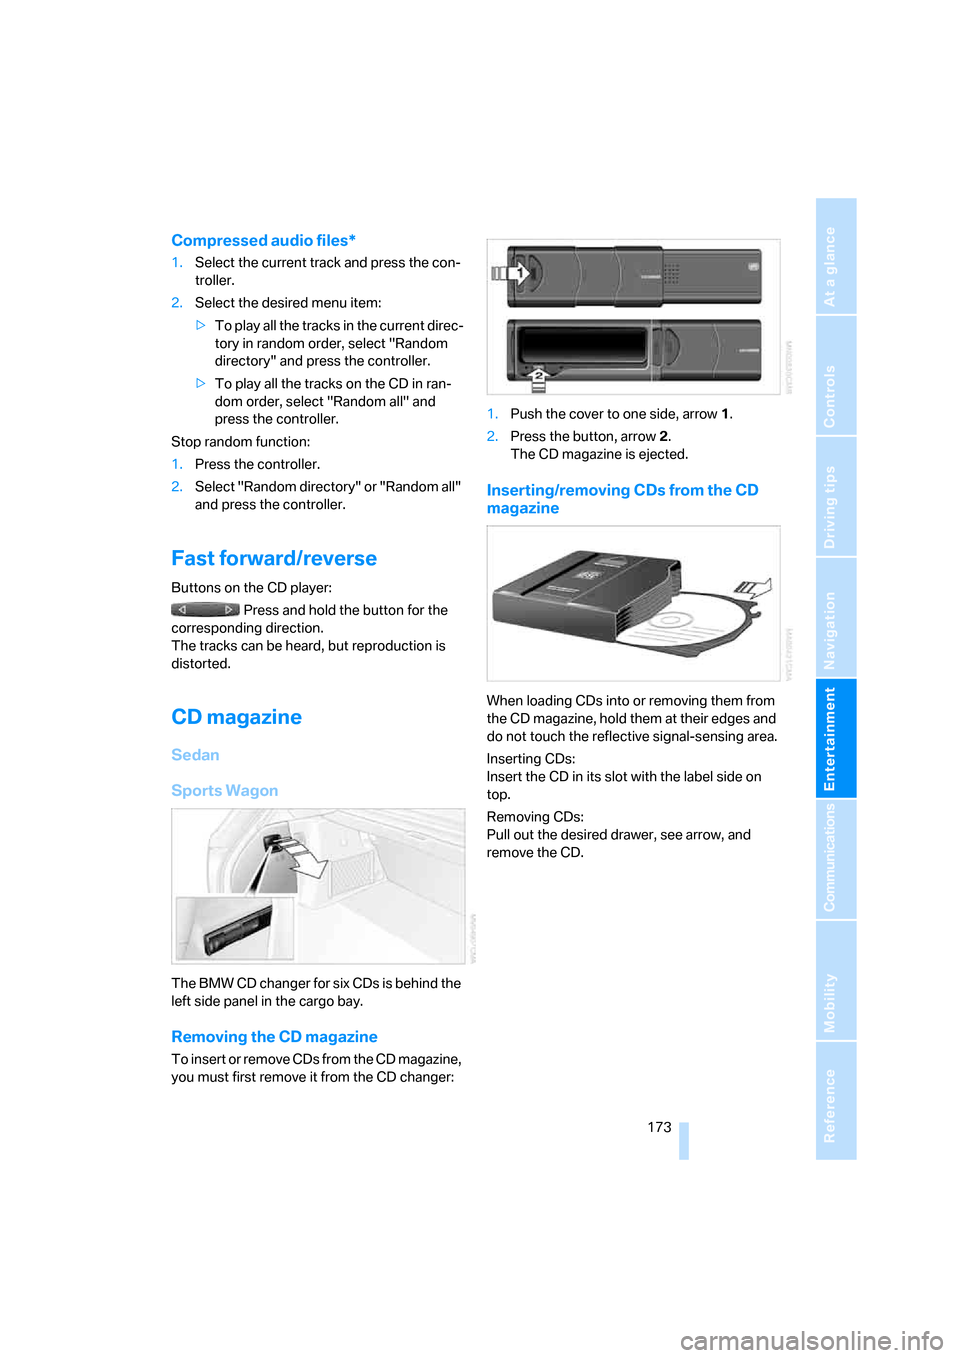
The BMW CD changer for six CDs is behind the
left side panel in the cargo bay.
Removing the CD magazine
T o i n s e r t o r r e m o v e C D s f r o m t h e C D m a g a z i n e ,
you must first remove it from the CD changer:1.Push the cover to one side, arrow 1.
2.Press the button, arrow 2.
The CD magazine is ejected.
Inserting/removing CDs from the CD
magazine
When loading CDs into or removing them from
the CD magazine, hold them at their edges and
do not touch the reflective signal-sensing area.
Inserting CDs:
Insert the CD in its slot with the label side on
top.
Removing CDs:
Pull out the desired drawer, see arrow, and
remove the CD.
Page 208 of 274
Refueling
206
Refueling
Always switch off the engine before refu-
eling, otherwise, fuel cannot be added to
the tank and a message will be displayed.<
Take all precautionary measures and
observe all applicable regulations when
handling fuel. Do not carry any spare fuel con-
tainers in your vehicle. They can develop a leak
and cause an explosion or cause a fire in the
event of an accident.<
Fuel filler door
Opening
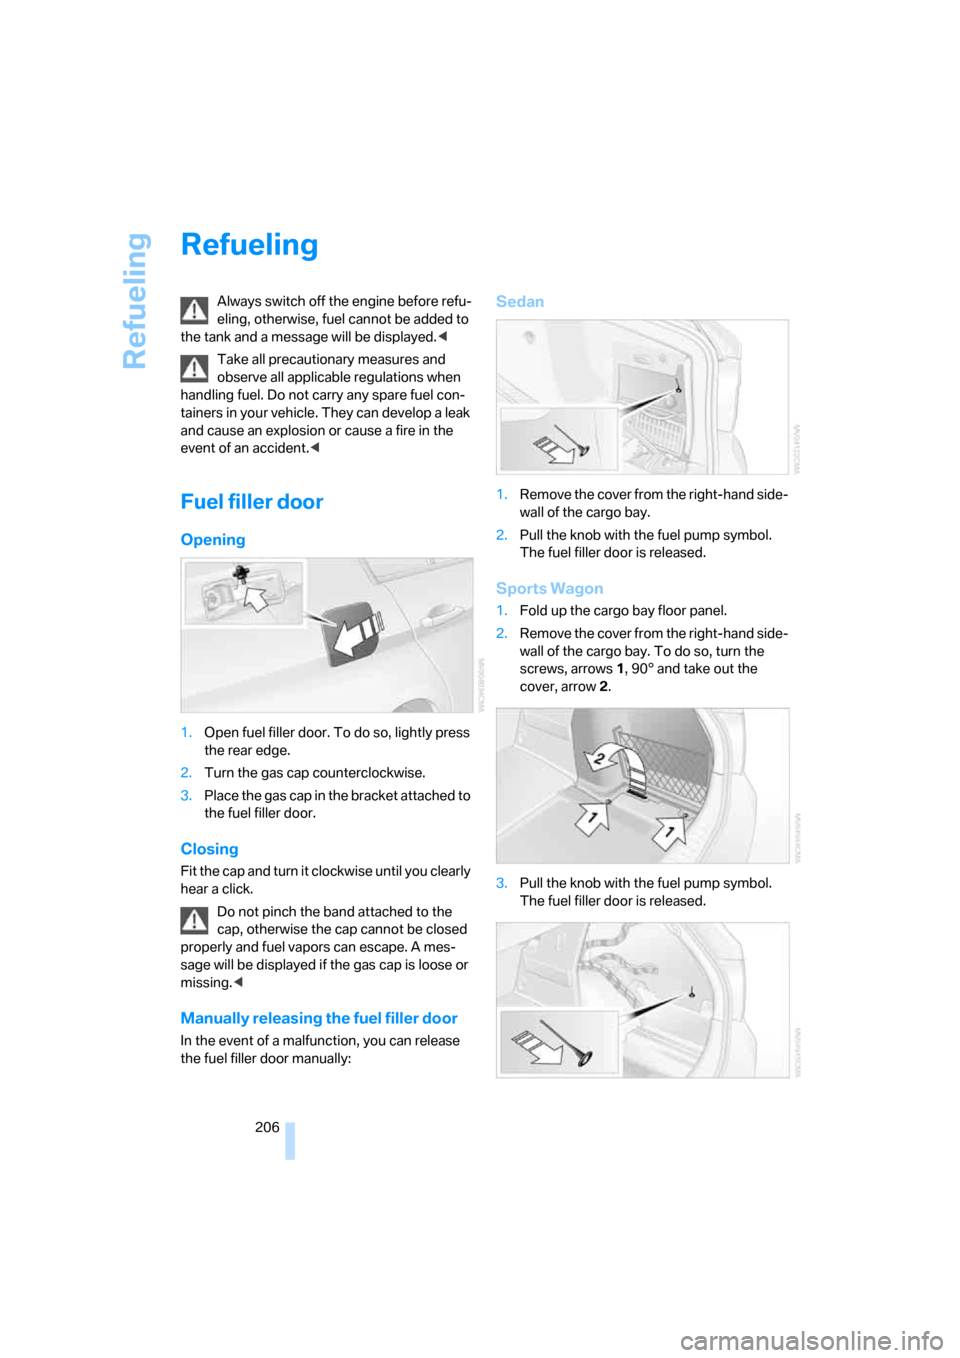
1.Open fuel filler door. To do so, lightly press
the rear edge.
2.Turn the gas cap counterclockwise.
3.Place the gas cap in the bracket attached to
the fuel filler door.
Closing
Fit the cap and turn it clockwise until you clearly
hear a click.
Do not pinch the band attached to the
cap, otherwise the cap cannot be closed
properly and fuel vapors can escape. A mes-
sage will be displayed if the gas cap is loose or
missing.<
Manually releasing the fuel filler door
In the event of a malfunction, you can release
the fuel filler door manually:
Sedan
1.Remove the cover from the right-hand side-
wall of the cargo bay.
2.Pull the knob with the fuel pump symbol.
The fuel filler door is released.
Sports Wagon
1.Fold up the cargo bay floor panel.
2.Remove the cover from the right-hand side-
wall of the cargo bay. To do so, turn the
screws, arrows 1, 90° and take out the
cover, arrow 2.
3.Pull the knob with the fuel pump symbol.
The fuel filler door is released.
Page 230 of 274
Replacing components
228
Replacing components
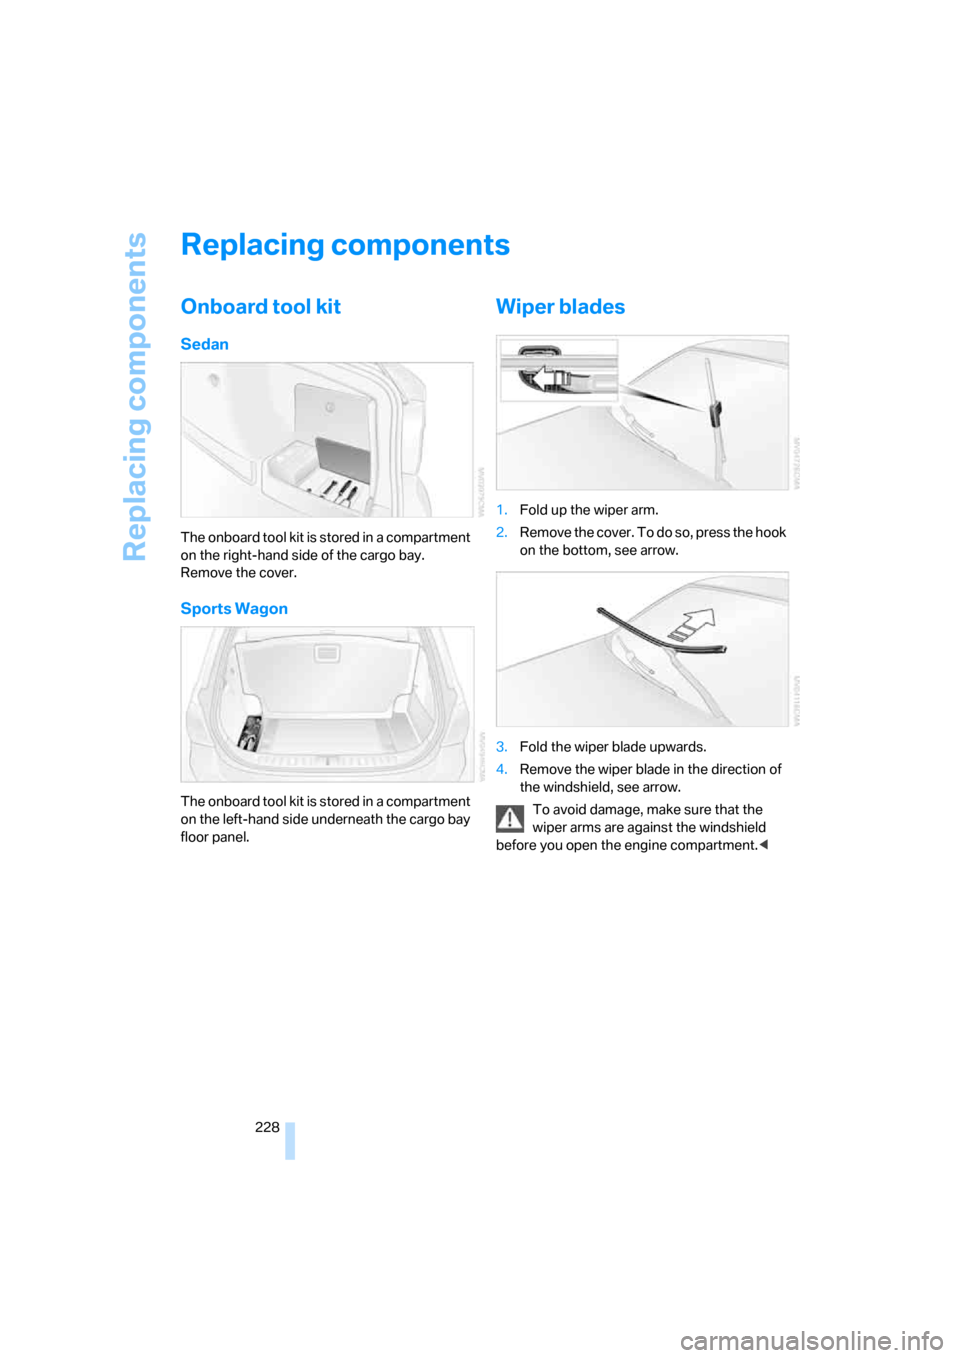
Onboard tool kit
Sedan
The onboard tool kit is stored in a compartment
on the right-hand side of the cargo bay.
Remove the cover.
Sports Wagon
The onboard tool kit is stored in a compartment
on the left-hand side underneath the cargo bay
floor panel.
Wiper blades
1.Fold up the wiper arm.
2.R e m o v e t h e c o v e r . T o d o s o , p r e s s t h e h o o k
on the bottom, see arrow.
3.Fold the wiper blade upwards.
4.Remove the wiper blade in the direction of
the windshield, see arrow.
To avoid damage, make sure that the
wiper arms are against the windshield
before you open the engine compartment.<
Page 234 of 274
Replacing components
232
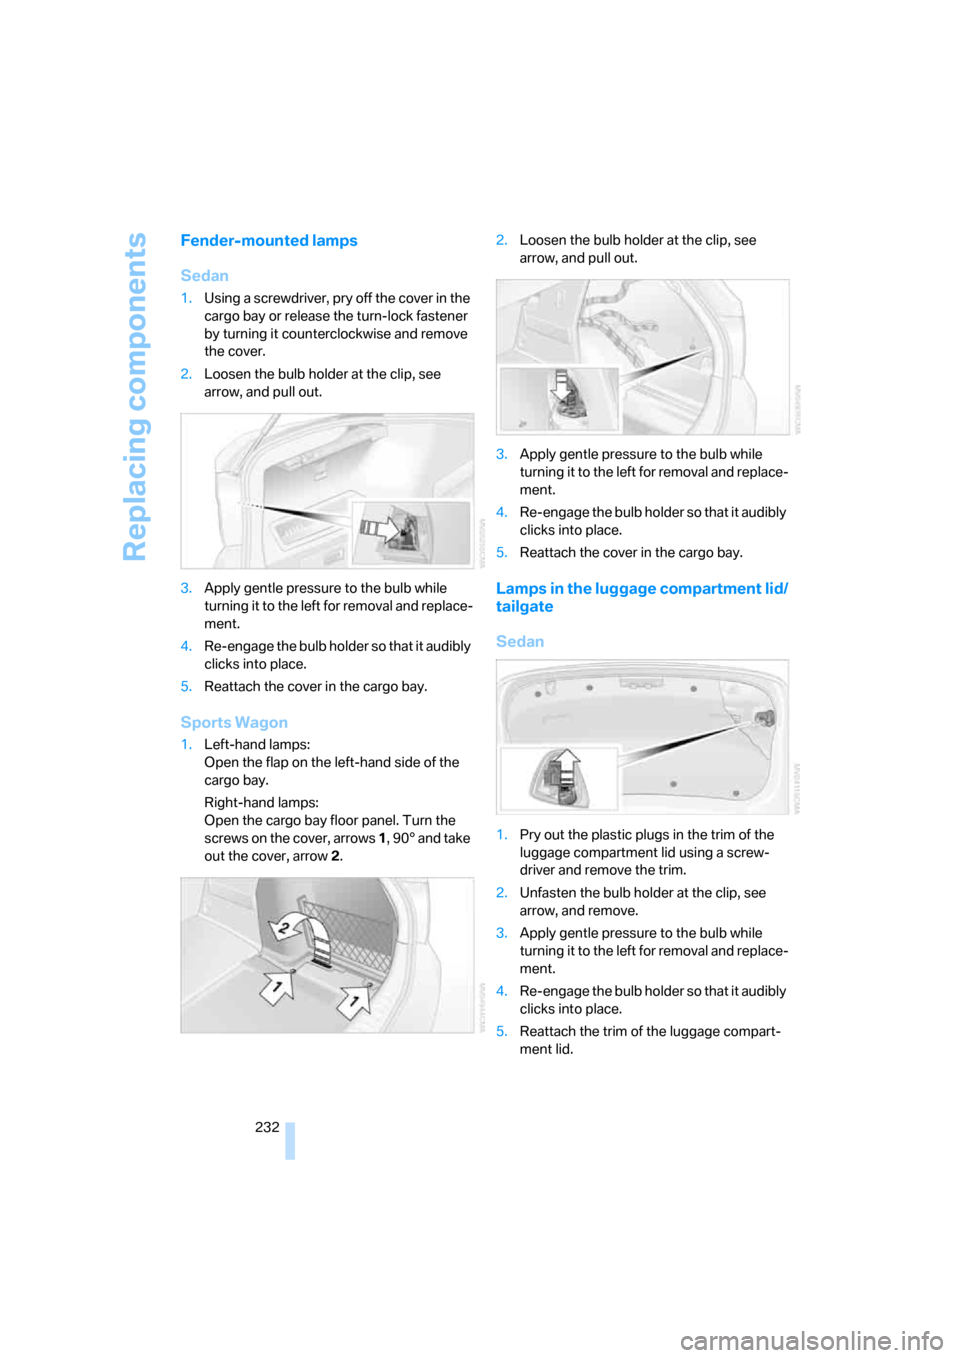
Fender-mounted lamps
Sedan
1.Using a screwdriver, pry off the cover in the
cargo bay or release the turn-lock fastener
by turning it counterclockwise and remove
the cover.
2.Loosen the bulb holder at the clip, see
arrow, and pull out.
3.Apply gentle pressure to the bulb while
turning it to the left for removal and replace-
ment.
4.Re-engage the bulb holder so that it audibly
clicks into place.
5.Reattach the cover in the cargo bay.
Sports Wagon
1.Left-hand lamps:
Open the flap on the left-hand side of the
cargo bay.
Right-hand lamps:
Open the cargo bay floor panel. Turn the
screws on the cover, arrows 1, 90° and take
out the cover, arrow 2.2.Loosen the bulb holder at the clip, see
arrow, and pull out.
3.Apply gentle pressure to the bulb while
turning it to the left for removal and replace-
ment.
4.Re-engage the bulb holder so that it audibly
clicks into place.
5.Reattach the cover in the cargo bay.
Lamps in the luggage compartment lid/
tailgate
Sedan
1.Pry out the plastic plugs in the trim of the
luggage compartment lid using a screw-
driver and remove the trim.
2.Unfasten the bulb holder at the clip, see
arrow, and remove.
3.Apply gentle pressure to the bulb while
turning it to the left for removal and replace-
ment.
4.Re-engage the bulb holder so that it audibly
clicks into place.
5.Reattach the trim of the luggage compart-
ment lid.
Page 238 of 274
Giving and receiving assistance
236
First aid pouch*
Some of the articles contained in the first aid
pouch have a limited service life. Therefore,
check the expiration dates of the contents reg-
ularly and replace any items in good time, if nec-
essary.
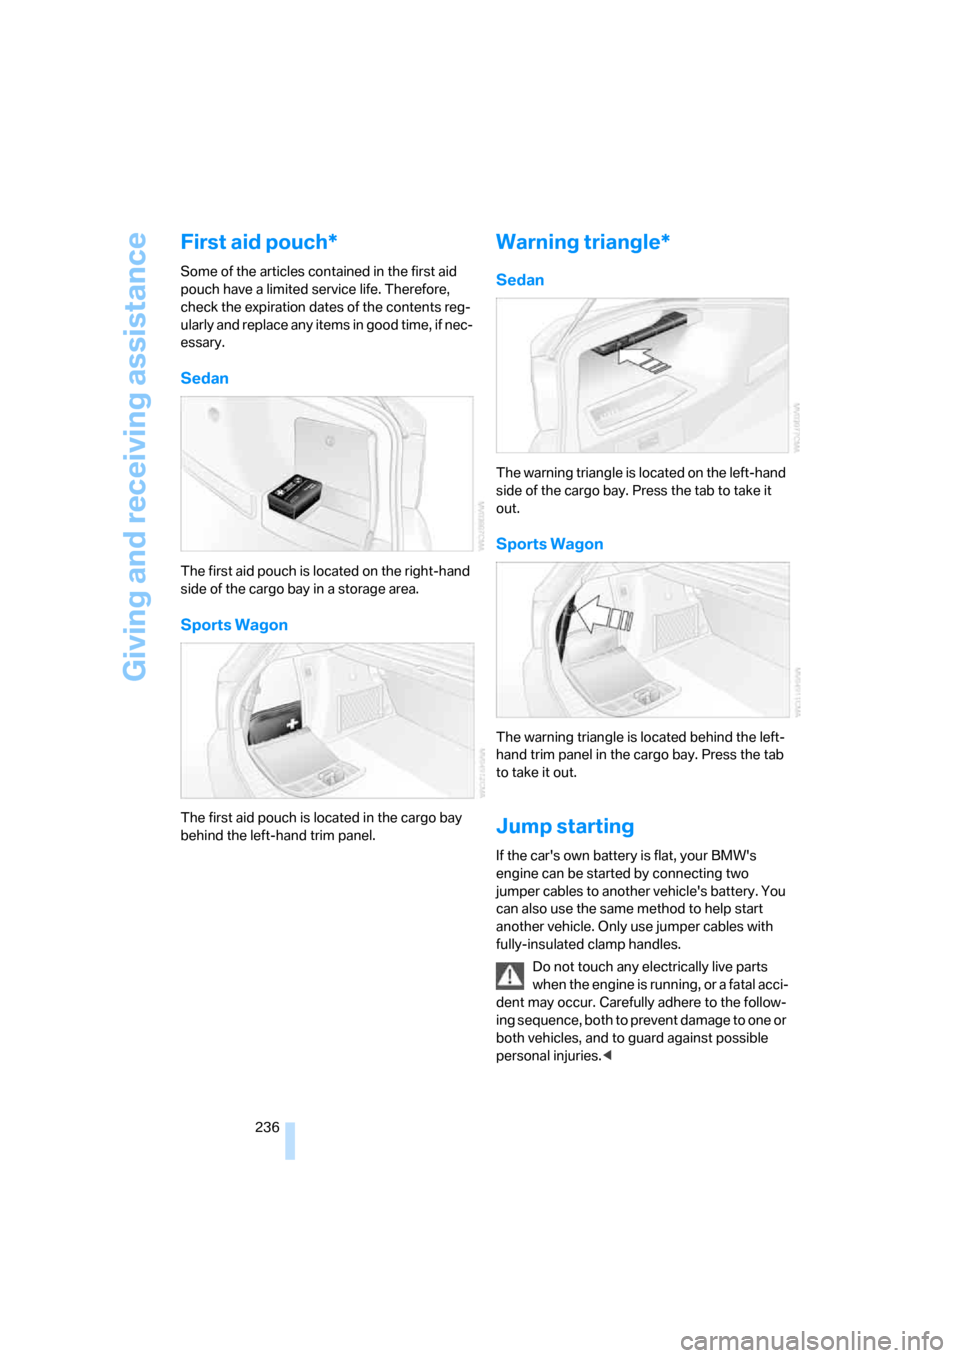
Sedan
The first aid pouch is located on the right-hand
side of the cargo bay in a storage area.
Sports Wagon
The first aid pouch is located in the cargo bay
behind the left-hand trim panel.
Warning triangle*
Sedan
The warning triangle is located on the left-hand
side of the cargo bay. Press the tab to take it
out.
Sports Wagon
The warning triangle is located behind the left-
hand trim panel in the cargo bay. Press the tab
to take it out.
Jump starting
If the car's own battery is flat, your BMW's
engine can be started by connecting two
jumper cables to another vehicle's battery. You
can also use the same method to help start
another vehicle. Only use jumper cables with
fully-insulated clamp handles.
Do not touch any electrically live parts
when the engine is running, or a fatal acci-
dent may occur. Carefully adhere to the follow-
ing sequence, both to prevent damage to one or
both vehicles, and to guard against possible
personal injuries.<
Page 240 of 274
Giving and receiving assistance
238
Using a tow fitting
The screw-in tow fitting must always be carried
in the car. It can be screwed in at the front or
rear of the BMW.
Sedan: it is stored in the onboard tool kit under-
neath the cover on the right-hand side of the
cargo bay, refer to page228.
Sports Wagon: it is stored in the onboard tool kit
underneath the cover on the left-hand side of
the cargo bay, refer to page228.
Use only the tow fitting provided with the
vehicle and screw it all the way in. Use the
tow fitting for towing on paved roads only. Avoid
lateral loading of the tow fitting, e.g. do not lift
the vehicle by the tow fitting. Otherwise the tow
fitting and the vehicle could be damaged.<
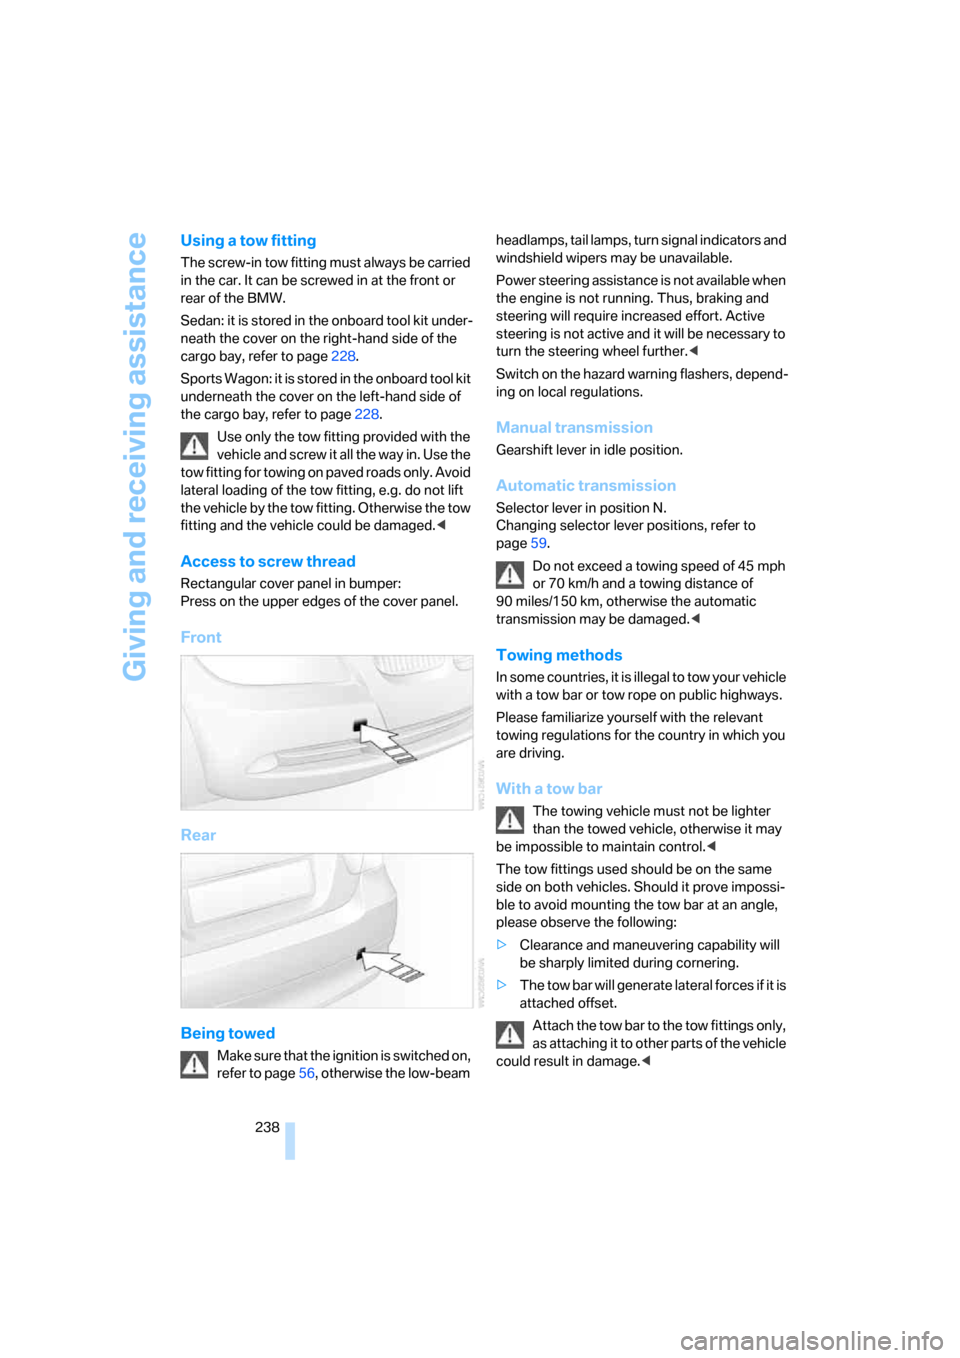
Access to screw thread
Rectangular cover panel in bumper:
Press on the upper edges of the cover panel.
Front
Rear
Being towed
Make sure that the ignition is switched on,
refer to page56, otherwise the low-beam headlamps, tail lamps, turn signal indicators and
windshield wipers may be unavailable.
Power steering assistance is not available when
the engine is not running. Thus, braking and
steering will require increased effort. Active
steering is not active and it will be necessary to
turn the steering wheel further.<
Switch on the hazard warning flashers, depend-
ing on local regulations.
Manual transmission
Gearshift lever in idle position.
Automatic transmission
Selector lever in position N.
Changing selector lever positions, refer to
page59.
Do not exceed a towing speed of 45 mph
or 70 km/h and a towing distance of
90 miles/150 km, otherwise the automatic
transmission may be damaged.<
Towing methods
In some countries, it is illegal to tow your vehicle
with a tow bar or tow rope on public highways.
Please familiarize yourself with the relevant
towing regulations for the country in which you
are driving.
With a tow bar
The towing vehicle must not be lighter
than the towed vehicle, otherwise it may
be impossible to maintain control.<
The tow fittings used should be on the same
side on both vehicles. Should it prove impossi-
ble to avoid mounting the tow bar at an angle,
please observe the following:
>Clearance and maneuvering capability will
be sharply limited during cornering.
>The tow bar will generate lateral forces if it is
attached offset.
Attach the tow bar to the tow fittings only,
as attaching it to other parts of the vehicle
could result in damage.<