Page 161 of 260
Navigation
Entertainment
Driving tips
159Reference
At a glance
Controls
Communications
Mobility
1.Select the station and press the controller.
2.Select "Details" and press the controller.
The information is displayed.
When you change to another digitally received
station, any additional information is displayed
after a brief interruption.
Page 162 of 260
Satellite radio
160
Satellite radio
You can receive over 100 different channels
with high sound quality.
The channels are offered to you in predefined
packages. To receive the channels of your
choice, you must have the corresponding pack-
ages enabled.
With this new technology, signal losses
can occur from time to time and result in
audio interruptions.<
Enabling or disabling
channels
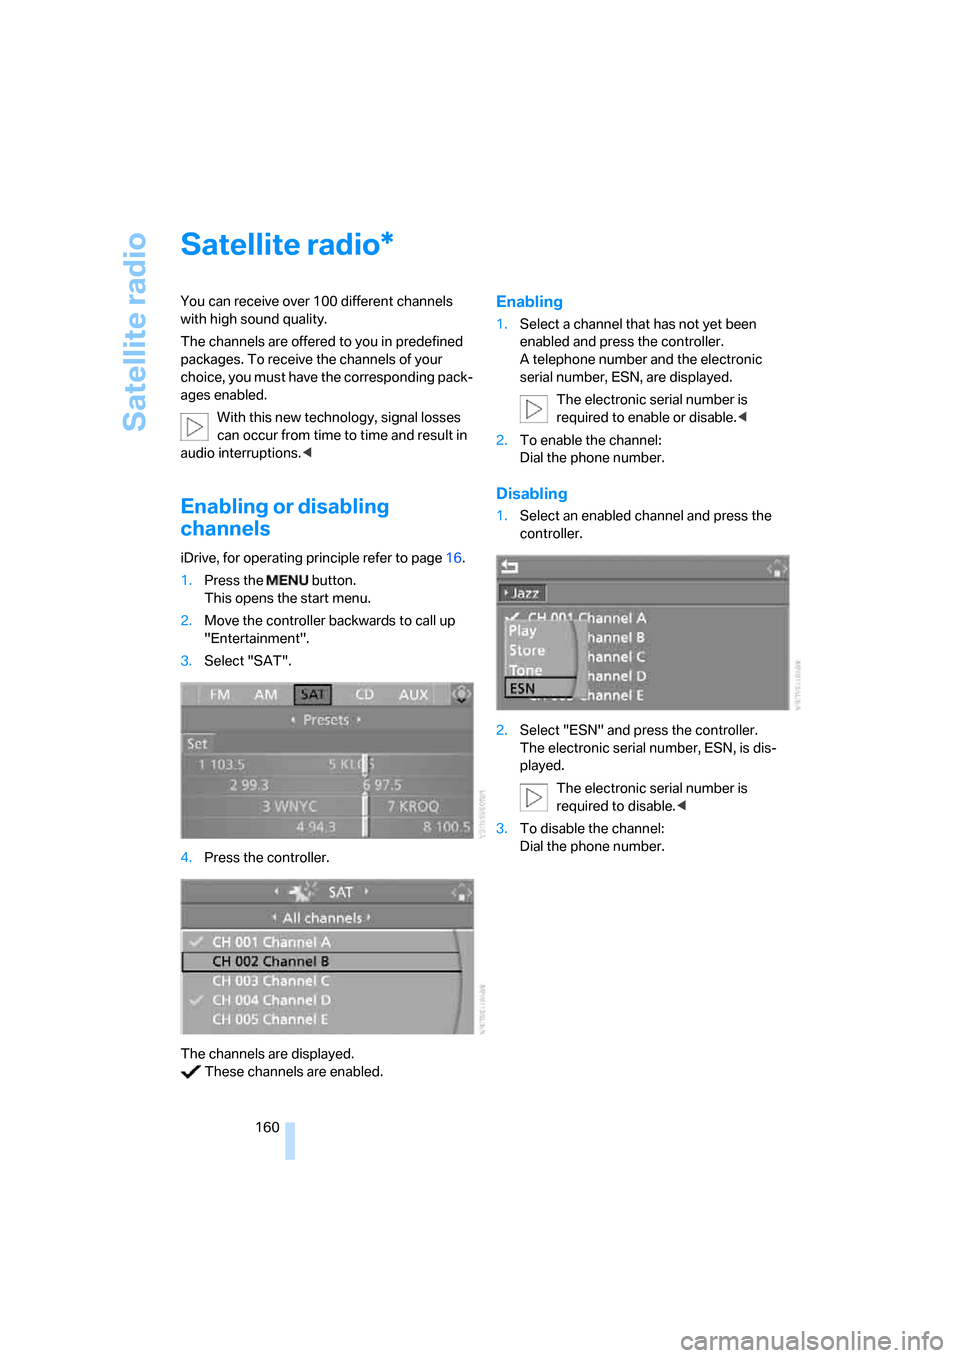
iDrive, for operating principle refer to page16.
1.Press the button.
This opens the start menu.
2.Move the controller backwards to call up
"Entertainment".
3.Select "SAT".
4.Press the controller.
The channels are displayed.
These channels are enabled.
Enabling
1.Select a channel that has not yet been
enabled and press the controller.
A telephone number and the electronic
serial number, ESN, are displayed.
The electronic serial number is
required to enable or disable.<
2.To enable the channel:
Dial the phone number.
Disabling
1.Select an enabled channel and press the
controller.
2.Select "ESN" and press the controller.
The electronic serial number, ESN, is dis-
played.
The electronic serial number is
required to disable.<
3.To disable the channel:
Dial the phone number.
*
Page 163 of 260
Navigation
Entertainment
Driving tips
161Reference
At a glance
Controls
Communications
Mobility
Selecting and storing a
channel
1.Select "SAT" and press the controller.
Channels and categories are displayed on
the Control Display.
2.Select a menu item:
>"Presets":
Up to twelve channels you stored previ-
ously.
>"All channels":
All channels are displayed.
>"Categories":
All channels, sorted by category, e.g.
news, jazz.
3.Press the controller.4.If "Categories" has been selected:
Select the desired category and press the
controller.
The channels of this category are displayed.
5. Select a channel marked with this sym-
bol.
6.Press the controller.
Other menu items are displayed.
7.Select "Play" and press the controller.
Additional information
The name of the channel and additional infor-
mation on the current track are displayed, e.g.
the name of the artist.
Page 164 of 260
Satellite radio
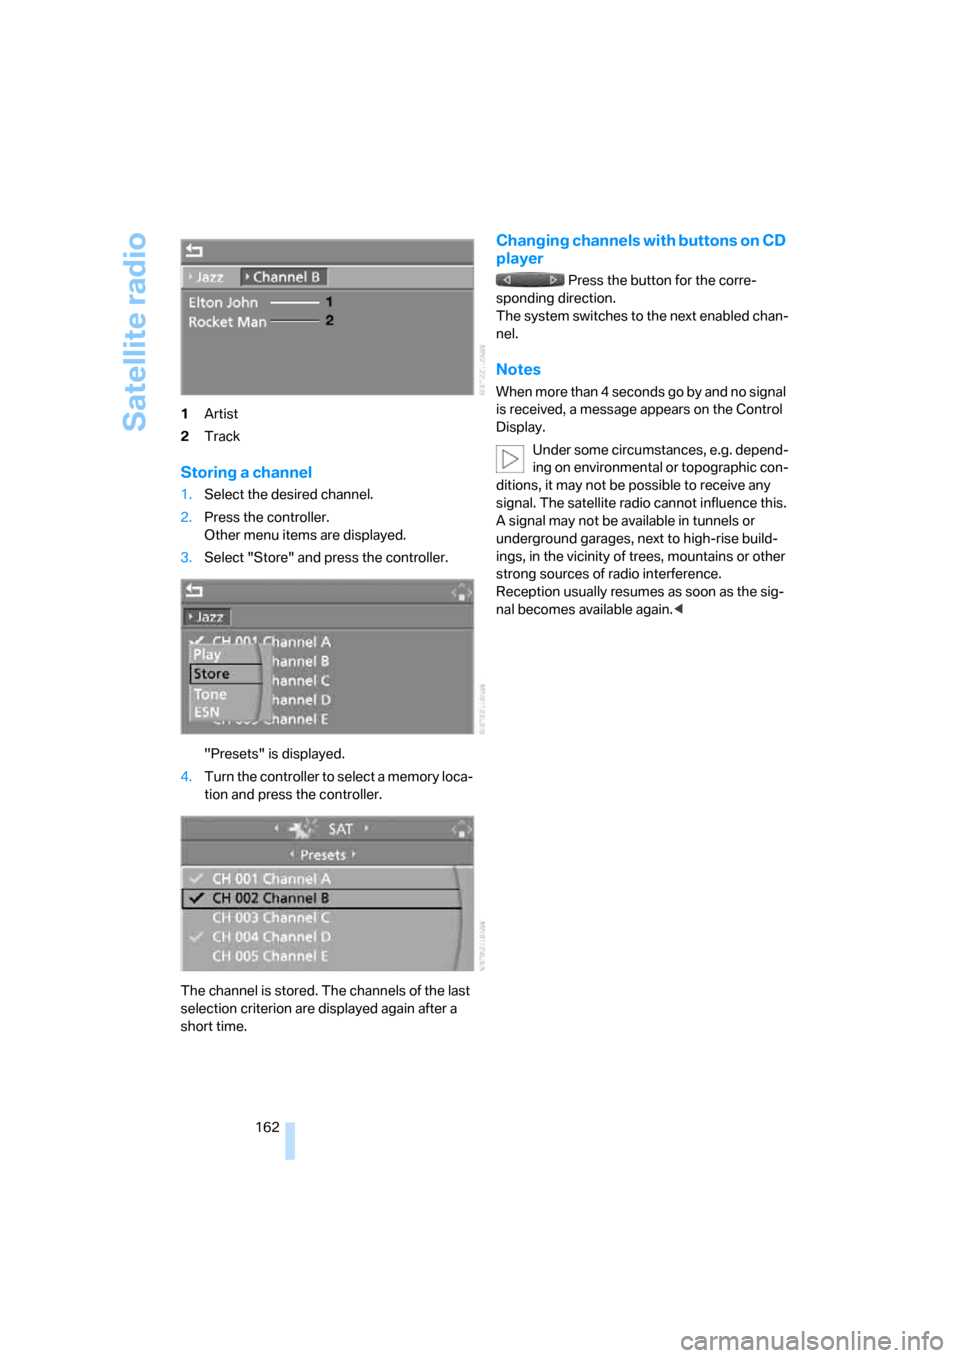
162 1Artist
2Track
Storing a channel
1.Select the desired channel.
2.Press the controller.
Other menu items are displayed.
3.Select "Store" and press the controller.
"Presets" is displayed.
4.Turn the controller to select a memory loca-
tion and press the controller.
The channel is stored. The channels of the last
selection criterion are displayed again after a
short time.
Changing channels with buttons on CD
player
Press the button for the corre-
sponding direction.
The system switches to the next enabled chan-
nel.
Notes
W hen mo re than 4 seconds go by and no s igna l
is received, a message appears on the Control
Display.
Under some circumstances, e.g. depend-
ing on environmental or topographic con-
ditions, it may not be possible to receive any
signal. The satellite radio cannot influence this.
A signal may not be available in tunnels or
underground garages, next to high-rise build-
ings, in the vicinity of trees, mountains or other
strong sources of radio interference.
Reception usually resumes as soon as the sig-
nal becomes available again.<
Page 166 of 260
CD player and CD changer
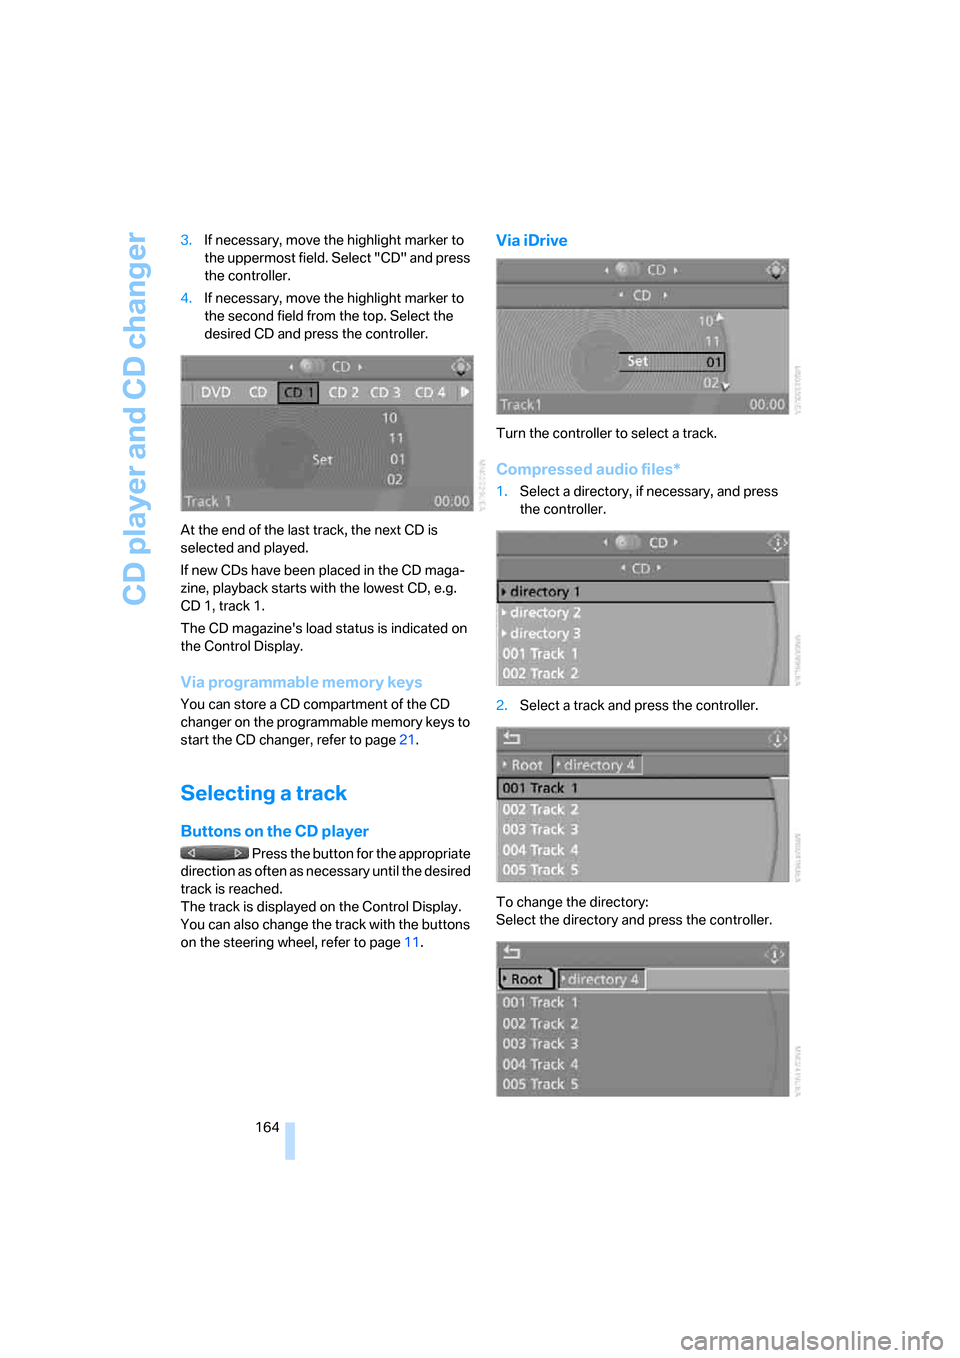
164 3.If necessary, move the highlight marker to
the uppermost field. Select "CD" and press
the controller.
4.If necessary, move the highlight marker to
the second field from the top. Select the
desired CD and press the controller.
At the end of the last track, the next CD is
selected and played.
If new CDs have been placed in the CD maga-
zine, playback starts with the lowest CD, e.g.
CD 1, track 1.
The CD magazine's load status is indicated on
the Control Display.
Via programmable memory keys
You can store a CD compartment of the CD
changer on the programmable memory keys to
start the CD changer, refer to page21.
Selecting a track
Buttons on the CD player
Press the button for the appropriate
direction as often as necessary until the desired
track is reached.
The track is displayed on the Control Display.
You can also change the track with the buttons
on the steering wheel, refer to page11.
Via iDrive
Turn the controller to select a track.
Compressed audio files*
1.Select a directory, if necessary, and press
the controller.
2.Select a track and press the controller.
To change the directory:
Select the directory and press the controller.
Page 167 of 260
Navigation
Entertainment
Driving tips
165Reference
At a glance
Controls
Communications
Mobility
To exit from the menu:
Select the arrow and press the controller.
If the car is equipped with two CD drives, you
can save specific tracks on the programmable
memory keys, refer to page21.
Displaying information about the
track*
With compressed audio files, any information
about the current track that has been recorded
can be displayed, e.g. the name of the artist.
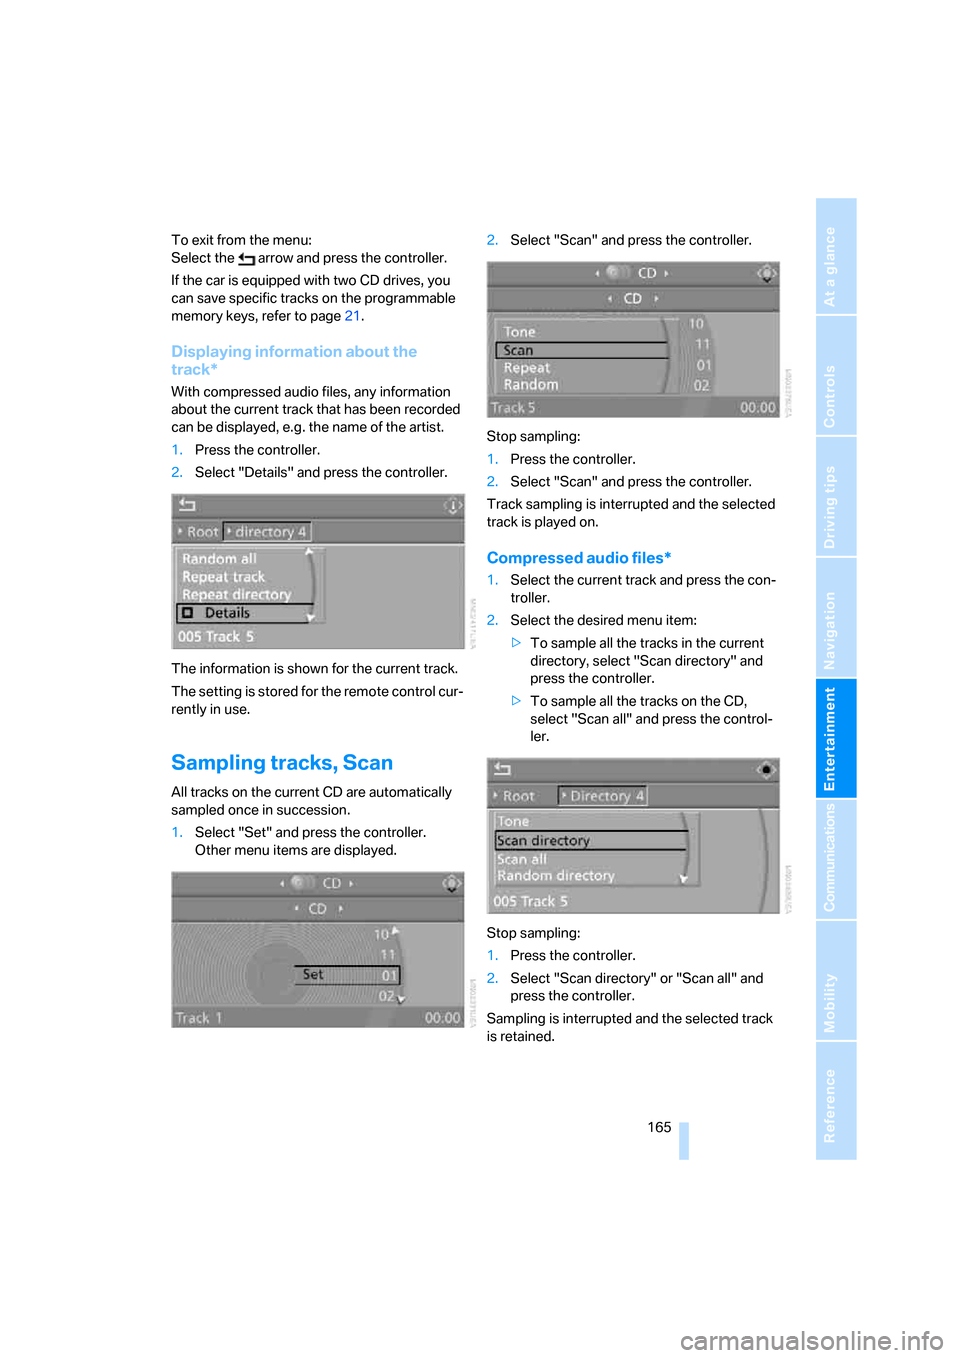
1.Press the controller.
2.Select "Details" and press the controller.
The information is shown for the current track.
The setting is stored for the remote control cur-
rently in use.
Sampling tracks, Scan
All tracks on the current CD are automatically
sampled once in succession.
1.Select "Set" and press the controller.
Other menu items are displayed.2.Select "Scan" and press the controller.
Stop sampling:
1.Press the controller.
2.Select "Scan" and press the controller.
Track sampling is interrupted and the selected
track is played on.
Compressed audio files*
1.Select the current track and press the con-
troller.
2.Select the desired menu item:
>To sample all the tracks in the current
directory, select "Scan directory" and
press the controller.
>To sample all the tracks on the CD,
select "Scan all" and press the control-
ler.
Stop sampling:
1.Press the controller.
2.Select "Scan directory" or "Scan all" and
press the controller.
Sampling is interrupted and the selected track
is retained.
Page 168 of 260
CD player and CD changer
166
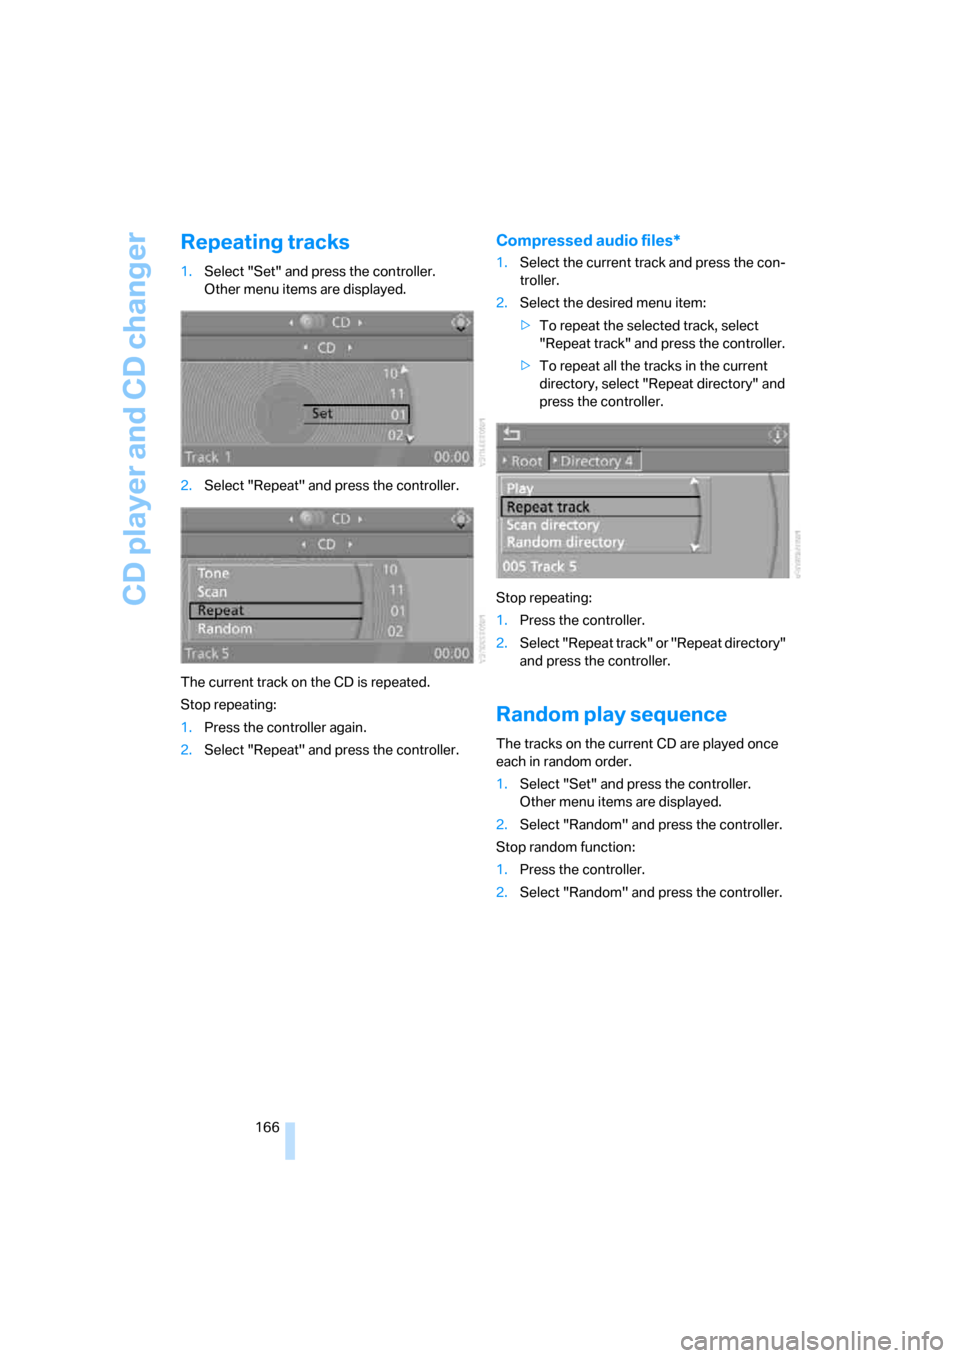
Repeating tracks
1.Select "Set" and press the controller.
Other menu items are displayed.
2.Select "Repeat" and press the controller.
The current track on the CD is repeated.
Stop repeating:
1.Press the controller again.
2.Select "Repeat" and press the controller.
Compressed audio files*
1.Select the current track and press the con-
troller.
2.Select the desired menu item:
>To repeat the selected track, select
"Repeat track" and press the controller.
>To repeat all the tracks in the current
directory, select "Repeat directory" and
press the controller.
Stop repeating:
1.Press the controller.
2.Select "Repeat track" or "Repeat directory"
and press the controller.
Random play sequence
The tracks on the current CD are played once
each in random order.
1.Select "Set" and press the controller.
Other menu items are displayed.
2.Select "Random" and press the controller.
Stop random function:
1.Press the controller.
2.Select "Random" and press the controller.
Page 172 of 260
USB-audio interface
170
USB-audio interface
You can connect audio devices, e. g. an iPod or
a USB device (MP3 player, USB stick) to the
USB-audio interface. They can be operated via
iDrive.
Standard audio formats, e.g. MP3, WMA, WAV
(PCM) and AAC, and playlists in the M3U format
can be played.
Due the variety of audio devices on the market,
it cannot be guaranteed that every device will
be operable on the vehicle.
Ask your BMW center about what audio devices
are suitable.
Connecting
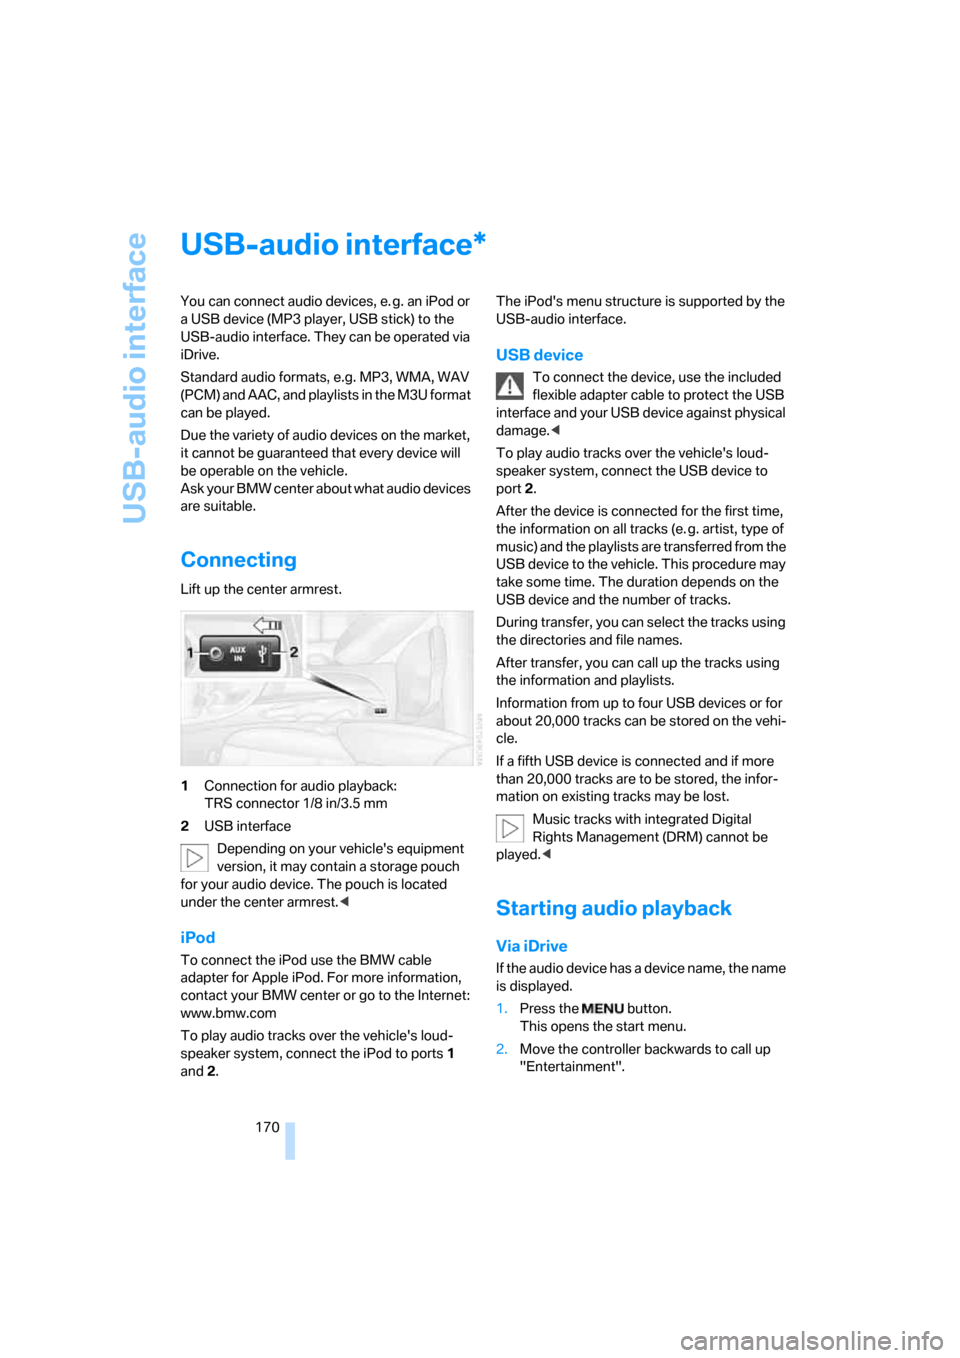
Lift up the center armrest.
1Connection for audio playback:
TRS connector 1/8 in/3.5 mm
2USB interface
Depending on your vehicle's equipment
version, it may contain a storage pouch
for your audio device. The pouch is located
under the center armrest.<
iPod
To connect the iPod use the BMW cable
adapter for Apple iPod. For more information,
contact your BMW center or go to the Internet:
www.bmw.com
To play audio tracks over the vehicle's loud-
speaker system, connect the iPod to ports 1
and 2.The iPod's menu structure is supported by the
USB-audio interface.
USB device
To connect the device, use the included
flexible adapter cable to protect the USB
interface and your USB device against physical
damage.<
To play audio tracks over the vehicle's loud-
speaker system, connect the USB device to
port2.
After the device is connected for the first time,
the information on all tracks (e. g. artist, type of
music) and the playlists are transferred from the
USB device to the vehicle. This procedure may
take some time. The duration depends on the
USB device and the number of tracks.
During transfer, you can select the tracks using
the directories and file names.
After transfer, you can call up the tracks using
the information and playlists.
Information from up to four USB devices or for
about 20,000 tracks can be stored on the vehi-
cle.
If a fifth USB device is connected and if more
than 20,000 tracks are to be stored, the infor-
mation on existing tracks may be lost.
Music tracks with integrated Digital
Rights Management (DRM) cannot be
played.<
Starting audio playback
Via iDrive
If the audio device has a device name, the name
is displayed.
1.Press the button.
This opens the start menu.
2.Move the controller backwards to call up
"Entertainment".
*