Replacing components
216
Replacing components
Onboard tool kit
The onboard tool kit is stored beneath the floor
panel in the cargo bay.
Wiper blades
1.Fold out the wiper arm and hold it.
2.Press together the locking spring, arrow1,
and fold out the wiper blade, arrow2.
3.Take the wiper blade out of the catch mech-
anism, pulling the blade toward the front.
To avoid damage, make sure that the
wiper arms are against the windshield
before you open the engine compartment.<
Lamps and bulbs
Lamps and bulbs make an essential contribu-
tion to vehicle safety. They should, therefore,
be handled carefully. BMW recommends hav-
ing your BMW center perform any work that you
do not feel competent to perform yourself or
that is not described here.
Never touch the glass of new bulbs with
your bare fingers, as even minute
amounts of contamination will burn into the
bulb's surface and reduce its service life. Use a
clean tissue, cloth or something similar, or hold
the bulb by its base.<
You can obtain a selection of replacement bulbs
at your BMW center.When working on electrical systems,
always begin by switching off the con-
sumer in question, otherwise short-circuits
could result. To avoid possible injury or equip-
ment damage when replacing bulbs, observe
any instructions provided by the bulb manufac-
turer.<
For care and maintenance of the headlamps,
please follow the instructions in the separate
Caring for your vehicle brochure.
If the routine for changing a particular
bulb is not described here, please contact
your BMW center or a workshop that works
according to BMW repair procedures with cor-
respondingly trained personnel.<
Light-emitting diodes LED
Light-emitting diodes installed behind translu-
cent lenses serve as the light source for many of
the controls and displays in your vehicle. These
light-emitting diodes, which operate using a
concept similar to that applied in conventional
lasers, are officially designated as Class 1 light-
emitting diodes.
Do not remove the covers or expose the
eyes directly to the unfiltered light source
for several hours, otherwise this could cause
irritation to the retina.<
Xenon lamps*
These bulbs have a very long service life and are
highly unlikely to fail. If a xenon lamp fails never-
theless, switch on the fog lamps and continue
the journey with great care, provided that local
legislation does not prohibit this.
Have any work on the xenon lamp system,
including bulb replacements, performed
o nl y b y a BM W c e n t er o r a w o r k s h o p t h a t w o rk s
according to BMW repair procedures with cor-
respondingly trained personnel. Otherwise, if
such work is carried out improperly, the high
voltage in the system presents the danger of
fatal injuries.<
Mobility
217Reference
At a glance
Controls
Driving tips
Communications
Navigation
Entertainment
Removing the headlamp cover
1.Pull the wire brackets over the notches, see
arrow, and fold to the side.
2.Fold away the headlamp cover.
Be careful when attaching the headlamp
cover and ensure that both wire brackets
are securely in place, otherwise leaks could
occur and cause damage to the headlamp sys-
tem.<
Attach the headlamp cover in reverse order.
Halogen headlamps
Halogen low beams and high beams
H7 bulb, 55 watts
Always wear gloves and eye protection;
the atmosphere within the H7 bulb is
pressurized. Otherwise there is a risk of injury if
the bulb is damaged.<
The figure shows the right-hand headlamp.
1High beams
2Low-beam headlamps
1.Remove the headlamp cover.
2.Fold down the holding bracket.
3.Remove and replace the bulb.4.Reattach the bulb holder with the notch at
the top.
5.Fold the holding bracket back up and let it
snap into place.
6.Attach the headlamp cover.
Parking lamps, roadside parking lamps
5 watt bulb, W5W
1.Remove the headlamp cover.
The figure shows the right-hand headlamp.
2.Pull out the bulb holder.
3.Remove and replace the bulb.
4.Reinsert the bulb holder.
5.Attach the headlamp cover.
Xenon headlamps
Parking lamps, roadside parking
lamps, daytime running lamps
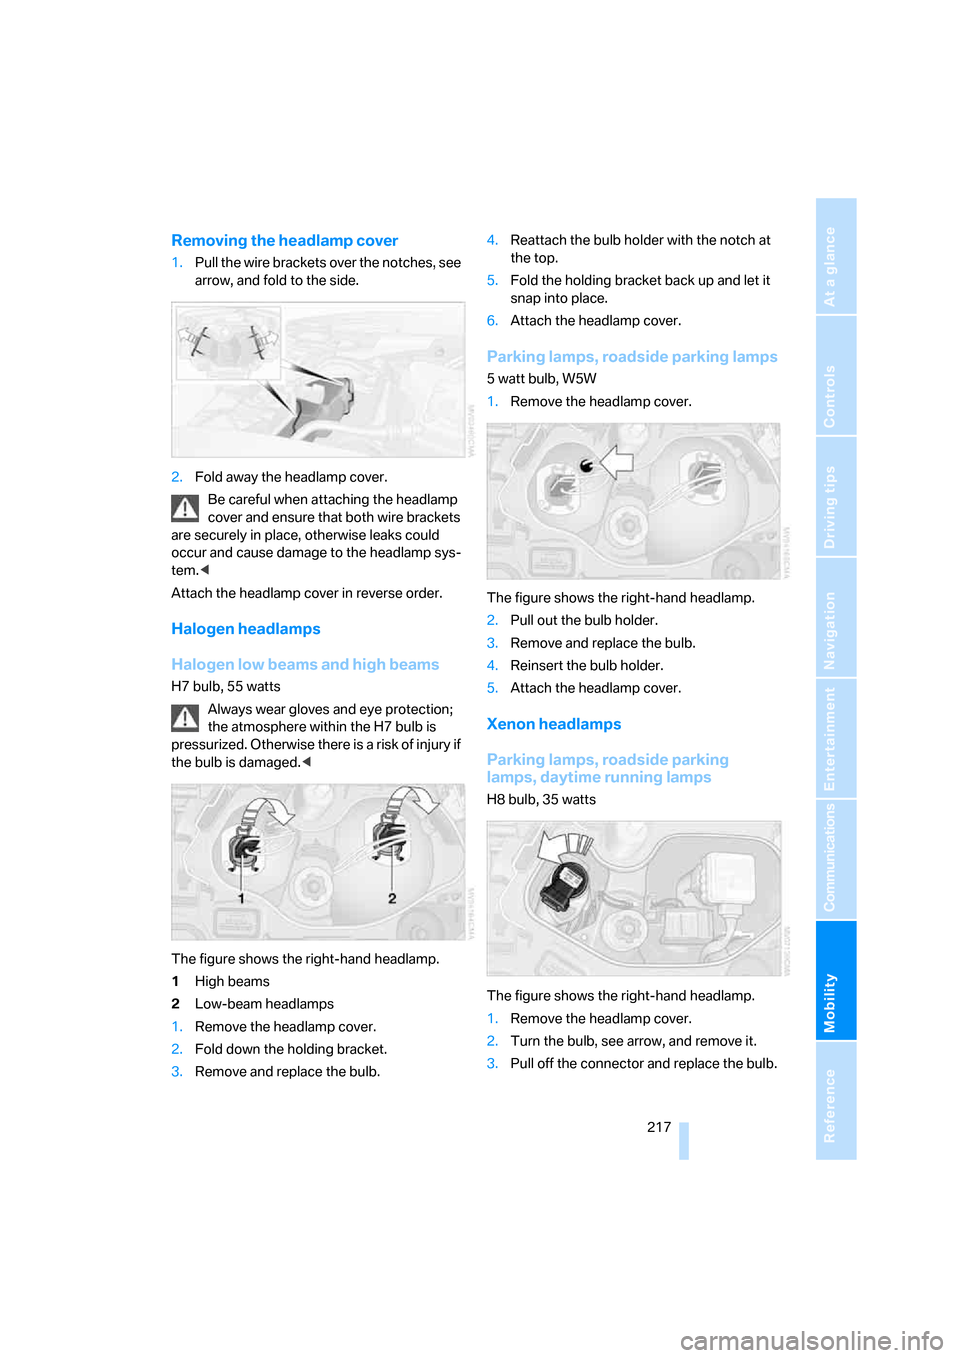
H8 bulb, 35 watts
The figure shows the right-hand headlamp.
1.Remove the headlamp cover.
2.Turn the bulb, see arrow, and remove it.
3.Pull off the connector and replace the bulb.