2008 AUDI TT ROADSTER buttons
[x] Cancel search: buttonsPage 26 of 316

Driver inf ormation sy ste m
Digital speedometer
Fig. 1 0 Dis play: Dig ital
s pe edom ete r
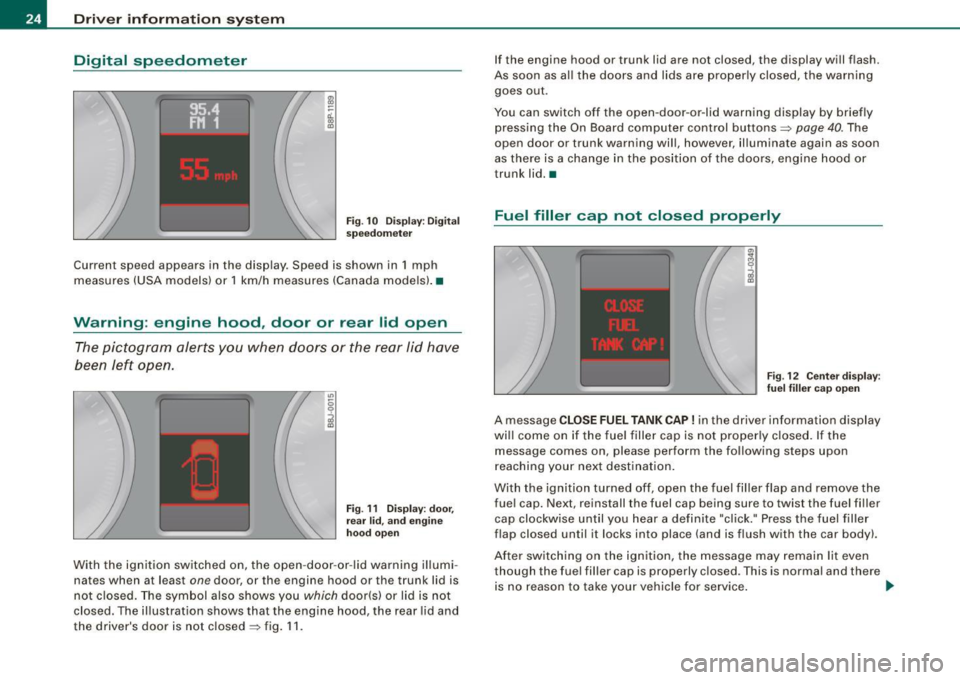
Current speed appears in the disp lay . Speed is shown in 1 mph
measures (USA models) or 1 km/h measures (Canada mode ls) .•
Warning : engine hood , door or rear lid open
The pictogram alerts you when doors or the rear lid have
been left open .
Fig . 11 D ispl ay: door,
re ar
lid , and en gine
h oo d open
With the ignition switched on, the open -door -or -lid warning illumi
nates when at least
one door, or the engine hood or the trunk lid is
not c losed. The symbol also shows you which door(s) or lid is not
closed. The illustration shows that the engine hood, the rear lid and
the driver's door is not closed=> fig . 11 . If the engine hood or trunk lid are not closed, the display will flash.
As soon as al l the doors and lids are proper ly closed, the warning
goes out .
You can switch off the open -door -or -lid warning display by brief ly
pressing the On Board computer control buttons=>
page 40. The
open door or trunk warning wil l, however, illuminate again as soon
as there is a change in the position of the doors, eng ine hood or
trunk lid. •
Fuel filler cap not closed properly
Fig. 12 C ente r dis play :
fu el fi ller cap op en
A message CLOSE FUEL TANK CAP ! in the driver informa tion display
wi ll come on if the fuel f iller cap is not proper ly closed. If the
message comes on, please perform the following steps upon
r eaching your next destination.
With the ignition turned off , open the fuel fil ler f lap and remove the
fue l cap. Next, reinstall the fuel cap being sure to twist the fuel fi ller
cap clockwise until you hear a definite "cl ick." Press the fuel filler
flap closed until it locks into place (and is flush with the car body) .
Af ter sw itch ing on the ign ition, the message may remain lit even
though the fuel filler cap is properly c losed. This is normal and there
is no reason to take your vehicle for service . _,,
Page 53 of 316

& WARNING
• When you lock your vehicle from outside, nobody -especially
children · should remain inside the vehicle. Remember, when you
lock the vehicle from the outside the windows cannot be opened
from the inside.
• When you leave the vehicle, always remove the ignition key and
take it with you. This will prevent passengers (children, for example) from accidentally being locked in the vehicle should they
accidentally press the power locking switch.
• Do not leave children inside the vehicle unsupervised. In an
emergency it would be impossible to open the doors from the
outside without the key.
[ i J Tips
• In the event of a crash with airbag deployment all locked doors
will be automatically unlocked to give access to the vehicle occu
pants from the outside .
• If the power locking system should malfunction, you can lock
each door individually using the vehicle key.
• If the power locking system should fail, you can still open the
fuel tank flap in an emergency=>
page 218.
• You are well advised not to keep valuables inside an unattended
vehicle, visible or not . Even a properly locked vehicle cannot provide
the security of a safe! •
Contro ls and eq uip
ment
Opening and closing
Unlocking and locking the vehicle with the
remote control
How the remote control works.
Fig. 35 Remote
control : function
buttons
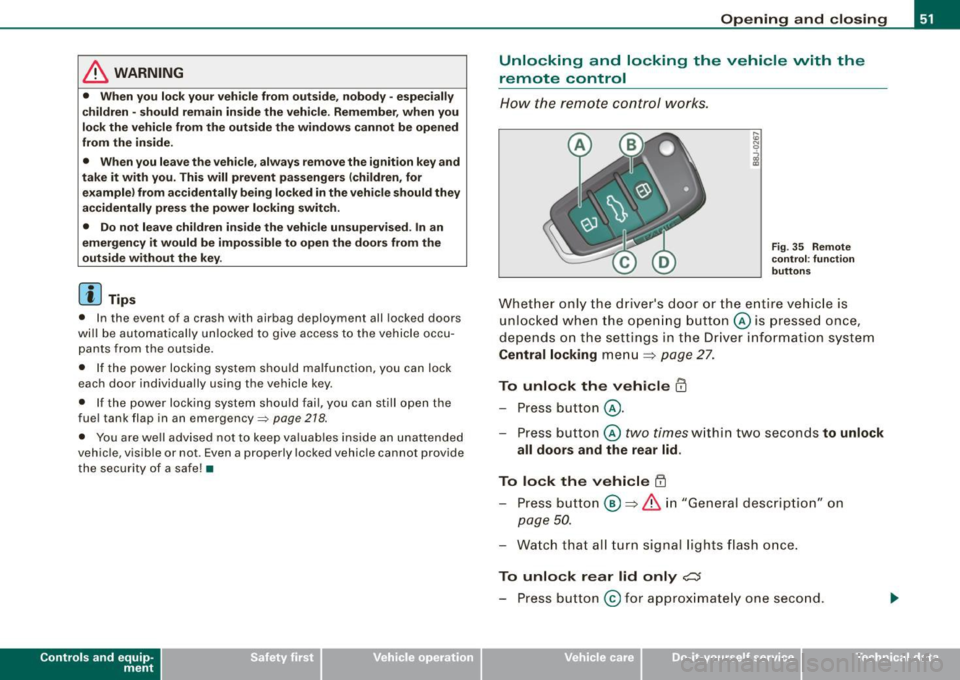
Whether only the driver's door or the entire vehicle is
unlocked when the opening button@ is pressed once,
depends on the settings in the Driver information system
Central locking menu => page 27.
To unlock the vehicle m
-Press button @.
- Press button ©
two times within two seconds to unlock
all doors and the rear lid .
To lock the vehicle 63
-Press button @ => & in "General description" on
page 50.
-Watch that all turn signal lights flash once.
To unlock rear lid only e::5
-Press button @for approximately one second.
Vehicle care I I irechnical data
Page 101 of 316

Functions are set by turning the rotary knob or switched on and off
by tapping the buttons. The LED in the buttons illuminates when the
function is active .
Button(sl
Rotary knob 0
Rotary knob 0 @
Rotary knob©
(- .,; +]
-
Po llutant f ilter Me
aning
Temperature selection
Switch ai r conditioning
on/o ff
Fan
Air distribution
Rear window defogger
Heated seat* driver/pas
senger side
Recirculation
Switch on cooling sys
tem
P age
~ page 100
~ page 100
~ page 701
~ page 101
~ page 103
~ page 104
~ page 102
~ page 102
The pollutant filter (particle filter) ensures that contaminants in the
outside air (such as dust or po llen) are grea tly reduced or stopped.
T he air is also filtered in recirculation mode.
The pollutant fil ter e lement must be changed according to the inter
vals specified in the maintenance schedu le so that the air condi
tioning system's performance is not adversely affected.
If the fil ter's effectiveness is weakened by driving the vehicle in
areas with heavi ly polluted outside air, the filter element should also
be changed in between the listed services .
Controls and equip
ment
W arm and cold
& WARNING
Fo r safet y rea sons , it is imp ort ant that all window s are free of ice,
snow , and condensati on . Only then i s good vi sibility en sured.
Pl eas e familiari ze yourself with the co rrect o peration of th e air
c ond itioning and how to dehum id ify /defro st the windows.
0 Note
• I f you suspect that the climate contro ls have been damaged ,
switch the system off to avoid damaging it , and have it inspected by
an authorized Audi dealer.
• Audi climate control system repairs require specia l expertise and
the proper tools. You shou ld contact an authorized Audi dealer in
the event of malfunct ions.
[ i ] Tip s
• To avoid adversely affecting heating and cooling performance
and to prevent condensation on the windows, the air intake in front
of the windsh ield must be free of ice, snow, and leaves.
• The air coming from the vents and circu lating through the en tire
interior is extracted through the out let slots in the side panels in the
luggage compartment. Make sure that the outlet slots are not
covered by clo th ing, etc.
• Climate control works most effectively if the windows are closed .
However , if the interior o f a parked vehicle is extremely hot from the
sun's rays, briefly opening the windows can speed up the cooling
process. •
I • •
Page 124 of 316

-L_!H~o~m~ e~L:!!in~ k~®~------------------------------------------------
Fig . 116 Front bumper ,
driver side: location of
transmitter unit
Phase 1: programming the overhead keypad
1. Make sure your vehicle is within operating range of the
remote controlled garage door opener.
2. Set the parking brake::::,
& in "Genera l information".
3. Turn the ignition on. Do not start the engine!
4. Press and hold the two outside Homelink® buttons
(D
and @f or approxim~tely 20 sec_onds until indicator
light@::::,
page 121, fig. 115 begins to flash. Then
release both buttons. Do not hold the buttons for longer
than
30 seconds.
- This procedure only needs to be performed
once. It
erases the factory-set default codes and does not have to
be repeated to program additional remote controls.
5. Press and hold the Homelink® button
(D , ® or @ until
the indicator light@starts flashing
slowly. Release the
button.
- The system will remain in programming mode for 5
minutes.
Go to the front of the vehicle and proceed with
phase 2.
Phase 2:
programming the bumper mounted transmitter
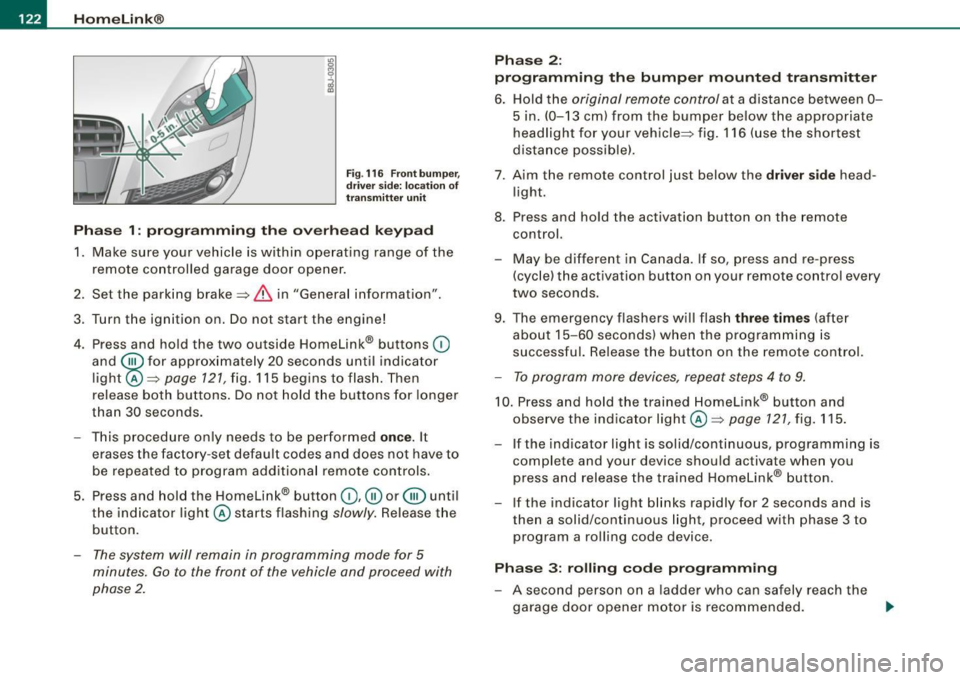
6. Hold the original remote control at a distance between 0-
5 in. (0-13 cm) from the bumper below the appropriate
headlight for your vehicle::::, fig.
116 (use the shortest
distance possible).
7 . Aim the remote control just below the driver side head
light.
8. Press and hold the activation button on the remote control.
- May be different in Canada. If so, press and re-press
(cycle) the activation button on your remote control every
two seconds.
9. The emergency flashers will flash three times (after
about
15-60 seconds) when the programming is
successful. Release the button on the remote control.
- To program more devices, repeat steps 4 to 9.
10. Press and hold the trained Homelink® button and
observe the indicator light @::::,
page 121, fig. 115.
If the indicator light is solid/continuous, programming is
complete and your device should activate when you
press and release the trained Homelink® button.
- If the indicator light blinks rapidly for 2 seconds and is
then a solid/continuous light, proceed with phase 3 to
program a rolling code device.
Phase 3: rolling code programming
- A second person on a ladder who can safely reach the
garage door opener motor is recommended.
~
Page 126 of 316

• .___H_ o_ m _ e _L_i _ n _k _® ____________________________________________________ _
Pr og ra mming th e bump er m ount ed tr ansmitt er
1. Hold the original remote control at a distance between 0-
5 in. (0 -13 cm ) from the bumper below the appropriate
headlight for your vehicle (use the shortest distance
poss ible).
2. Aim the remote control just below the
dr iver s ide head
l ight.
3. Press and hold the activation button on the remote control.
4. The emergency flashers will flash
three tim es (after
about
15-60 seconds) when the programming is
successful. Now release the button on the remote
co ntrol.
- If the dev ice utilizes a rol ling code, please f ollow phase 3
of ~
page 121, "Programming the Home Link® trans
m itter" for rolling code programming .
This pr oce dure w ill ca use the existing pr ogra mm ing on th e
H om eli nk® button to be eras ed ! •
A pplies to vehicl es: w ith H om eli nk® univ er sal re mot e con tro l
Erasing the programming of the HomeLink ®
transmitter
When you erase the programming, the programming on
all three of the transmitter channels with be lost!
- Perform steps 1 to 4 as described on~ page 122 , "Phase
1 : programming the overhead keypad".
When comp let ed, the Hom elink ® system will be in the program
ming mode and is then ready to learn the codes for remote
controlled devices.
[ i ] T ip s
• Programmed buttons cannot be erased ind ividua lly.
• For security reasons you are adv ised to erase the programming
of the Homelink ® system befo re you sell your vehic le. •
Applies to vehicle s: with Home link® univ er sa l re m ote con tro l
Information and accessories
If you wou ld like more information on Homelink ®, where to
pu rchase the Homelink ® compatib le products , or would li ke to
purchase the Homelink ® Home Lighting Package, please call tol l
free: 1 -800 -355 -3515.
[ i ] T ip s
• The Homelink ® universal transmitter complies with part 15 of
the FCC rules and RSS -2 10 of IC part 15. Operation is subject to th e
following conditions :
- this device may not cause harmful interference, and
- this device must accept any interference that may be received
including in terference that may cause undesired operation .
• Changes or modifications not express ly approved by the party
respons ible for compliance could void th e user 's authority to
operate the device (DOC : ISTC 1763 102 264 Pr ince MODEL/FCC ID :
CB2 V94800l. •