2008 AUDI S5 wipers
[x] Cancel search: wipersPage 67 of 294
Downloaded from www.Manualslib.com manuals search engine Lights and vision65
Controls
Safety
Driving tips
General maintenance
Self-help
Technical data
– Lift the wiper arm away from the glass.
– Press the release button on the wiper blade
⇒page 64, fig. 66. Hold the wiper blade firmly and press
it forwards slightly .
– Slide the wiper blade upwards .
Fitting the wiper blade
– Fit the new wiper blade into the mounting on the wiper
arm . You should hear it engage in the wiper arm.
– Fold the wiper arm back down onto the glass.
WARNING
•
To prevent smearing on the glass, the wiper blades should be
cleaned regularly using a window cleaner solution. If the wiper
blades are very dirty (insects etc.), they should be cleaned using a
sponge or cloth – bad visibility can cause accidents.
•
For safety, the wiper blades should be changed once or twice a
year.Caution
The windscreen wipers must be in the service position ⇒page 64
when replacing the blades! Otherwise the wiper motor or the paint-
work on the bonnet may be damaged.Rear-view mirrorsManual anti-dazzle adjustmentNormal setting
– Push the lever at the bottom of the mirror away from you.Anti-dazzle setting
– Pull the lever at the bottom of the mirror towards you.
Applies to vehicles: with automatic anti-dazzle adjustment for interior mirrorAutomatic anti-dazzle adjustment
The automatic anti-dazzle function can be switched on
and off as desired.Switching off anti-dazzle function
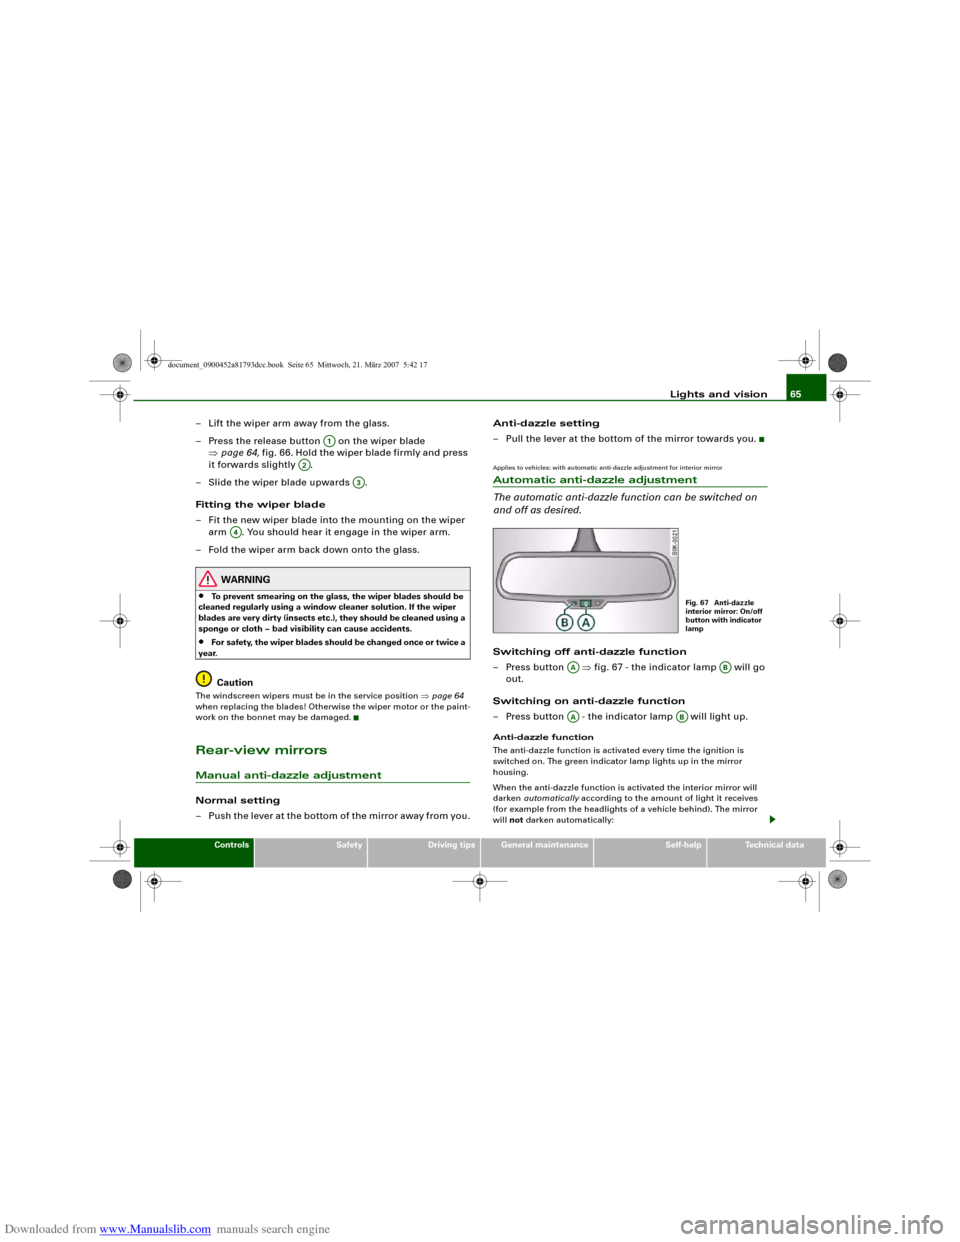
– Press button ⇒fig. 67 - the indicator lamp will go
out.
Switching on anti-dazzle function
– Press button - the indicator lamp will light up.Anti-dazzle function
The anti-dazzle function is activated every time the ignition is
switched on. The green indicator lamp lights up in the mirror
housing.
When the anti-dazzle function is activated the interior mirror will
darken automatically according to the amount of light it receives
(for example from the headlights of a vehicle behind). The mirror
will not darken automatically:
A1
A2
A3
A4
Fig. 67 Anti-dazzle
interior mirror: On/off
button with indicator
lamp
AA
AB
AA
AB
document_0900452a81793dcc.book Seite 65 Mittwoch, 21. März 2007 5:42 17
Page 191 of 294
Downloaded from www.Manualslib.com manuals search engine Intelligent technology189
Controls
Safety
Driving tips
General maintenance
Self-help
Technical data can cause the system to reduce engine power when this is not
desired. Also refer to ⇒page 234, “Replacing wheels and tyres”.
Electronic differential lock (EDL)
The electronic differential lock monitors the speed of the
driven wheels.General notes
The electronic differential lock (EDL) helps the car to start moving,
accelerate and climb a gradient in slippery conditions where this
may otherwise be difficult or even impossible.
How the system works
The EDL acts automatically. With the aid of the ABS sensors
⇒page 187, the system monitors the rotational speed of the driven
wheels on each axle. Whenever it detects a significant difference in
the speed of the driven wheels of one axle (for example, if the road is
slippery on one side) the system applies the brake to slow down the
spinning wheel so that more of the power is directed to the other
wheels. This function is active up to about 100 km/h. The brake
system will make noises while it is working.
Driving away from a standstill
Sometimes one wheel has less grip and starts spinning, for
example, if one of the driven wheels is on ice. In this case, keep
pressing the accelerator gradually until the car starts moving, even
though the wheel with less grip will still spin.
Overheating of the brakes
To prevent the disc brake of the braked wheel from overheating, the
EDL cuts out automatically if subjected to excessive loads. The car
remains operational and will behave in the same way as a car
without EDL.
The EDL will switch on again automatically when the brake has
cooled down.
WARNING
•
When accelerating on a uniformly slippery surface (for instance
all four wheels on ice or snow), press the accelerator gradually and
carefully. The driven wheels may otherwise start to spin (in spite
of the EDL), which would impair the car's stability and could lead
to an accident.
•
Even with EDL, you should always adjust your speed to suit the
conditions. Do not let the extra safety provided tempt you into
taking any risks when driving – this can cause accidents.Note
If the ABS warning lamp lights up, this can also mean there is a fault
in the EDL. Please contact a qualified workshop as soon as
possible.BrakesNew brake pads
New brake pads do not give full braking effect for the first 400 km,
they must first be “bedded in”. However, you can compensate for
the slightly reduced braking effect by applying more pressure on
the brake pedal. Avoid placing a heavy load on the brakes during the
running-in period.
We ar
The rate of wear on the brake pads depends a great deal on how you
drive and the conditions in which the vehicle is operated. Negative
factors are, for instance, city traffic, frequent short trips or hard
driving with abrupt starts and stops.
Wet roads; road salt
When you are driving at a speed higher than 80 km/h and have the
windscreen wipers switched on the brake pads are very briefly
document_0900452a81793dcc.book Seite 189 Mittwoch, 21. März 2007 5:42 17
Page 214 of 294
Downloaded from www.Manualslib.com manuals search engine Care of vehicle and cleaning 212Plastic partsPlastic parts will come clean with regular washing. If this is not suffi-
cient, plastic parts should only be treated with a special solvent-free
plastic cleaning agent. Do not use paint cleaners, polishes or wax on
plastic parts.Paint damageMinor damage to the paint, such as scratches or stone chips, should
be touched up without delay before the metal starts to corrode. Suit-
able touch-up brushes or sprays for your car can be obtained from
an Audi dealer.
The number of the original paint finish on the vehicle is given on the
data sticker ⇒page 279.
If corrosion is already visible it must be thoroughly removed by a
qualified workshop.Windows
Clear vision is an essential safety factor.The windscreen must not be cleaned with insect remover or wax,
otherwise the windscreen wipers will not function properly
(juddering).
Traces of rubber, oil, grease or silicone can be removed with a
window cleaning solution or a silicone remover. Wax residue can
only be removed with a special cleaner. Your Audi dealer will be able
to provide you with more detailed information.
The windows should also be cleaned on the inside at regular inter-
vals.
Use a separate cloth or chamois to dry the windows. Cloths used for
waxing and polishing contain residues that will cause smears on the
glass.
WARNING
Do not use water-repellent coatings on the windscreen. In bad visi-
bility conditions such as light rain, low sun or when driving at
night these coatings can cause increased dazzle, which is a
serious safety hazard. Such coatings can also cause the wiper
blades to judder.
Caution
•
Remove snow and ice from windows and mirrors with a plastic
scraper only. To avoid scratches caused by dirt on the glass, the
scraper should only be pushed in one direction and not moved to
and fro.
•
The heating element for the rear window is located on the inner
side of the window. To avoid damaging the heating element, do not
put stickers on the inner side of the window.
•
Never use warm or hot water to remove snow and ice from
windows and mirrors. This could cause the glass to crack!
Rubber seals (weatherstrips)The weatherstrips will remain pliable and last longer if they are
occasionally treated with a suitable care product (for example sili-
cone spray). This will also prevent premature ageing and leaks. The
doors will be easier to open as well. If they are kept pliable, the door
seals will be less likely to freeze up in the winter.WheelsThe wheels require regular attention to preserve their appearance.
It is important to remove road salt and brake dust by washing the
wheels at regular intervals, otherwise the finish will be impaired.
document_0900452a81793dcc.book Seite 212 Mittwoch, 21. März 2007 5:42 17
Page 259 of 294
Downloaded from www.Manualslib.com manuals search engine Self-help257
Controls
Safety
Driving tips
General maintenance
Self-help
Technical data terminal must not touch metal parts of the vehicle: this can cause
short circuiting.
•
Do not bend over the batteries – risk of acid burns.
•
The screw plugs on the battery cells must be screwed in firmly.
•
Keep sparks, flame and lighted cigarettes away from batteries:
the gases given off can cause an explosion.
•
If jump-starting another vehicle, position the jump leads in
such a way that they cannot come into contact with any moving
parts in the engine compartment of the other vehicle.Caution
Please note that the above method of connecting the leads is meant
for jump-starting your vehicle. If jump-starting another vehicle, you
should not connect the negative lead (–) to the negative terminal of
the discharged battery, but directly to the engine block or a solid
metal part bolted to the engine block. If the battery of the other
vehicle does not have a gas vent, there is a risk that a mixture of
oxygen and hydrogen gas can accumulate and cause an
explosion.Tow-starting and towing awayGeneral notes
Points to observe when tow-starting or towing awayIf you use a towrope:
Notes for the driver of the towing vehicle
– The towrope must be taut before driving off.– Engage the clutch very gently when starting to move; on
vehicles with automatic gearbox press the accelerator
slowly.
Notes for the driver of the towed vehicle
– The ignition should be switched on so that the turn
signals, horn, windscreen wipers and washers can be
used. Please ensure that the steering wheel is unlocked
when you switch on the ignition, and that it moves freely.
–Put gear lever in neutral (manual gearbox) or move
selector lever to position N (automatic gearbox).
– The brake servo and power steering only work when the
engine is running. Considerably more effort is required
on the brake pedal and steering wheel when the engine
is switched off.
– Ensure that the towrope remains taut at all times when
towing.
Towrope or towbar
It is easier and safer to tow a vehicle with a towbar. You should only
use a towrope if you do not have a towbar.
A towrope should be slightly elastic to reduce the loading on both
vehicles. It is advisable to use a towrope made of synthetic fibre or
similar material.
Attach the tow-rope or tow-bar only to the towing anchorages
intended for this purpose ⇒page 258 or ⇒page 259.
Driving technique
Towing requires some experience – especially when using a
towrope. Both drivers should be familiar with the technique required
for towing. Inexperienced drivers should not attempt to tow-start or
tow away another vehicle.
WARNING (continued)
document_0900452a81793dcc.book Seite 257 Mittwoch, 21. März 2007 5:42 17
Page 293 of 294
Downloaded from www.Manualslib.com manuals search engine Index291
Controls
Safety
Driving tips
General maintenance
Self-help
Technical data Safety notes . . . . . . . . . . . . . . . . . . . . . 161
Taking off . . . . . . . . . . . . . . . . . . . . . . . 164
Warning lamp . . . . . . . . . . . . . . . . . . . . 17
Seat heating
Front (deluxe automatic air conditioner)
112
Rear . . . . . . . . . . . . . . . . . . . . . . . . . . . . 113
Seat memory . . . . . . . . . . . . . . . . . . . . . . . . 72
Service interval display . . . . . . . . . . . . . . . 23
Service position for windscreen wipers . . 64
servotronic . . . . . . . . . . . . . . . . . . . . . . . . . 190
Side lights . . . . . . . . . . . . . . . . . . . . . . . . . . 54
Single journey memory . . . . . . . . . . . . . . . 26
Sitting position
Driver . . . . . . . . . . . . . . . . . . . . . . . . . . . 154
Front passenger . . . . . . . . . . . . . . . . . . 155
Incorrect sitting position . . . . . . . . . . 157
Rear passengers . . . . . . . . . . . . . . . . . 155
Snow chains . . . . . . . . . . . . . . . . . . . . . . . 237
Sockets
230 Volt . . . . . . . . . . . . . . . . . . . . . . . . . . 87
Spare key . . . . . . . . . . . . . . . . . . . . . . . . . . . 38
Starting the engine . . . . . . . . . . . . . . . . 41
Spare parts . . . . . . . . . . . . . . . . . . . . . . . . 239
Spare wheel . . . . . . . . . . . . . . . . . . . . . . . . 246
Speed warning . . . . . . . . . . . . . . . . . . . . . . 28
Speedometer . . . . . . . . . . . . . . . . . . . . . 14, 22
Starting the engine
Jump-starting . . . . . . . . . . . . . . . . . . . . 255
Spare key . . . . . . . . . . . . . . . . . . . . . . . . 41
Tow-starting . . . . . . . . . . . . . . . . . . . . . 257
Starting with jump leads . . . . . . . . . . . . . 255Steering
Locking the steering . . . . . . . . . . . . . . 114
Malfunction . . . . . . . . . . . . . . . . . . . . . . 33
Steering wheel height adjustment
(manual) . . . . . . . . . . . . . . . . . . . . . . . 114
Storage compartments . . . . . . . . . . . . . . . . 89
Front seats . . . . . . . . . . . . . . . . . . . . . . . 90
Stretch net . . . . . . . . . . . . . . . . . . . . . . . . . . 77
Sun blind . . . . . . . . . . . . . . . . . . . . . . . . . . . 61
Sun roof (tilting panorama roof) . . . . . . . . 51
Manual operation . . . . . . . . . . . . . . . . . 52
Tilting open and closed . . . . . . . . . . . . 51
Sun visors . . . . . . . . . . . . . . . . . . . . . . . . . . 60
Sunroof (tilting panorama roof)
Convenience open/close function . . . . 50
Switches on driver's door
Central locking system . . . . . . . . . . . . . 46
Switching off the engine . . . . . . . . . 116, 118
Symbols . . . . . . . . . . . . . . . . . . . . . . . . . . . . 15
TTailgate
SeeBoot lid . . . . . . . . . . . . . . . . . . . . . . . 48
Tank capacity . . . . . . . . . . . . . . . . . . . . . . . 279
Technical data . . . . . . . . . . . . . . . . . . . . . . 278
Text messages . . . . . . . . . . . . . . . . . . . . . . . 30
Tools . . . . . . . . . . . . . . . . . . . . . . . . . . . . . . 245
Total journey memory . . . . . . . . . . . . . . . . 26
Tow-away protection . . . . . . . . . . . . . . . . . 47
Towing
Automatic braking . . . . . . . . . . . . . . . . 199
Trailer stabilisation . . . . . . . . . . . . . . . 199Towing away . . . . . . . . . . . . . . . . . . . . . . . 257
Towing bracket
Parking system . . . . . . . . . . . . . . . . . . . 138
Towing bracket, removable . . . . . . . . . . . 201
Towing bracket, retrofitting . . . . . . . . . . . 206
Towline anchorage
Front . . . . . . . . . . . . . . . . . . . . . . . . . . . 258
Rear . . . . . . . . . . . . . . . . . . . . . . . . . . . . 259
Tow-starting . . . . . . . . . . . . . . . . . . . . . . . . 259
Traction control system
How the system works . . . . . . . . . . . . 188
Trailer . . . . . . . . . . . . . . . . . . . . . . . . . . . . . 198
Accessories . . . . . . . . . . . . . . . . . . . . . . 201
Notes on towing . . . . . . . . . . . . . . . . . . 200
Points to check before towing . . . . . . 198
Technical requirements . . . . . . . . . . . 198
Trailer stabilisation . . . . . . . . . . . . . . . . . . 199
Trailer turn signals
Indicator lamp . . . . . . . . . . . . . . . . . . . . 17
Trailer weights
SeePerformance, weights and
dimensions . . . . . . . . . . . . . . . . . . . . 281
Transport bag
SeeLoad-through hatch . . . . . . . . . . . . 81
Tread depth . . . . . . . . . . . . . . . . . . . . . . . . 234
Trip recorder . . . . . . . . . . . . . . . . . . . . . . . . 14
Trips, checklist . . . . . . . . . . . . . . . . . . . . . . 152
Turn signals . . . . . . . . . . . . . . . . . . . . . . . . . 58
Indicator lamp . . . . . . . . . . . . . . . . . . . . 16
Type plate . . . . . . . . . . . . . . . . . . . . . . . . . . 279
Tyre Mobility System . . . . . . . . . . . . . . . . 247
Tyre pressure . . . . . . . . . . . . . . . . . . . . . . . 232
document_0900452a81793dcc.book Seite 291 Mittwoch, 21. März 2007 5:42 17
Page 294 of 294
Downloaded from www.Manualslib.com manuals search engine Index 292Tyre repair kit . . . . . . . . . . . . . . . . . . . . . . 245
Tyre Mobility System . . . . . . . . . . . . . 247
Tyres
Inflation pressures . . . . . . . . . . . . . . . 232
Tread wear indicators . . . . . . . . . . . . . 234
Tyre service life . . . . . . . . . . . . . . . . . . 232UUniversal transmitter . . . . . . . . . . . . . . . . 145
Unleaded fuel . . . . . . . . . . . . . . . . . . . . . . 217
Unlocking . . . . . . . . . . . . . . . . . . . . . . . . . . 43
Central locking system . . . . . . . . . . . . . 45VVehicle data sticker . . . . . . . . . . . . . . . . . 279
Vehicle identification data . . . . . . . . . . . . 279
Vehicle identification number . . . . . . . . . 279
Ventilation
Deluxe automatic air conditioner . . . . 91
Deluxe automatic air conditioner plus 99
Ventilation slots . . . . . . . . . . . . . . . . . . . . 158WWarning lamps . . . . . . . . . . . . . . . . . . . . . . 15
Airbag system . . . . . . . . . . . . . . . . . . . . 16
Anti-lock brake system . . . . . . . . . . . . . 17
Brake system . . . . . . . . . . . . . . . . . . . . . 19
Electro-mechanical parking brake . . . 18
Electronic stabilisation program . . . . . 16
Emission control system . . . . . . . . . . . 17Engine management . . . . . . . . . . . . . . 15
Seat belt . . . . . . . . . . . . . . . . . . . . . . . . . 17
Warning triangle . . . . . . . . . . . . . . . . . . . . 244
Washer fluid level low . . . . . . . . . . . . . . . . 36
Washing the vehicle
By hand . . . . . . . . . . . . . . . . . . . . . . . . 210
Car wash . . . . . . . . . . . . . . . . . . . . . . . . 210
With high-pressure cleaner . . . . . . . . 210
Waxing . . . . . . . . . . . . . . . . . . . . . . . . . . . . 211
Weights
SeePerformance, weights and
dimensions . . . . . . . . . . . . . . . . . . . . 281
Wheel bolts . . . . . . . . . . . . . . . . . . . . . . . . 236
Wheel imbalance . . . . . . . . . . . . . . . . . . . 232
Wheels . . . . . . . . . . . . . . . . . . . . . . . . 212, 232
Changing . . . . . . . . . . . . . . . . . . . . . . . 250
Changing wheels round . . . . . . . . . . . 234
Window heating . . . . . . . . . . . . . . . . . 96, 104
Windows
Cleaning . . . . . . . . . . . . . . . . . . . . . . . . 212
De-icing . . . . . . . . . . . . . . . . . . . . . . . . 212
Malfunctions . . . . . . . . . . . . . . . . . . . . . 51
Windows (electric)
SeeElectric windows . . . . . . . . . . . . . . 49
Windscreen washer fluid . . . . . . . . . . . . . 231
Windscreen wiper and washer system . . 62
Windscreen wipers . . . . . . . . . . . . . . . . . . . 62
Changing blades . . . . . . . . . . . . . . . . . . 64
Defective . . . . . . . . . . . . . . . . . . . . . . . . 37
Service position . . . . . . . . . . . . . . . . . . . 64
Winter conditions
Battery . . . . . . . . . . . . . . . . . . . . . . . . . 228
Care of vehicle . . . . . . . . . . . . . . . . . . . 210Cooling system . . . . . . . . . . . . . . . . . . 224
Defrosting windows . . . . . . . . . . . 96, 104
De-icing windows . . . . . . . . . . . . . . . . 212
Seat heating (deluxe automatic air
conditioner) . . . . . . . . . . . . . . . . . . . . 112
Seat heating for rear seats . . . . . . . . . 113
Snow chains . . . . . . . . . . . . . . . . . . . . . 237
Tyres . . . . . . . . . . . . . . . . . . . . . . . . . . . 236
Windscreen washer . . . . . . . . . . . . . . . 231
Winter tyres . . . . . . . . . . . . . . . . . . . . . . . . 236
Wiper blades
SeeWindscreen wipers . . . . . . . . . . . . . 64
XXenon lights . . . . . . . . . . . . . . . . . . . . . . . 195
document_0900452a81793dcc.book Seite 292 Mittwoch, 21. März 2007 5:42 17