2008 AUDI A5 warning light
[x] Cancel search: warning lightPage 89 of 313
Seats and storage87
Controls
Safety
Driving tips
General maintenance
Self-help
Technical data
Rear ashtrayOpening ashtray
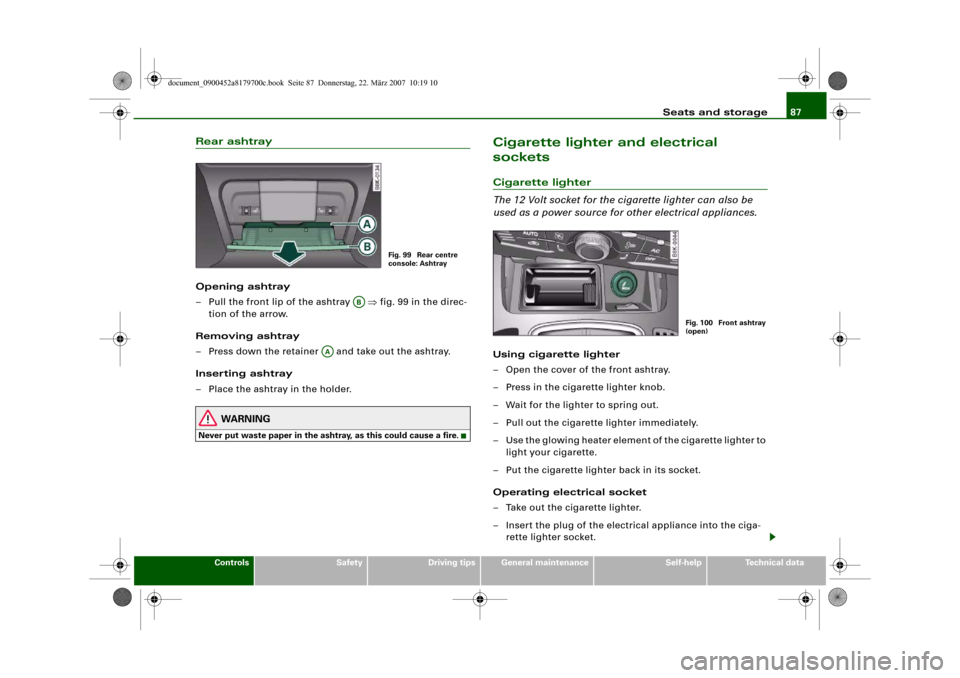
– Pull the front lip of the ashtray ⇒fig. 99 in the direc-
tion of the arrow.
Removing ashtray
– Press down the retainer and take out the ashtray.
Inserting ashtray
– Place the ashtray in the holder.
WARNING
Never put waste paper in the ashtray, as this could cause a fire.
Cigarette lighter and electrical
socketsCigarette lighter
The 12 Volt socket for the cigarette lighter can also be
used as a power source for other electrical appliances.Using cigarette lighter
– Open the cover of the front ashtray.
– Press in the cigarette lighter knob.
– Wait for the lighter to spring out.
– Pull out the cigarette lighter immediately.
– Use the glowing heater element of the cigarette lighter to
light your cigarette.
– Put the cigarette lighter back in its socket.
Operating electrical socket
– Take out the cigarette lighter.
– Insert the plug of the electrical appliance into the ciga-
rette lighter socket.
Fig. 99 Rear centre
console: Ashtray
AB
AA
Fig. 100 Front ashtray
(open)
document_0900452a8179700c.book Seite 87 Donnerstag, 22. März 2007 10:19 10
Page 90 of 313
Seats and storage 88The cigarette lighter employs a standard 12 Volt socket which can
also be used as a power source for electrical appliances. The appli-
ances connected to the socket must not exceed a power rating of
100 W.
WARNING
•
Take care when using the cigarette lighter. Carelessness or
negligence when using the cigarette lighter can cause burns.
•
The cigarette lighter also works when the ignition is off and
when the ignition key is removed. To avoid the risk of fire, never
leave children unsupervised in the vehicle.
•
The electrical sockets and any appliances connected to them
will operate only when the ignition is switched on. Improper use
of the electrical sockets or the appliances connected to them can
cause injuries or fire. To avoid the risk of injury, never leave chil-
dren unsupervised in the vehicle with the key.Caution
Always use the correct type of plugs to avoid damaging the sockets.
Note
Using electrical appliances with the engine switched off will drain
the battery.
Applies to vehicles: with 12 Volt sockets12 Volt sockets
Electrical equipment can be connected to both 12 Volt
sockets.Electrical socket in luggage compartment and
front centre console
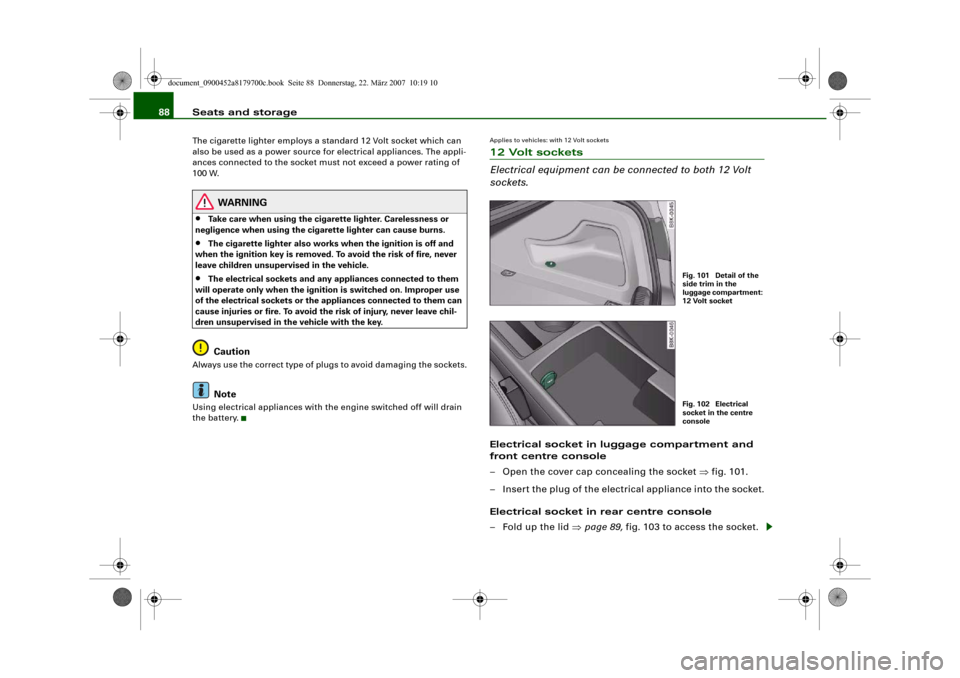
– Open the cover cap concealing the socket ⇒fig. 101.
– Insert the plug of the electrical appliance into the socket.
Electrical socket in rear centre console
– Fold up the lid ⇒page 89, fig. 103 to access the socket.
Fig. 101 Detail of the
side trim in the
luggage compartment:
12 Volt socketFig. 102 Electrical
socket in the centre
console
document_0900452a8179700c.book Seite 88 Donnerstag, 22. März 2007 10:19 10
Page 91 of 313
Seats and storage89
Controls
Safety
Driving tips
General maintenance
Self-help
Technical data
– Insert the plug of the electrical appliance into the socket.Electrical equipment can be connected to the 12 Volt socket. The
appliances connected to the socket must not exceed a power rating
of 100 W.
WARNING
The electrical sockets and any appliances connected to them will
operate only when the ignition is switched on. Improper use of the
electrical sockets or the appliances connected to them can cause
injuries or fire. To avoid the risk of injury, never leave children
unsupervised in the vehicle with the key.
Caution
•
To avoid damage to the vehicle's electrical system, never
connect equipment that generates electrical current, such as a solar
panel or battery charger, to the 12 Volt sockets or cigarette lighter in
order to charge the vehicle's battery.
•
Use only equipment which has been tested for electromagnetic
compatibility in compliance with EC Directive 2004/104/EC.Note
Using electrical appliances with the engine switched off will drain
the battery.
Applies to vehicles: with 230 Volt Euro socketOn-board 230 Volt Euro socketElectrical equipment can be connected to the 230 Volt
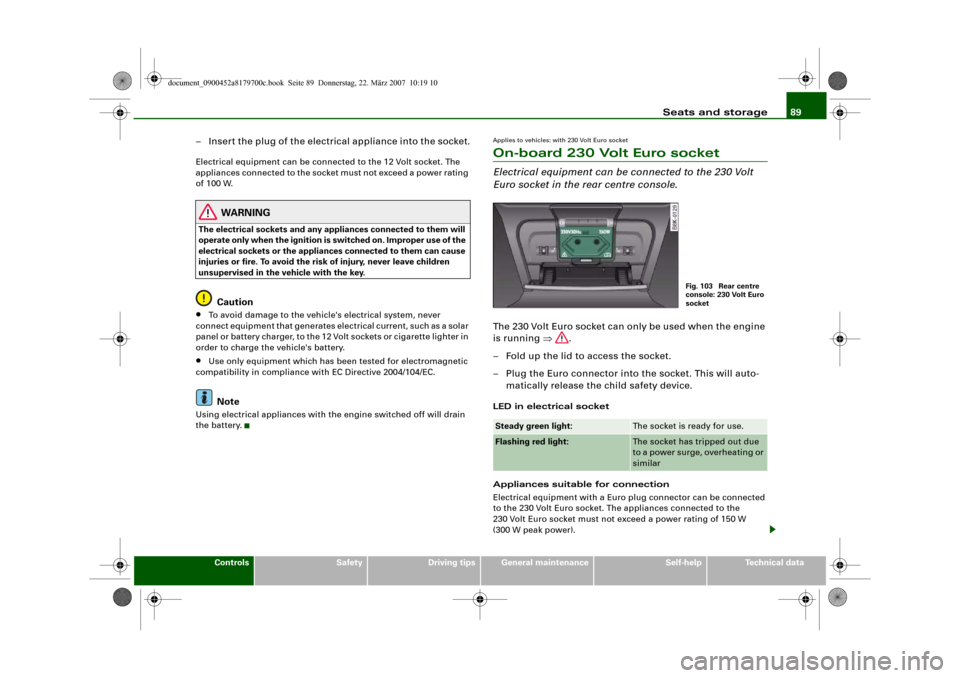
Euro socket in the rear centre console.The 230 Volt Euro socket can only be used when the engine
is running ⇒.
– Fold up the lid to access the socket.
– Plug the Euro connector into the socket. This will auto-
matically release the child safety device.LED in electrical socket
Appliances suitable for connection
Electrical equipment with a Euro plug connector can be connected
to the 230 Volt Euro socket. The appliances connected to the
230 Volt Euro socket must not exceed a power rating of 150 W
(300 W peak power).Steady green light:
The socket is ready for use.
Flashing red light:
The socket has tripped out due
to a power surge, overheating or
similar
Fig. 103 Rear centre
console: 230 Volt Euro
socket
document_0900452a8179700c.book Seite 89 Donnerstag, 22. März 2007 10:19 10
Page 93 of 313
Seats and storage91
Controls
Safety
Driving tips
General maintenance
Self-help
Technical data
Storage compartmentsOverview
There are several storage compartments at various points
in the vehicle.Glove box
The glove box is equipped with a lock* and a light.
Opening glove box
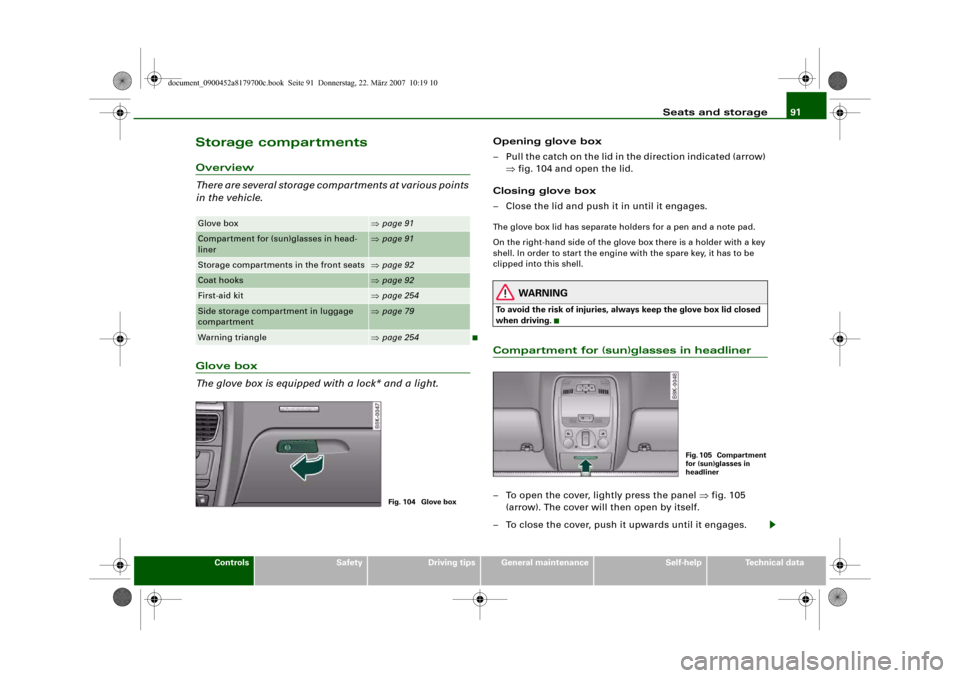
– Pull the catch on the lid in the direction indicated (arrow)
⇒fig. 104 and open the lid.
Closing glove box
– Close the lid and push it in until it engages.The glove box lid has separate holders for a pen and a note pad.
On the right-hand side of the glove box there is a holder with a key
shell. In order to start the engine with the spare key, it has to be
clipped into this shell.
WARNING
To avoid the risk of injuries, always keep the glove box lid closed
when driving.Compartment for (sun)glasses in headliner– To open the cover, lightly press the panel ⇒fig. 105
(arrow). The cover will then open by itself.
– To close the cover, push it upwards until it engages.
Glove box
⇒page 91
Compartment for (sun)glasses in head-
liner
⇒page 91
Storage compartments in the front seats
⇒page 92
Coat hooks
⇒page 92
First-aid kit
⇒page 254
Side storage compartment in luggage
compartment
⇒page 79
Warning triangle
⇒page 254
Fig. 104 Glove box
Fig. 105 Compartment
for (sun)glasses in
headliner
document_0900452a8179700c.book Seite 91 Donnerstag, 22. März 2007 10:19 10
Page 94 of 313
Seats and storage 92
WARNING
Always keep the compartment cover closed while the vehicle is in
motion to reduce the risk of injury during a sudden braking
manoeuvre or in the event of an accident.Coat hooks
The coat hooks are located on the rear side of the B-pillars
(in the rear passenger compartment).
WARNING
•
Please make sure that any items of clothing hanging from the
coat hooks do not obstruct your view to the rear.
•
Only use the coat hooks for light items of clothing and make
sure that there are no heavy or sharp objects in the pockets.
•
Do not use clothes hangers to hang up the clothing, as this
could interfere with the function of the head-protection
airbags*.
Applies to vehicles: with storage compartments in the front seatsStorage compartments in front seats
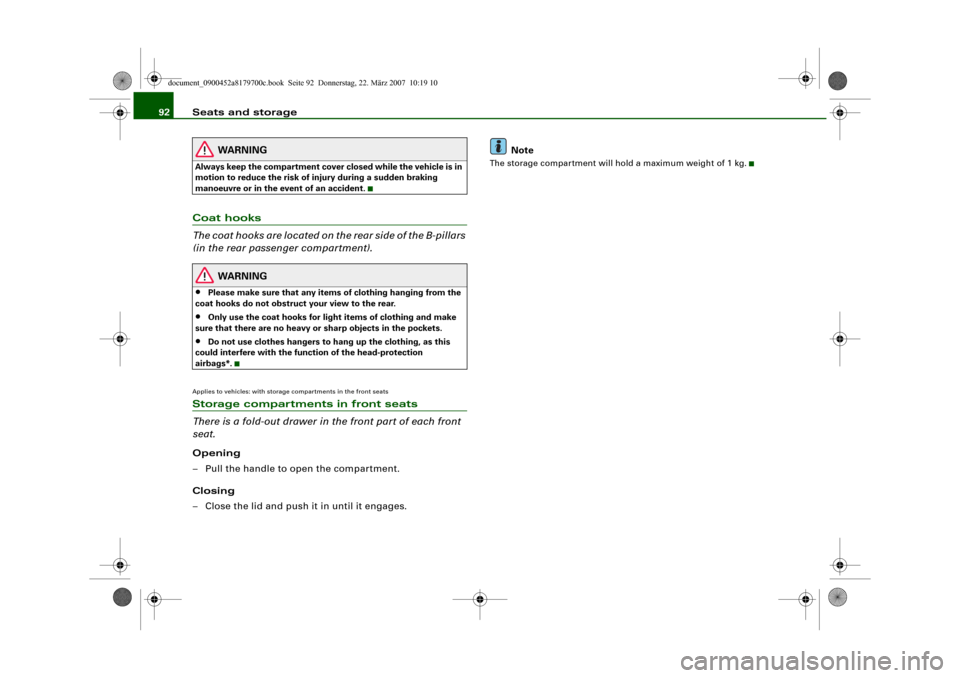
There is a fold-out drawer in the front part of each front
seat.Opening
– Pull the handle to open the compartment.
Closing
– Close the lid and push it in until it engages.Note
The storage compartment will hold a maximum weight of 1 kg.
document_0900452a8179700c.book Seite 92 Donnerstag, 22. März 2007 10:19 10
Page 96 of 313
Heating and cooling 94
WARNING
For safety reasons it is important that all the windows are kept
free of ice, snow and condensation. These can cause poor visibility
and lead to an accident. Please familiarise yourself with the oper-
ating controls for the air conditioner, including the demist/defrost
functions for the windows.
Caution
•
If you suspect that the air conditioner is damaged, switch it off
to prevent further damage and have the system checked by a quali-
fied workshop.
•
Repairs to the Audi air conditioner require specialist knowledge
and special tools. For this reason, please contact a qualified work-
shop if the system is not working properly.Note
•
Keep the air intake slots in front of the windscreen clear of snow,
ice and leaves to ensure unimpaired heating and cooling, and to
prevent the windows misting over.
•
The air from the outlets flows through the passenger compart-
ment and out through the slots at the rear of the vehicle. Do not
cover these slots with clothing or other objects.
•
The air conditioner operates most effectively with the windows
and the tilting panorama roof* closed. However, if the vehicle has
heated up after standing in the sun for some time, the air inside can
be cooled more quickly by opening the windows for a short time.
Applies to vehicles: with deluxe automatic air conditionerControls
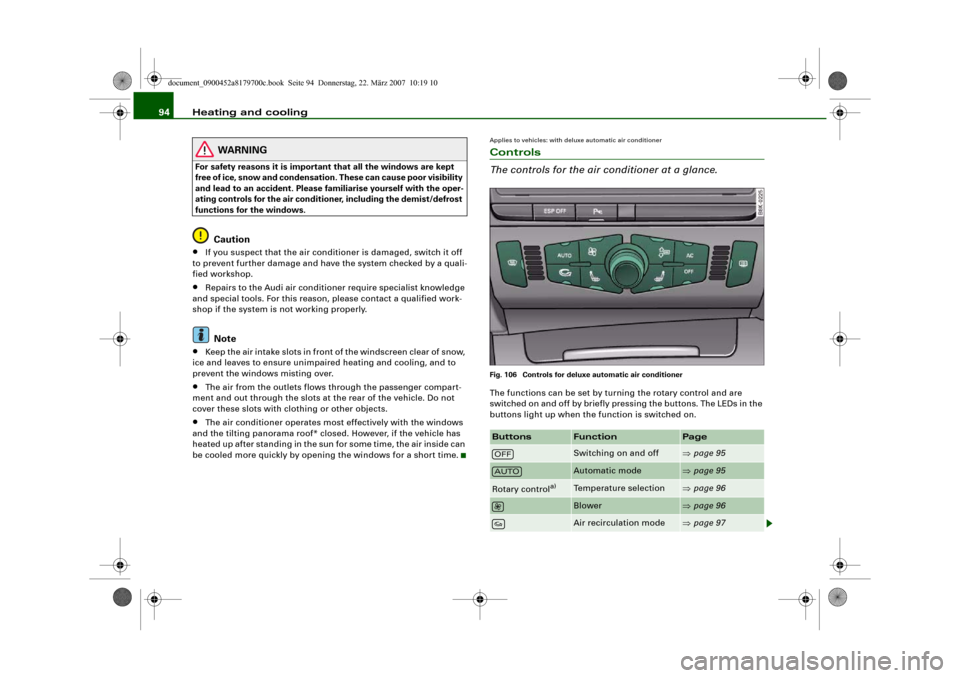
The controls for the air conditioner at a glance.Fig. 106 Controls for deluxe automatic air conditionerThe functions can be set by turning the rotary control and are
switched on and off by briefly pressing the buttons. The LEDs in the
buttons light up when the function is switched on.Buttons
Function
Page
Switching on and off
⇒page 95
Automatic mode
⇒page 95
Rotary control
a)
Temperature selection
⇒page 96
Blower
⇒page 96
Air recirculation mode
⇒page 97
OFFAUTO
document_0900452a8179700c.book Seite 94 Donnerstag, 22. März 2007 10:19 10
Page 113 of 313
Heating and cooling111
Controls
Safety
Driving tips
General maintenance
Self-help
Technical data
Auxiliary heating and auxiliary
ventilationApplies to vehicles: with auxiliary heating - under development at the time of printingDescription
The auxiliary heating and ventilation systems heat and
cool the interior independently of the engine.The auxiliary heating
works in conjunction with the air condi-
tioner system, but does not rely on heat from the engine. Instead of
this, the system burns fuel. The system's main function is to warm
up the interior of the vehicle and to defrost the windows in cold
weather.
The auxiliary heating system can be used both when the vehicle is
stationary and when driving (to provide extra heat while the engine
is warming up).
The auxiliary ventilation also operates independently of the
engine. This feature can be used to cool the interior with the blower
when the vehicle is left parked in the sun.
The system will automatically activate either the auxiliary heating or
the auxiliary ventilation mode, depending on the actual tempera-
ture measured inside the car and the temperature you have set with
the air conditioner controls. It is possible to alter the temperature
setting while the auxiliary heating/ventilation is running.
Switching on and off
There are two different ways of switching on the auxiliary
heating/ventilation system.
•
Immediate start: You can switch the auxiliary heating/ventilation
on and off at any time in the MMI Car menu ⇒page 112. You can
also switch the system on and off using the remote control
⇒page 114.
•
Switching on via timer: You can programme various start times
using the timers ⇒page 112. However you must first activate the timer before the auxiliary heating/ventilation system will switch on
automatically.
The auxiliary heating/ventilation will switch itself off at the end of
the programmed running time. The running time can be set to 15,
30, 45 or 60 minutes ⇒page 113.
WARNING
•
The auxiliary heating must not be allowed to run when the
vehicle is in a confined space because it can give off toxic fumes.
•
To avoid any possible fire risk, never have the auxiliary heating
switched on when refuelling the vehicle.
•
Because of the high temperatures which occur when the auxil-
iary heating is running, make sure when parking the car that the
exhaust outlet under the car is not obstructed in any way and that
the exhaust gases do not come into contact with flammable mate-
rials (fire risk).Note
•
It is advisable to open the air outlets when using the auxiliary
heating/ventilation.
•
The auxiliary heating/ventilation will not switch on if the fuel in
the tank has reached the reserve zone.
•
The auxiliary heating/ventilation will not switch on if the battery
charge level is low.
•
The symbols
(auxiliary ventilation) or
(auxiliary heating)
flash in the instrument cluster next to the clock display when the
auxiliary heating/ventilation is switched on. Both symbols light
continuously when the timer is activated.
•
At low outside temperatures some visible water vapour may
form in the engine compartment. This is a normal phenomenon,
and no reason for concern.
document_0900452a8179700c.book Seite 111 Donnerstag, 22. März 2007 10:19 10
Page 118 of 313
Driving 116DrivingSteeringApplies to vehicles: with manually adjustable steering columnAdjusting the steering wheel position
The height and reach of the steering wheel can be
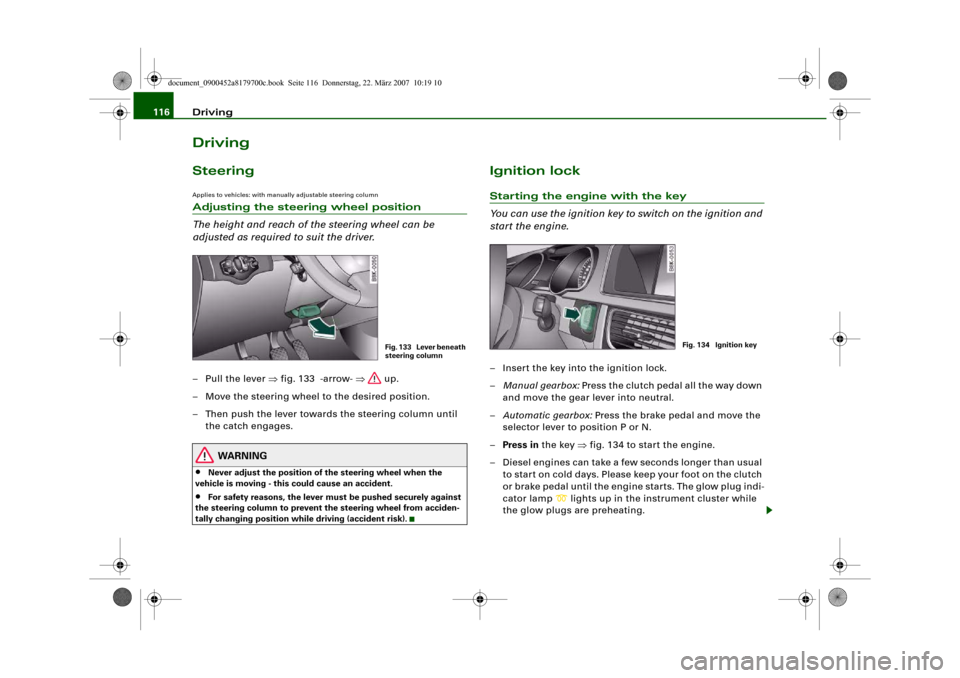
adjusted as required to suit the driver.– Pull the lever ⇒fig. 133 -arrow- ⇒ up.
– Move the steering wheel to the desired position.
– Then push the lever towards the steering column until
the catch engages.
WARNING
•
Never adjust the position of the steering wheel when the
vehicle is moving - this could cause an accident.
•
For safety reasons, the lever must be pushed securely against
the steering column to prevent the steering wheel from acciden-
tally changing position while driving (accident risk).
Ignition lockStarting the engine with the key
You can use the ignition key to switch on the ignition and
start the engine.– Insert the key into the ignition lock.
–Manual gearbox: Press the clutch pedal all the way down
and move the gear lever into neutral.
–Automatic gearbox: Press the brake pedal and move the
selector lever to position P or N.
–Press in the key ⇒fig. 134 to start the engine.
– Diesel engines can take a few seconds longer than usual
to star t on cold days. Please keep your foot on the clutch
or brake pedal until the engine starts. The glow plug indi-
cator lamp
lights up in the instrument cluster while
the glow plugs are preheating.
Fig. 133 Lever beneath
steering column
Fig. 134 Ignition key
document_0900452a8179700c.book Seite 116 Donnerstag, 22. März 2007 10:19 10