2008 AUDI A5 fuse
[x] Cancel search: fusePage 288 of 313
Fuses and bulbs 286Installing rear light
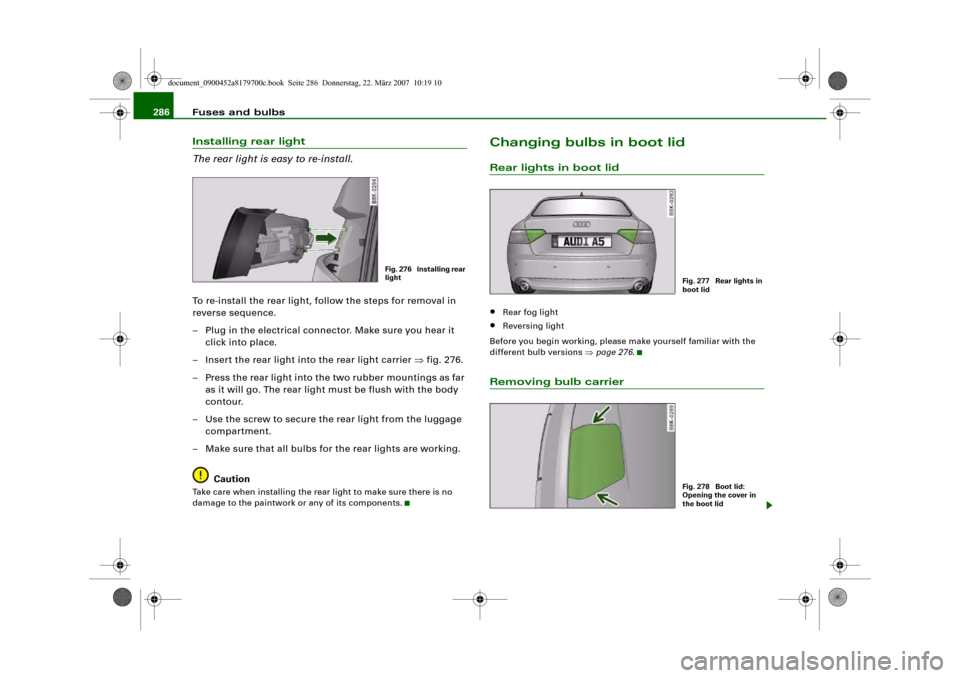
The rear light is easy to re-install.To re-install the rear light, follow the steps for removal in
reverse sequence.
– Plug in the electrical connector. Make sure you hear it
click into place.
– Insert the rear light into the rear light carrier ⇒fig. 276.
– Press the rear light into the two rubber mountings as far
as it will go. The rear light must be flush with the body
contour.
– Use the screw to secure the rear light from the luggage
compartment.
– Make sure that all bulbs for the rear lights are working.
CautionTake care when installing the rear light to make sure there is no
damage to the paintwork or any of its components.
Changing bulbs in boot lidRear lights in boot lid•
Rear fog light
•
Reversing light
Before you begin working, please make yourself familiar with the
different bulb versions ⇒page 276.
Removing bulb carrier
Fig. 276 Installing rear
light
Fig. 277 Rear lights in
boot lidFig. 278 Boot lid:
Opening the cover in
the boot lid
document_0900452a8179700c.book Seite 286 Donnerstag, 22. März 2007 10:19 10
Page 289 of 313
Fuses and bulbs287
Controls
Safety
Driving tips
General maintenance
Self-help
Technical data
The description for changing the bulb refers to the left rear
light unit; in principle the same procedure applies to the
right rear light unit.
– Check which of the bulbs is defective.
– Open the boot lid.
– Take the screwdriver out of the vehicle tool kit.
– Using the flat-blade side of the reversible screwdriver
insert, carefully detach the cover cap ⇒page 286,
fig. 278 -arrows-.
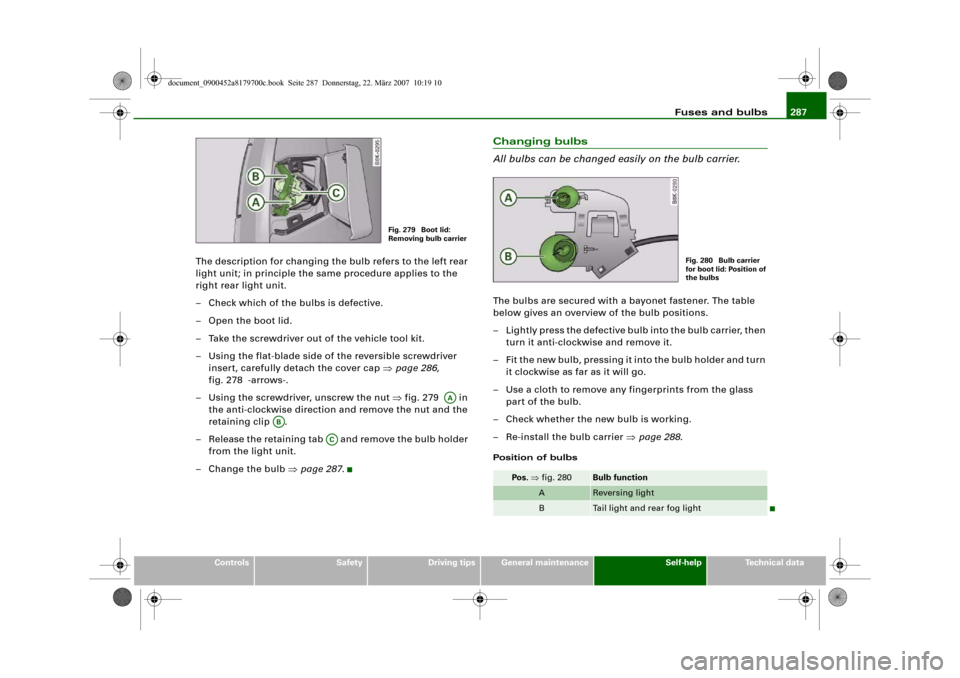
– Using the screwdriver, unscrew the nut ⇒fig. 279 in
the anti-clockwise direction and remove the nut and the
retaining clip .
– Release the retaining tab and remove the bulb holder
from the light unit.
– Change the bulb ⇒page 287.
Changing bulbs
All bulbs can be changed easily on the bulb carrier.The bulbs are secured with a bayonet fastener. The table
below gives an overview of the bulb positions.
– Lightly press the defective bulb into the bulb carrier, then
turn it anti-clockwise and remove it.
– Fit the new bulb, pressing it into the bulb holder and turn
it clockwise as far as it will go.
– Use a cloth to remove any fingerprints from the glass
part of the bulb.
– Check whether the new bulb is working.
– Re-install the bulb carrier ⇒page 288.Position of bulbs
Fig. 279 Boot lid:
Removing bulb carrier
AA
AB
AC
Pos. ⇒fig. 280
Bulb function
A
Reversing light
B
Tail light and rear fog light
Fig. 280 Bulb carrier
for boot lid: Position of
the bulbs
document_0900452a8179700c.book Seite 287 Donnerstag, 22. März 2007 10:19 10
Page 290 of 313
Fuses and bulbs 288Installing bulb carrier
The bulb carrier is easy to install.– Insert the bulb carrier into the rear light. Make sure you
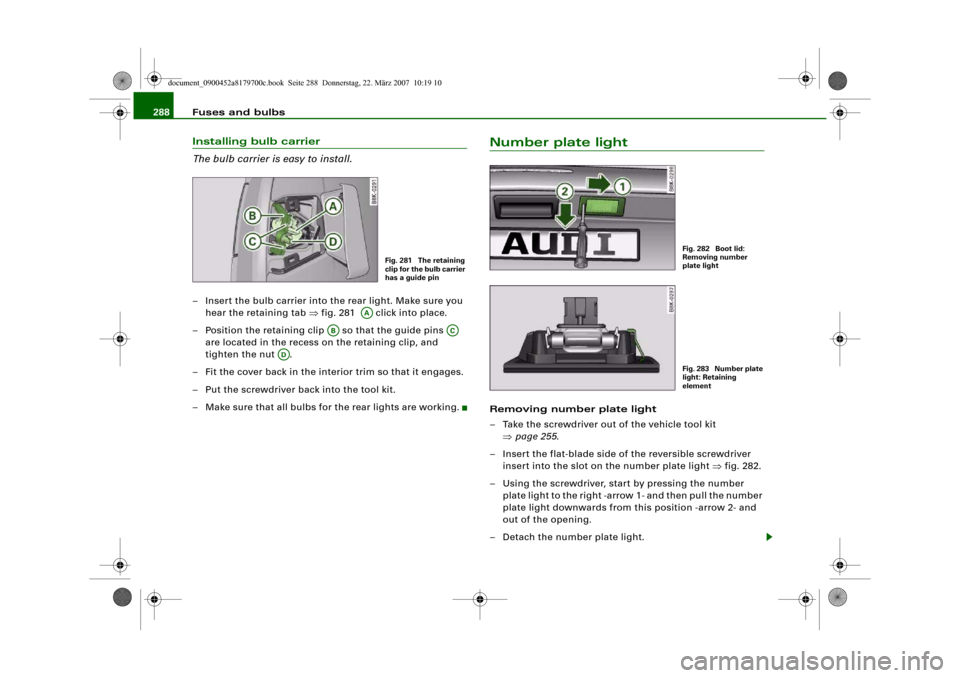
hear the retaining tab ⇒fig. 281 click into place.
– Position the retaining clip so that the guide pins
are located in the recess on the retaining clip, and
tighten the nut .
– Fit the cover back in the interior trim so that it engages.
– Put the screwdriver back into the tool kit.
– Make sure that all bulbs for the rear lights are working.
Number plate lightRemoving number plate light
– Take the screwdriver out of the vehicle tool kit
⇒page 255.
– Insert the flat-blade side of the reversible screwdriver
insert into the slot on the number plate light ⇒fig. 282.
– Using the screwdriver, start by pressing the number
plate light to the right -arrow 1- and then pull the number
plate light downwards from this position -arrow 2- and
out of the opening.
– Detach the number plate light.
Fig. 281 The retaining
clip for the bulb carrier
has a guide pin
AA
AB
AC
AD
Fig. 282 Boot lid:
Removing number
plate lightFig. 283 Number plate
light: Retaining
element
document_0900452a8179700c.book Seite 288 Donnerstag, 22. März 2007 10:19 10
Page 291 of 313
Fuses and bulbs289
Controls
Safety
Driving tips
General maintenance
Self-help
Technical data
Changing bulb
– Press the defective bulb out of the bulb holder and fit the
new bulb.
Installing number plate light
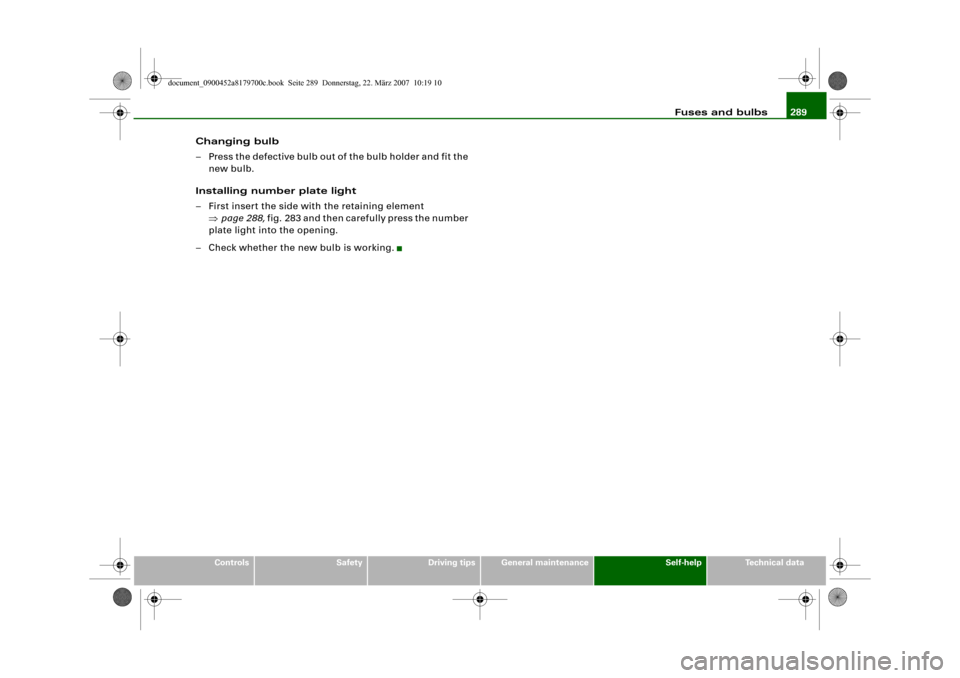
– First insert the side with the retaining element
⇒page 288, fig. 283 and then carefully press the number
plate light into the opening.
– Check whether the new bulb is working.
document_0900452a8179700c.book Seite 289 Donnerstag, 22. März 2007 10:19 10
Page 308 of 313
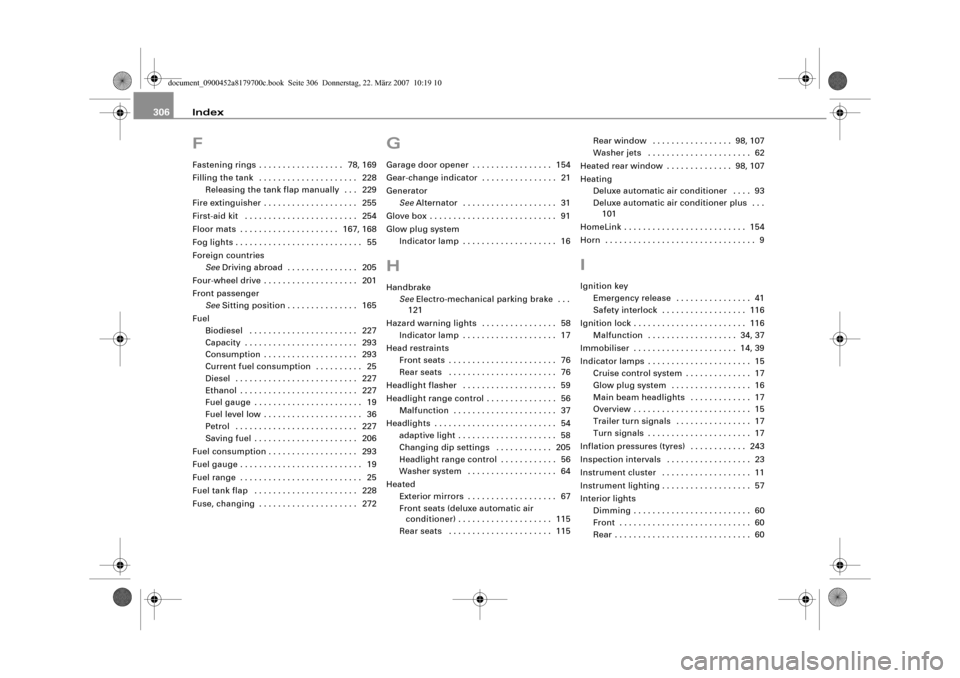
Index 306FFastening rings . . . . . . . . . . . . . . . . . . 78, 169
Filling the tank . . . . . . . . . . . . . . . . . . . . . 228
Releasing the tank flap manually . . . 229
Fire extinguisher . . . . . . . . . . . . . . . . . . . . 255
First-aid kit . . . . . . . . . . . . . . . . . . . . . . . . 254
Floor mats . . . . . . . . . . . . . . . . . . . . . 167, 168
Fog lights . . . . . . . . . . . . . . . . . . . . . . . . . . . 55
Foreign countries
SeeDriving abroad . . . . . . . . . . . . . . . 205
Four-wheel drive . . . . . . . . . . . . . . . . . . . . 201
Front passenger
SeeSitting position . . . . . . . . . . . . . . . 165
Fuel
Biodiesel . . . . . . . . . . . . . . . . . . . . . . . 227
Capacity . . . . . . . . . . . . . . . . . . . . . . . . 293
Consumption . . . . . . . . . . . . . . . . . . . . 293
Current fuel consumption . . . . . . . . . . 25
Diesel . . . . . . . . . . . . . . . . . . . . . . . . . . 227
Ethanol . . . . . . . . . . . . . . . . . . . . . . . . . 227
Fuel gauge . . . . . . . . . . . . . . . . . . . . . . . 19
Fuel level low . . . . . . . . . . . . . . . . . . . . . 36
Petrol . . . . . . . . . . . . . . . . . . . . . . . . . . 227
Saving fuel . . . . . . . . . . . . . . . . . . . . . . 206
Fuel consumption . . . . . . . . . . . . . . . . . . . 293
Fuel gauge . . . . . . . . . . . . . . . . . . . . . . . . . . 19
Fuel range . . . . . . . . . . . . . . . . . . . . . . . . . . 25
Fuel tank flap . . . . . . . . . . . . . . . . . . . . . . 228
Fuse, changing . . . . . . . . . . . . . . . . . . . . . 272
GGarage door opener . . . . . . . . . . . . . . . . . 154
Gear-change indicator . . . . . . . . . . . . . . . . 21
Generator
SeeAlternator . . . . . . . . . . . . . . . . . . . . 31
Glove box . . . . . . . . . . . . . . . . . . . . . . . . . . . 91
Glow plug system
Indicator lamp . . . . . . . . . . . . . . . . . . . . 16HHandbrake
SeeElectro-mechanical parking brake . . .
121
Hazard warning lights . . . . . . . . . . . . . . . . 58
Indicator lamp . . . . . . . . . . . . . . . . . . . . 17
Head restraints
Front seats . . . . . . . . . . . . . . . . . . . . . . . 76
Rear seats . . . . . . . . . . . . . . . . . . . . . . . 76
Headlight flasher . . . . . . . . . . . . . . . . . . . . 59
Headlight range control . . . . . . . . . . . . . . . 56
Malfunction . . . . . . . . . . . . . . . . . . . . . . 37
Headlights . . . . . . . . . . . . . . . . . . . . . . . . . . 54
adaptive light . . . . . . . . . . . . . . . . . . . . . 58
Changing dip settings . . . . . . . . . . . . 205
Headlight range control . . . . . . . . . . . . 56
Washer system . . . . . . . . . . . . . . . . . . . 64
Heated
Exterior mirrors . . . . . . . . . . . . . . . . . . . 67
Front seats (deluxe automatic air
conditioner) . . . . . . . . . . . . . . . . . . . . 115
Rear seats . . . . . . . . . . . . . . . . . . . . . . 115Rear window . . . . . . . . . . . . . . . . . 98, 107
Washer jets . . . . . . . . . . . . . . . . . . . . . . 62
Heated rear window . . . . . . . . . . . . . . 98, 107
Heating
Deluxe automatic air conditioner . . . . 93
Deluxe automatic air conditioner plus . . .
101
HomeLink . . . . . . . . . . . . . . . . . . . . . . . . . . 154
Horn . . . . . . . . . . . . . . . . . . . . . . . . . . . . . . . . 9
IIgnition key
Emergency release . . . . . . . . . . . . . . . . 41
Safety interlock . . . . . . . . . . . . . . . . . . 116
Ignition lock . . . . . . . . . . . . . . . . . . . . . . . . 116
Malfunction . . . . . . . . . . . . . . . . . . . 34, 37
Immobiliser . . . . . . . . . . . . . . . . . . . . . . 14, 39
Indicator lamps . . . . . . . . . . . . . . . . . . . . . . 15
Cruise control system . . . . . . . . . . . . . . 17
Glow plug system . . . . . . . . . . . . . . . . . 16
Main beam headlights . . . . . . . . . . . . . 17
Overview . . . . . . . . . . . . . . . . . . . . . . . . . 15
Trailer turn signals . . . . . . . . . . . . . . . . 17
Turn signals . . . . . . . . . . . . . . . . . . . . . . 17
Inflation pressures (tyres) . . . . . . . . . . . . 243
Inspection intervals . . . . . . . . . . . . . . . . . . 23
Instrument cluster . . . . . . . . . . . . . . . . . . . 11
Instrument lighting . . . . . . . . . . . . . . . . . . . 57
Interior lights
Dimming . . . . . . . . . . . . . . . . . . . . . . . . . 60
Front . . . . . . . . . . . . . . . . . . . . . . . . . . . . 60
Rear . . . . . . . . . . . . . . . . . . . . . . . . . . . . . 60
document_0900452a8179700c.book Seite 306 Donnerstag, 22. März 2007 10:19 10