2008 AUDI A5 radio
[x] Cancel search: radioPage 3 of 313
ForewordThank you for choosing the Audi A5.
The new Audi A5 combines the latest technology with numerous features for your comfort and
convenience. To help you get the best out of these features in everyday use, we recommend that
you read this Manual carefully so you can quickly become familiar with your vehicle in detail.
As well as information on how to use the controls and equipment, the Owner's Manual contains
important notes on care and maintenance. These are relevant to your safety and will help preserve
your car's value. The Manual also offers useful driving tips and advice, together with some sugges-
tions on how to drive your car with minimum impact on the environment.
In addition to this Owner's Manual, the Service Wallet also includes the Service Schedule for your
vehicle. This booklet contains important information on Audi service requirements and lists the
vehicle's fuel consumption figures. The Service Wallet also includes operating manuals for
optional on-board systems such as the radio, navigation and telephone. We recommend that you
keep the Service Wallet in the car at all times.
Should you have any further questions regarding your car or if you suspect that your owner's liter-
ature is not complete, please contact your Audi dealer or importer. They are always glad to answer
your queries and note any suggestions you may have.
We wish you safe and enjoyable motoring with your Audi A5.
AUDI AG
document_0900452a8179700c.book Seite 1 Donnerstag, 22. März 2007 10:19 10
Page 5 of 313
Contents3
Controls
Safety
Driving tips
General maintenance
Self-help
Technical data Airbag system
. . . . . . . . . . . . . . . . .
Description of airbag system . . . .
Front airbags . . . . . . . . . . . . . . . . . .
Side airbags . . . . . . . . . . . . . . . . . . .
Head-protection airbags
(sideguard) . . . . . . . . . . . . . . . . . . . .
Deactivating the front passenger's
airbag via the key-operated switch
Child safety
. . . . . . . . . . . . . . . . . . . .
Points to remember if children are
travelling in the car . . . . . . . . . . . . .
Child safety seats . . . . . . . . . . . . . .
Fitting child safety seats . . . . . . . .
Driving tips
. . . . . . . . . . . . . . . .
Intelligent technology
. . . . . . . . . .
Electronic stabilisation program
(ESP) . . . . . . . . . . . . . . . . . . . . . . . . . .
Brakes . . . . . . . . . . . . . . . . . . . . . . . .
Power steering (servotronic) . . . . .
Four-wheel drive (quattro®) . . . . . .
Power management . . . . . . . . . . . .
Your vehicle and the
environment
. . . . . . . . . . . . . . . . . . .
Running in . . . . . . . . . . . . . . . . . . . .
Emission control systems . . . . . . .
Driving abroad . . . . . . . . . . . . . . . . .
How to improve economy and
minimise pollution . . . . . . . . . . . . .
Environmental compatibility . . . . .
Towing a trailer
. . . . . . . . . . . . . . . .
Driving the vehicle with a trailer or
caravan . . . . . . . . . . . . . . . . . . . . . . .
Removable towing bracket . . . . . .
General maintenance
. .
Care of vehicle and cleaning
. . .
General notes . . . . . . . . . . . . . . . . . .
Care of exterior . . . . . . . . . . . . . . . . .
Care of interior . . . . . . . . . . . . . . . . .
Fuel and filling the tank
. . . . . . . .
Petrol . . . . . . . . . . . . . . . . . . . . . . . . .
Diesel . . . . . . . . . . . . . . . . . . . . . . . . .
Filling the tank . . . . . . . . . . . . . . . . .
Checking and topping up fluidsBonnet . . . . . . . . . . . . . . . . . . . . . . . .
Engine compartment layout . . . . .
Engine oil . . . . . . . . . . . . . . . . . . . . . .
Cooling system . . . . . . . . . . . . . . . . .
Brake fluid . . . . . . . . . . . . . . . . . . . . .
Battery . . . . . . . . . . . . . . . . . . . . . . . .
Windscreen washer . . . . . . . . . . . . . Wheels and tyres
. . . . . . . . . . . . . . .
Wheels . . . . . . . . . . . . . . . . . . . . . . . .
Accessories and modifications
to the vehicle
. . . . . . . . . . . . . . . . . . .
Accessories and replacement
parts . . . . . . . . . . . . . . . . . . . . . . . . . .
Modifications . . . . . . . . . . . . . . . . . .
Radio transmitters and business
equipment . . . . . . . . . . . . . . . . . . . . .
Self-help
. . . . . . . . . . . . . . . . . . . . .
Self-help
. . . . . . . . . . . . . . . . . . . . . . . .
Warning triangle . . . . . . . . . . . . . . . .
First-aid kit . . . . . . . . . . . . . . . . . . . . .
Fire extinguisher . . . . . . . . . . . . . . . .
To o l s a n d T y r e M o b i l i t y S y s t e m . . .
Compact temporary spare wheel*
Tyre repairs . . . . . . . . . . . . . . . . . . . .
Changing a wheel . . . . . . . . . . . . . .
Jump-starting . . . . . . . . . . . . . . . . . .
Tow-starting and towing away . . .
Fuses and bulbs
. . . . . . . . . . . . . . . .
Fuses . . . . . . . . . . . . . . . . . . . . . . . . . .
Bulbs . . . . . . . . . . . . . . . . . . . . . . . . . .
Changing bulbs for headlights . . .
Changing bulb for turn signals . . .
Changing bulb for side lights . . . . .
Changing bulb for front fog lights
Changing bulbs for rear lights in
side panel . . . . . . . . . . . . . . . . . . . . . .
Changing bulbs in boot lid . . . . . . .
Number plate light . . . . . . . . . . . . . . 176
176
178
180
181
183
185
185
186
189
195
196
196
199
201
201
202
205
205
205
205
206
207208
208
211
219
220
220
220
223
227
227
227
228
230
230
232
233
235
238
239
242
243
243250
250
250
251
253
254
254
254
255
255
256
257
260
265
267
272
272
276
278
282
282
283
284
286
288
document_0900452a8179700c.book Seite 3 Donnerstag, 22. März 2007 10:19 10
Page 11 of 313
Controls and displays9
Controls
Safety
Driving tips
General maintenance
Self-help
Technical data
Controls and displaysOverview
Door handle
Central locking switch . . . . . . . . . . . . . . . . . . . . . . . . . . .
Electric adjuster for exterior mirrors . . . . . . . . . . . . . . .
Seat memory . . . . . . . . . . . . . . . . . . . . . . . . . . . . . . . . . .
Light switch . . . . . . . . . . . . . . . . . . . . . . . . . . . . . . . . . . .
Instrument lighting . . . . . . . . . . . . . . . . . . . . . . . . . . . . .
Lever for turn signals and main beam headlights . . . .
Headlight range control . . . . . . . . . . . . . . . . . . . . . . . . .
Steering wheel with:
−Horn
−Driver's airbag . . . . . . . . . . . . . . . . . . . . . . . . . . . . . . .
−Controls for audio, TV*, telephone and speech
dialogue system*
−Paddle levers for tiptronic gearshift . . . . . . . . . . . . .
SET button . . . . . . . . . . . . . . . . . . . . . . . . . . . . . . . . . . . .
Instrument cluster . . . . . . . . . . . . . . . . . . . . . . . . . . . . . .
Reset button for trip recorder . . . . . . . . . . . . . . . . . . . .
Control lever for:
−Windscreen wipers and washer . . . . . . . . . . . . . . . . .
−On-board computer . . . . . . . . . . . . . . . . . . . . . . . . . . .
Ignition lock . . . . . . . . . . . . . . . . . . . . . . . . . . . . . . . . . . .
Air outlets with thumbwheel . . . . . . . . . . . . . . . . . . . . .
−For deluxe automatic air conditioner . . . . . . . . . . . .
−For deluxe automatic air conditioner plus . . . . . . . .
Depending on equipment fitted:
−Radio
−CD changer
Depending on equipment fitted:−Radio display
−MMI display
1)
Hazard warning lights
Glove box . . . . . . . . . . . . . . . . . . . . . . . . . . . . . . . . . . . . .
Front passenger's airbag . . . . . . . . . . . . . . . . . . . . . . . . .
Switches for the following (as applicable):
−Audi parking system . . . . . . . . . . . . . . . . . . . . . . . . . .
−Electronic Stabilisation Program (ESP) . . . . . . . . . . .
−Electric sun blind . . . . . . . . . . . . . . . . . . . . . . . . . . . . .
Air conditioner, depending on equipment fitted:
−Deluxe automatic air conditioner . . . . . . . . . . . . . . . .
−Deluxe automatic air conditioner plus . . . . . . . . . . .
Ashtray with cigarette lighter . . . . . . . . . . . . . . . . . . . . .
Depending on gearbox fitted, gear lever or selector
lever for:
−multitronic
® . . . . . . . . . . . . . . . . . . . . . . . . . . . . . . . . .
−Manual gearbox
Depending on equipment fitted:
−MMI control console or
−Switch for Audi parking system . . . . . . . . . . . . . . . . .
−Switch for Electronic Stabilisation Program (ESP
OFF) . . . . . . . . . . . . . . . . . . . . . . . . . . . . . . . . . . . . . . . .
−Switch for electric sun blind . . . . . . . . . . . . . . . . . . . .
Start/stop button . . . . . . . . . . . . . . . . . . . . . . . . . . . . . . .
Electro-mechanical parking brake . . . . . . . . . . . . . . . . .
A1A2
47
A3
67
A4
74
A5
54
A6
57
A7
59
A8
57
A9
178
135
A10
12
A11
11
A12
14
A13
62
25
A14
116
A15
108
99
108
A16A17
1)Depending on the MMI system fitted in your vehicle the display screen is
either two-coloured or multi-coloured. As the two displays are more or less
identical this Owner's Manual uses the multi-coloured displays for illustra-
tion purposes.A18A19
91
A20
178
A21
138
196
61
A22
93
101
A23
86, 87
A24
130
A25
138
196
61
A26
118
A27
121
document_0900452a8179700c.book Seite 9 Donnerstag, 22. März 2007 10:19 10
Page 15 of 313
Instruments and warning/indicator lamps13
Controls
Safety
Driving tips
General maintenance
Self-help
Technical data The button has the following functions:
Activating clock, date, temperature and mileage
recorder displays
The display will appear for about 30 seconds if you press the
button ⇒page 12, fig. 3 when the ignition is switched off.
Starting check procedure (auto-check control)
The auto-check control checks important components and vehicle
systems. These background checks are run constantly, as long as
the ignition is switched on ⇒page 29.
You can start the “check procedure” manually by pressing the
button with the ignition switched on. This function check can be
started at road speeds up to 5 km/h.
Calling up driver messages again
A red or yellow symbol appearing in the instrument cluster display
is normally accompanied by a corresponding message. The
message will disappear from the display after about 5 seconds. If
required, you can call up the message again by briefly pressing the
button.
Setting speed warning
You can press the button briefly to set speed limit warning 1
while the vehicle is moving ⇒page 28. If you press and hold the
button, this will cancel the speed warning.
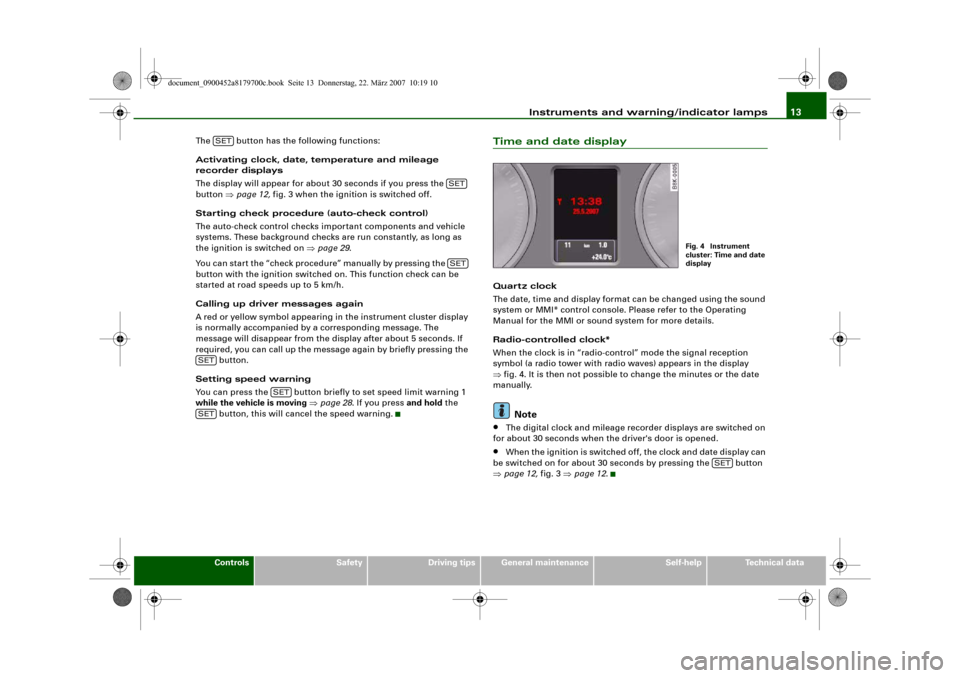
Time and date displayQuart z clock
The date, time and display format can be changed using the sound
system or MMI* control console. Please refer to the Operating
Manual for the MMI or sound system for more details.
Radio-controlled clock*
When the clock is in “radio-control” mode the signal reception
symbol (a radio tower with radio waves) appears in the display
⇒fig. 4. It is then not possible to change the minutes or the date
manually.
Note
•
The digital clock and mileage recorder displays are switched on
for about 30 seconds when the driver's door is opened.
•
When the ignition is switched off, the clock and date display can
be switched on for about 30 seconds by pressing the button
⇒page 12, fig. 3 ⇒page 12.
SET
SETSET
SET
SET
SET
Fig. 4 Instrument
cluster: Time and date
display
SET
document_0900452a8179700c.book Seite 13 Donnerstag, 22. März 2007 10:19 10
Page 22 of 313
Driver information system 20Driver information systemIntroductionGeneral notes
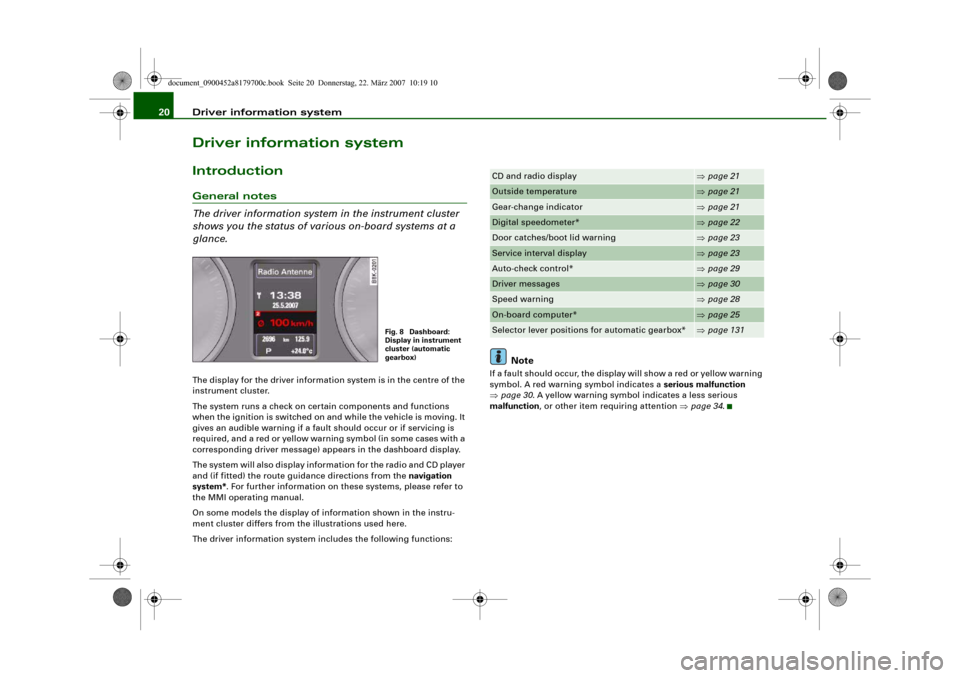
The driver information system in the instrument cluster
shows you the status of various on-board systems at a
glance.The display for the driver information system is in the centre of the
instrument cluster.
The system runs a check on certain components and functions
when the ignition is switched on and while the vehicle is moving. It
gives an audible warning if a fault should occur or if servicing is
required, and a red or yellow warning symbol (in some cases with a
corresponding driver message) appears in the dashboard display.
The system will also display information for the radio and CD player
and (if fitted) the route guidance directions from the navigation
system*. For further information on these systems, please refer to
the MMI operating manual.
On some models the display of information shown in the instru-
ment cluster differs from the illustrations used here.
The driver information system includes the following functions:
Note
If a fault should occur, the display will show a red or yellow warning
symbol. A red warning symbol indicates a serious malfunction
⇒page 30. A yellow warning symbol indicates a less serious
malfunction, or other item requiring attention ⇒page 34.
Fig. 8 Dashboard:
Display in instrument
cluster (automatic
gearbox)
CD and radio display
⇒page 21
Outside temperature
⇒page 21
Gear-change indicator
⇒page 21
Digital speedometer*
⇒page 22
Door catches/boot lid warning
⇒page 23
Service interval display
⇒page 23
Auto-check control*
⇒page 29
Driver messages
⇒page 30
Speed warning
⇒page 28
On-board computer*
⇒page 25
Selector lever positions for automatic gearbox*
⇒page 131
document_0900452a8179700c.book Seite 20 Donnerstag, 22. März 2007 10:19 10
Page 23 of 313
Driver information system21
Controls
Safety
Driving tips
General maintenance
Self-help
Technical data
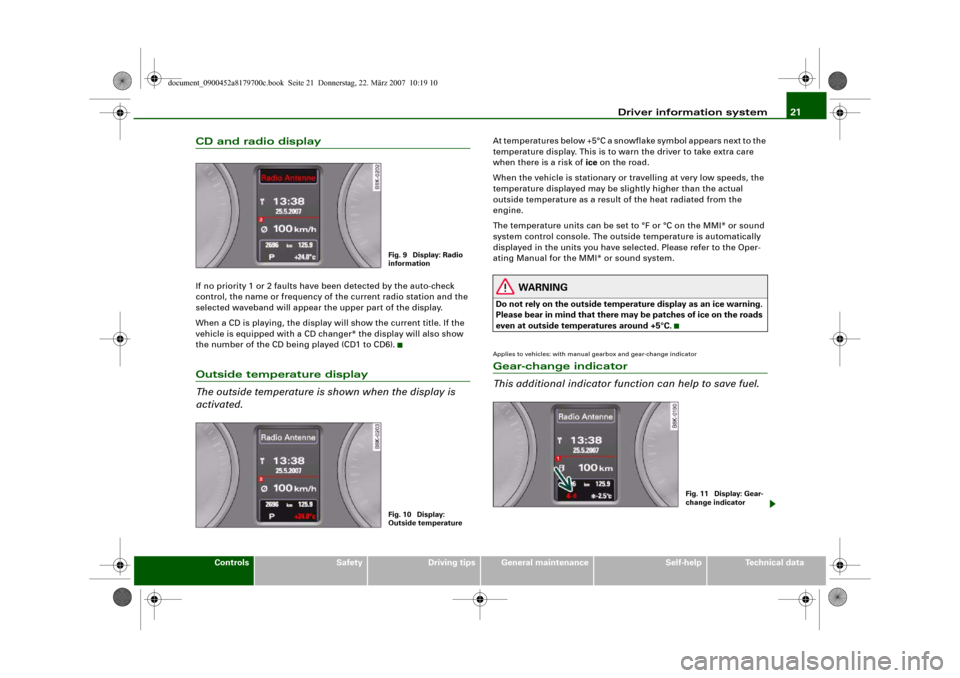
CD and radio displayIf no priority 1 or 2 faults have been detected by the auto-check
control, the name or frequency of the current radio station and the
selected waveband will appear the upper part of the display.
When a CD is playing, the display will show the current title. If the
vehicle is equipped with a CD changer* the display will also show
the number of the CD being played (CD1 to CD6).Outside temperature display
The outside temperature is shown when the display is
activated.
At temperatures below +5°C a snowflake symbol appears next to the
temperature display. This is to warn the driver to take extra care
when there is a risk of ice on the road.
When the vehicle is stationary or travelling at very low speeds, the
temperature displayed may be slightly higher than the actual
outside temperature as a result of the heat radiated from the
engine.
The temperature units can be set to °F or °C on the MMI* or sound
system control console. The outside temperature is automatically
displayed in the units you have selected. Please refer to the Oper-
ating Manual for the MMI* or sound system.
WARNING
Do not rely on the outside temperature display as an ice warning.
Please bear in mind that there may be patches of ice on the roads
even at outside temperatures around +5°C.Applies to vehicles: with manual gearbox and gear-change indicatorGear-change indicator
This additional indicator function can help to save fuel.
Fig. 9 Display: Radio
informationFig. 10 Display:
Outside temperature
Fig. 11 Display: Gear-
change indicator
document_0900452a8179700c.book Seite 21 Donnerstag, 22. März 2007 10:19 10
Page 42 of 313
Doors and windows 40
WARNING
•
Always switch off the ignition and take the key with you when
leaving the vehicle - even if you only intend to be gone for a short
time. This is especially important if children are left in the car. They
might otherwise be able to start the engine or use power-operated
equipment such as the electric windows - this could lead to inju-
ries.
•
Wait for the vehicle to come to a standstill before removing the
ignition key from the lock. Otherwise the steering lock could
engage suddenly, causing an accident.Note
The function of the remote control key may be impaired by interfer-
ence from other nearby radio signals (for example from a mobile
telephone or TV transmitter) if these are in the same frequency
range.Indicator lamp on remote control key
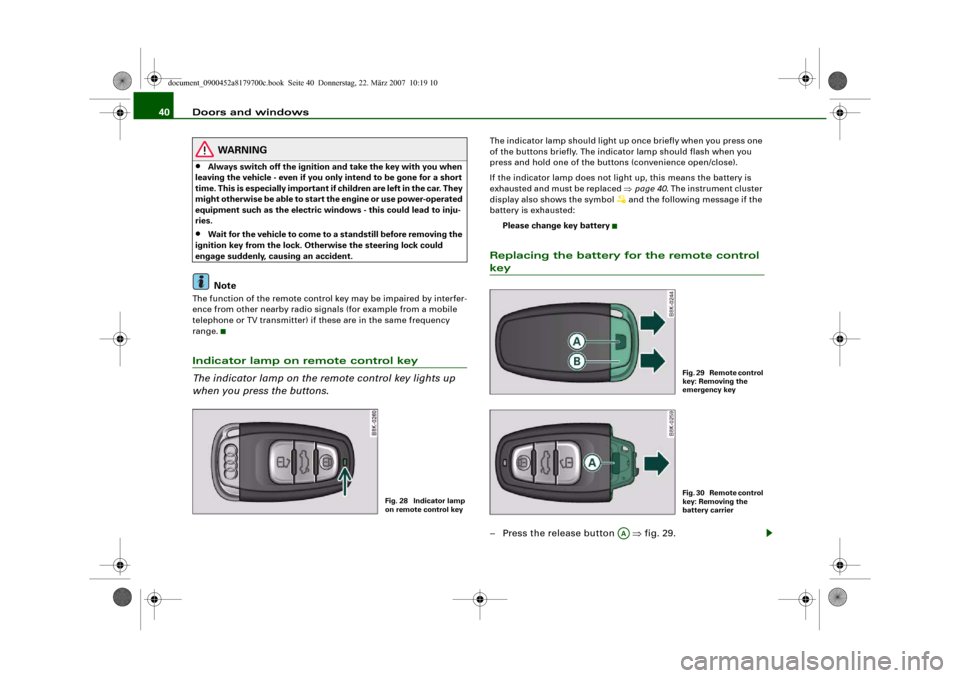
The indicator lamp on the remote control key lights up
when you press the buttons.
The indicator lamp should light up once briefly when you press one
of the buttons briefly. The indicator lamp should flash when you
press and hold one of the buttons (convenience open/close).
If the indicator lamp does not light up, this means the battery is
exhausted and must be replaced ⇒page 40. The instrument cluster
display also shows the symbol
and the following message if the
battery is exhausted:
Please change key battery
Replacing the battery for the remote control key– Press the release button ⇒fig. 29.
Fig. 28 Indicator lamp
on remote control key
Fig. 29 Remote control
key: Removing the
emergency keyFig. 30 Remote control
key: Removing the
battery carrier
AA
document_0900452a8179700c.book Seite 40 Donnerstag, 22. März 2007 10:19 10
Page 92 of 313
Seats and storage 90If you connect more than one appliance, the total power rating of all
appliances must not exceed 150 W. If necessary, check the type
plates on the connected appliances for details of the power ratings.
Connected appliances must be in perfect condition and free of
defects.
WARNING
•
Heavy appliances or plugs (such as power supply units) can
damage the mounting of the 230 Volt Euro socket if they are
suspended directly from the socket – Risk of injury!
•
Make sure that all connected appliances are securely stowed
when driving to prevent them from being catapulted through the
car under braking or in an accident – Danger to life!
•
Never spill liquid over the socket – Danger to life! If the socket
does get wet, ensure that it is absolutely dry before using it again.
•
Improper use of the electrical socket or appliances connected
to it can cause injuries or fire – Risk of injury!
•
Never leave children unattended in the vehicle while the engine
is running – Risk of injury!
•
Connected appliances behave differently than when they are
connected to the public electricity grid. As a result, the connected
appliances may become hot during operation – Risk of injury!
•
When using adapters or extension cables, please remember
that the child safety device on the 230 Volt Euro socket is deacti-
vated and the socket is live – Risk of injury!
•
Do not insert conductive materials, such as knitting needles,
into the contacts of the 230 Volt Euro socket – Danger to life!
•
Switch off the connected electrical appliances if the inverter
trips out due to overheating – Risk of injury!Caution
•
Please observe the operating instructions for the connected
appliances.
•
If the power drawn by the connected appliances is above 150 W,
the inverter in the socket will get warm. The inverter will trip out if
the temperature exceeds a certain limit. The inverter can trip out on
hot days even when an appliance with a suitable power rating is
used. The inverter will switch on again automatically after it has
cooled down. Appliances which are already connected and
switched on will be activated again automatically ⇒.
•
Do not connect lamps which contain a neon tube. For technical
reasons, this may damage the lamp.
•
Do not connect 115 Volt appliances to the 230 Volt Euro socket.
This may cause irreparable damage to the appliance. Check the type
plate on the appliance if you are unsure of the voltage rating.
•
With some power supplies (e.g. on laptop computers), the inte-
grated surge suppressor prevents the equipment from being
switched on because the starting current is too high. If this
happens, please disconnect the power supply unit from the load
and wait for about 10 seconds before re-connecting.Note
•
Unshielded equipment can cause interference on the radio, TV
and vehicle's electrical system.
•
The Euro socket has an integrated child safety device. There is no
power at the socket until the Euro connector is fully inserted.
•
Some appliances may not function normally due to the lower
power rating (wattage).
•
The socket can be operated with 115 Volt power supplies, as is
the case in certain countries. In this case, a different type of inverter
must be installed in the vehicle. Retrofit kits are available from your
Audi dealer. Do not connect 115 Volt appliances to the 230 Volt Euro
socket.
•
Interference can occur on the radio's AM waveband if electrical
appliances are used near the rear window aerial.
document_0900452a8179700c.book Seite 90 Donnerstag, 22. März 2007 10:19 10