2008 AUDI A4 park assist
[x] Cancel search: park assistPage 4 of 342
Contents 2ContentsNotes on this Owner's
Manual
. . . . . . . . . . . . . . . . . . . . . .
Controls
. . . . . . . . . . . . . . . . . . . . .
Controls and displays
. . . . . . . . . .
Overview . . . . . . . . . . . . . . . . . . . . . .
Instruments and
warning/indicator lamps
. . . . . . .
Instruments . . . . . . . . . . . . . . . . . . . .
Fuel gauge . . . . . . . . . . . . . . . . . . . . .
Warning and indicator lamps . . . . .
Driver information system
. . . . . .
Introduction . . . . . . . . . . . . . . . . . . . .
On-board computer . . . . . . . . . . . . .
Speed warning function . . . . . . . . .
Auto-check control . . . . . . . . . . . . . .
Tyre pressure monitoring system .
Doors and windows
. . . . . . . . . . . .
Central locking system . . . . . . . . . .
Boot lid . . . . . . . . . . . . . . . . . . . . . . . .
Child-proof catches . . . . . . . . . . . . .
Electric windows . . . . . . . . . . . . . . .
Sun roof . . . . . . . . . . . . . . . . . . . . . . .
Lights and vision
. . . . . . . . . . . . . . .
Lights . . . . . . . . . . . . . . . . . . . . . . . . .
Interior lights . . . . . . . . . . . . . . . . . . .Clear vision . . . . . . . . . . . . . . . . . . . .
Windscreen wipers . . . . . . . . . . . . .
Rear-view mirrors . . . . . . . . . . . . . .
Digital compass . . . . . . . . . . . . . . . .
Seats and storage
. . . . . . . . . . . . .
Manual adjustment of front seats
Electric adjustment of front seats
Seat memory . . . . . . . . . . . . . . . . . .
Head restraints . . . . . . . . . . . . . . . .
Front armrest . . . . . . . . . . . . . . . . . .
Luggage compartment . . . . . . . . .
Roof carrier . . . . . . . . . . . . . . . . . . . .
Roof load . . . . . . . . . . . . . . . . . . . . .
Cup holders . . . . . . . . . . . . . . . . . . .
Ashtrays . . . . . . . . . . . . . . . . . . . . . .
Cigarette lighter and electrical
sockets . . . . . . . . . . . . . . . . . . . . . . .
On-board 230 Volt Euro socket . . .
Storage compartments . . . . . . . . .
Heating and cooling
. . . . . . . . . . .
Deluxe automatic air conditioner .
Deluxe automatic air conditioner -
basic settings . . . . . . . . . . . . . . . . . .
Deluxe automatic air conditioner
plus . . . . . . . . . . . . . . . . . . . . . . . . . .
Deluxe automatic air conditioner
plus - basic settings . . . . . . . . . . . .
Auxiliary heating and auxiliary
ventilation . . . . . . . . . . . . . . . . . . . . .
Seat heating . . . . . . . . . . . . . . . . . . .
Driving
. . . . . . . . . . . . . . . . . . . . . . . . .
Steering . . . . . . . . . . . . . . . . . . . . . . .
Ignition lock . . . . . . . . . . . . . . . . . . .
Starting and stopping the engine
with the advanced key . . . . . . . . . . Electro-mechanical parking brake
Cruise control system . . . . . . . . . . .
adaptive cruise control (ACC)
. .
Speed and distance control system
Driver messages . . . . . . . . . . . . . . .
System limitations . . . . . . . . . . . . . .
Audi braking guard . . . . . . . . . . . . .
Audi lane assist
. . . . . . . . . . . . . . . .
Audi lane assist . . . . . . . . . . . . . . . .
Audi side assist
. . . . . . . . . . . . . . . .
Lane change assist feature . . . . . .
Notes . . . . . . . . . . . . . . . . . . . . . . . . .
Audi drive select
. . . . . . . . . . . . . . .
Adjusting the vehicle set-up . . . . .
Automatic gearbox
. . . . . . . . . . . . .
multitronic®, tiptronic (6-speed
gearbox) . . . . . . . . . . . . . . . . . . . . . . .
Parking aid
. . . . . . . . . . . . . . . . . . . . .
General notes . . . . . . . . . . . . . . . . . .
Audi parking system . . . . . . . . . . . .
Audi parking system plus . . . . . . . .
Audi parking system advanced . . .
Switching display and acoustic
signals on and off . . . . . . . . . . . . . .
Towing bracket . . . . . . . . . . . . . . . . .
Error messages . . . . . . . . . . . . . . . . .
HomeLink
. . . . . . . . . . . . . . . . . . . . . .
Universal transmitter . . . . . . . . . . . . 5
7
9
9
11
11
14
15
21
21
25
28
30
39
42
42
51
53
53
55
57
57
6364
65
68
71
73
73
74
75
77
78
79
83
84
85
86
87
89
90
93
93
100
101
109
110
114
116
116
116
118121
125
128
128
134
140
142
145
145
149
149
156
159
159
162
162
169
169
169
170
171
177
177
178
179
179
document_0900452a81b1b9de.book Seite 2 Donnerstag, 26. Juli 2007 9:16 09
Page 11 of 342
Controls and displays9
Controls
Safety
Driving tips
General maintenance
Self-help
Technical data
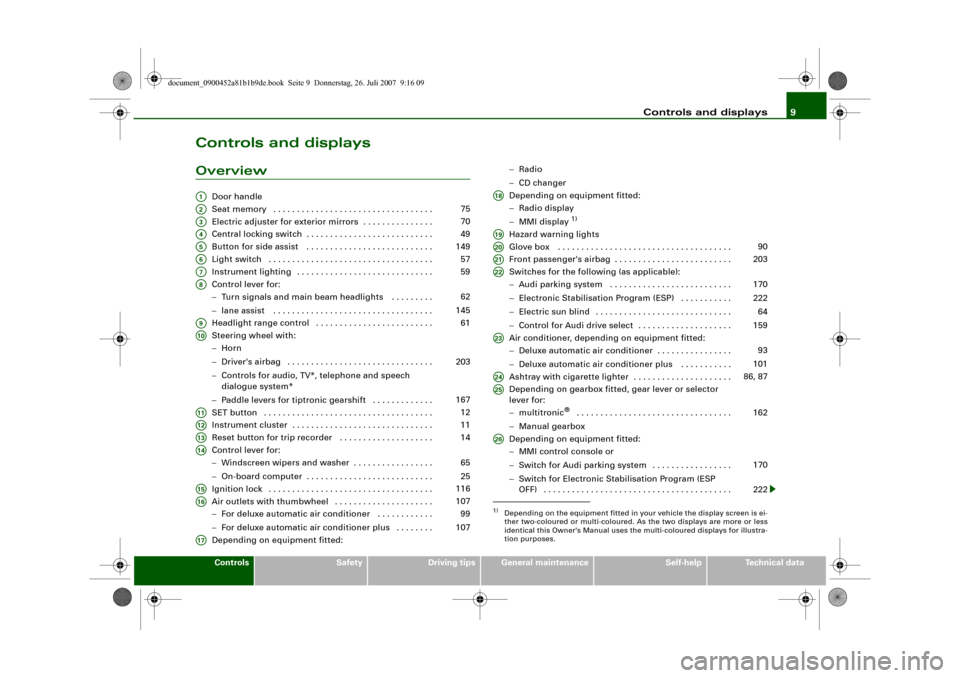
Controls and displaysOverview
Door handle
Seat memory . . . . . . . . . . . . . . . . . . . . . . . . . . . . . . . . . .
Electric adjuster for exterior mirrors . . . . . . . . . . . . . . .
Central locking switch . . . . . . . . . . . . . . . . . . . . . . . . . . .
Button for side assist . . . . . . . . . . . . . . . . . . . . . . . . . . .
Light switch . . . . . . . . . . . . . . . . . . . . . . . . . . . . . . . . . . .
Instrument lighting . . . . . . . . . . . . . . . . . . . . . . . . . . . . .
Control lever for:
−Turn signals and main beam headlights . . . . . . . . .
−lane assist . . . . . . . . . . . . . . . . . . . . . . . . . . . . . . . . . .
Headlight range control . . . . . . . . . . . . . . . . . . . . . . . . .
Steering wheel with:
−Horn
−Driver's airbag . . . . . . . . . . . . . . . . . . . . . . . . . . . . . . .
−Controls for audio, TV*, telephone and speech
dialogue system*
−Paddle levers for tiptronic gearshift . . . . . . . . . . . . .
SET button . . . . . . . . . . . . . . . . . . . . . . . . . . . . . . . . . . . .
Instrument cluster . . . . . . . . . . . . . . . . . . . . . . . . . . . . . .
Reset button for trip recorder . . . . . . . . . . . . . . . . . . . .
Control lever for:
−Windscreen wipers and washer . . . . . . . . . . . . . . . . .
−On-board computer . . . . . . . . . . . . . . . . . . . . . . . . . . .
Ignition lock . . . . . . . . . . . . . . . . . . . . . . . . . . . . . . . . . . .
Air outlets with thumbwheel . . . . . . . . . . . . . . . . . . . . .
−For deluxe automatic air conditioner . . . . . . . . . . . .
−For deluxe automatic air conditioner plus . . . . . . . .
Depending on equipment fitted:−Radio
−CD changer
Depending on equipment fitted:
−Radio display
−MMI display
1)
Hazard warning lights
Glove box . . . . . . . . . . . . . . . . . . . . . . . . . . . . . . . . . . . . .
Front passenger's airbag . . . . . . . . . . . . . . . . . . . . . . . . .
Switches for the following (as applicable):
−Audi parking system . . . . . . . . . . . . . . . . . . . . . . . . . .
−Electronic Stabilisation Program (ESP) . . . . . . . . . . .
−Electric sun blind . . . . . . . . . . . . . . . . . . . . . . . . . . . . .
−Control for Audi drive select . . . . . . . . . . . . . . . . . . . .
Air conditioner, depending on equipment fitted:
−Deluxe automatic air conditioner . . . . . . . . . . . . . . . .
−Deluxe automatic air conditioner plus . . . . . . . . . . .
Ashtray with cigarette lighter . . . . . . . . . . . . . . . . . . . . .
Depending on gearbox fitted, gear lever or selector
lever for:
−multitronic
® . . . . . . . . . . . . . . . . . . . . . . . . . . . . . . . . .
−Manual gearbox
Depending on equipment fitted:
−MMI control console or
−Switch for Audi parking system . . . . . . . . . . . . . . . . .
−Switch for Electronic Stabilisation Program (ESP
OFF) . . . . . . . . . . . . . . . . . . . . . . . . . . . . . . . . . . . . . . . .
A1A2
75
A3
70
A4
49
A5
149
A6
57
A7
59
A8
62
145
A9
61
A10
203
167
A11
12
A12
11
A13
14
A14
65
25
A15
116
A16
107
99
107
A17
1)Depending on the equipment fitted in your vehicle the display screen is ei-
ther two-coloured or multi-coloured. As the two displays are more or less
identical this Owner's Manual uses the multi-coloured displays for illustra-
tion purposes.A18A19A20
90
A21
203
A22
170
222
64
159
A23
93
101
A24
86, 87
A25
162
A26
170
222
document_0900452a81b1b9de.book Seite 9 Donnerstag, 26. Juli 2007 9:16 09
Page 18 of 342
Instruments and warning/indicator lamps 16Additional warning and indicator lamps are displayed on vehicles
equipped with the adaptive cruise control* ⇒page 134.
Note
A number of functions are monitored by the auto-check control
⇒page 21. If a malfunction should occur, this will be shown by the
display in the instrument cluster either with a red symbol (priority 1
– serious malfunction) or a yellow symbol (priority 2 – other
malfunction or item requiring attention).Applies to vehicles: with Audi drive selectDynamic steering
If the warning lamp
lights up when you switch on the ignition and
goes out when the engine has started, the dynamic steering is acti-
vated.
If the warning lamp stays on after the engine has started, this
indicates a malfunction in the system. You can continue driving
carefully at reduced speed to the next qualified workshop, however
the steering may feel heavier and its response may be more sensi-
tive than usual. In addition, it is possible that the steering wheel will
be off centre when driving in a straight line.
WARNING
Have the system malfunction in the dynamic steering repaired by
a qualified workshop as soon as possible – risk of accident.
Note
•
If the warning lamp
flashes, this indicates that the dynamic
steering is being initialised. The message “Dynamic steering: Initial-
ising” ⇒page 36 will appear in the driver information system
display.
•
The stabilisation functions of the dynamic steering ⇒page 222
are not available in the event of a system malfunction.
Applies to vehicles: with petrol engineEngine management
This warning lamp monitors the engine management
system on petrol engines.The
warning lamp (Electronic Power Control) lights up when the
ignition is switched on to show that the lamp is working properly.Note
If the warning lamp lights up while the vehicle is moving, this indi-
cates a fault in the engine management system. The engine should
be serviced by a qualified workshop without delay.Applies to vehicles: with diesel engineGlow plug system
The indicator lamp lights up to show that the glow plugs
are preheating.Your vehicle is equipped with an automatic glow plug system.
The indicator lamp
lights up while the glow plugs are preheating.
If the engine fails to start immediately, the glow plugs have not
finished preheating. In this case, keep the clutch pedal depressed
(or keep your foot on the brake if your vehicle has an automatic
gearbox) until the engine starts.
Anti-lock brake system (ABS)
⇒page 19
Electro-mechanical parking
brake/Audi hold assist*
⇒page 20
Fault in brake system
⇒page 20
document_0900452a81b1b9de.book Seite 16 Donnerstag, 26. Juli 2007 9:16 09
Page 22 of 342
Instruments and warning/indicator lamps 20When the vehicle has been stationary for an extended period, Audi
hold assist will automatically apply the parking brake. In this case,
the green symbol
will change to red
.
Electro-mechanical parking brake
This warning lamp monitors the electro-mechanical
parking brake.The warning lamp
lights up when the parking brake is applied
with the ignition on. After the ignition has been switched off the
lamp will stay on for about 30 seconds. The warning lamp will light
up for about 30 seconds if the parking brake is applied with the igni-
tion switched off.
The warning lamp should go out when the parking brake is released.
If the warning lamp flashes continuously after the parking brake has
been applied, the brake may not be strong enough to hold the
vehicle on a slope. This may be due to the brakes overheating.
Please note the following points:
•
If the gradient is too steep to park the vehicle safely, the display
will show the message Caution: Vehicle parked too steep.
•
In the event of a fault in the parking brake system the symbol
will also appear in the instrument cluster display together with the
message Parking brake! You should have the fault corrected by a
qualified workshop without delay.
Brake system
The warning lamp flashes if the brake fluid level is too low
or if there is a fault in the ABS system or the parking
brake.If the warning lamp
flashes, there is a fault in the brake system.
The symbol
in the instrument cluster display will flash at the same time. You can press the button to obtain a message
explaining the fault ⇒page 32.
If a failure should occur in the ABS, the ABS warning lamp
will
light up together with the brake warning lamp
⇒.
WARNING
•
Before opening the bonnet and checking the brake fluid level,
observe the warning information on ⇒page 255, “Working on
components in the engine compartment”.
•
If the brake warning lamp does not go out, or if it lights up
when driving, the brake fluid level in the reservoir is too low – this
may cause an increased accident risk. Stop the vehicle and do not
drive on. You should obtain professional assistance.
•
If the brake warning lamp lights up together with the ABS
warning lamp, this can mean that the control function of the ABS
is out of action. As a result the rear wheels can lock relatively
easily when braking. This could cause the tail of the vehicle to skid
sideways. Drive carefully to the nearest qualified workshop and
have the fault rectified.
SET
document_0900452a81b1b9de.book Seite 20 Donnerstag, 26. Juli 2007 9:16 09
Page 33 of 342
Driver information system31
Controls
Safety
Driving tips
General maintenance
Self-help
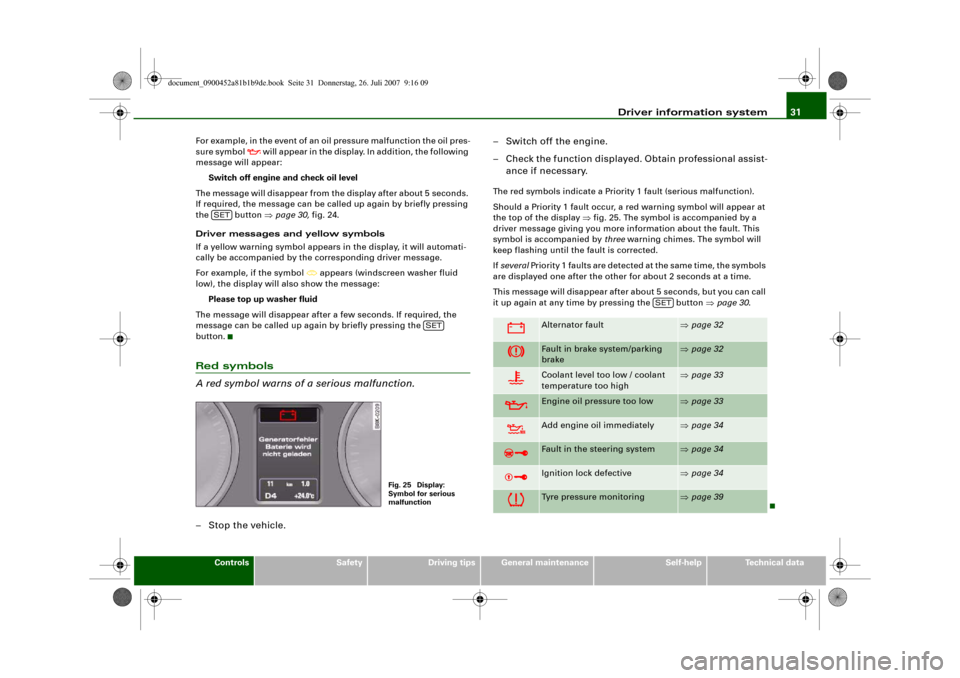
Technical data For example, in the event of an oil pressure malfunction the oil pres-
sure symbol
will appear in the display. In addition, the following
message will appear:
Switch off engine and check oil level
The message will disappear from the display after about 5 seconds.
If required, the message can be called up again by briefly pressing
the button ⇒page 30, fig. 24.
Driver messages and yellow symbols
If a yellow warning symbol appears in the display, it will automati-
cally be accompanied by the corresponding driver message.
For example, if the symbol
appears (windscreen washer fluid
low), the display will also show the message:
Please top up washer fluid
The message will disappear after a few seconds. If required, the
message can be called up again by briefly pressing the
button.
Red symbols
A red symbol warns of a serious malfunction.–Stop the vehicle.– Switch off the engine.
– Check the function displayed. Obtain professional assist-
ance if necessary.
The red symbols indicate a Priority 1 fault (serious malfunction).
Should a Priority 1 fault occur, a red warning symbol will appear at
the top of the display ⇒fig. 25. The symbol is accompanied by a
driver message giving you more information about the fault. This
symbol is accompanied by three warning chimes. The symbol will
keep flashing until the fault is corrected.
If several Priority 1 faults are detected at the same time, the symbols
are displayed one after the other for about 2 seconds at a time.
This message will disappear after about 5 seconds, but you can call
it up again at any time by pressing the button ⇒page 30.
SET
SET
Fig. 25 Display:
Symbol for serious
malfunction
Alternator fault
⇒page 32
Fault in brake system/parking
brake
⇒page 32
Coolant level too low / coolant
temperature too high
⇒page 33
Engine oil pressure too low
⇒page 33
Add engine oil immediately
⇒page 34
Fault in the steering system
⇒page 34
Ignition lock defective
⇒page 34
Tyre pressure monitoring
⇒page 39
SET
document_0900452a81b1b9de.book Seite 31 Donnerstag, 26. Juli 2007 9:16 09
Page 34 of 342
Driver information system 32Alternator fault
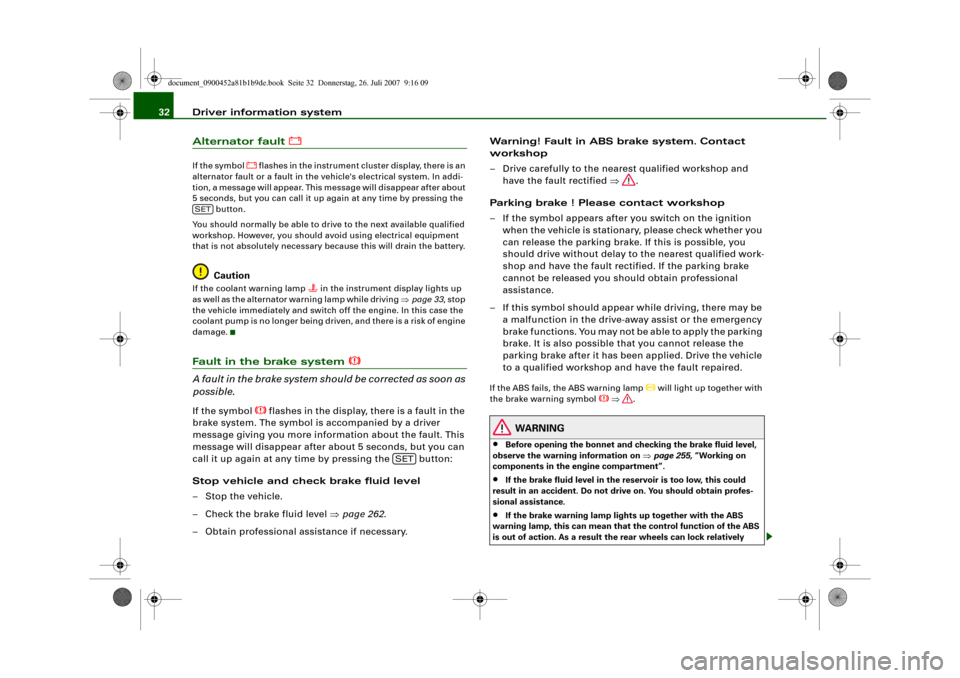
If the symbol
flashes in the instrument cluster display, there is an
alternator fault or a fault in the vehicle's electrical system. In addi-
tion, a message will appear. This message will disappear after about
5 seconds, but you can call it up again at any time by pressing the
button.
You should normally be able to drive to the next available qualified
workshop. However, you should avoid using electrical equipment
that is not absolutely necessary because this will drain the battery.
Caution
If the coolant warning lamp
in the instrument display lights up
as well as the alternator warning lamp while driving ⇒page 33, stop
the vehicle immediately and switch off the engine. In this case the
coolant pump is no longer being driven, and there is a risk of engine
damage.
Fault in the brake system
A fault in the brake system should be corrected as soon as
possible.If the symbol
flashes in the display, there is a fault in the
brake system. The symbol is accompanied by a driver
message giving you more information about the fault. This
message will disappear after about 5 seconds, but you can
call it up again at any time by pressing the button:
Stop vehicle and check brake fluid level
– Stop the vehicle.
– Check the brake fluid level ⇒page 262.
– Obtain professional assistance if necessary.Warning! Fault in ABS brake system. Contact
workshop
– Drive carefully to the nearest qualified workshop and
have the fault rectified ⇒.
Parking brake ! Please contact workshop
– If the symbol appears after you switch on the ignition
when the vehicle is stationary, please check whether you
can release the parking brake. If this is possible, you
should drive without delay to the nearest qualified work-
shop and have the fault rectified. If the parking brake
cannot be released you should obtain professional
assistance.
– If this symbol should appear while driving, there may be
a malfunction in the drive-away assist or the emergency
brake functions. You may not be able to apply the parking
brake. It is also possible that you cannot release the
parking brake after it has been applied. Drive the vehicle
to a qualified workshop and have the fault repaired.
If the ABS fails, the ABS warning lamp
will light up together with
the brake warning symbol
⇒.
WARNING
•
Before opening the bonnet and checking the brake fluid level,
observe the warning information on ⇒page 255, “Working on
components in the engine compartment”.
•
If the brake fluid level in the reservoir is too low, this could
result in an accident. Do not drive on. You should obtain profes-
sional assistance.
•
If the brake warning lamp lights up together with the ABS
warning lamp, this can mean that the control function of the ABS
is out of action. As a result the rear wheels can lock relatively
SET
SET
document_0900452a81b1b9de.book Seite 32 Donnerstag, 26. Juli 2007 9:16 09
Page 50 of 342
Doors and windows 48
Locking the vehicle
– Move the selector lever to position P (automatic
gearbox), otherwise it will not be possible to lock the
vehicle.
– Touch the sensor on the door handle once to lock the
vehicle ⇒.
– Touch the sensor a second time within 2 seconds to lock
the vehicle without activating the deadlock mechanism.The vehicle can be locked and unlocked from any of the doors. The
driver's door will always be unlocked as well when the passenger's
door is unlocked. The remote control key has to be within a range of
about 1.5 metres of the relevant door or the boot lid. It does not
matter where you carry the key, for instance whether it is in your
jacket pocket or in a briefcase.
The unlocking function may be affected if the sensor area on the
door handle is touched while the vehicle is being unlocked.
The locking function may be affected if you grasp the door handle
while the vehicle is being locked.
Once the doors have been locked, they cannot be opened again
immediately. This will enable you to check that the doors are prop-
erly closed.
The system will either unlock all the doors or one door only,
depending on the settings you have chosen on the sound system or
MMI* ⇒page 50.
WARNING
Do not leave anyone (especially children) in the car if it is locked
from the outside and the deadlock mechanism is activated: the
doors and windows cannot then be opened from the inside.
Locked doors could delay assistance in an emergency, potentially
putting lives at risk.
Note
Please note the following points if the vehicle is left parked for long
periods:•
To save electrical power, the proximity sensors are switched off
after a few days. You will then need to pull the door handle once to
unlock the vehicle, and a second time to open it.
•
To prevent the battery from becoming discharged and thus
maintain the vehicle's starting ability for as long as possible, the
power management system will gradually switch off convenience
functions that are not required. In this case you may not be able to
unlock the vehicle with this convenience function.
Locking and unlocking the vehicle using the key
If the central locking system should fail to work, you can
still lock and unlock the driver's door by turning the emer-
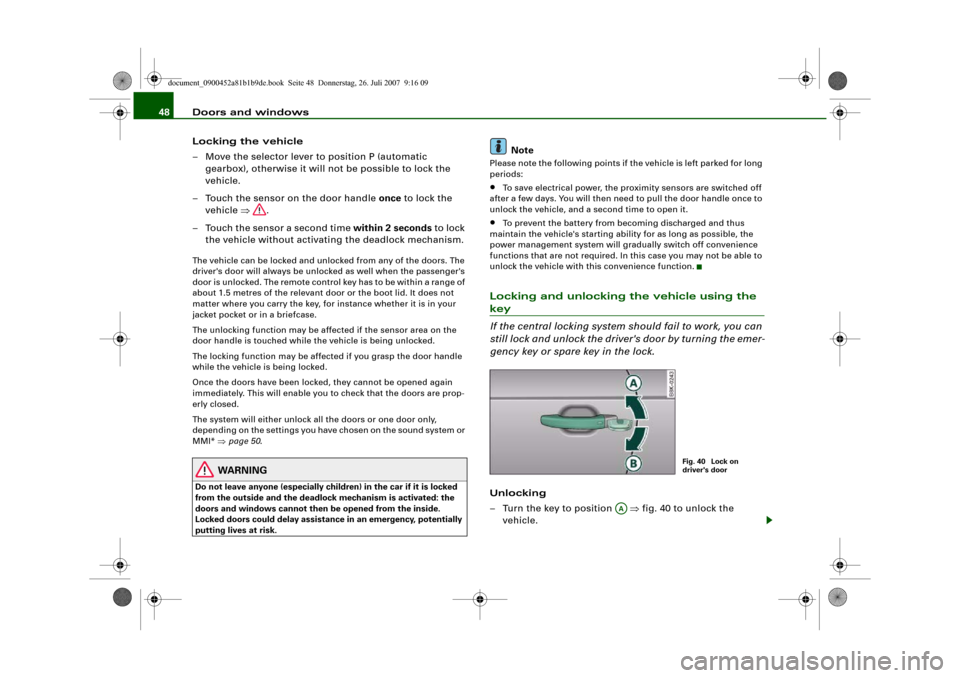
gency key or spare key in the lock.Unlocking
– Turn the key to position ⇒fig. 40 to unlock the
vehicle.
Fig. 40 Lock on
driver's door
AA
document_0900452a81b1b9de.book Seite 48 Donnerstag, 26. Juli 2007 9:16 09
Page 124 of 342
Driving 122a fault in the parking brake. Have the fault repaired by a qualified
workshop without delay ⇒page 32.
Note
•
The parking brake can be applied at any time - even when the
ignition is switched off. However, the ignition must be switched on
before the parking brake can be released.
•
Any slight noise which may be heard when the parking brake is
applied or released is quite normal and no cause for concern.
•
The parking brake runs an automatic test cycle at regular inter-
vals when the vehicle is parked. This may also cause a slight noise,
which is normal.
Parking
Please note the following points to ensure there is no risk
of the car rolling away accidentally after it is parked.Parking t he c ar
– Use the foot brake to stop the vehicle.
– Pull the switch to apply the parking brake.
– Automatic gearbox: Move the selector lever to P.
– Switch off the engine ⇒.
– Manual gearbox: Engage the first gear.
When parking on slopes
– Turn the steering wheel so that the vehicle would roll into
the kerb if it did start to move accidentally.
WARNING
•
Always take the key with you when leaving the vehicle – even
if you only intend to be gone for a short time. This is especially
important if children are left in the car. They might otherwise be
able to start the engine, release the parking brake or use power-
operated equipment such as the electric windows - this could lead
to injuries.
•
Do not leave anyone (especially children) in the vehicle when it
is locked. Locked doors could delay assistance in an emergency,
potentially putting lives at risk.
Driving away from a standstill
The parking brake auto release function releases the
parking brake automatically when you wish to start
moving.Applying the parking brake when stopping
– Pull the switch to apply the parking brake.
Releasing the parking brake when driving away
– Drive off in the normal way: the parking brake will be
released automatically and the vehicle will start moving.On vehicles with automatic gearbox, you can apply the parking
brake when stopping at traffic lights, etc. Then you do not have to
hold the car with the footbrake, as the parking brake will stop it
creeping forward while a gear is engaged in the automatic transmis-
sion. When you drive off in the normal way, the parking brake will be
released automatically and the vehicle will start moving.
Driving away on a slope
When driving away on a gradient, the parking brake auto release
function prevents the vehicle from rolling back unintentionally. The
document_0900452a81b1b9de.book Seite 122 Donnerstag, 26. Juli 2007 9:16 09