2008 AUDI A4 warning light
[x] Cancel search: warning lightPage 123 of 342
Driving121
Controls
Safety
Driving tips
General maintenance
Self-help
Technical data start running again after some time if the coolant temperature rises
due to a build-up of heat, or if the engine is hot and the engine
compartment is heated up further by direct sunlight.
Electro-mechanical parking brakeOperation
The electro-mechanical parking brake replaces the hand-
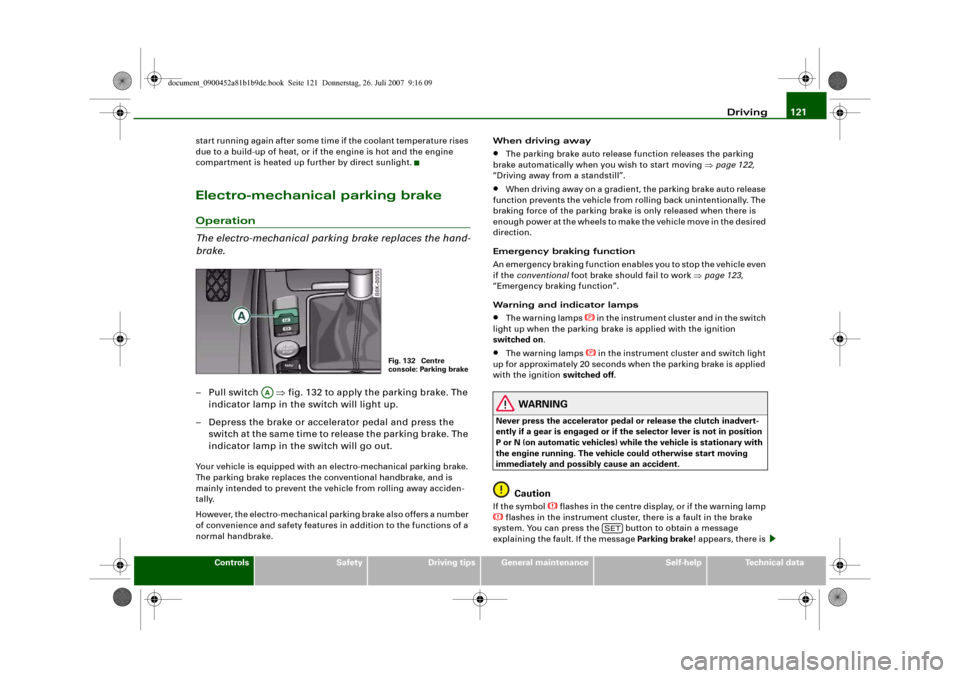
brake.– Pull switch ⇒fig. 132 to apply the parking brake. The
indicator lamp in the switch will light up.
– Depress the brake or accelerator pedal and press the
switch at the same time to release the parking brake. The
indicator lamp in the switch will go out.Your vehicle is equipped with an electro-mechanical parking brake.
The parking brake replaces the conventional handbrake, and is
mainly intended to prevent the vehicle from rolling away acciden-
tally.
However, the electro-mechanical parking brake also offers a number
of convenience and safety features in addition to the functions of a
normal handbrake.When driving away
•
The parking brake auto release function releases the parking
brake automatically when you wish to start moving ⇒page 122,
“Driving away from a standstill”.
•
When driving away on a gradient, the parking brake auto release
function prevents the vehicle from rolling back unintentionally. The
braking force of the parking brake is only released when there is
enough power at the wheels to make the vehicle move in the desired
direction.
Emergency braking function
An emergency braking function enables you to stop the vehicle even
if the conventional foot brake should fail to work ⇒page 123,
“Emergency braking function”.
Warning and indicator lamps
•
The warning lamps
in the instrument cluster and in the switch
light up when the parking brake is applied with the ignition
switched on.
•
The warning lamps
in the instrument cluster and switch light
up for approximately 20 seconds when the parking brake is applied
with the ignition switched off.
WARNING
Never press the accelerator pedal or release the clutch inadvert-
ently if a gear is engaged or if the selector lever is not in position
P or N (on automatic vehicles) while the vehicle is stationary with
the engine running. The vehicle could otherwise start moving
immediately and possibly cause an accident.
Caution
If the symbol
flashes in the centre display, or if the warning lamp
flashes in the instrument cluster, there is a fault in the brake
system. You can press the button to obtain a message
explaining the fault. If the message Parking brake ! appears, there is
Fig. 132 Centre
console: Parking brake
AA
SET
document_0900452a81b1b9de.book Seite 121 Donnerstag, 26. Juli 2007 9:16 09
Page 124 of 342
Driving 122a fault in the parking brake. Have the fault repaired by a qualified
workshop without delay ⇒page 32.
Note
•
The parking brake can be applied at any time - even when the
ignition is switched off. However, the ignition must be switched on
before the parking brake can be released.
•
Any slight noise which may be heard when the parking brake is
applied or released is quite normal and no cause for concern.
•
The parking brake runs an automatic test cycle at regular inter-
vals when the vehicle is parked. This may also cause a slight noise,
which is normal.
Parking
Please note the following points to ensure there is no risk
of the car rolling away accidentally after it is parked.Parking t he c ar
– Use the foot brake to stop the vehicle.
– Pull the switch to apply the parking brake.
– Automatic gearbox: Move the selector lever to P.
– Switch off the engine ⇒.
– Manual gearbox: Engage the first gear.
When parking on slopes
– Turn the steering wheel so that the vehicle would roll into
the kerb if it did start to move accidentally.
WARNING
•
Always take the key with you when leaving the vehicle – even
if you only intend to be gone for a short time. This is especially
important if children are left in the car. They might otherwise be
able to start the engine, release the parking brake or use power-
operated equipment such as the electric windows - this could lead
to injuries.
•
Do not leave anyone (especially children) in the vehicle when it
is locked. Locked doors could delay assistance in an emergency,
potentially putting lives at risk.
Driving away from a standstill
The parking brake auto release function releases the
parking brake automatically when you wish to start
moving.Applying the parking brake when stopping
– Pull the switch to apply the parking brake.
Releasing the parking brake when driving away
– Drive off in the normal way: the parking brake will be
released automatically and the vehicle will start moving.On vehicles with automatic gearbox, you can apply the parking
brake when stopping at traffic lights, etc. Then you do not have to
hold the car with the footbrake, as the parking brake will stop it
creeping forward while a gear is engaged in the automatic transmis-
sion. When you drive off in the normal way, the parking brake will be
released automatically and the vehicle will start moving.
Driving away on a slope
When driving away on a gradient, the parking brake auto release
function prevents the vehicle from rolling back unintentionally. The
document_0900452a81b1b9de.book Seite 122 Donnerstag, 26. Juli 2007 9:16 09
Page 127 of 342
Driving125
Controls
Safety
Driving tips
General maintenance
Self-help
Technical data lights or in stop-and-go traffic. When the Audi hold assist function
is on, you don't have to keep your foot on the brake to prevent the
vehicle from accidentally rolling away. Once it detects that the
vehicle is stopped, Audi hold assist keeps the vehicle stationary. The
green symbol
in the instrument cluster indicates that the func-
tion is activated. You can now take your foot off the brake pedal.
As soon as you drive off in the normal way, the parking brake will
automatically be released and the vehicle will start moving.
If the conditions for Audi hold assist change and the function is
switched off as a result, the parking brake will be applied automati-
cally to ensure that the vehicle is parked safely. The diode in the
button will go out when the Audi hold assist function is switched
off.
WARNING
The intelligent technology in Audi hold assist cannot defy the laws
of physics. Do not let the extra convenience provided by Audi hold
assist tempt you into taking a safety risk.•
Audi hold assist cannot keep the vehicle stationary in all condi-
tions on a gradient (e.g. if the road is slippery or icy).
•
Audi hold assist must be switched on again each time the
engine is started – Risk of accident!
•
Never get out of the vehicle when the engine is running and
Audi hold assist is switched on – Risk of accident!
•
Always ensure that the vehicle is stopped properly and safely
to avoid injury to yourself and others.Caution
Switch off the Audi hold assist function before driving the vehicle
into a car wash.
Note
•
Audi hold assist can be switched on only when the driver's door
is closed, the driver's seat belt is buckled and the engine is running.
•
Audi hold assist prevents automatic vehicles from creeping
forwards when the brake pedal is released with the car in gear.
•
When the vehicle has been stationary for an extended period,
Audi hold assist will automatically apply the parking brake. In this
case, the green symbol
in the instrument cluster display will
change to red
.
Cruise control systemApplies to vehicles: with cruise control systemSwitching on
The cruise control system allows you to drive at a
constant speed of 30 km/h or higher.
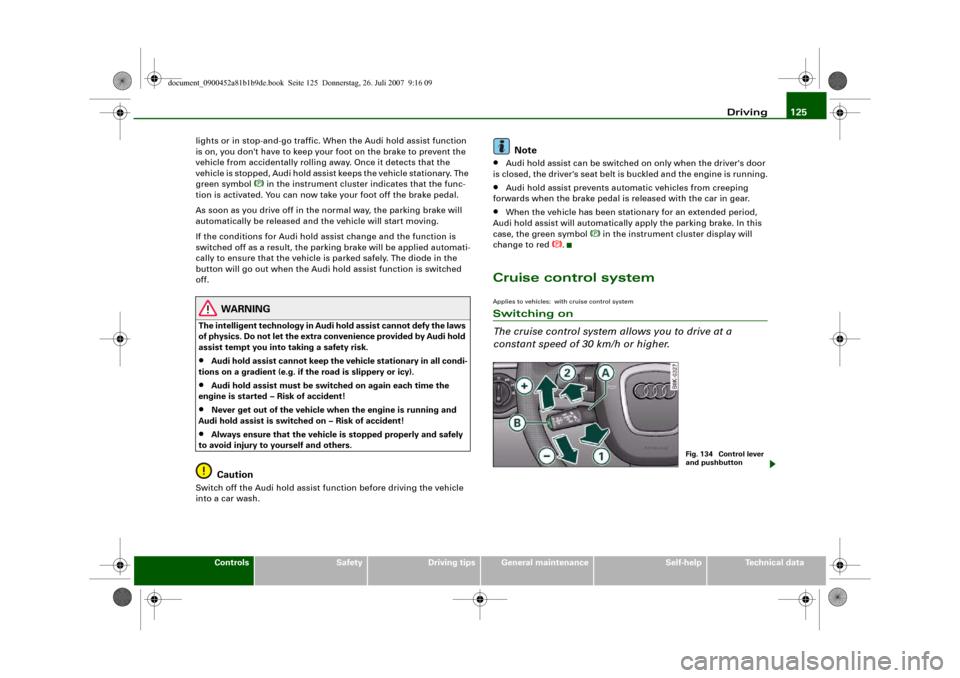
Fig. 134 Control lever
and pushbutton
document_0900452a81b1b9de.book Seite 125 Donnerstag, 26. Juli 2007 9:16 09
Page 128 of 342
Driving 126
– Pull the lever to position ⇒page 125, fig. 134 to
switch on the system.
– Drive at the speed you wish to set the system to.
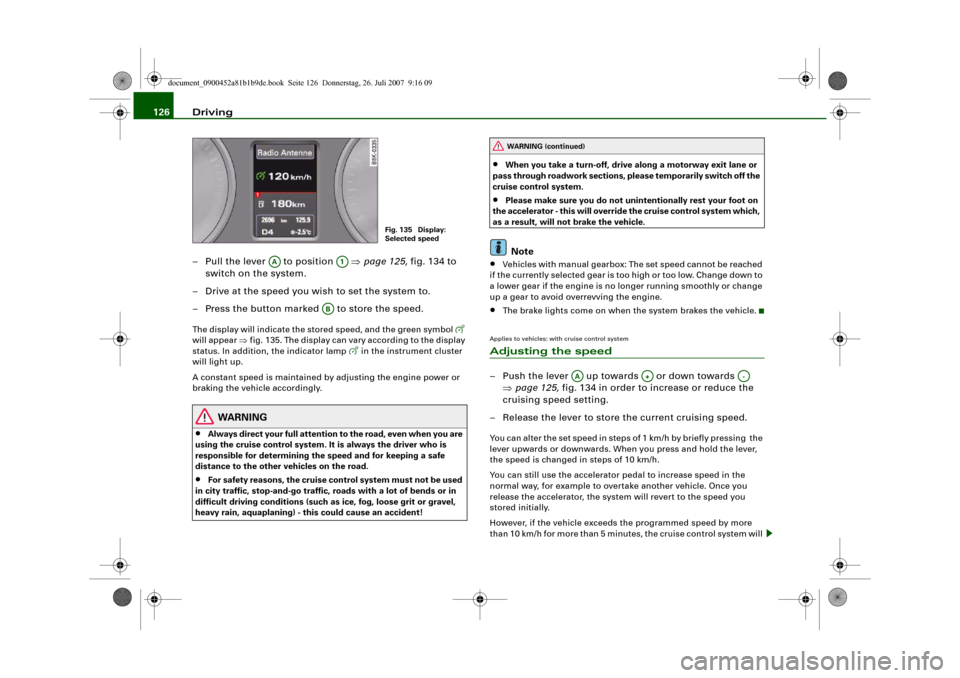
– Press the button marked to store the speed.The display will indicate the stored speed, and the green symbol
will appear ⇒fig. 135. The display can vary according to the display
status. In addition, the indicator lamp
in the instrument cluster
will light up.
A constant speed is maintained by adjusting the engine power or
braking the vehicle accordingly.
WARNING
•
Always direct your full attention to the road, even when you are
using the cruise control system. It is always the driver who is
responsible for determining the speed and for keeping a safe
distance to the other vehicles on the road.
•
For safety reasons, the cruise control system must not be used
in city traffic, stop-and-go traffic, roads with a lot of bends or in
difficult driving conditions (such as ice, fog, loose grit or gravel,
heavy rain, aquaplaning) - this could cause an accident!
•
When you take a turn-off, drive along a motorway exit lane or
pass through roadwork sections, please temporarily switch off the
cruise control system.
•
Please make sure you do not unintentionally rest your foot on
the accelerator - this will override the cruise control system which,
as a result, will not brake the vehicle.Note
•
Vehicles with manual gearbox: The set speed cannot be reached
if the currently selected gear is too high or too low. Change down to
a lower gear if the engine is no longer running smoothly or change
up a gear to avoid overrevving the engine.
•
The brake lights come on when the system brakes the vehicle.
Applies to vehicles: with cruise control systemAdjusting the speed– Push the lever up towards or down towards
⇒page 125, fig. 134 in order to increase or reduce the
cruising speed setting.
– Release the lever to store the current cruising speed.You can alter the set speed in steps of 1 km/h by briefly pressing the
lever upwards or downwards. When you press and hold the lever,
the speed is changed in steps of 10 km/h.
You can still use the accelerator pedal to increase speed in the
normal way, for example to overtake another vehicle. Once you
release the accelerator, the system will revert to the speed you
stored initially.
However, if the vehicle exceeds the programmed speed by more
than 10 km/h for more than 5 minutes, the cruise control system will
Fig. 135 Display:
Selected speed
AA
A1
AB
WARNING (continued)
AA
A+
A-
document_0900452a81b1b9de.book Seite 126 Donnerstag, 26. Juli 2007 9:16 09
Page 137 of 342
adaptive cruise control (ACC)135
Controls
Safety
Driving tips
General maintenance
Self-help
Technical data Target speed
The target speed set by the driver is indicated by a red diode in the
speedometer.
If the speed setting is between two graduations on the speedom-
eter dial, the two closest diodes will both light up ⇒fig. 143.
It is only possible to set target speeds ranging from 30 to 200 km/h.
This speed range is illuminated slightly by the diodes on the speed-
ometer dial.
Indicator lamp (symbol)
•
No vehicle in front: The green indicator lamp ⇒page 134,
fig. 144 shows that the adaptive cruise control system is in cruise
mode and that there is no vehicle in front. It maintains the stored
target speed.
•
Vehicle in front: The green indicator lamp shows that the
system has detected a vehicle in front. The speed is adapted to the
vehicle in front. The adaptive cruise control system accelerates and
brakes the vehicle automatically.
•
Driver intervention prompt: When the red indicator lamp
flashes , this is a warning for the driver to intervene. The driver
has to brake the vehicle with the foot brake. This warning lamp will
always appear when the adaptive cruise control system alone is not
able to brake the vehicle sufficiently to maintain a safe distance to
a vehicle in front. An audible alarm (warning tone) will also sound
when the lamp starts to flash. For further information on the driver
intervention prompt ⇒page 138.Note
•
If you exceed the target speed by using the accelerator, the
driver intervention prompt will not be accompanied by a warning
tone. The indicator lamp shown in the speedometer will also switch
off if the target speed is exceeded.
•
You can change the volume of the warning tone on the sound
system or MMI* ⇒page 139, “Setting the warning tone volume and
driving program”.
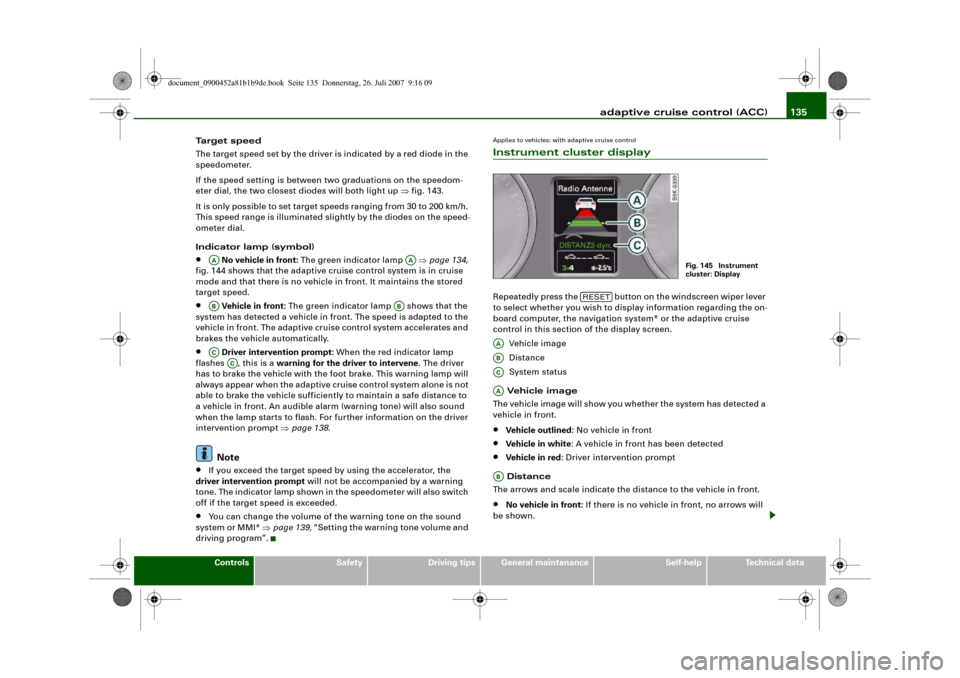
Applies to vehicles: with adaptive cruise controlInstrument cluster displayRepeatedly press the button on the windscreen wiper lever
to select whether you wish to display information regarding the on-
board computer, the navigation system* or the adaptive cruise
control in this section of the display screen.
Vehicle image
Distance
System status
Vehicle image
The vehicle image will show you whether the system has detected a
vehicle in front.•
Vehicle outlined: No vehicle in front
•
Vehicle in white: A vehicle in front has been detected
•
Vehicle in red: Driver intervention prompt
Distance
The arrows and scale indicate the distance to the vehicle in front.
•
No vehicle in front: If there is no vehicle in front, no arrows will
be shown.
AA
AA
AB
AB
AC
AC
Fig. 145 Instrument
cluster: Display
RESET
AAABACAAAB
document_0900452a81b1b9de.book Seite 135 Donnerstag, 26. Juli 2007 9:16 09
Page 147 of 342
Audi lane assist145
Controls
Safety
Driving tips
General maintenance
Self-help
Technical data
Audi lane assistAudi lane assistApplies to vehicles: with lane assistDescription
The lane assist system assists the driver in keeping the
vehicle in the right lane.The system uses a camera to detect the markings of the lane you are
driving in. If the vehicle approaches one of the detected lane mark-
ings, the steering wheel vibrates to warn the driver that the vehicle
might be about to cross one of the markings. The lane assist system
is functional when it has detected lane markings on both sides of
the lane you are driving in. The green lamp
in the instrument
cluster indicates that the function is activated and fully functional.
If you operate the turn signal before crossing one of the lane mark-
ings (while the lane assist system is functional), the system will
detect that the lane change is intended and will not warn the driver.
As the system is designed for driving on motorways and other major
roads, it is only active above a speed of about 65 km/h.
WARNING
•
The lane assist system does not keep the vehicle in its lane. It
merely warns the driver when the vehicle is in danger of crossing
the markings of the lane. As the driver you are always responsible
for staying in your own lane.
•
The camera cannot detect all lane markings. Therefore it is
possible that variations in the road surface or objects might be
detected as lane markings, which can lead to false warnings, or
warnings not being given.
•
The camera's view might be obstructed, for example by vehi-
cles travelling in front, rain, snow, a lot of water on the road or adverse light. This can result in the system not detecting the lane
markings correctly.
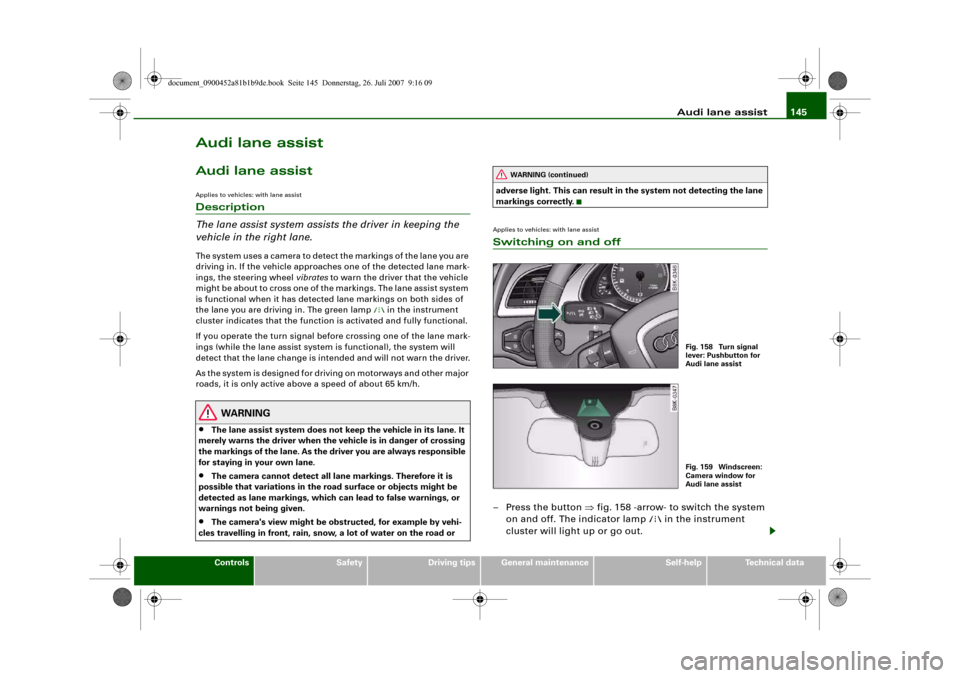
Applies to vehicles: with lane assistSwitching on and off– Press the button ⇒fig. 158 -arrow- to switch the system
on and off. The indicator lamp
in the instrument
cluster will light up or go out.
WARNING (continued)
Fig. 158 Turn signal
lever: Pushbutton for
Audi lane assistFig. 159 Windscreen:
Camera window for
Audi lane assist
document_0900452a81b1b9de.book Seite 145 Donnerstag, 26. Juli 2007 9:16 09
Page 148 of 342
Audi lane assist 146Indicator lamp in instrument cluster Active: The green indicator lamp confirms that the system is fully
functional. You will be warned if you are about to cross the lane
markings detected by the system. Inactive: The yellow warning lamp indicates that the system is
switched on. However, you will not be warned if you cross the lane
markings. This can have the following causes:•
There is only one or no lane marking.
•
The system cannot detect the lane markings (e.g. due to snow,
dirt, wet conditions or adverse light).
•
There are more than two lane markings in the lane you are
driving in (e.g. in roadwork sections).
•
The vehicle's speed is below 65 km/h, the speed at which the lane
assist system is activated.
•
The lane is narrower than 2.5 m or wider than 5 m.
•
The bend is too tight.Note
•
Make sure that the camera window ⇒page 145, fig. 159 is not
covered with stickers or similar objects.
•
Always keep the camera window clean. Usually it should suffice
to operate the windscreen wipers.
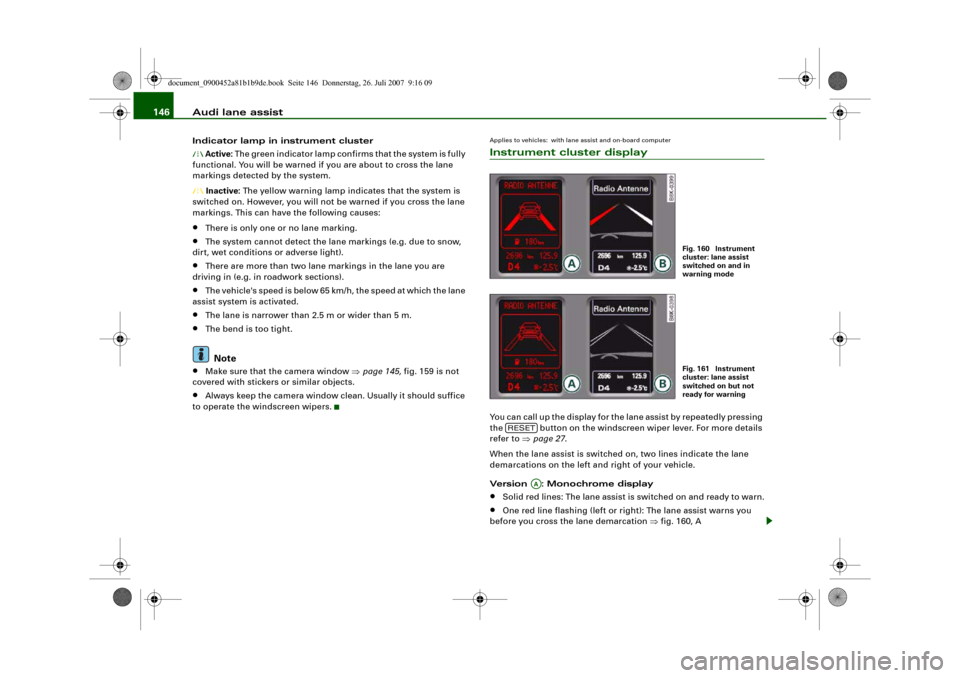
Applies to vehicles: with lane assist and on-board computerInstrument cluster displayYou can call up the display for the lane assist by repeatedly pressing
the button on the windscreen wiper lever. For more details
refer to ⇒page 27.
When the lane assist is switched on, two lines indicate the lane
demarcations on the left and right of your vehicle.
Version : Monochrome display•
Solid red lines: The lane assist is switched on and ready to warn.
•
One red line flashing (left or right): The lane assist warns you
before you cross the lane demarcation ⇒fig. 160, A
Fig. 160 Instrument
cluster: lane assist
switched on and in
warning modeFig. 161 Instrument
cluster: lane assist
switched on but not
ready for warning
RESET
AA
document_0900452a81b1b9de.book Seite 146 Donnerstag, 26. Juli 2007 9:16 09
Page 151 of 342
Audi side assist149
Controls
Safety
Driving tips
General maintenance
Self-help
Technical data
Audi side assistLane change assist featureApplies to vehicles: with side assistDescription
The side assist function assists the driver when changing
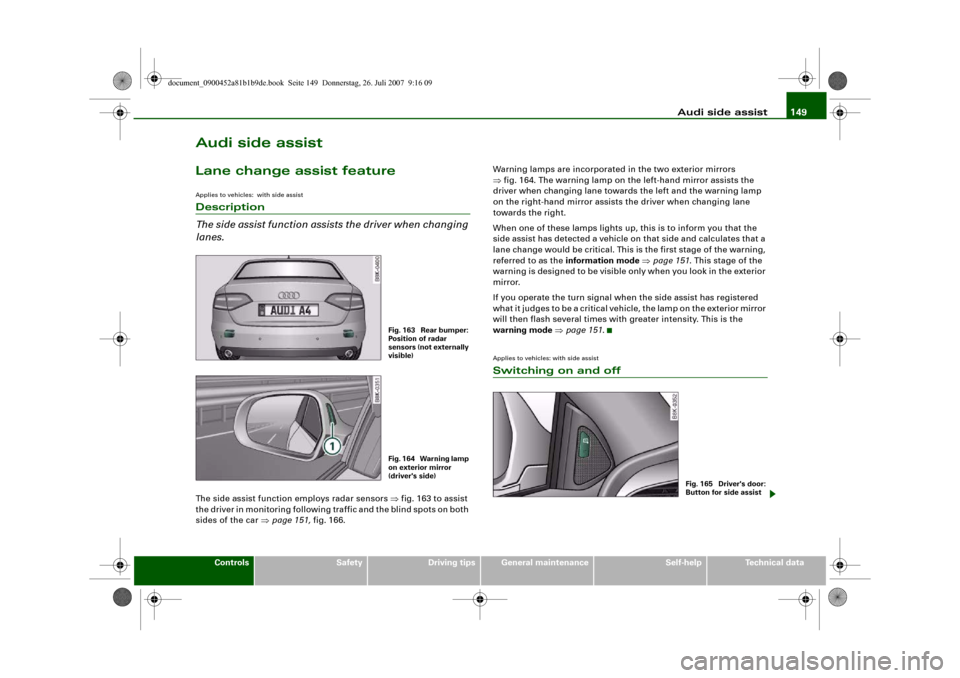
lanes.The side assist function employs radar sensors ⇒fig. 163 to assist
the driver in monitoring following traffic and the blind spots on both
sides of the car ⇒page 151, fig. 166.Warning lamps are incorporated in the two exterior mirrors
⇒fig. 164. The warning lamp on the left-hand mirror assists the
driver when changing lane towards the left and the warning lamp
on the right-hand mirror assists the driver when changing lane
towards the right.
When one of these lamps lights up, this is to inform you that the
side assist has detected a vehicle on that side and calculates that a
lane change would be critical. This is the first stage of the warning,
referred to as the information mode ⇒page 151. This stage of the
warning is designed to be visible only when you look in the exterior
mirror.
If you operate the turn signal when the side assist has registered
what it judges to be a critical vehicle, the lamp on the exterior mirror
will then flash several times with greater intensity. This is the
warning mode ⇒page 151.
Applies to vehicles: with side assistSwitching on and off
Fig. 163 Rear bumper:
Position of radar
sensors (not externally
visible)Fig. 164 Warning lamp
on exterior mirror
(driver's side)
Fig. 165 Driver's door:
Button for side assist
document_0900452a81b1b9de.book Seite 149 Donnerstag, 26. Juli 2007 9:16 09